Table des Matières

Publicité

Les langues disponibles

Les langues disponibles

Liens rapides

EL1SS
Telephone Entry System
Installation and Set Up Manual
For How-to videos, visit the
LiftMaster Training Academy at
LiftMasterTraining.com

Publicité

Table des Matières
loading

Sommaire des Matières pour LiftMaster EL1SS

  • Page 1 EL1SS Telephone Entry System Installation and Set Up Manual For How-to videos, visit the LiftMaster Training Academy at LiftMasterTraining.com...
  • Page 2: Table Des Matières

    Wiring a Gate Operator (Normally Open) and a EL1SS MASTER CODE ....18 Maglock (Normally Closed) . . . . . . . . . . . . . . . . . . . . . . . . . . . . . 9 Wiring a Door Strike Lock (Normally Open) .
  • Page 3: Introduction

    250 - 500 feet (76 .2 - 152 .4 m) 12 AWG NOTE: LiftMaster is not responsible for conflicts between the information listed in the above table and the requirements of local building codes. The information is for suggested use only. Check local building codes before installation.
  • Page 4: Carton Inventory

    TEST SET UP INTRODUCTION INSTALLATION CARTON INVENTORY TEST SET UP INTRODUCTION INSTALLATION Unit (1) Set of keys (1) 16 .5 Vdc 2 .5A Plug-In UL Listed Power Transformer (1) Bypass Board (1) Manual (1) TEST SET UP DESCRIPTION OF THE PROCESSOR BOARD INTRODUCTION INSTALLATION TEST...
  • Page 5: Mount The Unit

    • Reversed polarity will not damage the unit, however, some 18-24 AWG twisted cable telephones will not function properly. • The EL1SS is intended for use with a single access control system (phone line can not be shared with multiple EL1SS’s).
  • Page 6: Typical Telco Overview With The Unit

    TEST SET UP Phone lines with DSL service . In order for the EL1SS to function normally a DSL filter is required to separate the DSL (digital) signal from the telephone service (POTS) . 1 . Install the splitter between the Telco entrance box and the EL1SS .
  • Page 7: Wiring The Unit With A Telco Line

    Telco entrance demarcation point. EL1SS may malfunction RING if any voltage is allowed to back-feed into the EL1SS when RING in “Intercom Mode”. Telephone company voltages may be present, even if telephone service is disconnected.
  • Page 8: Wiring A Gate Operator (Normally Open)

    TEST SET UP INTRODUCTION INSTALLATION WIRING A GATE OPERATOR (NORMALLY OPEN) The gate operator can be connected to Relay 1 or Relay 2 . See the Set Up section for information about configuring Relays 1 and 2 . TEST SET UP INTRODUCTION INSTALLATION •...
  • Page 9: Wiring A Gate Operator (Normally Open) And A

    TEST SET UP INTRODUCTION INSTALLATION WIRING A GATE OPERATOR (NORMALLY OPEN) & A DOOR STRIKE LOCK (NORMALLY OPEN) TEST SET UP The door strike can be connected to Relay 1 or Relay 2 . See the Set Up section for information about configuring Relays 1 and 2 . INTRODUCTION INSTALLATION TEST...
  • Page 10: Wiring A Gate Operator (Normally Open) And A

    NOTE: Do not use the unit’s power supply for the maglock. COM (Common) TEST SET UP INTRODUCTION INSTALLATION Primary Gate Operator NOTE: Install a 1N4001 (Strike Open Input) diode or equivalent. (Normally Open) NC (Normally Closed) (Common) WIRING A GATE OPERATOR (NORMALLY OPEN) & A MAGLOCK (NORMALLY CLOSED) TEST SET UP...
  • Page 11: Wiring A Door Strike Lock (Normally Open)

    TEST SET UP INTRODUCTION INSTALLATION WIRING A DOOR STRIKE LOCK (NORMALLY OPEN) The door strike can be connected to Relay 1 or Relay 2 . See the Set Up section for information TEST SET UP INTRODUCTION INSTALLATION about configuring Relays 1 and 2 . •...
  • Page 12: Earth Ground Rod

    250 - 500 feet (76 .2 - 152 .4 m) 12 AWG NOTE: LiftMaster is not responsible for conflicts between the information listed in the above table and the requirements of local building codes. The information is for suggested use only. Check...
  • Page 13: Plug The Transformer Into The Outlet

    NOTE: Once power is applied, the EL1SS will constantly beep to indicate that it is powered, and is waiting to be programmed for the unit’s Master Code. The Master Code is used to unlock the programming functions of the EL1SS. The Master Code should not be distributed as an Entry Code.
  • Page 14: Test The Gate/Door Relays

    ANSWERING CALLS FROM EL1SS When the home phone receives a call from the EL1SS, answer the call to initiate the audio and to speak to visitor . To deny the caller access to the property, hang up . To extend the talk time press 0 or continue talking .
  • Page 15: Installer - System Programming Using The Keypad

    INSTALLER - SYSTEM PROGRAMMING USING THE KEYPAD The following pages are a reference to the programming options for setting up the EL1SS using the keypad . The programming steps below are used by the installer for initial set up (occasionally used by a resident) . The programming options on pages 15-17 can be used by the resident or installer .
  • Page 16: Additional System Programming Using The Keypad

    + New Temporary (1 Time) Entry Code digits) + (Relay associated with the entry device resident wishes The EL1SS holds 1 temporary Entry Code . to activate) or no button is pressed NOTE: An Entry Code cannot be the same as the Master Code.
  • Page 17: Resident - System Programming Using The House Phone

    INTRODUCTION INSTALLATION RESIDENT - SYSTEM PROGRAMMING USING THE HOUSE PHONE A house phone is a telephone with an actual wiring connection to the EL1SS system . See call forwarding instructions on page 17 . PROGRAMMING STEPS PROGRAM DESCRIPTION OF FUNCTION OR SETTING...
  • Page 18: Resident - Direct Commands Using The House Telephone

    CALL WAITING (FOR LANDLINES) Press “Flash” once to answer guest, press again to return to outside call on Telco line, if is not pressed . If (relay 1) or (relay 2) is pressed, the EL1SS will automatically return to the Telco line .
  • Page 19: Repair Parts

    Keypad K002B1597-1 NOT SHOWN Bypass Board-PCB KSN1600341B Main Board Transformer K001D7121-1 K002B0821-1 Rear Housing K09-37589 Speaker K002B1598 ABA Lock and Keys K002B0799-4 Call Button K101C0232-1 EL1SS MASTER CODE Write down the Master Code and store in a secure location .
  • Page 20: Warranty

    WARRANTY LiftMaster (“Seller”) warrants to the first purchaser of this product, for the structure in which this product is originally installed, that it is free from defect in materials and/or workmanship for a period of two years from the date of purchase .
  • Page 21: Système D'accès Par Téléphone

    EL1SS Système d’accès par téléphone Manuel d’installation et de configuration Pour des vidéos d’instructions, aller à l’Académie de formation LiftMaster à LiftMasterTraining.com.
  • Page 22 Câblage d’une gâche (normalement ouverte) . . . . . . . . . . . . . . . 10 CODE MAÎTRE DU EL1SS ....18 Câblage d’une serrure magnétique (normalement fermée) .
  • Page 23: Introduction

    12 AWG REMARQUE : LiftMaster ne peut être tenue responsable des divergences entre les données du tableau ci-dessus et les exigences des codes de construction en vigueur localement. Les données sont fournies à titre indicatif uniquement. Consulter les codes de construction en vigueur localement avant l’installation.
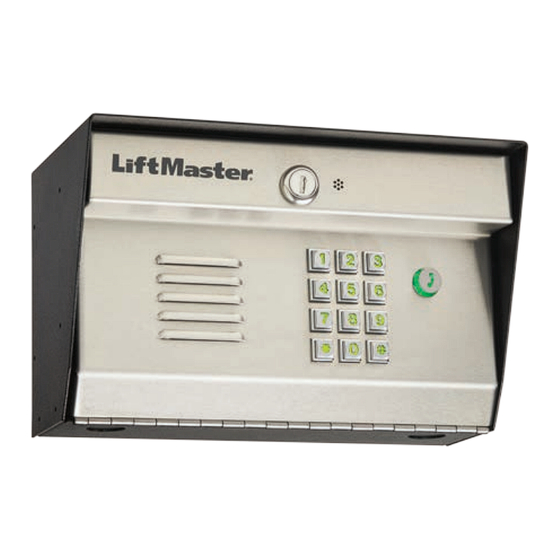
  • Page 24: Contenu De La Boîte D'emballage

    ESSAI CONFIGURATION INTRODUCTION INSTALLATION CONTENU DE LA BOÎTE D’EMBALLAGE ESSAI CONFIGURATION Appareil (1) INTRODUCTION INSTALLATION Jeu de clés (1) Transformateur d’alimentation enfichable de 16,5 Vcc 2,5A homologué UL (1) Carte bypass (1) Manuel (1) DESCRIPTION DE LA CARTE PROCESSEUR ESSAI CONFIGURATION INTRODUCTION INSTALLATION...
  • Page 25: Fixation Du Unite

    • L’inversion des polarités n’endommagera pas le système, mais certains appareils téléphoniques ne fonctionneront pas correctement. • Le système EL1SS a été prévu pour être utilisé avec un seul système de contrôle d’accès (la ligne de téléphone ne peut pas être partagée entre plusieurs EL1SS).
  • Page 26: Connexion Représentative Entre Telco Et L'appareil

    &’) PQRS WXYZ OPER RING RING Lignes téléphoniques à service d’accès numérique (DSL) . Pour que le EL1SS fonctionne normalement, un filtre DSL est nécessaire pour INTRODUCTION INSTALLATION ESSAI CONFIGURATION séparer le signal DSL (numérique) du service téléphonique (POTS) .
  • Page 27: Câblage De L'appareil Avec Une Ligne Téléphonique De Telco

    Se reporter à la page 14. Le service téléphonique doit être complètement déconnecté au point de démarcation d’entrée du service de la compagnie de téléphone. Le système EL1SS RING peut mal fonctionner si une tension quelconque a réussi à réalimenter le RING système EL1SS lorsque ce dernier...
  • Page 28: Actionneur De Barrière (Normalement Ouvert)

    ESSAI CONFIGURATION INTRODUCTION INSTALLATION ACTIONNEUR DE BARRIÈRE (NORMALEMENT OUVERT) L’actionneur de barrière peut être raccordé au relai 1 ou au relai 2 . Consulter la section Configuration pour les détails sur la configuration des relai 1 et 2 . ESSAI CONFIGURATION INTRODUCTION INSTALLATION...
  • Page 29: Câblage D'un Actionneur De Barrière (Normalement Ouvert) Et D'une Gâche De Barrière (Normalement Ouverte)

    ESSAI CONFIGURATION INTRODUCTION INSTALLATION CÂBLAGE D’UN ACTIONNEUR DE BARRIÈRE (NORMALEMENT OUVERT) ET D’UNE GÂCHE DE BARRIÈRE (NORMALEMENT OUVERTE) ESSAI CONFIGURATION INTRODUCTION INSTALLATION La gâche peut être raccordée au relai 1 ou au relai 2 . Consulter la section Configuration pour les détails sur la configuration des relais 1 et 2 .
  • Page 30: Câblage D'un Actionneur De Barrière (Normalement Ouvert) Et D'une Serrure Magnétique (Normalement Fermée)

    REMARQUE : Ne pas utiliser l’alimentation de l’appareil pour la serrure magnétique. ESSAI CONFIGURATION INTRODUCTION INSTALLATION COM (Commun) Actionneur de barrière principale (entrée ouverte de gâche) (Normalement ouvert) CÂBLAGE D’UN ACTIONNEUR DE BARRIÈRE (NORMALEMENT OUVERT) REMARQUE : Installer une diode NC (Normalement fermée) (Commun) 1N4001 ou l’équivalent.
  • Page 31: Câblage D'une Gâche (Normalement Ouverte)

    ESSAI CONFIGURATION INTRODUCTION INSTALLATION CÂBLAGE D’UNE GÂCHE (NORMALEMENT OUVERTE) La gâche peut être raccordée au relai 1 ou au relai 2 . Consulter la section Configuration pour les détails sur la ESSAI CONFIGURATION INTRODUCTION INSTALLATION configuration des relais 1 et 2 . •...
  • Page 32: Tige De Mise À La Terre

    CONFIGURATION 76,2 à 152,4 m (250 à 500 pieds) 12 AWG REMARQUE : LiftMaster ne peut être tenue responsable des divergences entre les données du tableau ci-dessus et les exigences des codes de construction en vigueur localement. Les données sont fournies à titre indicatif uniquement. Consulter les...
  • Page 33: Branchement Du Transformateur Dans La Prise

    REMARQUE : Après avoir mis l’alimentation, le système EL1SS émettra constamment des bips pour indiquer qu’il est sous tension et qu’il attend d’être programmé pour le code maître de l’unité. Le code maître set à déverrouiller les fonctions programmées du EL1SS. Le code maître ne doit pas être distribué...
  • Page 34: Essai Des Relais De Portes Ou Barrières

    FONCTIONNEMENT Le système EL1SS exige un code maître (voir la page 12) pour configurer les fonctions et paramètres de base . Utiliser la touche ÉTOILE « * » pour annuler une saisie . Lors de la configuration de l’unité, certaines tonalités retentiront (voir le tableau ci-dessous) . Les commandes au clavier doivent être saisies en une seule chaîne pour réussir la programmation (indiquée par un bip à...
  • Page 35: Installateur - Programmation Du Système Avec Le Clavier

    INSTALLATEUR – PROGRAMMATION DU SYSTÈME AVEC LE CLAVIER Les tableaux suivants constituent une référence aux options de programmation du système EL1SS avec le clavier . Les étapes de programmation ci-dessous sont utilisées principalement par l’installateur lors de la configuration initiale (occasionnellement utilisées par le résident) .
  • Page 36: Programmation Supplémentaire Du Système Avec Le Clavier

    (un seul usage) (4 chiffres) + (Le relais associé au dispositif d’accès que le résident souhaite activer) ou aucun bouton n’est Le système EL1SS retient 1 code d’entrée temporaire . enfoncé REMARQUE : Le code d’entrée ne peut être identique au code maître.
  • Page 37: Résident - Programmation Du Système Avec Le Téléphone Intérieur

    INSTALLATION RÉSIDENT – PROGRAMMATION DU SYSTÈME AVEC LE TÉLÉPHONE INTÉRIEUR Un téléphone intérieur est un appareil câblé au système EL1SS .Voir les instructions de renvoi d’appel à la page 17 . CODE DE DESCRIPTION DE LA FONCTION OU DU RÉGLAGE ÉTAPES DE PROGRAMMATION...
  • Page 38: Résident - Commandes Directes Avec Le Téléphone Intérieur

    » une fois pour répondre à l’invité, appuyer de nouveau sur la touche pour revenir à l’appel extérieur sur la ligne de la compagnie de Telco, si n’ont pas été composés . Si (relais 1) ou (relais 2) est enfoncée, le EL1SS reviendra automatiquement à la ligne de Telco .
  • Page 39: Pièces De Réparation

    K002B1597-1 NON ILLUSTRÉ Carte bypass-PCB KSN1600341B Carte principale Transformateur K001D7121-1 K002B0821-1 Boîtier Arrière K09-37589 Haut-parleur K002B1598 ABA Serrure et clés K002B0799-4 Bouton d’appel K101C0232-1 CODE MAÎTRE DU EL1SS Noter le code maître et le conserver dans un endroit sûr .
  • Page 40: Garantie

    GARANTIE LiftMaster (« le Vendeur ») garantit à l’acheteur initial de ce produit, dans le bâtiment duquel ce produit est originalement installé, que le produit est exempt de tout défaut de matériau ou de fabrication pour une période de deux ans à compter de la date d’achat .
  • Page 41: Sistema De Entra De Teléfono

    EL1SS Sistema de entra de teléfono Manual de instalación y configuración Para ver videos instructivos, visite LiftMaster Training Academy en LiftMastertraining.com...
  • Page 42 (normalmente cerrado) . . . . . . . . . . . . . . . . . . . . . . . . . . . . . . . . 9 CÓDIGO MAESTRO EL1SS ....18 Cómo realizar el cableado de un seguro de contacto de puerta...
  • Page 43: Introducción Instalación

    AWG 12 NOTA: LiftMaster no se responsabiliza por las discrepancias entre la información incluida en el cuadro anterior y los requisitos de los códigos locales de construcción. Dicha información se aplica únicamente al uso sugerido. Consulte los códigos locales de construcción antes de realizar la instalación.
  • Page 44: Inventario De La Caja

    PRUEBA CONFIGURAR INTRODUCCIÓN INSTALACIÓN INVENTARIO DE LA CAJA PRUEBA CONFIGURAR INTRODUCCIÓN INSTALACIÓN Unidad (1) Juego de llaves (1) Transformador enchufable de alimentación eléctrica de ca de 16 .5 VCC 2 .5A homologado por UL (1) Tarjeta de puente (1) Manual (1) DESCRIPCIÓN DE LA TARJETA DEL PROCESADOR PRUEBA CONFIGURAR...
  • Page 45: Montaje De La Unidad

    • La polaridad invertida no daña la unidad; sin embargo, algunos teléfonos no funcionan correctamente. • El EL1SS es apto para uso con un sólo sistema de control de entrada (la línea telefónica no puede compartirse con varios EL1SS).
  • Page 46: Descripción General De Una Compañía De Telecomunicaciones

    PRUEBA CONFIGURAR Líneas telefónicas con servicio DSL . Para que el EL1SS funcione normalmente debe instalarse un filtro para separar la señal digital de DSL del servicio telefónico . 1 . Instalar el bifurcador entre la caja de entrada de línea y el EL1SS .
  • Page 47: Cómo Realizar El Cableado De La Unidad Con La Línea De La

    (Telco). EL1SS RING puede tener un mal funcionamiento si se permite la retroalimentación RING de cualquier voltaje en el EL1SS cuando se encuentra en “Modo intercomunicador”. Puede haber voltaje de la compañía telefónica, incluso si el INTRODUCCIÓN INSTALACIÓN...
  • Page 48: Cómo Realizar El Cableado De Un Operador De Portón

    PRUEBA CONFIGURAR INTRODUCCIÓN INSTALACIÓN CÓMO REALIZAR EL CABLEADO DE UN OPERADOR DE PORTÓN (NORMALMENTE ABIERTO) El operador de portón puede conectarse al relé 1 o al relé 2 . Consulte la sección Configurar para obtener información acerca de cómo configurar los relés 1 y 2 . PRUEBA CONFIGURAR INTRODUCCIÓN...
  • Page 49: Cómo Realizar El Cableado De Un Operador De Portón

    PRUEBA CONFIGURAR INTRODUCCIÓN INSTALACIÓN CÓMO REALIZAR EL CABLEADO DE UN OPERADOR DE PORTÓN (NORMALMENTE ABIERTO) Y UN SEGURO DE CONTACTO DE PUERTA (NORMALMENTE ABIERTO) PRUEBA CONFIGURAR INTRODUCCIÓN INSTALACIÓN El contacto de puerta puede conectarse al relé 1 o al relé 2 . Consulte la sección Configurar para obtener información acerca de cómo configurar los relés 1 y 2 .
  • Page 50: Cómo Realizar El Cableado De Un Operador De Portón

    PRUEBA CONFIGURAR INTRODUCCIÓN INSTALACIÓN CÓMO REALIZAR EL CABLEADO DE UN OPERADOR DE PORTÓN (NORMALMENTE ABIERTO) Y DE UN SEGURO MAGNÉTICO (NORMALMENTE CERRADO) PRUEBA CONFIGURAR INTRODUCCIÓN INSTALACIÓN El contacto de seguro magnético al relé 1 o al relé 2 . Consulte la sección Configurar para obtener información acerca de cómo configurar los relés 1 y 2 .
  • Page 51: Cómo Realizar El Cableado De Un Seguro De Contacto De Puerta

    PRUEBA CONFIGURAR INTRODUCCIÓN INSTALACIÓN CÓMO REALIZAR EL CABLEADO DE UN SEGURO DE CONTACTO DE PUERTA (NORMALMENTE ABIERTO) • Los conectores de cables El contacto de puerta puede conectarse al relé 1 o al relé 2 . pueden retirarse para Consulte la sección Configurar para obtener información simplificar el cableado .
  • Page 52: Prueba

    AWG 16 Entre 76 .2 y 152 .4 m (250 y 500 pies) AWG 12 NOTA: LiftMaster no se responsabiliza por las discrepancias entre la información incluida en el cuadro anterior y los requisitos de los códigos locales de construcción. Dicha información se aplica únicamente al uso sugerido.
  • Page 53: Enchufar El Transformador En El Tomacorriente

    NOTA: Al conectar la alimentación, el EL1SS emitirá una señal sonora para indicar que está preparada para la programación con el código maestro. El código maestro se usa para desasegurar las funciones de programación del EL1SS. El código maestro no debe incluirse como un código de control de entrada.
  • Page 54: Prueba Del Relé Del Portón/De La Puerta

    RESPUESTA A LLAMADAS DESDE EL EL1SS Cuando el teléfono de la casa recibe una llamada desde el EL1SS, responda la llamada y presione 0 para iniciar el audio y hablar con el visitante . Para denegar acceso a la persona que llama a la propiedad, cuelgue . Para extender el tiempo de conversación, presione 0 o continúe hablando .
  • Page 55: Instalador - Programación Del Sistema Usando El Teclado

    INSTALADOR – PROGRAMACIÓN DEL SISTEMA USANDO EL TECLADO En las siguientes páginas se presentan las instrucciones de las opciones de programación del EL1SS mediante el teclado . Los siguientes pasos de programación son para el programador durante la instalación inicial (podrían aplicarse ocasionalmente al usuario/residente) . Las opciones de programación de las páginas 15 a 17 se aplican tanto al programador como al usuario/residente .
  • Page 56: Programación Del Sistema Adicional Usando El Teclado

    Para cancelar el modo fiesta: Ingrese un Código de entrada válido en el control del EL1SS o ingrese “*9” en el teléfono local . El Modo Party enganchará al relé 1 . CONECTAR EL MODO FIESTA (RELÉ 2) ) Código Maestro (4 dígitos) +...
  • Page 57 RESIDENTE – PROGRAMACIÓN DEL SISTEMA USANDO EL TELÉFONO DE LA CASA Un teléfono de la casa es un teléfono con una conexión de cableado real con el sistema EL1SS . Consulte las instrucciones de desvíos de llamadas en la página 17 .
  • Page 58 Presione “Flash” una vez para responder al invitado, presione otra vez para regresar a llamada externa en la línea Telco, si no se presiona . Si (relé 1) o (relé 2) se pulsa, el EL1SS volverá automáticamente a la línea de Telco .
  • Page 59: Partes De Repuesto

    K002B1597-1 NO MOSTRADO Tarjeta de puente-PCB KSN1600341B Tarjeta principal Transformador K001D7121-1 K002B0821-1 Alojamiento trasero K09-37589 Altavoz K002B1598 ABA Cerradura y llaves K002B0799-4 Botón de llamada K101C0232-1 CÓDIGO MAESTRO EL1SS Anote el Código Maestro y guárdelo en un lugar seguro .
  • Page 60: Garantía

    GARANTÍA LiftMaster (el “Vendedor”) garantiza al primer comprador de este producto, para la construcción en que este producto se instale originalmente, que está libre de defectos de materiales y de mano de obra, por un período de dos años a partir de la fecha de compra .

Table des Matières