Sage the 3X Bluicer BJB615 Guide Rapide
Masquer les pouces
Voir aussi pour the 3X Bluicer BJB615:
- Guide rapide (124 pages) ,
- Guide rapide (19 pages)

Manuels Connexes pour Sage the 3X Bluicer BJB615


Sommaire des Matières pour Sage the 3X Bluicer BJB615
- Page 1 3X Bluicer ™ BJB615 / SJB615 QUICK GUIDE KURZANLEITUNG GUIDE RAPIDE SNELSTARTGIDS GUIDA RAPIDA GUÍA RÁPIDA MANUAL RÁPIDO...
-
Page 2: Sage
IMPORTANT Contents SAFEGUARDS 2 Sage Recommends READ ALL INSTRUCTIONS Safety First BEFORE USE AND SAVE FOR 6 Components FUTURE REFERENCE 7 Assembly • Before using the first time ensure 10 Functions your electricity supply is the 12 Care & Cleaning... - Page 3 • Fully unwind the power should be performed at an cord before operating. authorised Sage Service Centre. • Do not let the power cord hang over the edge of a • This appliance is not intended for use by children or by persons counter or table.
- Page 4 Sage to be used on this appliance itself, should be product. Failing to follow this cleaned and dried before...
-
Page 5: Overload Protection
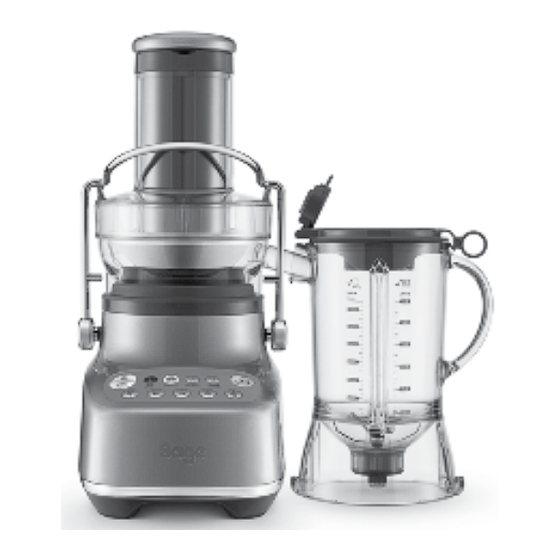
• Never attempt to operate maintenance other than with damaged blades, or with utensils, or any foreign cleaning is required please contact Sage Customer Service objects inside the jug. or go to sageappliances.com • Do not put the jug in extremes The symbol shown... - Page 6 Components A. Food pusher (not dishwasher safe) H. Inner measuring cup (dishwasher safe) B. Juicer cover (dishwasher safe) I. 1.5 litre blending jug & lid (dishwasher safe) C. Stainless steel filter basket (dishwasher safe) J. Juicing nozzle (dishwasher safe) Can be placed over spout to juice D.
- Page 7 Assembly 3. Place the juicer cover over the filter BEFORE FIRST USE bowl surround, positioning the Wash the lid, inner measuring cup, jug, lower part of the feed chute over the filter bowl surround, filter basket, juicer the stainless steel filter basket. cover, food pusher and pulp container in warm, soapy water with a soft cloth.
- Page 8 5. The safety locking arm should now 8. Drip stop plug can be fitted over juice be in a vertical position and locked outlet nozzle. It then allows the outlet into place on top of the juicer cover. to be plugged to prevent dripping after juicing.
- Page 9 Insert the clear, inner measuring lid into the blender lid and turn clockwise to lock into position. The jug features a Sage Assist™ Lid. This allows the lid to fit tightly onto the blender jug, avoiding...
-
Page 10: Functions
Functions Smoothie GETTING STARTED For dairy-based smoothies, a combination The ON / OFF button powers the unit into READY mode. of speeds and pulses are designed to combine and aerate ingredients into a smooth and creamy texture. PRESET PROGRAMS Pulse / Ice Crush BLENDING A program of continuous pulsing designed The appliance has 4 preset functions:... -
Page 11: Important
Auto Clean 2. Turning the Juicer On Select desired speed setting by pressing Use to remove most of the ingredients button 1-5. Use lower numbers (1-3) for off the blender walls and blades. Add 2 soft fruits and vegetables and higher cups of warm, soapy water and press the numbers (4 and 5) for hard fruits and clean button. -
Page 12: Care & Cleaning
SPEED SELECTOR GUIDE Care & Cleaning FOOD TYPE SPEED APPLES Ensure the motor base is turned off by pressing the ON / OFF button. Then BABY SPINACH unplug the power cord. BEETROOTS CLEANING CAPSICUMS 1. Remove Blender Jug. BLUEBERRIES 2. Disengage Locking Bar, pull BROCCOLI up entire Juice Collector Assembly and take to sink. - Page 13 JUG AND LID STUBBORN FOOD STAINS In order to keep your Jug clean and avoid Strong smelling foods such as garlic, fish food drying on the blades and jug, follow and some vegetables such as carrots may the below steps as soon as possible after leave an odour or stain on the blender jug and lid.
- Page 14 Troubleshooting The safety locking arm may not be correctly engaged in the vertical • LCD screen turns on operating position. In this case, the LCD screen will show an animated but appliance doesn't prompt . Check the top cover is properly aligned and the locking arm respond to controls.
- Page 15 If the issue persists after allowing to cool, this indicates an internal problem. • Please call Sage Customer Service or your nearest Authorised Sage Service Centre. Note that triggering the overload protection indicates abnormal use of •...
- Page 16 2 years from the date of purchase against defects caused by faulty workmanship and materials. During this guarantee period Sage Appliances will repair, replace, or refund any defective product (at the sole discretion of Sage Appliances).
- Page 17 3X Bluicer ™ BJB615 / SJB615 KURZANLEITUNG...
- Page 18 HINWEISE ZUR Inhalt SICHERHEIT BITTE ALLE ANWEISUNGEN 2 Bei Sage ® steht Sicherheit VOR GEBRAUCH LESEN UND ZUM SPÄTEREN NACHSCHLA an erster Stelle 7 Komponenten GEN AUFBEWAHREN • Vergewissern Sie sich vor 8 Montage dem ersten Gebrauch, dass 12 Funktionen...
- Page 19 Sie und trockene Fläche in einem es nicht und senden Sie es sicheren Abstand zur Kante an das nächstgelegene Sage und betreiben Sie es nicht Service Center zur Überprüfung, in der Nähe einer Hitzequelle, Reparatur oder um einen Ersatz wie beispielsweise Kochplatten, zu erhalten.
- Page 20 Schäden am Gerät oder gar zu Sicherheitsrisiken führen. in dieser Bedienungsanleitung beschriebenen Vorgänge sind • Versuchen Sie nicht, das Gerät in einem Sage Service Center auf andere Weise als der in durchzuführen. dieser Anleitung beschriebenen zu betreiben. • Dieses Gerät ist nicht für die Verwendung von Kindern oder •...
- Page 21 herum ausbreitet, muss die der Klingen beschädigt ist oder Fläche vor dem weiteren sich Zubehör oder andere Fremdgegenstände im Krug Gebrauch des Geräts gereinigt und getrocknet werden. befinden. • Setzen Sie den Krug keinen • Lassen Sie beim Umgang mit dem Siebeinsatz aus Edelstahl hohen Temperaturunterschie- Vorsicht walten, da die kleinen...
- Page 22 Wartungsarbeiten, die über die für diesen Zweck eingerichteten gewöhnliche Reinigung hinaus- behördlichen Sammelstelle oder gehen, kontaktieren Sie bitte den zu einem Händler gebracht Sage Kundendienst oder besu- werden, der Entsorgung anbietet. chen Sie sageappliances.com. Weitere Informationen dazu erhalten Sie bei Ihrem Gemein- deamt.
- Page 23 Komponenten A. Speiseschieber (nicht spülmaschinenfest) G. Langlebiger Motorsockel B. Deckel des Entsafters (spülmaschinenfest) H. Interner Messbecher (spülmaschinenfest) C. Siebeinsatz aus Edelstahl I. 1,5 Liter Mixerkrug mit Deckel (spülmaschinenfest) (spülmaschinenfest) D. Einfassung des Siebeinsatzes J. Ausgießer (spülmaschinenfest) Kann am Ausguss befestigt werden, (spülmaschinenfest) E.
-
Page 24: Montage
Montage VOR DEM ERSTEN GEBRAUCH 2. Richten Sie die Pfeile an der Unterseite des Siebeinsatzes mit den Pfeilen an der Reinigen Sie Deckel, internen Messbecher, Antriebskupplung des Motorsockels aus Krug, Einfassung des Siebeinsatzes, Siebein- und drücken Sie den Einsatz nach unten, satz, Entsafter-Deckel, Speiseschieber und bis er einrastet, um ihn sicher mit dem Tresterbehälter mit warmem Seifenwasser... - Page 25 4. Heben Sie den Schutzriegel an und 7. Bringen Sie den Tresterbehälter durch schieben Sie ihn in die Rillen zu beiden leichtes Kippen und Anheben des Motorsockels in Position. Setzen Sie Seiten des Entsafter-Deckels. den Tresterbehälter unter dem Deckel des Entsafters auf der Rückseite ein und vergewissern Sie sich, dass die vordere Kante unter der hinteren Kante der Einfassung des Siebeinsatzes...
- Page 26 Setzen Sie den durchsichtigen Deckel des inneren Messbechers in den Deckel des Mixers ein und drehen Sie ihn im Uhrzeigersinn, bis er einrastet. Der Krug ist mit einem Sage Assist ™ -Deckel ausgestattet. Dadurch sitzt der Deckel fest auf dem Mixerkrug und verhindert, dass sich Teile während des Gebrauchs...
- Page 27 4. Befüllen Sie den Mixerkrug nur bis zur ‚MAX‘-Markierung und nicht darüber hinaus. 5. Vergewissern Sie sich, dass die Ausguss- abdeckung des Mixerdeckels sicher befestigt und geschlossen ist. Durch den Zugring kann der Deckel mit einer einfachen Hebelbewegung ganz leicht entfernt werden.
-
Page 28: Erste Schritte
Funktionen Das Programm und der Timer können durch ERSTE SCHRITTE Drücken der Pause-Taste angehalten werden. Mit der Powertaste wird das Gerät in den Durch erneutes Drücken der Funktionstaste Bereitschaftsmodus („READY“) versetzt. wird das Programm wieder aufgenommen, ein weiteres Drücken der Pause-Taste bricht VOREINGESTELLTE PROGRAMME das Programm ab. - Page 29 Frozen Cocktail (Gefrorene Cocktails) 2. Einschalten des Entsafters Stellen Sie die gewünschte Geschwin- Um Getränke und Cocktails auf Eisbasis, digkeitsstufe ein, indem Sie eine der z.B. Margaritas, Daiquiris und Slushies, Tasten von 1 bis 5 drücken. Die unteren kreieren zu können, beginnt dieses Programm Geschwindigkeitsstufen (1-3) sind für mit einem Intervall zur Eiszerkleinerung, weiches Obst und Gemüse geeignet,...
- Page 30 Pflege und LEITFADEN FÜR GESCHWINDIGKEITSSTUFEN Reinigung OBST/GEMÜSESORTE STUFE Vergewissern Sie sich, dass der Motorsockel ÄPFEL ausgeschaltet ist, indem Sie die Powertaste drücken. Ziehen Sie dann das Stromkabel BLATTSPINAT aus der Steckdose. ROTE BEETE REINIGUNG PAPRIKASCHOTEN 1. Entfernen Sie den Mixerkrug. HEIDELBEEREN 2.
- Page 31 Fach gewaschen werden. Bei regelmäßiger REINIGUNGSMITTEL Reinigung im Geschirrspüler kann sich jedoch Verwenden Sie keine Scheuerschwämme die Lebensdauer der Teile verkürzen, da sie oder Scheuermittel zur Reinigung des Motor- dort ständig aggressiven Reinigungsmitteln, sockels oder Saftkrugs, da dies Kratzer Heißwasser und Druck ausgesetzt sind. verursachen kann.
- Page 32 Störungsbehebung Möglicherweise ist der Schutzriegel nicht richtig in der aufrechten • Das LCD-Display lässt Betriebsstellung eingerastet. In diesem Fall wird auf dem LCD-Display eine sich einschalten, aber kleine Animation eingeblendet. Überprüfen Sie, ob der Deckel richtig das Gerät reagiert ausgerichtet ist und der Schutzriegel sicher in den Rillen auf beiden Seiten nicht auf Befehle des Entsafter-Deckels bzw.
- Page 33 Gerät vom Stromkreis getrennt werden, während es abkühlt. Wenn das Problem nach dem Abkühlen weiterhin besteht, weist dies auf • eine interne Fehlfunktion hin. Bitte wenden Sie sich an den Sage-Kunden- dienst oder an Ihre nächstgelegene autorisierte Sage ®...
-
Page 34: Jahre Beschränkte Garantie
Garantie 2 JAHRE BESCHRÄNKTE GARANTIE Sage Appliances bietet für dieses Produkt für den häuslichen Gebrauch in bestimmten Bereichen ab Kaufdatum eine 2-jährige Garantie gegen Mängel, die durch fehlerhafte Verarbeitung und Materialien verursacht wurden. Während dieser Garantiezeit repariert, ersetzt oder erstattet Sage Appliances ein defektes Produkt (nach eigenem Ermessen von Sage Appliances). - Page 35 3X Bluicer ™ BJB615 / SJB615 GUIDE RAPIDE...
- Page 36 CONSIGNES Table des DE SÉCURITÉ matières IMPORTANTES recommande la sécurité 2 Sage ® avant tout LISEZ TOUTES LES 7 Composants INSTRUCTIONS AVANT 8 Assemblage UTILISATION ET CONSERVEZ 12 Fonctions LES POUR RÉFÉRENCE ULTÉRIEURE 14 Entretien et nettoyage • Avant une première utilisation, 16 Dépannage...
- Page 37 pas sur un bateau ou dans • L'installation d'un commutateur des véhicules en mouvement. de sécurité de courant résiduel est recommandée Ne l'utilisez pas en plein air. Une mauvaise utilisation peut pour fournir une sécurité supplémentaire lors de engendrer des blessures. l'utilisation de tous les appareils •...
- Page 38 Sage agréé par Sage. Le non-respect de le plus proche pour qu'il soit cette consigne peut entraîner vérifié, remplacé ou réparé.
- Page 39 • Assurez-vous que le produit • Ne faites pas fonctionner l'appareil si le récipient est hors tension, que le panier- filtre en acier inoxydable s'est à pulpe n'est pas en place. • Ne détachez pas l'arceau de arrêté de tourner et que le moteur est entièrement arrêté...
- Page 40 En cas de dommages ou si un connecteur de la base d'alimenta- entretien autre que le nettoyage tion. N'immergez pas la base est nécessaire, contactez le d'alimentation lors du nettoyage. service client Sage ou consultez le site sageappliances.com. USAGE DOMESTIQUE UNIQUEMENT CONSERVEZ CES INSTRUCTIONS...
- Page 41 Composants A. Poussoir (non adapté au lave-vaisselle) G. Base du moteur résistante B. Couvercle de l'extracteur de jus H. Bouchon doseur interne (adapté au lave-vaisselle) (adapté au lave-vaisselle) I. Couvercle et pichet du blender 1,5 L C. Panier-filtre en acier inoxydable (adapté...
-
Page 42: Assemblage
Assemblage 2. Alignez les flèches à la base du panier- AVANT LA PREMIÈRE UTILISATION filtre en acier inoxydable avec celles du Lavez le couvercle, le bouchon doseur couplage de la commande du moteur et intérieur, le pichet, le contenant du filtre, poussez vers le bas jusqu'à... - Page 43 4. Relevez l'arceau de blocage de sûreté et 7. Mettez en place le récipient à pulpe en placez-le dans les deux encoches inclinant et soulevant légèrement la base situées de part et d'autre du couvercle. du moteur. Insérez le récipient à pulpe sous le couvercle de l'extracteur à...
- Page 44 9. En option : Pour réaliser une extraction MIXAGE dans un verre, vous pouvez placer 1. Avec le pichet du blender en position la buse d'extraction sur la buse de sortie droite, placez-le sur la base du moteur. du jus. La poignée du blender peut être positionnée à...
- Page 45 Le pichet est doté d'un couvercle Sage Assist™. Cela permet au couvercle d'être ajusté fermement dans le pichet du blender, évitant ainsi les déplacements lors du fonctionnement.
- Page 46 Fonctions Le programme peut également être annulé COMMENCER à tout moment en appuyant sur le bouton Le bouton ON / OFF allume l'unité en mode ON / OFF. La minuterie se réinitialise à 0:00. READY (Prêt). Smoothie PROGRAMMES PRÉCONFIGURÉS Pour réaliser des smoothies à base de lait, l'association de vitesses et battements MIXAGE permet de combiner et d'aérer les ingrédients...
- Page 47 Auto Clean (Nettoyage automatique) 2. Mise en marche de l'extracteur de jus Sélectionnez la vitesse souhaitée en Utilisez cette fonction pour retirer la plupart des appuyant sur l'un des boutons 1 à 5. ingrédients des parois et lames du blender. Utilisez les chiffres les plus faibles (1 à...
-
Page 48: Entretien Et Nettoyage
GUIDE DE SÉLECTION Entretien DE LA VITESSE et nettoyage TYPE D'ALIMENT VITESSE POMMES Assurez-vous que la base du moteur est hors tension en appuyant sur le bouton ON / OFF. PETITS ÉPINARDS Débranchez ensuite le cordon d'alimentation. BETTERAVES NETTOYAGE POIVRONS 1. -
Page 49: Pichet Et Couvercle
PICHET ET COUVERCLE TÂCHES D'ALIMENTS TENACES Pour conserver votre pichet propre Les aliments à forte odeur comme l'ail, et empêcher les aliments de sécher sur le poisson et certains légumes (carottes) les lames et le pichet, suivez les étapes peuvent laisser une odeur ou des tâches sur ci-dessous dès que possible après utilisation. -
Page 50: Dépannage
Dépannage • Il se peut que l'arceau de blocage de sûreté ne soit pas correctement L'écran LCD s'allume engagé en position de fonctionnement verticale. Dans ce cas, l'écran mais l'appareil LCD affiche une invite animée . Vérifiez que le couvercle supérieur ne répond pas est correctement aligné... - Page 51 • Si le problème persiste après avoir laissé refroidir, il peut être dû à un problème interne. Veuillez contacter le service client Sage ou votre centre de réparation Sage agréé le plus proche. • Notez que le déclenchement de la protection contre les surcharges indique une utilisation anormale de l'appareil, comme une charge trop importante dans le pichet du blender, une force de poussée excessive lors...
-
Page 52: Garantie Limitée De 2 Ans
Garantie GARANTIE LIMITÉE DE 2 ANS Sage Appliances garantit ce produit pour un usage domestique sur les territoires spécifiés pendant 2 ans à compter de la date d'achat, contre les défauts de fabrication et de matériaux. Au cours de cette période de garantie, Sage Appliances s'engage à... -
Page 53: Déclaration À L'intention Du Consommateur
Déclaration à l'intention du consommateur SAGE FRANCE - GARANTIE LIMITÉE Article L. 217-4 du Code de la consommation : Sage Appliances garantit ce produit pour un usage domestique sur les territoires spécifiés pendant 2 « Le vendeur livre un bien conforme au contrat et ans à... - Page 54 3X Bluicer ™ BJB615 / SJB615 SNELSTARTGIDS...
-
Page 55: Table Des Matières
BELANGRIJKE Inhoud VEILIGHEIDS- MAATREGELEN stelt veiligheid voorop 2 Sage ® 7 Onderdelen LEES ALLE INSTRUCTIES 8 Montage VÓÓR GEBRUIK EN BEWAAR 12 Functies DEZE VOOR TOEKOMSTIGE 14 Onderhoud en reiniging NASLAG 16 Problemen oplossen • Controleer vóór het eerste 18 Garantie... - Page 56 Sage- van de rand van het aanrecht servicecentrum voor onderzoek, en werk niet op of in de buurt vervanging of reparatie.
- Page 57 Sage zijn goedgekeurd is gemorst, moet het worden voor gebruik met dit product. schoongemaakt en afgedroogd Als u deze instructie niet voordat u het weer gebruikt.
- Page 58 Neem contact op voorwerpen in de kan. met de klantenservice van Sage of ga naar sageappliances.com • Onderwerp de kan niet als er sprake is van schade aan extreem hoge of lage...
- Page 59 Het weergegeven symbool geeft aan dat dit apparaat niet met het normale huishoudelijke afval mag worden weggegooid. Het moet naar een geschikt plaatselijk afvalverwerkingscentrum worden gebracht of naar een dealer die deze service biedt. Neem voor meer informatie contact op met uw gemeente.
-
Page 60: Onderdelen
Onderdelen A. Fruit- en groentedrukker (niet vaatwasserbestendig) H. Maatbekerdop (vaatwasserbestendig) B. Deksel van sapcentrifuge (vaatwasserbestendig) I. Blenderkan van 1,5 liter met deksel (vaatwasserbestendig) C. Filtermand van roestvrij staal (vaatwasserbestendig) J. Schenkstuk (vaatwasserbestendig) Kan over de tuit worden geplaatst om het sap D. -
Page 61: Montage
Montage 2. Zorg dat de pijltjes op de basis van de VÓÓR HET EERSTE GEBRUIK filtermand zijn uitgelijnd met de pijltjes Was het deksel, de maatbekerdop, kan, op de koppeling van de motoraandrijving, behuizing van de filterkom, filtermand, en duw de filtermand omlaag totdat deze het deksel van de sapcentrifuge, de fruit- en vastklikt en stevig op de motorbasis is groentedrukker en pulpopvangbak af in warm... - Page 62 4. Til de vergrendelingshendel omhoog 7. Zet de opvangbak voor pulp op zijn en schuif deze in de twee groeven aan plaats door de motorbasis een beetje op weerszijden van het deksel van de te tillen en te kantelen. Zet de opvangbak voor pulp onder het deksel van de sapcentrifuge.
- Page 63 MIXEN 9. Optioneel: Het schenkstuk kan op de saptuit worden bevestigd om 1. Plaats de blenderkan rechtop op de rechtstreeks in een glas te persen. motorbasis. Het handvat van de blender kan zowel aan de linker- als de rechterkant van het apparaat worden geplaatst.
- Page 64 Steek de doorzichtige maatbekerdop in het blenderdeksel en draai deze met de klok mee om hem vast te zetten. De kan beschikt over het Sage Assist™-deksel. Hierdoor blijft het deksel stevig op de blenderkan zitten zodat dit tijdens gebruik niet loskomt.
-
Page 65: Functies
Functies Het programma kan ook op elk moment AAN DE SLAG worden geannuleerd met de ON/OFF-knop. Met de knop ON/OFF (AAN/UIT) zet u het De timer wordt teruggezet naar 0:00. apparaat aan voor gebruik. Smoothie VOORAF INGESTELDE Voor smoothies op basis van zuivel PROGRAMMA'S is een combinatie van snelheden en pulseerstanden ontworpen om ingrediënten... - Page 66 Automatisch reinigen 2. De sapcentrifuge inschakelen Selecteer de gewenste snelheids- Gebruik de functie voor automatisch reinigen om de meeste etensresten van de zijkant instelling door knoppen 1-5 in te drukken. Gebruik de lagere standen (1-3) voor van de kan en de messen te verwijderen. zachte groenten en fruit en de hogere Voeg 2 kopjes warm zeepsop toe en druk op standen (4 en 5) voor harde groenten en...
-
Page 67: Onderhoud En Reiniging
TABEL VOOR SNELHEIDSKEUZE Onderhoud INGREDIËNTTYPE SNELHEID en reiniging APPELS Zet de motorbasis uit door op de ON/OFF- SPINAZIE knop te drukken. Trek vervolgens de stekker RODE BIETEN uit het stopcontact. PAPRIKA EN PEPERS REINIGEN BOSBESSEN 1. Verwijder de blenderkan. 2. Ontgrendel de vergrendelingshendel, BROCCOLI trek het deel met de sapkan omhoog KOOL... - Page 68 KAN EN DEKSEL HARDNEKKIGE VOEDSELVLEKKEN Volg de onderstaande stappen zo snel Sterk ruikende ingrediënten zoals knoflook, mogelijk na gebruik om uw kan schoon te vis en sommige groenten, zoals wortels, houden en te voorkomen dat etensresten kunnen een geur of vlekken op de hard worden op de messen, kan en het blenderkan en het deksel achterlaten.
-
Page 69: Problemen Oplossen
Problemen oplossen • De vergrendelingshendel staat mogelijk niet goed in de verticale positie. Het lcd-scherm In dat geval geeft het lcd-scherm een animatie weer gaat aan maar . Controleer of het bovenste deksel goed is uitgelijnd en dat de vergrendelingshendel stevig het apparaat in de groeven aan weerszijden van het deksel van de sapcentrifuge of de reageert niet op de... - Page 70 • Als het probleem aanhoudt nadat het apparaat is afgekoeld, duidt dit op een intern probleem. Neem contact op met de klantenservice van Sage of uw dichtstbijzijnde geautoriseerd Sage-servicecentrum. • De overbelastingsbeveiliging duidt op abnormaal gebruik van het apparaat, zoals een te zware belasting in de blenderkan, overmatige drukkracht tijdens het persen of langdurig continu gebruik.
-
Page 71: Garantie
Garantie BEPERKTE GARANTIE VAN 2 JAAR Sage Appliances biedt een garantie op dit product voor huishoudelijk gebruik in genoemde gebieden gedurende 2 jaar vanaf de datum van aankoop voor defecten veroorzaakt door gebrekkige afwerking en materialen. Gedurende deze garantieperiode zal Sage Appliances... - Page 72 3X Bluicer Pro ™ BJB615 / SJB615 GUIDA RAPIDA...
- Page 73 NORME DI Sommario SICUREZZA IMPORTANTI consiglia: la sicurezza 2 Sage ® prima di tutto LEGGERE TUTTE LE 7 Componenti ISTRUZIONI PRIMA DELL'USO 8 Montaggio E CONSERVARLE PER 12 Funzioni CONSULTARLE IN FUTURO 14 Manutenzione e pulizia • Prima di usare l'apparecchio per...
- Page 74 • Si consiglia l'installazione di un • Posizionare l'elettrodomestico interruttore salvavita per una su una superficie stabile, maggiore sicurezza durante resistente al calore, piana e asciutta, lontano dal bordo l'utilizzo di tutti i dispositivi elettrici. Si consiglia l'uso di un del piano di lavoro.
- Page 75 Sage autorizzato da Sage per l'utilizzo con più vicino affinché venga questo prodotto. La mancata esaminato, sostituito o riparato. osservazione di questa istruzione •...
- Page 76 blocco di sicurezza e/o prima • Non spremere più di 3 kg di di spostare l'apparecchio, carote alla volta. quando non è in uso, e prima • Evitare di porre il boccale di smontarlo, pulirlo e riporlo. del frullatore sopra la base •...
- Page 77 Se l'elettrodomestico è danneggiato o richiede un intervento di manutenzione diverso dalla pulizia, contattare il Servizio clienti Sage o visitare il sito Web sageappliances.com. Questo simbolo indica che l'apparecchio non può essere smaltito con i rifiuti domestici comuni.
- Page 78 Componenti A. Spingitore (non lavabile in lavastoviglie) H. Tappo misuratore interno (lavabile in lavastoviglie) B. Coperchio dello spremitore (lavabile in lavastoviglie) I. Boccale da 1,5 litri e coperchio (lavabile in lavastoviglie) C. Cestello filtrante in acciaio inossidabile J. Bocchetta di uscita (lavabile in lavastoviglie) (lavabile in lavastoviglie) Può...
-
Page 79: Preparazione Al Primo Utilizzo
Montaggio 2. Allineare le frecce alla base del cestello PREPARAZIONE AL PRIMO UTILIZZO filtrante in acciaio inossidabile con le Lavare il coperchio, il tappo misuratore frecce sul raccordo della base del motore interno, il boccale, la copertura del filtro, e spingere verso il basso fino a udire uno il cestello filtrante, il coperchio dello scatto, per garantire l'aderenza alla base spremitore, lo spingitore e il contenitore... - Page 80 4. Sollevare la leva del blocco di sicurezza 7. Mettere il contenitore raccogli-polpa e accomodarla nei due solchi sui lati del in posizione inclinando e sollevando coperchio dello spremitore. leggermente la base del motore. Inserire il contenitore raccogli-polpa sotto il coperchio dello spremitore sul retro, verificando che il bordo anteriore si trovi sotto il bordo posteriore della copertura...
- Page 81 9. Facoltativo: Per la spremitura in una MISCELAZIONE tazza, è possibile adattare la bocchetta 1. Posizionare il frullatore sulla base per succo sulla bocchetta di uscita. del motore, con il boccale in posizione verticale. La maniglia del frullatore può essere posizionata sul lato sinistro o destro dell'apparecchio.
- Page 82 Inserire il coperchio di misurazione interno trasparente nel coperchio del frullatore e ruotare in senso orario per bloccarlo in posizione. Il boccale dispone di un coperchio Sage Assist™. Questa caratteristica consente di fissare saldamente il coperchio al boccale del frullatore, evitando che si sposti durante il funzionamento.
-
Page 83: Guida Introduttiva
Funzioni È anche possibile annullare il programma GUIDA INTRODUTTIVA in qualsiasi momento premendo il pulsante Il pulsante ON/OFF imposta la modalità ON|OFF. Il timer verrà reimpostato su 0:00. READY (PRONTO). Smoothie (Frullato) PROGRAMMI PREIMPOSTATI Per frullati con prodotti a base di latte, una combinazione di velocità... - Page 84 Auto Clean (Pulizia automatica) 2. Accensione dello spremitore Selezionare la velocità desiderata Utilizzare questa funzione per rimuovere la premendo uno dei pulsanti, da 1 a 5. maggior parte degli ingredienti dalle pareti Scegliere i valori più bassi (1-3) per frutta e dalle lame del frullatore.
-
Page 85: Manutenzione E Pulizia
TABELLA DI SELEZIONE Manutenzione DELLA VELOCITÀ e pulizia TIPO DI ALIMENTI VELOCITÀ MELE Verificare sempre che il motore sia spento premendo il pulsante ON/OFF. Quindi SPINACINI scollegare il cavo. BARBABIETOLE PULIZIA PEPERONI 1. Rimuovere il boccale del frullatore. MIRTILLI 2. Sbloccare la leva di sicurezza, sollevare tutto l'apparato di raccolta BROCCOLI del succo e posizionarlo nel lavello. - Page 86 BOCCALE E COPERCHIO MACCHIE PERSISTENTI Per mantenere pulito il boccale ed evitare Gli alimenti con odori forti quali l'aglio, che gli alimenti si secchino sulla superficie il pesce e alcune verdure quali le carote delle lame e del boccale, eseguire la possono lasciare odori o macchie residue procedura seguente subito dopo l'uso.
-
Page 87: Risoluzione Dei Problemi
Risoluzione dei problemi • La leva del blocco di sicurezza potrebbe non essere fissata correttamente Il display LCD in posizione verticale. In questo caso il display LCD mostra l'animazione si accende ma Controllare che la copertura superiore sia allineata correttamente e che la l'apparecchio non leva del blocco di sicurezza sia fissata nei due solchi sui lati del coperchio risponde ai comandi. - Page 88 • Se dopo il raffreddamento il problema persiste, l'apparecchio presenta un problema interno. Contattare il Servizio clienti Sage oppure il centro assistenza Sage autorizzato più vicino. • L'attivazione della protezione da sovraccarico indica un uso anomalo dell'apparecchio, ad esempio un carico eccessivo nel boccale, una spinta eccessiva durante la spremitura o un uso continuato eccessivo.
- Page 89 Garanzia GARANZIA LIMITATA DI 2 ANNI Sage Appliances offre una garanzia per l'utilizzo domestico di questo prodotto in specifiche aree geografiche; la copertura è di 2 anni a partire dalla data di acquisto. La garanzia copre eventuali malfunzionamenti causati da difetti di fabbricazione o dei materiali.
- Page 90 3X Bluicer ™ BJB615 / SJB615 GUÍA RÁPIDA...
- Page 91 MEDIDAS DE Índice SEGURIDAD IMPORTANTES recomienda seguridad ® 2 Sage LEE TODAS LAS ante todo INSTRUCCIONES ANTES 7 Componentes DEL USO Y GUÁRDALAS PARA 8 Ensamblaje PODER CONSULTARLAS 11 Funciones EN EL FUTURO. 13 Cuidado y limpieza • Antes de usar el producto por 15 Resolución de problemas...
- Page 92 Centro de servicio autorizado de Sage más fuente de calor (por ejemplo, cercano para que la examinen, una placa de cocina eléctrica, un quemador o un horno).
- Page 93 • No muevas el aparato mientras realizarse en un Centro de esté en funcionamiento. servicio autorizado de Sage. • No utilices el aparato sobre una superficie inclinada. • El aparato no está diseñado • No introduzcas alimentos para ser usado por niños ni...
- Page 94 (que no sea la limpieza), ponte • No intentes cambiar repentina- en contacto con el Servicio mente la temperatura de la jarra. de atención al cliente de Sage Por ejemplo, no coloques la jarra o visita sageappliances.com fría en agua caliente, o viceversa.
- Page 95 Este símbolo indica que el aparato no debe desecharse con la basura doméstica normal. Debe llevarse a un centro de recogida de residuos designado por las autoridades locales para ese fin, o a una empresa que preste ese servicio. Para obtener más información, ponte en contacto con los servicios municipales.
-
Page 96: Datos Técnicos
Componentes A. Empujador de alimentos (no apto para G. Base resistente lavavajillas) H. Tapa medidora interna (apta para lavavajillas) B. Tapa de la licuadora (apta para lavavajillas) I. Jarra para batir de 1,5 l con tapa (apta para C. Filtro de acero inoxidable (apto para lavavajillas) lavavajillas) D. -
Page 97: Antes Del Primer Uso
Ensamblaje 3. Coloca la tapa de la licuadora sobre ANTES DEL PRIMER USO la carcasa del filtro, poniendo la parte Lava la tapa de la licuadora, la tapa medidora inferior de la abertura para alimentos interna, la tapa de la jarra, la jarra, la carcasa sobre el filtro de acero inoxidable. - Page 98 5. El bloqueo de seguridad debe estar ahora 8. La pieza antigoteo se puede colocar en el en posición vertical y fijo en su sitio en la pico de zumo. Permite tapar la salida para evitar goteos después del licuado. parte superior de la tapa de la licuadora.
- Page 99 La jarra cuenta con una práctica tapa Sage Assist™. Esto permite que la tapa encaje firmemente en la jarra de la batidora de vaso y evita que se...
-
Page 100: Funciones
Funciones El programa también puede cancelarse CÓMO EMPEZAR en cualquier momento pulsando el botón Al pulsar el botón ON / OFF, el aparato se ON | OFF. El temporizador se reiniciará enciende y pasa al modo READY una vez a 0:00. listo para el funcionamiento. - Page 101 Auto Clean 2. Encendido de la licuadora Selecciona la velocidad deseada Este programa de autolimpieza sirve presionando los botones 1-5. Usa los para eliminar la mayoría de los ingredientes números más bajos (1-3) para frutas del interior de la batidora de vaso y de y verduras blandas y los números más las cuchillas.
-
Page 102: Cuidado Y Limpieza
GUÍA DE SELECCIÓN Cuidado DE VELOCIDAD y limpieza TIPO DE ALIMENTO VELOCIDAD Pulsa el botón ON | OFF en la base del MANZANAS aparato para asegurarte de que el motor ESPINACAS BABY esté apagado. Luego desenchufa el cable de alimentación. REMOLACHA PIMIENTOS LIMPIEZA... -
Page 103: Almacenamiento
JARRA Y TAPA MANCHAS DE ALIMENTOS Para mantener la jarra limpia y evitar que PERSISTENTES se sequen los alimentos en las cuchillas Los alimentos con olor fuerte como el ajo, el pescado y algunas verduras como las y la jarra, sigue los siguientes pasos tan pronto como sea posible después del uso. -
Page 104: Resolución De Problemas
Resolución de problemas Puede que el bloqueo de seguridad no esté correctamente colocado en • La pantalla LCD la posición de operación vertical. En este caso, la pantalla LCD mostrará se enciende pero el una animación . Comprueba que la tapa superior esté correctamente aparato no responde alineada y que la barra de seguridad esté... - Page 105 Si el problema continúa después de haber dejado que el aparato se enfríe, • significa que hay un problema interno. Llama al servicio de atención al cliente de Sage o al centro de servicio autorizado de Sage más cercano. Ten en cuenta que la protección de sobrecarga se activa para indicar •...
-
Page 106: Garantía Limitada De 2 Años
Garantía GARANTÍA LIMITADA DE 2 AÑOS La garantía de Sage Appliances cubre este producto para uso doméstico en territorios específicos durante 2 años a partir de la fecha de compra contra fallos causados por mano de obra y materiales defectuosos. Durante el plazo de la garantía, Sage Appliances reparará, sustituirá... - Page 107 3X Bluicer ™ BJB615 / SJB615 MANUAL RÁPIDO...
-
Page 108: Cuidados Importantes
CUIDADOS Índice IMPORTANTES LEIA TODAS AS INSTRUÇÕES recomenda ANTES DE UTILIZAR 2 A Sage ® E GUARDEAS PARA a segurança como máxima prioridade CONSULTA FUTURA • Antes de utilizar pela primeira 7 Componentes vez, certifique-se de que a sua 8 Montagem fonte de alimentação corres-... - Page 109 Sage e não utilize próximo de uma mais próximo para inspeção, fonte de calor, como uma placa substituição ou reparação.
- Page 110 Sage para utilização antes de o continuar a usar. neste produto. O não cumpri- • Tenha cuidado ao manusear o mento desta instrução pode...
- Page 111 Contacte o serviço de atendi- água quente, ou vice-versa. mento ao cliente da Sage ou • A tampa deve estar fixa à jarra aceda a sageappliances.com antes da operação para garantir se o aparelho estiver danificado que o conteúdo interno não sai,...
- Page 112 O símbolo apresentado indica que este aparelho não deve ser eliminado juntamente com os resíduos domésticos normais. Deve ser encaminhado para um centro de recolha de resíduos da autoridade local designado para este fim ou um revendedor que forneça este serviço.
- Page 113 Componentes A. Empurrador de alimentos (não adequado G. Base do motor resistente para máquina de lavar louça) H. Copo de medição interno (adequado B. Cobertura do liquidificador (adequada para para máquina de lavar louça) máquina de lavar louça) I. Jarro de mistura de 1,5 litros e tampa C.
-
Page 114: Antes Da Primeira Utilização
Montagem 3. Coloque a cobertura do liquidificador ANTES DA PRIMEIRA UTILIZAÇÃO sobre a taça do filtro, posicionando Lave a tampa, o copo interno de medição, a parte inferior da calha de alimentação a jarra, a taça do filtro, o cesto de filtro, sobre o cesto do filtro de aço inoxidável. - Page 115 5. O braço de bloqueio de segurança 8. Pode colocar a tampa do bocal deve estar agora na posição vertical antigotejamento no bocal de saída e bloqueado no topo da cobertura do sumo. Em seguida, permite tapar do liquidificador. a saída para evitar o gotejamento após servir o sumo.
- Page 116 A jarra inclui uma tampa Sage Assist™. Esta tampa permite o ajuste perfeito na jarra do liquidificador para evitar que se mova durante o funcionamento.
- Page 117 Funções Também pode cancelar o programa INTRODUÇÃO em qualquer momento premindo o botão O botão ON/OFF (Ligar/Desligar) liga ON/OFF (Ligar/Desligar). O temporizador a unidade no modo READY (Pronto). será reposto para 0:00 PROGRAMAS PREDEFINIDOS Smoothie (Batido) Para batidos com produtos lácteos, existe MISTURAR uma combinação de velocidades e impulsos O aparelho tem 4 funções predefinidas:...
- Page 118 2. Ligar o liquidificador Auto clean (LIMPEZA AUTOMÁTICA) Ligue o botão para a definição Utilize para remover a maioria dos de velocidade desejada premindo ingredientes das paredes do liquidificador o botão 1-5. Utilize os números e das lâminas. Adicione 2 chávenas de baixos (1-3) para frutas e vegetais água morna com sabão e prima o botão de moles e os números altos (4 e 5) para...
-
Page 119: Cuidados E Limpeza
GUIA DO SELETOR DE VELOCIDADE Cuidados TIPO DE ALIMENTO VELOCIDADE e limpeza MAÇÃS Certifique-se de que a base do motor ESPINAFRES está desligada premindo o botão ON/OFF (Ligar/Desligar). Em seguida, desligue BETERRABAS o cabo de alimentação. PIMENTOS LIMPEZA ARANDOS 1. Remova a jarra da centrifugadora. 2. -
Page 120: Máquina De Lavar Louça
Limpar as peças na máquina de lavar louça JARRA E TAMPA pode também causar a sua deterioração, por Para manter a jarra limpa e evitar que isso inspecione-as regularmente e pare de os alimentos sequem nas lâminas, jarra utilizar o produto se notar sinais de danos. e tampa, siga os passos abaixo o mais depressa possível após o uso. -
Page 121: Resolução De Problemas
Resolução de problemas O braço de bloqueio de segurança pode não estar bem encaixado • O ecrã LCD liga, na posição de operação vertical. Neste caso, o ecrã LCD apresenta mas o aparelho uma mensagem animada . Verifique se a cobertura superior está não responde bem alinhada e se o braço de bloqueio está... - Page 122 Se o problema persistir depois de deixar arrefecer, indica que é um • problema interno. Contacte o Atendimento ao Cliente da Sage ou o Centro de Assistência Autorizado da Sage mais próximo. Tenha em atenção que a proteção de sobrecarga indica a utilização •...
- Page 123 2 anos a partir da data de compra contra avarias provocadas por defeitos na mão-de-obra e de materiais. Durante este período da garantia, a Sage Appliances irá reparar, substituir ou reembolsar qualquer produto defeituoso (sob o critério exclusivo da Sage Appliances).
- Page 124 0800 880 72 Deutschland: 08005053104 Österreich: 0800 80 2551 Switzerland 0800 009 933 Spain Sage Appliances France SAS 0900 838 534 Siège social : 66 avenue des Champs Elysées – 75008 Paris 879 449 866 RCS Paris Portugal France: 0800 903 235 0800 180 243 www.sageappliances.com...