Table des Matières
Publicité
Liens rapides
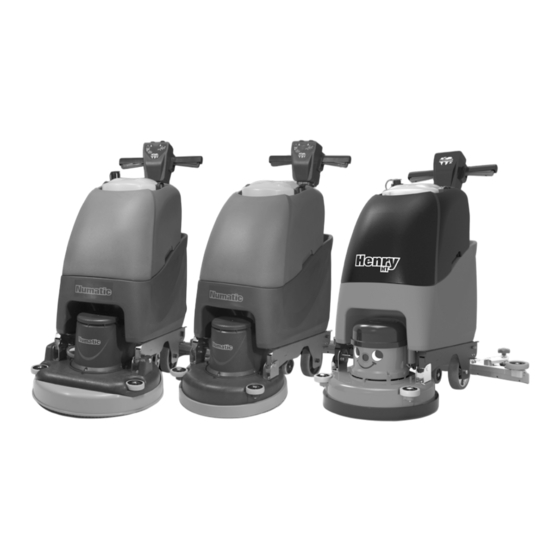
HT4045, TT4045G & TT4055G
S C R U B B E R D RY E R
S C H E U E R S A U G M A S C H I N E
AUTOLAVEUSE
SCHROBZUIGMACHINE
Original Instructions
Warning! Read instructions before using the machine
Originalanleitung
Achtung! Vor Verwendung der Maschine bitte die Anleitung lesen
Notice originale
Attention ! Lisez la notice avant d'utiliser la machine
Originele instructies
Waarschuwing! Lees deze instructies voor u de machine gebruikt
www.numatic.co.uk
Publicité
Table des Matières
Dépannage

Manuels Connexes pour Numatic HT4045


Sommaire des Matières pour Numatic HT4045
- Page 1 HT4045, TT4045G & TT4055G S C R U B B E R D RY E R S C H E U E R S A U G M A S C H I N E AUTOLAVEUSE SCHROBZUIGMACHINE Original Instructions Warning! Read instructions before using the machine...
-
Page 2: Table Des Matières
EU Declaration Document S C R U B B E R D RY E R HT4045, TT4045G & TT4055G Index Machine Overview Überblick über die Maschine ...... Seite 4-5 ........ Pages 4-5 Machine Set up Guide ........ Page 6-14 Einrichten der Maschine ....... Seite 6-14 Tilting the Handle ........ - Page 3 S C R U B B E R D RY E R HT4045, TT4045G & TT4055G Index Description de la machine ......Pages 4-5 Inhoudsopgave Overzicht machine ..... Pagina 4-5 Guide d’installation de la machine ....Page 6-14 Gids machine-instellingen ......Pagina 6-14 Inclinaison de la poignée .......
-
Page 4: Machine Overview
Machine Overview... - Page 5 Machine Overview / Überblick über die Maschine / Description de la machine / Overzicht machine (UK) AFTER THE REMOVAL OF ALL THE PACKAGING, (DE) NACHDEM SIE DIE VERPACKUNG ENTFERNT HABEN, CAREFULLY OPEN AND CHECK THE CONTENTS. ÖFFNEN SIE SORGFÄLTIG DAS PAKET UND PRÜFEN SIE ES AUF VOLLSTÄNDIGKEIT.
-
Page 6: Machine Set Up Guide
Machine Set Up PLEASE READ BEFORE COMMENCING ANY OPERATION AFTER THE REMOVAL OF ALL THE PACKAGING, CAREFULLY OPEN AND CHECK THE CONTENTS. Tilting the handle Using the handle position lever (Fig.1). Move the handle into the upright position (Fig.2). Einrichten der Maschine Lesen Sie diese Anleitung durch, bevor Sie die Maschine in Betrieb nehmen. -
Page 7: Fitting The Top Tank
Featuring the Nulock brush system. The brush is simply pushed and twisted to lock, making fitting and removal a simple process. The Pad is retained using Numatic’s own PadLoc system (ask your supplier for details). Only use manufacturer supplied brushes / pads. -
Page 8: Anbringen Des Oberen Tanks
De borstel hoeft alleen te worden aangebracht en gedraaid om te worden bevestigd, waardoor installeren en verwijderen erg eenvoudig is. De pad wordt vastgehouden door middel van het door Numatic ontwikkelde PadLoc-systeem. (Uw leverancier kan u hierover nadere details geven). -
Page 9: Fitting The Floor-Tool
Machine Set Up Fitting the Floor-tool The floor-tool has been designed for quick fitting, allowing easy squeegee blade replacement and a safety knock-off feature if the floor- tool gets snagged, whilst in transit. Note: It is easier to fit the floor-tool if the weight of the machine is resting on the brush. Ensure the brush is fitted first. Fit the floor-tool and retain using the detent pin (Fig.9). -
Page 10: Anbringen Des Abstreifers
Als de U-vormige slangklem moet worden verwijderd, dient deze weer correct te worden teruggeplaatst voordat de machine weer wordt gebruikt (Fig. 12-15). MAX 30mm Breng de zuigslang weer op het vloerelement aan. Opmerking: Duw de zuigslang NIET op het vloerelement als het vloerelement zich in de opgeheven positie bevindt. www.numatic.co.uk... -
Page 11: Filling The Cleanwater Tank
Machine Set Up Filling the clean-water tank The TT Range are all equipped with a 40 litre clean-water tank allowing large areas to be cleaning in a single fill. To fill the clean-water tank, use the FLEXI - FILL pipe from either a tap or hose pipe (Fig.16). The large cap on the left can be removed for filling from a bucket or suitable container. -
Page 12: Füllen Des Frischwassertanks
Houd u altijd aan de veiligheidsvoorschriften van de fabrikant van het betreffende product. Gebruik enkel chemische producten die aanbevolen worden voor gebruik in schrobzuigmachines. Belangrijk. Gebruik de machine pas nadat u de gebruikershandleiding volledig hebt gelezen en begrepen. Schoonwaterkraan. Draai de schoonwaterkraan open. www.numatic.co.uk... -
Page 13: Pre Cleaning
Pre-cleaning advice Before performing the cleaning operation, place out appropriate warning signs and sweep or dust-mop the floor (Fig.18). Numatic part (629044) Wet Floor sign (available if required) ALWAYS ENSURE THAT THE FLOOR IS PRE-SWEPT AND RELEVANT SAFETY SIGNS ARE DISPLAYED. -
Page 14: Bedienung Der Maschine
Avant d’effectuer l’opération de nettoyage, placez les panneaux d’avertissement appropriés et balayez ou dépoussiérez le sol (Fig.18). Panneau de signalisation “Attention sol mouillé”, pièce Numatic (629044) (disponible si nécessaire) ASSUREZ-VOUS TOUJOURS QUE LE SOL EST PRÉ-BALAYÉ ET QUE LES PANNEAUX D’AVERTISSEMENT PERTINENTS SONT INSTALLÉS. -
Page 15: Break-Away Floor-Tool Feature
Setting the cleaning controls Breakaway floor-tool The floor-tool design incorporates a safety knock-off feature. Allowing it to safely disengage from its mounting should it become caught on an obstruction, during forward machine movement. To re-attach the floor-tool blade to its holder, first loosen the retaining knobs on the floor-tool body and slide onto the holding bracket. -
Page 16: Ausbrechen Des Bodenwerkzeugs
Zorg dat de TT machine op een geschikt stopcontact is aangesloten. Selecteer de gewenste functie met de aan/uit-schakelaars op de handgreep. Starten: Houd een van de twee uitschakelgrepen ingedrukt en druk één keer op de gele startknop. Externe Schoonmaakkit (Optioneel Accessoire) www.numatic.co.uk... -
Page 17: Regular Maintenance
Regular Maintenance ALWAYS ENSURE THAT THE BATTERY IS DISCONNECTED PRIOR TO ANY MAINTENANCE OPERATION The TT Range has been designed with ease of use in mind, this included easy stripping- down and cleaning. After use, empty waste-water tank using emptying hose and flush out with clean water (Fig.24). -
Page 18: Regelmäßige Wartung
Achtergebleven water kan worden afgevoerd met de afvoerslang aan de achterzijde van de machine. Links onderaan bevindt zich een schoonwaterfilter. Controleer of de schoonwaterkraan gesloten is voordat u dit filter verwijdert (Fig. 32). Spoel het filter indien nodig af met schoon water. www.numatic.co.uk... -
Page 19: Changing Floor-Tool Blades
Regular Maintenance ALWAYS ENSURE THAT THE BATTERY IS DISCONNECTED PRIOR TO ANY MAINTENANCE The floor-tool The TT range is provided with the aluminium floor-tool shown. To clean the floor-tool, remove securing-pin and disconnect the lifting strap and remove the floor-tool securing pin pull-free the floor- tool from the rear of the machine. -
Page 20: Auswechseln Der Blätter Des Bodenwerkzeugs
U vervangt de wissers door de stappen hierboven in omgekeerde volgorde uit te voeren. Overzicht vloerelement 1. Hoofdlichaam vloerelement 2. Achterste wisser 3. Wisserhouder 4. Voorste wisser (met sleuf) 5. Borgpennen x 4 Opmerking: Voor een langere levensduur zijn de wisserbladen zodanig ontworpen dat ze kunnen worden omgekeerd. www.numatic.co.uk... -
Page 21: Face Fitting Instructions
Face Fitting Instructions FRONT BACK BOTTOM T 01460 68600... - Page 22 Face Fitting Instructions, For face removal reverse steps 8 to 5. www.numatic.co.uk...
-
Page 23: Specifications
Off-Aisle Cleaning Kit (Optional Extra Accessory) In the event of a breakdown contact your Numatic dealer or the Numatic Technical helpline +44 (0)1460 269268 (See back page for company addresses or dealers stamp) HT 4045, TT 4045G & TT 4055G... -
Page 24: Technische Daten
HT & TT4045 W - 470mm L - 890mm 150rpm @ 50Hz 76 ± 3 H - 1100mm 0-2L/Min 40 L 42 m 0-4 kph 1.4 m/s 180rpm @ 60Hz dB(A) TT4055 W - 560mm L - 935mm H - 1100mm www.numatic.co.uk... -
Page 25: Trouble Shooting
Bürstendeck angehoben Bürstendeck absenken (Seite 19) Wenn Sie das Problem nicht beheben können oder wenn es zu einer Störung kommt, wenden Sie sich an Ihren Numatic- Händler oder rufen Sie bei der Numatic Technical Helpline an unter 0049 (0)511 9842160. -
Page 26: Dépannage
Borstelplaat omhoog Laat borstelplaat zakken (pag. 19) Neem contact op met uw Numatic-verdeler als u het probleem niet kunt verhelpen of de machine dienst weigert. U kunt ook de technische hulplijn van Numatic bellen op +31 172 467 999 (zie achterpagina voor bedrijfsadressen of stempel van de dealer) -
Page 27: About The Machine
Note: A risk assessment should be conducted to determine which PPE should be worn. In the event of a breakdown contact your Safety Critical Component: Numatic dealer or the Mains lead: H05VV-F x 1.5 mm2 x 3 core Numatic Technical help line... -
Page 28: Safety Precautions
• Regularly examine the power cord for damage, such as cracking or ageing. If damage is found, replace the cord before further use. • Only replace the power cord with the correct Numatic approved replacement parts. • Ensure that the work area is clear of obstructions and / or people. -
Page 29: Leistungsschild/Persönliche Schutzausrüstung/Recycling
Wenn Sie das Problem nicht beheben können oder Sicherheitskritische Komponenten wenn es zu einer Störung kommt, wenden Sie sich Netzkabel: an Ihren Numatic-Händler oder rufen Sie bei der H05VV-F x 1.5 mm2 x 3 core Numatic Technical Helpline an unter 0049 (0)511 9842160. -
Page 30: Sicherheitsvorkehrungen
• Überprüfen Sie das Netzkabel regelmäßig auf Beschädigungen, wie z. B. Risse oder Abnutzungserscheinungen. Wenn Sie feststellen, dass das Kabel beschädigt ist, ersetzen Sie es, bevor Sie weiterarbeiten. • Ersetzen Sie das Netzkabel nur durch korrekte, von Numatic genehmigte Ersatzteile. • Stellen Sie sicher, dass sich keine Hindernisse oder Personen im Arbeitsbereich befinden. -
Page 31: À Propos De La Machine
Si vous ne parvenez pas résoudre le problème ou Composants critiques pour la sécurité en cas de panne, contactez votre Câble d’alimentation : H05VV-F x 1.5 mm2 x 3 conducteurs revendeur Numatic ou le service d’assistance technique Numatic au +33164726161 T 01460 68600... -
Page 32: Précautions À Prendre
S’il est endommagé, remplacez-le avant toute nouvelle utilisation. FAIRE • Remplacez le câble d’alimentation uniquement par la pièce de rechange correcte approuvée par Numatic. • Assurez-vous que la zone de travail n’est pas encombrée et/ou que personne ne s’y trouve. -
Page 33: Informatie Over De Machine
Oogbescherming Reflecterende jas kleding vloer Opmerking: Voer een risicobeoordeling uit en bepaal welke PBM moeten worden gedragen. Neem contact op met uw Numatic-verdeler als u het Veiligheidskritische onderdelen probleem niet kunt verhelpen of de machine dienst Aansluitsnoer: weigert. H05VV-F x 1.5 mm... -
Page 34: Veiligheidsmaatregelen
• beschadigd is voordat u de machine opnieuw gebruikt. WEL DOEN • Vervang de stroomkabel uitsluitend door het door Numatic goedgekeurde reserveonderdeel. • Zorg ervoor dat er zich geen obstakels en/of mensen in de werkzone bevinden. • Zorg ervoor dat de werkzone goed verlicht is. -
Page 35: Twintec Maintenance
Twin Tec Maintenance / Twin Tec Wartung / Twin Tec Entretien / Onderhoud Twin Tec Daily Keep the machine clean Ensure brushes/ pads/ squeegee/ filters are in good condition Check for any worn or damaged parts and replace immediately Drain and rinse dirty water tank after every use Store machine with brush deck secured in tilted position Weekly –... -
Page 36: Spare Parts
236028 208830 Clean Water Filter Gasket 236118 MAINS CABLE - INDUSTRIAL 16 AMP 208889 Clean Water Filter Mesh 206813 SWITCH KEY HT 4045 / TT 4045G / TT 4055G - Schematic Diagrams Schaltbild - Schéma de câblage - Bedradingsschema www.numatic.co.uk... -
Page 37: Eu Declaration Document
EU Declaration of Conformity - EU Conformiteitsverklaring EU Konformitätserkärung - Declaration de Confromite CE T 01460 68600... - Page 38 Notes www.numatic.co.uk...
- Page 39 Notes T 01460 68600...
-
Page 40: Company Address
Tel: 0861 686 284 www.numatic.co.za Numatic International Schweiz AG. Sihlbruggstrasse 142, 6340 Baar. SCHWEIZ Tel: 0041 (0) 41 76 80 76 - 0 www.numatic.ch Numatic International ULDA. Rua da Boa Viagem, n.º 177 4470-210 Moreira, Maia PORTUGAL Tel: +351 220 047 700 www.numatic.pt This Product has been comprehensively inspected and checked during every stage of its manufacture.