Table des Matières
Publicité
Les langues disponibles
Les langues disponibles
Liens rapides
English, 13
Polski, 37
Magyar, 49
Déballage et mise à niveau, 2
Raccordements hydrauliques et électriques, 2-3
Español, 25
Premier cycle de lavage, 3
Caractéristiques techniques, 3
Bandeau de commandes, 4
Comment ouvrir et fermer le tambour, 4
Ecran, 5
Èeský, 61
En bref: démarrage d'un programme, 6
Tableau des programmes, 6
Réglage de la température, 7
Réglage de l'essorage, 7
Options, 7
Tiroir à produits lessiviels, 8
Cycle blanchissage, 8
Triage du linge, 8
Pièces de linge particulières, 8
Woolmark Platinum Care, 8
Sécurité générale, 9
Mise au rebut, 9
Economies et respect de l'environnement, 9
Coupure de l'arrivée d'eau et de courant, 10
Nettoyage du lave-linge, 10
Nettoyage du tiroir à produits lessiviels, 10
Entretien du couvercle et du tambour, 10
Nettoyage de la pompe, 10
Nettoyage du tiroir à produits lessiviels, 10
Contrôle du tuyau d'arrivée de l'eau, 10
Consultation à tout moment, 12
Publicité
Table des Matières

Manuels Connexes pour Ariston AVTXL 129


Sommaire des Matières pour Ariston AVTXL 129
- Page 1 Déballage et mise à niveau, 2 Raccordements hydrauliques et électriques, 2-3 Español, 25 English, 13 Premier cycle de lavage, 3 Caractéristiques techniques, 3 Bandeau de commandes, 4 Comment ouvrir et fermer le tambour, 4 Ecran, 5 Èeský, 61 Polski, 37 Magyar, 49 En bref: démarrage d'un programme, 6 Tableau des programmes, 6...
- Page 2 Conservez ce mode d'emploi pour pouvoir le consulter à chine et évite qu'il y ait des vibrations, du bruit et des tout moment. En cas de vente, de cession ou de déména- déplacements en cours de fonctionnement. Si la machine est posée sur de la moquette ou un tapis, réglez les petits gement, veillez à...
- Page 3 150 cm. AVTXL 129 Avant de brancher la fiche dans la prise de courant, contrôlez que: largeur 40 cm •...
- Page 4 Bouton Bouton Touche Voyant Voyants Touches Touches Bouton Touche : mise en marche ou Tiroir à produits lessiviels pour charger produits arrêt du lave-linge. (voir page 6). lessiviels et additifs (voir page 8). Touche : démarrage des programmes ou Voyants pour suivre le stade d'avancement du pro- annulation (en cas d'erreur).
- Page 5 Soulevez le Couvercle externe et ouvrez le complètement; Appuyez d'un doigt sur le bouton comme illustré et le tambour s'ouvrira délicatement. Fig. 1 Fig. 2 • refermez bien le tambour en baissant d’abord la porte antérieure et posez ensuite la porte postérieure; •...
- Page 6 4. Sélectionnez la température de lavage (voir page 7). 5. Sélectionnez la vitesse d'essorage (voir page 7). 6. Appuyez sur la touche START/RESET pour lancer 1. Pour allumer le lave-linge appuyez sur la touche le programme. Tous les voyants s'allument pendant quelques Pour annuler, poussez sur la touche START/RESET secondes puis s'éteignent et le voyant ALLUMAGE/ pendant 2 secondes au moins.
- Page 7 Tournez le bouton TEMPERATURE pour sélectionner la température de lavage (voir Tableau des programmes page 6). Vous pouvez réduire la température jusqu'au lavage à froid ( Tournez le bouton ESSORAGE pour sélectionner la vitesse d'essorage du programme sélectionné. Les vitesses maximales prévues pour les programmes sont: Programmes Vitesse maximale Coton...
- Page 8 N'utilisez pas de lessives pour lavage à la main, elles génèrent trop de mousse. Ariston a introduit un nouveau standard de performances supérieures, reconnu par The Woolmark Company qui lui a attribué le N'utilisez de l'eau de Javel traditionnelle que pour les prestigieux label Woolmark Platinum Care.
- Page 9 Ce lave-linge a été conçu et fabriqué conformément aux appareils usagés doivent être collectés séparément afin normes internationales de sécurité. Ces avertissements d'optimiser le taux de récupération et le recyclage des sont fournis pour des raisons de sécurité, lisez-les matériaux qui les composent et réduire l'impact sur la attentivement.
-
Page 10: Démontage
Contrôlez que le cycle de lavage est bien terminé et débranchez la fiche. Pour récupérer les objets qui pourraient être tombés dans • Fermez le robinet de l'eau après chaque la préchambre : lavage: vous limiterez ainsi l'usure de l'installation hydraulique de votre lave-linge et éliminerez le danger de 1. - Page 11 Il peut arriver que le lave-linge ne fonctionne pas bien. Avant de appelez le Service après-vente (voir page 12), contrôlez s'il ne s'agit pas d'un problème facile à résoudre grâce à la liste suivante. • La fiche n'est pas branchée dans la prise de courant ou mal branchée.
- Page 12 ...Cont. Il vous signale une anomalie. Avant d’appeler le service de dépannage, nous vous prions de bien vouloir procéder comme suit : 1. Eteignez l’appareil; 2. Débranchez la fiche d’alimentation et attendez au moins 40 secondes; 3. Rebranchez la fiche d’alimentation; 4.
-
Page 13: Table Des Matières
Setting the spin cycle, 19 Functions, 19 Detergents and laundry, 20 Detergent dispenser, 20 Bleach cycle, 20 Preparing your laundry, 20 AVTXL 129 Special items, 20 Woolmark Platinum Care, 20 Precautions and advice, 21 General safety, 21 Disposal, 21 Saving energy and respecting the environment, 21... -
Page 14: Installation
Installation Keep this instruction manual in a safe place for loosening the adjustable front feet (see figure); the angle of inclination, measured according to the future reference. Should the appliance be sold, worktop, must not exceed 2°. transferred or moved, make sure the instruction Levelling your appliance correctly will provide it with manual accompanies the washing machine to inform stability and avoid any vibrations, noise and shifting... -
Page 15: Electric Connection
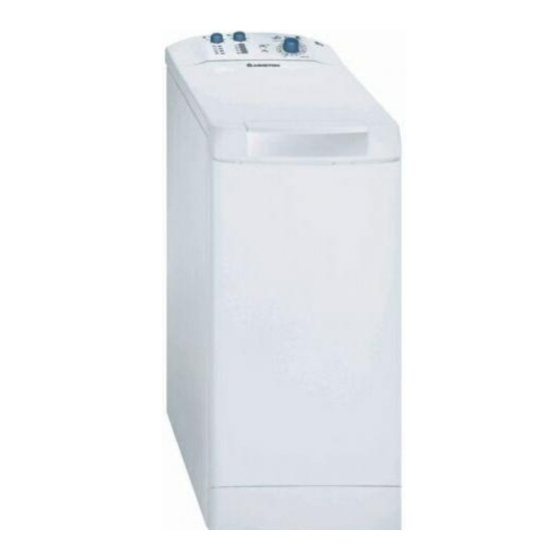
Technical details same diameter as the original hose and must not exceed 150 cm in length. Model AVTXL 129 40 cm wide Electric connection Dimensions 85 cm high 60 cm deep... -
Page 16: Washing Machine Description
Washing machine description Control panel SPIN SPEED TEMPERATURE knob knob ON/OFF LID LOCKED LEDs START/RESET FUNCTION PROGRAMME knob keys Detergent dispenser to add detergent and fabric ON/OFF key to turn the washing machine on and softener (see page 20). off. LEDs to find out which wash cycle phase is under way. -
Page 17: Leds
How to open and to close the drum A) Opening (Fig. 1). Lift the external lid and open it completely. B) Opening the drum (Soft opening): With one finger, push the button indicated in fig. 2 and the drum will open delicately. Fig. -
Page 18: Starting And Programmes
Starting and Programmes Briefly: starting a programme 4. Set the wash temperature (see page 19). 5. Set the spin speed (see page 19). 1. Switch the washing machine on by pressing button 6. Start he programme by pressing the START/RESET All the LEDS will light up for a few seconds and button. -
Page 19: Personalisations
Personalisations Setting the temperature Turn the TEMPERATURE knob to set the wash temperature (see Programme table on page 18). The temperature can be lowered, or even set to a cold wash ( ). Setting the spin speed Turn the SPIN SPEED knob to set the spin speed for the programme selected. The maximum spin speeds for each programme are as follows: Programmes Maximum spin speed... -
Page 20: Detergents And Laundry
4: Bleach Do not use hand wash detergent because it may As gentle as a hand wash. form too much foam. Ariston sets a new standard of superior performance that has been endorsed by Bleach cycle The Woolmark Company with the prestigious Woolmark Platinum Care brand. -
Page 21: Precautions And Advice
Precautions and advice The washing machine was designed and built in in order to optimise the recovery and recycling of compliance with the applicable international safety the materials they contain and reduce the impact on regulations. The following information is provided for human health and the environment. -
Page 22: Care And Maintenance
Care and maintenance Cutting off the water or electricity Make sure the wash cycle has ended and unplug supply the appliance. • Turn off the water tap after every wash. This will To recover any objects that have fallen into the pre- limit the wear of your appliance's water system chamber: and also prevent leaks. -
Page 23: Troubleshooting
Troubleshooting Your washing machine could fail to work. Before calling for Assistance (see page 24), make sure the problem can't easily be solved by consulting the following list. Possible causes/Solution: Problem • The appliance is not plugged into the socket, or not enough to The washing machine won't make contact. -
Page 24: Service
Service Before calling for Assistance: • Check whether you can solve the problem on your own (see page 11); • Restart the programme to check whether the problem has been solved; • If this is not the case, contact an authorised Technical Service Centre on the telephone number provided on the guarantee certificate. - Page 25 Desembalaje y nivelación, 38 Conexiones hidráulicas y eléctricas, 38-39 Primer ciclo de lavado, 39 Datos técnicos, 39 Panel de control, 40 Cómo abrir y cerrar el cesto, 41 Luces testigo, 41 En la práctica: poner en marcha un programa, 42 Tabla de programas, 42 Seleccione la temperatura, 43 Seleccionar el centrifugado, 43...
- Page 26 delanteros (véase la figura); el ángulo de inclinación Es importante conservar este manual para poder medido sobre la superficie de trabajo, no debe superar consultarlo en cualquier momento. En caso de venta, los 2º. de cesión o de traslado, verifique que permanezca Una cuidadosa nivelación brinda estabilidad a la junto con la lavadora para informar al nuevo propieta- máquina y evita vibraciones, ruidos y desplazamien-...
- Page 27 90ºC sin prelavado. agua. No se aconseja utilizar tubos de prolongación, de todos modos, si es indispensable, la prolongación AVTXL 129 debe tener el mismo diámetro del tubo original y no superar los 150 cm. ancho 40 cm.
- Page 28 Perilla de Perilla de Botón Luz testigo de TAPA BLOQUEADA Luces Botón testigo Botones Perilla de Contenedor de detergentes para cargar Perilla de para seleccionar la temperatu- detergentes y aditivos (véase la pág. 44). ra o el lavado en frío (ver la pág. 43). Luces testigo para seguir el estado de avance del Botón de para encender y...
- Page 29 Levante la tapa externa y ábrala completamente Pulse el botón indicado en la fig. 2 con un dedo y el cesto se abrirá delicadamente. Fig. 1 Fig. 2 - cierre bien el cesto bajando primero la puerta delantera y apoyando luego la posterior; - luego verifique que los ganchos de la puerta delantera estén perfectamente alojados en la sede de la puerta posterior;...
- Page 30 4. Fije la temperatura de lavado (ver la pág. 43). 5. Fije la velocidad de centrifugado (ver la pág. 43). 6. Ponga en marcha el programa pulsando el botón 1. Encienda la lavadora pulsando el botón . Todas las START/RESET. luces testigo se encenderán durante algunos segundos, Para anular, mantenga presionado el botón luego se apagarán y la luz indicadora de ENCENDIDO/...
-
Page 31: Velocidad Máxima
Girando el mando de la TEMPERATURA se selecciona la temperatura de lavado (ver la Tabla de programas en la pág. 42). La temperatura se puede disminuir hasta el lavado en frío ( ). Girando el mando de CENTRIFUGADO se selecciona la velocidad de centrifugado del programa seleccionado. Las velocidades máximas previstas para los programas son: Programa Velocidad máxima... - Page 32 No use detergentes para el lavado a mano ya que producen demasiada espuma. El blanqueador debe utilizarse para los Ariston introdujo un nuevo estándar de tejidos resistentes blancos, mientras que el prestaciones superiores reconocido por The debe utilizarse para la lana y los tejidos coloreados y Woolmark Company con la prestigiosa sintéticos.
- Page 33 La lavadora fue proyectada y fabricada en conformi- habituales; tienen que ser recogidos selectivamente para optimizar la dad con las normas internacionales de seguridad. recuperación y reciclado de los componentes y Estas advertencias se suministran por razones de materiales que los constituyen, y reducir el impacto en la seguridad y deben ser leídas atentamente.
- Page 34 Verifique que el ciclo de lavado haya terminado y desenchufe la máquina. • Cierre el grifo de agua después de cada lavado. Para recuperar los objetos caídos en la precámara: De este modo se limita el desgaste de la instalación hidráulica de la lavadora y se elimina el 1.
- Page 35 Puede suceder que la lavadora no funcione. Antes de llamar a la Asistencia Técnica (ver la pág. 48), controle que no se trate de un problema de fácil solución ayudándose con la siguiente lista. • El enchufe no está introducido en la toma de corriente, o no hace contacto. •...
- Page 36 • Verifique si la anomalía la puede resolver solo (ver la pág. 47); • Vuelva a poner en marcha el programa para controlar si el inconveniente fue resuelto; • Si no es así, llame a la Asistencia técnica autorizada, al número de teléfono indicado en el certificado de garantía.
- Page 38 (zobacz rysunek). (zobacz rysunek). w razie ponownego uzycia kròtsze srubki powinny byc przymocowane u gòry. (zobacz rysunek). (zobacz na s¹siedniej stronie). (zobacz rysunek) .
- Page 39 Po zainstalowaniu pr zobacz rysunek (zobacz obok); zobacz obok °...
- Page 40 Œwiate³ka sygnalizuj¹ce Szufladka na œrodki pior¹ce zobacz str. 44 mŒwiate³ka sygnalizuj¹ce zobacz str. 41 zobacz str. 43 patrz str. 41 patrz str. 42 zobacz str. 7...
- Page 41 Fig. 1 Fig. 2 Fig. 4 Fig. 3...
- Page 42 (zobacz str. 43). (zobacz str. 43). (patrz str. 44) ° ° ° ° ° ° ° ° ° ° ° na nastêpnej stronie Dzienny 30' Zalecamy stosowanie p³ynnego œrodka pior¹cego.
- Page 43 na str. 42) W celu unikniecia nadmiernych wibracji przed kazdym odwirowaniem pralka rozklada ciezar wsadu w sposób jednolity, nastepuje to poprzez wykonywanie stalych obrotów kosza z predkoscia nieco wyzsza od obrotów podczas prania. Kiedy jednak, niezaleznie od powtarzanych prób, wsad nie zostanie rozlozony równomiernie, maszyna wykona wirowanie z predkoscia nizsza od zaprogramowanej.
- Page 44 zobacz rysunek...
- Page 45 • Pozbywanie sie starych urzadzen elektrycznych. Europejska Dyrektywa 2002/96/EC dotyczaca Zuzytych Elektrycznych i Elektronicznych Urzadzen (WEEE) zaklada zakaz pozbywania sie starych urzadzen domowego uzytku jako nieposortowanych smieci komunalnych. Zuzyte urzadzenia musza byc osobno zbierane i sortowane w celu zoptymalizowania odzyskania oraz ponownego przetworzenia...
- Page 46 patrz rysunek zobacz rysunek : zobacz rysunek Ris. 4 Ris. 2 Ris. 3 Ris. 1...
- Page 47 zobacz str. 48 zobacz str. 39). zobacz str. 39). zobacz str. 42 zobacz str. 43). zobacz str. 39 zobacz str. 38). zobacz str. 38 zobacz str. 38 zobacz str. 38 zobacz str. 46 zobacz str. 39...
- Page 48 • zobacz str. 47);...
- Page 50 Illessze az A tömí (lásd (lásd ábra) . ábra) A csomagolóanyag nem gyermekjáték A mosógépet sík és kemény padlóra állítsa, ( lásd ábra). úgy, hogy ne érjen falhoz, bútorhoz vagy máshoz. lennie (lásd a szemben lévõ oldalt). (lásd ábra) Soha ne alkalmazzon már használt csöveket.
- Page 51 Ne használjon hosszabbítót vagy elosztót. Ne legyen a kábel megtörve vagy összenyomva. A hálózati kábelt csak megbízott szakember cserélheti. (lásd ábra) AVTXL 129 szélesség 40 cm magasság 85 cm mélység 60 cm 1-tõl 6 kg-ig Lásd a készüléken található, muszaki (lásd szemben);...
- Page 52 Lámpák Mosószer rekesz lásd 56. old. lásd 55. old. Lámpák lásd 53. old. lásd 55. old. lásd 53. old. lásd 54. old. lásd 59. old.
- Page 53 2. ábra 1. ábra 3. ábra 4. ábra...
- Page 54 (lásd 55. oldal). (lásd 55. oldal). 2. Rakja be a mosnivalót, töltse be a mosószert és adalékanyagokat (lásd 56. oldal), majd zárja össze az dob szárnyait, és csukja le a fedelet ! Ciklus Mosószer Kelmék és a szennyezõdés Öblítõ- Fehérítés / Programok Hõmérséklet idõtartama Mosóciklus leírása...
- Page 55 a 54. ol-dalon). A minden centrifugálás elején jelentkezõ túlzott vibrálás elkerülése érdekében a készülék egyenletesen elosztja a bepakolt ruhákat a dob folyamatos, a mosási sebességnél valamivel gyorsabb forgatásával. Ha azonban az ismételt próbálkozások ellenére sem sikerül a bepakolt ruhát tökéletesen elosztani, a készülék a beállítottnál kisebb fordulatszámon fog centrifugálni.
- Page 56 lásd ábra...
- Page 57 A mosógépet a nemzetközi biztonsági szabványok •...
- Page 58 ábra ; az óra járásával ellentétes irányban forgatva csavarja le a fedelet (lásd ábra) : természetes, hogy egy kevés víz kifolyik; lásd ábra Az ajtót hagyja mindig résre nyitva, nehogy rossz szagok keletkezzenek. A mosógép öntisztító szivattyúval van felszerelve, melynek nincs szüksége tisztítási és karbant Soha ne alkalmazzon már használt csöveket.
- Page 59 (lásd 60. oldal) lásd 51. oldal). lásd 51. oldal). lásd 54. oldal lásd 55. oldal). lásd 51. oldal lásd 50. oldal). lásd 50. oldal lásd 50. oldal lásd 50. oldal lásd a 58. oldalon lásd 51. oldal...
- Page 60 • lásd 59. oldal); öz.
- Page 62 (viz obrázek), (viz obrázek) (viz obrázek). Tlak v rozvodu vody se musí pohybovat v rozmezí hodnot uvedených v tabulce s technickými údaji (viz vedlejší strana). (viz obrázek)
-
Page 63: Technické Údaje
(viz obrázek) Technické údaje Model AVTXL 129 šíøka 40 cm Rozmìry výška 85 cm hloubka 60 cm Kapacita od 1 do 6 kg Viz štítek s technickými údaji, Napájení aplikovaný na zarízení. (viz maximální tlak 1 MPa (10 bar) vedle) Pøipojení... - Page 64 Kontrolky Dávkovaè pracích prostøedkù (viz str. 66 viz str. 68 ZAPNUTÍ/VYPNUTÍ Kontrolky do startu pracího programu (viz str. 65 ). (viz str. 67 ). viz str. 65 viz str. 66) viz str. 71...
- Page 65 Obr. 2 Obr. 1 Obr. 3 Obr. 4...
- Page 66 (viz str. 67) (viz str. 67) viz str. 68 Volitelná Prací Doba Druh tkaniny a stupeò jejího zneèi Prací funkce Bìlení prostøedek Teplota Avivá± z cyklu (v Popis pracího cyklu štìní programy / Bìlící minutách) pøedp. praní prostøedek Bavlna Extrémnì zneèištìné bílé prádlo Pøedpírání, praní, máchání, •...
- Page 67 str. 66 Aby se zabránilo nadmerným vibracím, pracka pred každým odstredováním rovnomerne rozloží nápln tak, že se buben nepretržite otácí rychlostí, která mírne prevyšuje rychlost použitou behem pracího cyklu. Když se ani po nekolika pokusech nepodarí dokonale rozložit nápln, pracka provede odstredování nižší rychlostí, než je predpokládaná...
- Page 68 obrázek...
- Page 69 ízení.
- Page 70 (viz obrázek): (viz obrázek)
- Page 71 (viz str. 72) (viz str. 63). (viz str. 63). (viz str. 66 (viz str. 67). (viz str. 63 (viz str. 62). (viz str. 62 (viz str. 62 (viz str. 62 – viz str. 70 (viz str. 63...
- Page 72 195 064 199.00 05/2007 - Xerox Business Services • (viz str. 71);...