
Manuels Connexes pour Saris SuperClamp EX-2 Bike


Sommaire des Matières pour Saris SuperClamp EX-2 Bike
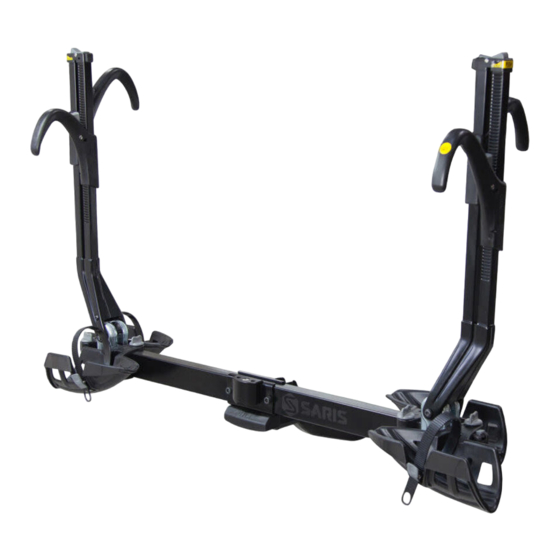
- Page 1 SuperClamp EX - 2 Bike Assembly Instructions | Instrucciones de montaje | Instructions d’assemblage 4025F, 4025HD...
- Page 2 TELL US WHAT YOU THINK SARIS.COM/FEEDBACK REGISTER YOUR PRODUCT FOR UPDATES SARIS.COM/REGISTRATION...
- Page 3 LONG FOR THE RIDE Just as no garage is complete without a bicycle, at Saris, we believe no car is complete withouta bike rack. Since setting off on this journey nearly 30 years ago, Saris racks have freed millions of bike-lovers to explore new territory and terrain, take part in group rides, bike pool to races, and commute to and from work.
- Page 4 Max = 60lb/27kg * Guía de For relevant patents, see www.saris.com/patents adaptación Guide Para las patentes pertinentes, consulte www.saris.com/patents * Guide de compatibilité Pour les brevets concernés, consultez www.saris.com/patents Max = 120 lbs/54kg (Max = 60 lbs/27kg per bike) 1.800.783.7257 Máx.= 54 kg/120 libras (Máx.
- Page 5 * Guía de adaptación Guide * Guide de compatibilité Max = 120 lbs/54kg (Max = 60 lbs/27kg per bike) 1.800.783.7257 Máx.= 54 kg/120 libras (Máx. = 27 kg /60 libras por bicicleta) http://www.saris.com/en/vehicle-racks.html Max = 120lb/54kg (Max = 60lb/27kg par vélo)
-
Page 6: Tools Needed
Tools Needed: Items Included: Optional Accessories: Herramientas necesarias: Accesorios opcionales Artículos incluidos Outils nécessaires: éléments inclus Accessoires en option #4419 Fat Tire Wheel Trays For 4.5”-5” tires M10 x 60 Pre installed Adjustable or 19mm and 17mm Pre instalado Pre installé... - Page 7 INSTALL RACK / INSTALAR PORTABICICLETAS / INSTALLATION DU PORTE-VÉLOS Copy here... Install receiver and secure with pin and lock, as shown. Note: If your receiver is 1.25” remove the adapter block as shown (4025F 1.25” Only).Tools Required: 19mm(3/4’’) Wrench, 5mm Hex Key(to remove adapter block).
- Page 8 COPY HERE Lay horizontal bar on to receiver plate, lining up front plate with bar and receiver. Secure with bolts & nuts, using 17mm(9/16”) wrench and 8mm hex key. NOTE : Remove rubber tips Tools Required: 17mm Wrench, 8mm Hex Key Colocar la barra horizontal sobre la placa del receptor, alineando la placa frontal con la barra y el receptor.
- Page 9 COPY HERE Slide on outer wheel trays to complete rack assembly. (Wheel tray with Copy here... white reflectors installed on passenger side of vehicle facing away from the vehicle.) Deslizar las bandejas para ruedas exteriores para completar el montaje del portabicicletas.
- Page 10 LOAD BIKES / CARGAR BICICLETAS / CHARGEMENT DES VÉLOS Push and hold button on top of arm to open arm. Push and hold button on top of hook to slide hook up. Presione y mantenga presionado el botón en la parte superior del brazo para abrir el brazo.
- Page 11 Load bikes. Heaviest bike closest to car. Adjust wheel tray if necessary. Tighten wheeltray knob. NOTE: Position arms at ‘‘10:00’’ and ‘‘2:00’’ without contacting bike frame components. Cargar las bicicletas. La bicicleta más pesada debe colocarse en la posición más cercana al vehículo. Ajustar las bandejas para ruedas en caso necesario.
- Page 12 Press hooks down onto tires. Once the hook contacts the tire, firmly press the hook down until you hear 1 additional click. Ensure the tires are properly inflated and in good condition. Bajar los ganchos hacia las ruedas. Una vez que el gancho haga contacto con la rueda, presionar con fuerza hasta escuchar un clic adicional.
- Page 13 To lock bikes press and hold button, pull out lock cable. Insert cables ends into lock shank as shown. Turn the key to the lock position to lock the cables. To return cable press and hold button. Para bloquear las bicicletas, presione y mantenga presionado el botón, tire del cable de bloqueo.
- Page 14 Use straps to secure front and rear wheels to trays. Use correas para asegurar las ruedas delanteras y traseras a las bandejas. Utilisez des sangles pour fixer les roues avant et arrière aux plateaux.
- Page 15 HATCH ACCESS / ACCESO A SOMBREADO / ACCÈS À LA TRAPPE Copy here... Pull handle, tilt rack away from vehicle. Caution: hold bikes with available hand. Tirar del tirador, inclinar el portabicicletas alejándolo del vehículo. Precaución: Sujetar las bicicletas con la otra mano. Tirez sur la poignée pour basculer le porte-vélos en l’éloignant du véhicule.
- Page 16 COPY HERE Access Hatch. Acceder al maletero Accès au coffre...
- Page 17 COPY HERE Push rack into place, you will hear audible “click” when in place. Copy here... Empujar el portabicicletas a su posición, oirá “clic” audible cuando esté en su lugar. Replacez le porte-vélos en poussant dessus, vous entendrez un «clic» audible en place.
- Page 18 RACK STORAGE / ALMACENAMIENTO DEL PORTABICICLETAS / RANGEMENT DU PORTE-VÉLOS Pull hande, Fold up rack toward vehicle Tirar hande, Plegar el bastidor en dirección al vehículo. Tirer Hande, Poussez le porte-vélos vers le véhicule pour le plier.
- Page 19 • All requirements for compatability/fit as stated in the current Saris vehicle/carrier compatability guide must be followed. (Available at any Saris dealer or www.saris.com). If your vehicle is not listed or you have any questions, please call our customer service at 800-783-7257 or visit www.saris.com.
- Page 20 Official Warranty Terms: Saris Racks Saris Cycling Group, Inc (SCG), parent company of Saris Racks, warrants our products to the original consumer to be free from defects in materials and workmanship. Your purchase includes the following warranty which is in lieu of all other express warranties. This warranty is extended only to the initial consumer purchaser. This warranty gives you specific legal...
- Page 21 (3) there was no failure to follow instructions or warn- ings in Owner’s Manual; (4) no alterations or modifications were made; and (5) the product or part is delivered, freight prepaid, to Saris Cycling Group or an authorized service center.
- Page 22 Consumable Items not covered by warranty. Including but not limited to. • Arm and wheel tray adjustment knobs • Frame and wheel straps • Vehicle attachment straps • Molded wheel trays • Frame cradles • Threaded assemblies • Ratcheting assemblies © 2021 SARIS CYCLING GROUP...
- Page 23 Se deben respetar todos los requisitos de compatibilidad/idoneidad especificados en la guía actual de compatibilidad de vehículos y portabicicletas de Saris. (Disponible en todos los distribuidores de Saris & www.saris.com). Si su vehículo no aparece en el listado o si desea realizar alguna consulta, llame a nuestro servicio de atención al cliente al teléfono 800-783-7257 o visite www.saris.com.
- Page 24 Fíjelo de forma segura y ajuste una distribución de cargas uniforme, cargando primero las bicicletas más grandes o pesadas en la parte más próxima al vehículo. • Sustituya las correas de montaje a la primera señal de desgaste. Las piezas de repuestos están disponibles a través del distribuidor local de Saris o llamando al 1-800- 783-7257.
- Page 25 (3) no se hayan seguido incorrectamente las instrucciones o advertencias del Manual de usuario; (4) no se hayan realizado alteraciones o modificaciones; y (5) el producto se haya enviado, con transporte prepagado, a Saris Cycling Group o a un centro de servicio autorizado. Llame al 1-800-783-7257 para obtener una autorización de devolución antes de la devolución.
- Page 26 Pomos de ajuste de brazos y bandeja de bicicletas • Correas para ruedas y bastidor • Correas de fijación al vehículo • Bandejas moldeadas para ruedas • Horquillas de bastidor • Conjuntos roscados • Conjuntos de rochete © 2021 SARIS CYCLING GROUP...
- Page 27 • Suivez les indications du guide de compatibilité Saris entre les véhicules et les porte-vélos. (Ce guide est disponible chez tous les revendeurs Saris & www.saris.com). Si votre véhicule n’est pas dans la liste ou si vous avez des questions, veuillez contacter notre service après-vente au 800-783-7257 ou consultez notre site www.saris.com.
- Page 28 • Resserrez les sangles régulièrement pendant votre voyage. • Saris ne pourra en aucun cas être tenu responsable des blessures personnelles ou dommages indirects à des biens ou possessions, résultant d’une installation ou d’une utilisation incorrecte. • Le véhicule doit être en bon état dans la zone dans laquelle l’attelage.
- Page 29 à l’origine ; (3) il n’y a pas eu non-respect des consignes et des avertissements indiqués dans le manuel du propriétaire ; (4) le produit n’a subi aucune modification ; et (5) le produit ou ses pièces sont envoyés, en port payé, à Saris Cycling Group inc. ou à un centre de service autorisé. Veuillez appeler le 1-800-783-7257 pour obtenir une autorisation de retour avant de procéder à...
- Page 30 Y COMPRIS, MAIS SANS S’Y LIMITER, TOUTE GARANTIE IMPLICITE DE QUALITÉ MARCHANDE OU D’ADÉQUATION À UN USAGE PARTICULIER, EST STRICTEMENT LIMITÉE À LA DURÉE APPLICABLE DE CETTE GARANTIE LIMITÉE. SCG ne saurait être tenu responsable des pertes, dépenses ou dommages accidentels ou indirects découlant de l’utilisation de ses produits. La responsabilité de SCG au titre du présent contrat est expressément limitée au remplacement des produits non conformes à...
- Page 31 Saris 5253 Verona Road Madison WI 53711 www.saris.com 800.783.7257 | support@saris.com...