South Shore 2280 Instructions D'assemblage
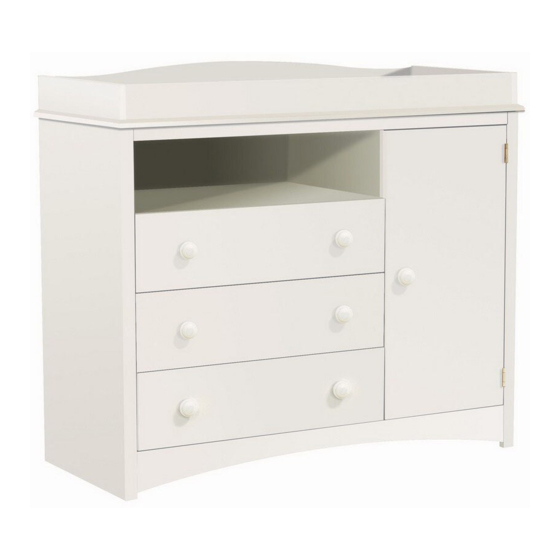
Table à langer
Liens rapides
ASSEMBLY INSTRUCTIONS
INSTRUCTIONS D'ASSEMBLAGE
INSTRUCCIONES DE ENSAMBLAJE
Modèle
Model/
/ Modelo
-
2280
-
Item
Article/
/ Articulo
Changing Table
Table à langer
-
331
-
Mesa de pañales
ADULT ASSEMBLY REQUIRED
DOIT ÊTRE ASSEMBLÉ PAR UN ADULTE
DEBE SER ENSAMBLADO POR UN ADULTA
N.B.: It is important to carefully read all instructions
before beginning the assembly and before use of the furniture.
Identify all the parts and hardware.
We recommend that you assemble the unit on a carpeted floor
to avoid scratches. To facilitate assembly
Keep the assembly instructions
for warranty purposes. It contains all pertinent
information regarding replacement parts and maintenance.
N.B. Il est important de bien lire
avant de commencer l'assemblage
Bien identifier les pièces et la quincaillerie.
Il est recommand d'assembl
é
éviter les égratignures. Pour un assemblage facile et agréable
;
2 personnes sont requises
Gardez les instructions d'assemblage pour
la garantie. Elles contiennent toutes les informations pour un
remplacement de pièce ou pour l'entretien périodique.
N.B. Lea con detenimiento las instrucciones
antes de comenzar a ensamblar
Identifique las piezas y los articulos de ferretería.
Se recomienda ensamblar la unidad sobre una alfombra
para evitar los rasguños. Para un ensamblaje mas facil
se necesitan dos personas.
para
un futuro
uso
Este instructivo contiene todas las informaciones necesarias
para un sustitución de pieza o un mantenimiento periodico.
1-800-290-0465
10010335
Rev.:Ci1
2 people are required
for future use
and
toutes les
instructions
et avant d'utiliser le meuble
l'unité sur un tapis pour
er
.
et pour
utilisation future
y antes de utilizar su mueble
Guarde
el instructivo de ensamble
y para usos
de garantía.
16/07/20 3
.
.
.
1

Manuels Connexes pour South Shore 2280


Sommaire des Matières pour South Shore 2280
- Page 1 INSTRUCCIONES DE ENSAMBLAJE for warranty purposes. It contains all pertinent information regarding replacement parts and maintenance. Modèle Model/ / Modelo 2280 N.B. Il est important de bien lire toutes les instructions avant de commencer l’assemblage et avant d’utiliser le meuble...
- Page 2 AVERTISSEMENT ADVERTENCIA WARNING Serious or fatal crushing injuries Des blessures graves ou fatales El vuelco del mueble puede ser peuvent résulter du basculement causa de lesiones graves o de un can occur from furniture tip-over. du meuble. aplastamiento fatal. To help prevent tip-over: Afin d’éviter le basculement : Para evitar el vuelco: •...
- Page 4 ONSEILS D NTRETIEN CUSTOMERS SERVICE/ SERVICE À LA CLIENTÈLE / SERVICIO A LA CLIENTELA AINTENANCE TIPS ONSEJOS DE MANUTENIMIENTO If you have any difficulty assembling this unit, or to order replacement parts, do not hesitate to contact us. - Never let liquids or damp cloths sit on this furniture. Do not return any parts to the store, find the number(s) - Ne jamais laisser de liquide ou linge humide of the part(s) in the “Exploded view”...
- Page 5 HOW TO USE THE DOWEL(-14 -) AND THE ECCENTRIC NUT(-158-) EXEMPLE D'UTILISATION (GOUJON(-14 -) ET ECROU(-158-)) EJEMPLO DE UTILIZACIÓN (CLAVIJA(-14 -) Y TUERCA EXCÉNTRICA(-158-) -144- -158- FRANÇAIS ENGLISH ESPAÑOL Fully insert the “quick fit dowel -14 -” nsérer jusqu’au fond le «goujon à...
- Page 6 -EXPLODED VIEW (Piece numbers for reference)FACING THE UNIT -VUE EXPLOSÉE (Numéros des pièces pour références)FACE AU MEUBLE -VISIÓN DE CONJUNTO (Número de las piezas para referencia)FRENTE AL MUEBLE LEFT SIDE RIGHT SIDE CÔTÉ GAUCHE CÔTÉ DROIT LADO IZQUIERDO LADO DERECHO S1(3) T(3) U(3)
- Page 7 CODE HARDWARE DESCRIPTION CODE HARDWARE DESCRIPTION CODE DESCRIPTION DE LA QUINCAILLERIE CODE DESCRIPTION DE LA QUINCAILLERIE CODIGÓ CANTIDAD DESCRIPCION DE LA FERRETERÍA CODIGÓ CANTIDAD DESCRIPCION DE LA FERRETERÍA 2 1/2" ROUND HEAD SCREW FELT VIS 2 1/2" TÊTE RONDE FEUTRE ORNILLO 2 1/2"...
- Page 8 * TOOLS REQUIRED/ OUTILS REQUIS/ HERRAMIENTAS REQUERIDOS: TOOL FOR INSERTION OF THE SLIDES OUTIL D'INSERTION DES COULISSES ERRAMIENTA DE INSERCIÓN DE LOS CORREDERAS - 2 PEOPLES/ 2 PERSONNES /2 PERSONAS PLASTIC DOWEL GOUJON DE PLASTIQUE TARUGO DE PLASTICO - HAMMER /MARTEAU /MARTILLO PLASTIC DOWEL...
- Page 9 Required/Requis/Requerido Required/Requis/Requerido -148- Screw - 99 (4) throug h -191-(4) into G. -247- Screw - 99 (2) throug h -195-(2) into C and C1. -195- -148- Visser - 99 (4) à travers de -191-(4) dans G. Visser - 99 (2) à...
- Page 10 Required/Requis/Requerido Required/Requis/Requerido -14 - 4 -158- -158- SAME PIECE-2 SIDES MÊME PIÈCE-2 CÔTÉS MISMO PIEZA-2 LADOS - With thumb, insert -158-( 2) into G, C, C1, C2, C3, P3, P1, H and G . (Make sure the little arrow is towards the insertion hole.) - nsert -14 -( 4 22 ) into...
- Page 11 Required/Requis/Requerido Required/Requis/Requerido -231- Drawers iroirs ajones - Insert -231-( ) into N, P1, P3 - Insert -229-(2) into R. - Insérer -231-( ) dans N, P1, P3 - Insérer -229-(2) dans R. - Insertar -231-( ) en N, P1, P3 - Insertar -229-(2) en R.
- Page 12 Required/Requis/Requerido Required/Requis/Requerido -2 - 1 Drawers Drawers iroirs iroirs ajones ajones -22- -22 - 1 -21-/-22- -221- -22- -2 - 1 - To insert -22- on S and -21- on S1, use -221- by placing it on -21- and -22-, and knock it in with a hammer. - Pour insérer -22- sur S et -21- sur S1, utiliser -221- en le plaçant sur - Insert -242-(4) into T.
- Page 13 Required/Requis/Requerido Drawers Drawers iroirs iroirs ajones ajones - Insert S and S1 into R. - nsert -184- tilted in S and S1 then swivel. - Insérer S et S1 dans R. - Insérer - 184 4 incliné -( ) dans S et S1 puis pivoter.
- Page 14 Required/Requis/Requerido Drawers Drawers iroirs iroirs ajones ajones - Screw - 278 (4) through -184-(4) into . - Slide U (not printed) into the grooves of , 1 and R. - Visser - 278 (4) à travers -184-(4) dans . - Glisser U (non inscrit) dans les rainures de S, S1 et R. - Atornillar - 278-(4) a través...
- Page 15 Required/Requis/Requerido Required/Requis/Requerido Drawers 3 0 m iroirs ajones -106- With care Each side -101- Avec précaution Chaque côté Con preconción Cada lado -101- -22- -21- Drawers iroirs ajones - Align U(3) with T(3). Screw - 101 6 -( ) throug h -22-(3) into S(3) and -21-(3) into S1(3).
- Page 16 Required/Requis/Requerido Required/Requis/Requerido -23- Drawers iroirs ajones -120- -23- -92- -221- -92- -92- -23- -92- -23- -23- -120- -120- - To insert -23-( ) on , use -221- by placing it into -23-( ), and knock it in with a hammer. - Screw -23-( ) on with -92-( ).
- Page 17 Required/Requis/Requerido Required/Requis/Requerido Haut -148- Alto -148- -148- -148- -148- -147- -148- -147- Haut -147- Alto - To insert -147-(3) on C use -221- by placing it into -147-(3), and knock it in with a hammer. - Screw -148-(6) through -147-(3) into C. - Pour insérer -147-(3) sur C utiliser -221- en le plaçant dans -147-(3), et cogner dessus avec un marteau.
- Page 18 Required/Requis/Requerido Required/Requis/Requerido -160- -158- correct/ incorrect/ -120- correcto incorrecto -120- - Insert into - Screw H into G with -160-(2). - Insert into - Tighten right -158-( ) 2 little more than a half turn to lock them together. - Insérer dans - Visser H dans G avec -160-(2).
- Page 19 -158- -158- correct/ correct/ incorrect/ incorrect/ correcto correcto incorrecto incorrecto - Insert into - Tighten right -158-( ) little more than a half turn on G to lock them together. Insert into G and C1 - Insert into G, N and G1. - Tighten right -158-( ) little more than a half turn - Insérer dans .
- Page 20 Required/Requis/Requerido -158- correct/ incorrect/ correcto incorrecto - Insert into C, C1 and H. - Tighten right -158-( ) little more than a half turn C, C1 and H to lock them together. - Insérer dans C, C1 et H. - Tourner -158-( ) un peu plus qu'un demi tour à...
- Page 21 Required/Requis/Requerido Required/Requis/Requerido -90- Pull the paper off. Enlever le papier. Quitar el papel. - Make sure the unit is level (squared). - In beginning by the corners, nail F to A, G, C and C1 with -90-(30). - Stick -6-(5) under C, C1 and N. - Assurez vous que l'unité...
- Page 22 Required/Requis/Requerido -158- -231- correct/ incorrect/ correcto incorrecto -231- -231- -158- correct/ incorrect/ - Insert -231-( ) into correcto incorrecto - Insert C2, C3, P3 and P1 into A. - Tighten right -158-( ) little more than a half turn - Insert C2 and C3 into P3 and P1.
- Page 23 -247- -253- -HEIGHT -HAUTEUR -ALTURA -253- * Make sure the unit is level. Loosen the concerned screw(s), adjust, and tighten. * Assurez-vous que le meuble soit au niveau. Déserrer la(les) vis concernée(s), ajuster, et resserrer. - To install J, screw -253-(2) into -247-(2). * Cerciorarse de que la unidad se encuentre a nivel.
- Page 24 Required/Requis/Requerido -248- -247- -253- -248- -247- -253- -248- Caution: Screw - 248 (2) throug h -253-(2) and -247-(2) into C1. Attention: Visser - 248 (2) à travers de -253-(2) et -247-(2) dans C1. Atención: Atornillar - 248 (2) a través de -253-(2) y -247-(2) en C1.
- Page 25 -Safety bracket installation -Installation de l’équerre de sécurité * Doors adjustement (Hinges) -Instalacion del escuadra de seguridad * Ajustement des portes (Charnières) * Ajuste de las puertas (Bisagras) Wall/ Mur/ Muro -LEFT/ RIGHT -GAUCHE/ DROITE -IZQUIERDA/ DERECHA -116- -199- -99- -DEPTH -PROFONDEUR -PROFUNDIDAD...
- Page 26 Required/Requis/Requerido -180- - Insert -180-(4) on C1 and H. - Slide G2 on -180-(4). - Insert the drawers. - To pull out the drawer, push, each side, on the glide stopper lever then pull out the drawer. Insérer -180-(4) sur C1 et H. Glisser G2 sur -180-(4).
-
Page 27: Service À La Clientèle
5 YEAR LIMITED WARRANTY GARANTIE LIMITÉE DE 5 ANS GARANTIA LIMITADA DE 5 AÑOS 1. South ShoreTM Furniture provides the original buyer with a 1.Meubles South ShoreMC garantit à l'acheteur original, pour 1.South ShoreMR garantizan al comprador original, por un warranty covering “defects”...