Télécharger Imprimer la page

Publicité

Les langues disponibles
  • FR

Les langues disponibles

  • FRANÇAIS, page 46

Liens rapides

Quick Start Guide (Using IE Browser)
22-3-2012
IP Vision 58
Outdoor IP Camera
1
2
13
24
35
46
57
68
79
IP Vision 58

Publicité

loading

Sommaire des Matières pour Ebode IP Vision 58

  • Page 1: Table Des Matières

    IP Vision 58 Outdoor IP Camera Quick Start Guide (Using IE Browser) User guide Bedienungsanleitung Gebruiksaanwijzing Användermanual Guide utilisateur Guía del usuario Manual do utilizador Manuale per l’utente 22-3-2012 IP Vision 58...
  • Page 2: User Guide

    1. Introduction Congratulations on purchasing this ebode product. With this product you can access your camera's live video feed from your web browser or through software on your computer, your tablet, or your smart phone.
  • Page 3 - Install the Wi-Fi antenna - Plug the power adaptor into the camera and into an AC outlet. - Plug one end of the network cable into the camera, and the other end into your router/switch. 22-3-2012 IP Vision 58...
  • Page 4 IP Camera Tool: Open the CD, click “IPCamSetup.exe”—“Next”—“Next”—“Close”. See the 2 pictures on the next page on how to achieve this. After this is done, the icon “IP Camera Tool” will be displayed on your desktop. 22-3-2012 IP Vision 58...
  • Page 5 If you are using Windows, you will ill also need the ActiveX software app. Please take the following steps to install this. The 2 images below illustrate where to find the right files. ActiveX: Click “Appinstall.exe”—“Next”—“Install”—“Finish”. 22-3-2012 IP Vision 58...
  • Page 6 WARNING: You might get a Windows Security Alert Popup. It will ask you to choose a setting for the firewall. Please make sure you choose the ‘UNBLOCK’ option. Your IP camera will not work without unblocking the firewall settings. 22-3-2012 IP Vision 58...
  • Page 7 IE login interface. It may take a few minutes before the IP address appears in the list. Default username: admin Password: no password (so please leave empty) 22-3-2012 IP Vision 58...
  • Page 8 If not you might have some certificate error in your web browser when trying to log in to the camera. Install the Appinstall.exe and please try to login again. If the Appinstal.exe didn`t work please take the next step. 22-3-2012 IP Vision 58...
  • Page 9 22-3-2012 IP Vision 58...
  • Page 10 Options” > “Security”> “Custom Level” > “ActiveX control and Plug-ins”, all the ActiveX options should be set to be “Enable”: Especially: Enable: Download unsigned ActiveX controls Enable: Initialize and script ActiveX controls not marked as safe Enable: Run ActiveX controls and plug-ins 22-3-2012 IP Vision 58...
  • Page 11 Wireless Lan can be found on the bottom of your router if installed professional, you might also ask the person who installed your wireless router for the correct password. 22-3-2012 IP Vision 58...
  • Page 12 Compatible Apps for mobile devices Please, keep checking the App store regularly; soon we will be introducing our own ebode app for the IP camera, which gives you even more functionalities! Search for ebode IPVision! In the meantime, for this IP camera, you can use the following apps:...
  • Page 13: Bedienungsanleitung

    Verantwortung für zusätzlichen Schaden, der über eine Produkthaftung hinausgeht. 1. Einleitung Herzlichen Glückwunsch zum Erwerb dieses ebode Produkts. Mit diesem Produkt können Sie auf Live-Bilder Ihrer Kamera über Ihren Web-Browser oder Software auf Ihrem Computer, Ihrem Tablet oder Ihrem Smartphone zugreifen Um auf Ihre Kamera via Ethernet und Ihren Desktop-Computer zuzugreifen, befolgen Sie die Schritte 1 bis 3.
  • Page 14 Bevor die Kamera kabellos benutzt werden kann, muss sie unter Benutzung eines Netzwerk-Kabels konfiguriert werden. Installieren Sie die Wi-Fi-Antenne. Verbinden Sie das Netzteil mit der Kamera. Verbinden Sie das Netzwerkkabel mit der Kamera, das andere Ende mit dem Router / Switch. 22-3-2012 IP Vision 58...
  • Page 15 Schritt 2: Software Installation IP Kamera Tool: Öffnen Sie die CD und klicken Sie auf “IPCamSetup.exe”—“Next”—“Next”—“Close”, wie auf den beiden folgenden Bildern zu sehen ist. Danach erscheint das Icon “IP Camera Tool” auf dem Desktop. 22-3-2012 IP Vision 58...
  • Page 16 Wenn Sie Windows verwenden, müssen Sie auch das ActiveX-Software App. Installieren. Führen Sie zur Installation die folgenden Schritte aus. Die 2 folgenden Bilder zeigen, wo Sie die richtigen Dateien finden können ActiveX: Klicken Sie auf “Appinstall.exe”—“Next”—“Install”—“Finish”. 22-3-2012 IP Vision 58...
  • Page 17 Warnung: Es könn ein Windows Security Alert Popup erscheinen. DiesesrPopup fragt Sie nach Ihrer Firewall-Einstellung. Achten Sie darauf, das Sie die "Blockierung aufheben"-Option waehlen. Ihre IP-Kamera wird anders nicht funktionieren. 22-3-2012 IP Vision 58...
  • Page 18 Login: Doppelklicken Sie auf das “IP Camera Tool” Icon auf dem Desktop, suchen Sie die IP-Adresse, wählen Sie eine Kamera und doppelklicken Sie darauf, um zum IE Login Interface zu gelangen. Es kann einige Minuten dauern, bevor die IP-Adresse in der Liste erscheint. Standard–Benutzername: admin Passwort: kein Passwort 22-3-2012 IP Vision 58...
  • Page 19 Sie die Kamera wieder an und Sie sehen das Live-Video. Zur Erinnerung: Haben Sie die appinstall.exe-Datei von der CD installiert, wie in den vorherigen Schritten beschrieben? Wenn Sie dies (noch) nicht getan haben, erhalten Sie ein Fehlermeldung auf Ihrem Bildschirm, wenn Sie die Kamera anmelden. 22-3-2012 IP Vision 58...
  • Page 20 22-3-2012 IP Vision 58...
  • Page 21 > “Tool” > “Internet Options” > Security”> “Custom Level” > “ActiveX control and Plug-ins”, alle ActiveX Optionen sollten mit “Enable” markiert sein, insbesondere: Enable: Download unsigned ActiveX controls Enable: Initialize and script ActiveX controls not marked as safe Enable: Run ActiveX controls and plug-ins 22-3-2012 IP Vision 58...
  • Page 22 Art der Verschlüsselung, die verwendet wird. Das Passwort Ihres Wireless LAN ist an der Unterseite des Routers zu finden, wenn er professionell installiert ist. Ansonsten fragen Sie die Person, die den Router installiert hat, nach dem richtigen Passwort. 22-3-2012 IP Vision 58...
  • Page 23 Bitte besuchen Sie den App Store regelmäßig: Bald werden wir unser eigenes ebode-App für die IP-Kamera vorstellen, das Ihnen sogar noch mehr Funktionen bietet! Bitte suche nach ebode IP Vision. In der Zwischenzeit können Sie für die IP-Kamera das folgende App nutzen: IP Vision...
  • Page 24: Gebruiksaanwijzing

    1. Introductie Gefeliciteerd met de aankoop van dit ebode product. Met dit product heeft u toegang tot de live video feed van uw camera die aangesloten is op uw web browser of via software op uw computer, tablet of smart phone.
  • Page 25 Installeer de antenne. Sluit de voedingsadapter aan op de camera en stop de adapter in het stopcontact. Sluit de netwerk kabel aan op de camera en daarna op uw kabel/ADSL modem of netwerk router / switch. Stap 2: Software Installatie 22-3-2012 IP Vision 58...
  • Page 26 IP Camera Tool: Open de CD, klik “IPCamSetup.exe”—“Next”—“Next”—“Close”. Zie de 2 afbeeldingen op de volgende pagina om te zien hoe u dit doet. De computer herstart na de installatie en een icoon wordt op het bureaublad getoond. 22-3-2012 IP Vision 58...
  • Page 27 Als u Windows gebruikt, heeft u ook de ActiveX software app nodig. Neem de volgende stappen om dit te installeren. De 2 afbeeldingen hieronder laten zien waar u de juiste bestanden kunt vinden. ActiveX: Click “Appinstall.exe”—“Next”—“Install”—“Finish”. 22-3-2012 IP Vision 58...
  • Page 28 Waarschuwing: Er kan een Windows Security Alert Popup verschijnen. Deze popup vraagt u een setting voor uw firewall te kiezen. Let erop dat u de ‘Blokkering opheffen’ optie kiest. Uw IP camera zal anders niet werken. 22-3-2012 IP Vision 58...
  • Page 29 Dubbelklik op het icoontje om naar de Internet Explorer login interface te gaan. Het kan een paar minuten duren voordat het IP adres in de lijst verschijnt. Standaard gebruikersnaam: admin Wachtwoord: geen wachtwoord (dus leeg laten) 22-3-2012 IP Vision 58...
  • Page 30 Heeft u het Appinstall.exe bestand van de CD geïnstalleerd, zoals in de vorige stappen beschreven staat? Als u dit (nog) niet gedaan heeft, kunt u een error in uw scherm krijgen wanneer u probeert in te loggen op de camera. 22-3-2012 IP Vision 58...
  • Page 31 22-3-2012 IP Vision 58...
  • Page 32 ‘Security’ > ‘Custom Level’ > ‘ActiveX control and Plug-ins’. Alle ActiveX opties zouden op ‘enable’ moeten staan. Vooral: Enable: Download unsigned ActiveX controls Enable: Initialize and script ActiveX controls not marked as safe Enable: Run ActiveX controls and plug-ins 22-3-2012 IP Vision 58...
  • Page 33 Wireless Lan kan gevonden worden op de onderkant van de router, als deze professioneel geïnstalleerd is. Anders kunt u de persoon die de router geïnstalleerd heeft vragen om het juiste wachtwoord. 22-3-2012 IP Vision 58...
  • Page 34 We updaten deze regelmatig. Compatibele Apps: Hou de app store in de gaten: binnenkort is onze eigen ebode app beschikbaar voor deze IP camera, met nog meer functionaliteit! Zoek naar ebode IPVision! Tot die tijd kunt u voor deze IP camera de volgende apps gebruiken:...
  • Page 35: Användermanual

    Återförsäljaren tar inget som helst ansvar för skador som inte täcks specifikt av garantin. 1. Inledning Gratulerar till köpet av denna ebode-produkt. Med denna produkt kan du komma åt din kameras livevideo-feed från din webbläsare eller genom programvara på din dator, din tablett eller din smartphone.
  • Page 36 Du måste installera din kamera med en nätverkskabel (ej trådlöst) först, innan du kan försöka använda den trådlöst. Installera Wi-Fi-antennen. Anslut nätadaptern till kameran och till ett vägguttag. Anslut ena änden av nätverkskabeln till kameran och den andra änden till din router/switch. Nätverkskabel Nätverks kabel Router/switch 22-3-2012 IP Vision 58...
  • Page 37 Installera följande program: IP-kameraverktyg: Öppna CD:n, klicka på “IPCamSetup.exe”—“Next”—“Next”—“Close”. Se de 2 bilderna på nästa sida om hur man uppnår detta. Efter detta är gjort, kommer ikonen “IP Camera Tool”“ ” att visas på ditt skrivbord. 22-3-2012 IP Vision 58...
  • Page 38 Om du använder Windows, behöver du även ActiveX programmet app. Ta följande steg för att installera detta. De 2 bilderna nedan visar var du hittar de rätta filerna. ActiveX: Klicka på “Appinstall.exe”—“Next”—“Install”—“Finish”. 22-3-2012 IP Vision 58...
  • Page 39 VARNING: Du kommer att få en Windows Security Alert Popup. Den kommer att fråga dig att välja en inställning för firewall. Se till att du väljer "UNBLOCK" alternativet. Din IP-kamera fungerar inte utan avlastning firewall inställningarna. 22-3-2012 IP Vision 58...
  • Page 40 Inloggning: Dubbelklicka på ikonen “IP Camera Tool” på skrivbordet, leta efter IP-adressen, välj ett för din kamera, dubbelklicka för att gå till gränssnittet IE inloggning. Det kan ta några minuter innan IP-adressen visas i listan. Standard användarnamn: admin Lösenord: Inget lösenord 22-3-2012 IP Vision 58...
  • Page 41 Påminnelse: Har du installerat Appinstall.exe filen från CD-skivan från föregående steg? Om inte kanske du har några certifikat fel i din webbläsare när du försöker logga in på kameran. 22-3-2012 IP Vision 58...
  • Page 42 22-3-2012 IP Vision 58...
  • Page 43 ActiveX-alternativ ska ställas in till “Enable”: Speciellt: Enable (Aktivera): Download unsigned ActiveX controls (Hämta osignerade ActiveX-kontroller): Enable (Aktivera): Initiera och kör skript på ActiveX-kontroller som inte är säkra Enable (Aktivera): Run ActiveX controls and plug-ins (kör ActiveX-kontroller och plugin-program): 22-3-2012 IP Vision 58...
  • Page 44 Encryption: kan också hittas bakom SSID namnet i Wireless Lan listan, detta är bara den typ av kryptering används kan lösenordet för ditt trådlösa Lan finns på undersidan av routern om installerat professionell, kan du också fråga personen som installerade den trådlösa routern för rätt lösenord. 22-3-2012 IP Vision 58...
  • Page 45 Kompatibla Apps för mobila enheter Snälla, håll kontroll App Store regelbundet, snart kommer vi att introducera vår egen ebode app för IP-kameran, som ger dig ännu fler funktioner! Sökning efter ebode IPVision! Under tiden för denna IP-kamera kan du använda följande program: IP Vision från Marcio Almeida (betalda)
  • Page 46: Guide Utilisateur

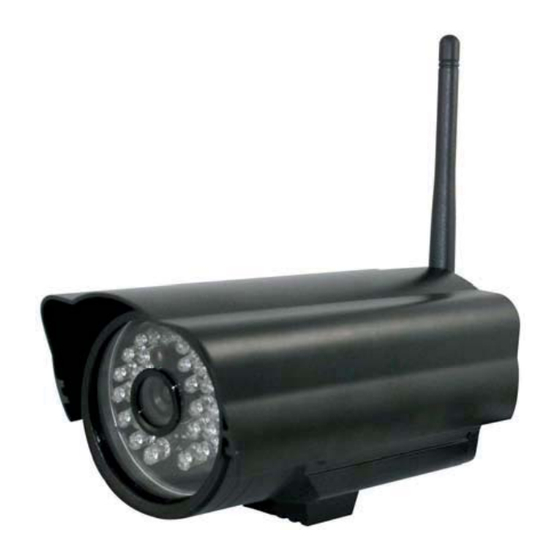
    1. Introduction Nous vous félicitons d'avoir fait l'acquisition de ce produit ebode. Avec ce produit vous pouvez accéder au flux vidéo de votre camera en direct depuis votre navigateur Internet ou un logiciel sur votre ordinateur, votre tablette ou votre smartphone.
  • Page 47 Vous devez configure votre camera via un câble réseau (filaire) d’abord, avant d’essayer de l’utiliser sans fil. Installer l´antenne Wifi. Branchez l´adaptateur de courant sur la caméra. Branchez le câble réseau sur la caméra ainsi que sur votre routeur/switch. 22-3-2012 IP Vision 58...
  • Page 48 Outil Caméra IP: Ouvrir le CD, double cliquez “IPCamSetup.exe”, seulement cliquez sur next, et vous aurez complété l´installation du logiciel. Regardez les 2 images sur la page suivante pour comment procéder. Ensuite, l’icône sera affichée sur le bureau automatiquement. 22-3-2012 IP Vision 58...
  • Page 49 Si vous utilisez Windows, vous aurez également besoin du logiciel ActiveX app. Veuillez suivre les étapes suivantes pour l’installer. Les 2 images ci-dessous illustrent où trouver les bons fichiers. ActiveX: Double cliquez “Appinstall.exe”—“Next”—“Install”—“Finish”. 22-3-2012 IP Vision 58...
  • Page 50 AVERTISSEMENT: C’est possible que vous obtiendrez un fenêtre d’alerte de sécurité Windows. Il vous sera demandé de choisir un réglage pour le pare-feu. Veuillez vous assurer de choisir l'option «débloquer». Votre caméra IP ne fonctionnera pas sans débloquer les paramètres de pare-feu. 22-3-2012 IP Vision 58...
  • Page 51 IP, choisissez celle de votre caméra, double cliquez pour accéder à l’interface de connexion IE. Il peut nécessiter quelques minutes avant que l'adresse IP apparaisse dans la liste. Nom d’utilisateur par défaut: admin Mot de passe: aucun mot de passe. 22-3-2012 IP Vision 58...
  • Page 52 Avez-vous installé le fichier Appinstall.exe à partir du CD et des étapes précédentes ? Si ce n’est pas le cas, vous pourriez avoir quelques erreurs de certificat dans votre navigateur lorsque vous essayez de vous connecter à la caméra. 22-3-2012 IP Vision 58...
  • Page 53 22-3-2012 IP Vision 58...
  • Page 54 “Personnaliser le niveau” > “Contrôles ActiveX et Plug-ins”, toutes les options ActiveX mis à “Activer”: en particulier: Activer: Télécharger les contrôles ActiveX non signés Activer: Contrôle d’initialisation et de script ActiveX non marqués comme sécurisés Activer: Exécuter les contrôles ActiveX et les plug-ins 22-3-2012 IP Vision 58...
  • Page 55 LAN sans fil peut être trouvé sur le dessous de votre routeur, vous pouvez également demander à la personne qui a installé votre routeur sans fil pour le mot de passe correct. 22-3-2012 IP Vision 58...
  • Page 56 Il existe une version complète du manuel fourni sur le CD avec votre caméra, mais nous vous suggèrons d'aller à www.ebodeelectronics.eu pour la dernière version du manuel. Nous l’actualisons régulièrement. Rechercher ebode IPVision ! Apps Compatible: IP Vision de Marcio Almeida (payant).
  • Page 57: Guía Del Usuario

    Tablet o Smartphone. Para comunicar la cámara vía Ethernet con su ordenador, siga los pasos 1-3. Para comunicar la cámara vía Wifi con su ordenador o teléfono móvil, siga los pasos 1-4. 22-3-2012 IP Vision 58...
  • Page 58 Necesitará configurar su cámara usando un cable de red local, antes de poder utilizarla con comunicación Wifi. Instalar la antena Wi-Fi Enchufe el adaptador de corriente a la cámara Conecte el cable de red a la cámara y el router / switch 22-3-2012 IP Vision 58...
  • Page 59 IP Camera Tool: Abra el CD, doble clic “IPCamSetup.exe”, sólo haga clic en siguiente, se completará la instalación del software. Fíjese en las 2 imágenes de la siguiente página para ver cómo realizarlo. Después, el icono aparecerá en el escritorio. 22-3-2012 IP Vision 58...
  • Page 60 Si usted está usando Windows, también necesitará el software ActiveX app. Siga los siguientes pasos para instalarlo. Las imágenes de abajo muestran cómo localizar los ficheros correctos. ActiveX: Haga doble clic en “Appinstall.exe” - “Siguiente” - “Instalar” - “Finalizar”. 22-3-2012 IP Vision 58...
  • Page 61 ADVERTENCIA: Es posible que usted reciba un Popup de alerta de seguridad de Windows. Le pedirá que seleccione una configuración para el firewall. Asegúrese de que selecciona la opción DESBLOQUEAR. Su cámara IP no funcionará sin desbloquear el firewall. 22-3-2012 IP Vision 58...
  • Page 62 IE. Pasarán algunos minutos antes de que la cámara IP aparezca en la lista. Nombre de usuario por defecto: admin Contraseña: sin contraseña 22-3-2012 IP Vision 58...
  • Page 63 Recordatorio Instaló el fichero Appinstall.exe del CD en los pasos previos?. Si no es así, deberían aparecer errores de certificado en el buscador cuando intenta entrar en la cámara. 22-3-2012 IP Vision 58...
  • Page 64 22-3-2012 IP Vision 58...
  • Page 65 “Security”> “Custom Level” > “ActiveX control and Plug-ins”, todas las opciones ActiveX establecida como “Enable”: Especialmente: Enable (permitir): Download unsigned ActiveX controls Enable (permitir): Initialize and script ActiveX controls not marked as safe Enable (permitir): Run ActiveX controls and plugins 22-3-2012 IP Vision 58...
  • Page 66 Este es solo el tipo de encriptación utilizado. La clave de su red inalámbrica puede encontrarla en la parte de abajo del router. Si se lo instaló un profesional, también puede consultarle a él sobre este tema. 22-3-2012 IP Vision 58...
  • Page 67 Apps compatibles: Por favor, mantenga el control de la App Store con regularidad, y pronto vamos a introducir nuestra aplicación ebode propia para la cámara IP, que le da funcionalidades aún más! Buscar ebode IPVision! Mientras tanto, para esta cámara IP, puede utilizar las siguientes aplicaciones:...
  • Page 68: Manual Do Utilizador

    1. Intodução Parabéns pela aquisição do ebode produto. Com este produto consegue aceder à sua câmara em tempo real a partir do seu browser de internet ou através de software no seu computador, tablet ou smartphone.
  • Page 69 Instalar a antena wi-fi. Plugar o cabo de rede na camera. Ligue a camera na energia ( ela fará uma checagem automática virando por 30 segundos). Plugar a outra extremidade em qualquer saída do roteador Wifi. 22-3-2012 IP Vision 58...
  • Page 70 Passo 2: Instalação Software Instalação do software: IP Camera Tool: Abra o CD, click “IPCamSetup.exe”—“Next”—“Next”—“Close”. Ver nas duas figuras seguintes como abrir e executar. Após a instalação abra "IP Camera Tool" l” O icone estará .em se desktop. 22-3-2012 IP Vision 58...
  • Page 71 Se você estiver usando Windows, é necessário possuir o software ActiveX app. Por favor siga os seguintes passos para instalar. As duas imagens seguintes mostram onde encontrar os ficheiros correctos. ActiveX: Click “Appinstall.exe”—“Next”—“Install”—“Finish”. 22-3-2012 IP Vision 58...
  • Page 72 Aviso: Irá pode receber uma mensagem popup de alerta de segurança do Windows. A mensagem vai pedir para configurar a firewall. Por favor certifique-se que escolhe a opção “desbloquear”. A sua câmara não funcionará se as comunicações não forem desbloqueadas. 22-3-2012 IP Vision 58...
  • Page 73 ‘’ admin ‘’ e a senha não deve ser preenchida, ou seja, deixe em branco. O endereço IP pode demorar alguns minutos até aparecer na lista. Default username: admin Password: não preencher. 22-3-2012 IP Vision 58...
  • Page 74 IE e login na camera novamente, depois deverá ser capaz de visualizar o vídeo. Lembrete: Instalou o ficheiro Appinstall.exe que estava no CD, nos passos anteriores? Se não instalou, deverá ter alguns problemas relacionados com o certificado no Browser, quando tentar fazer login na camera. 22-3-2012 IP Vision 58...
  • Page 75 22-3-2012 IP Vision 58...
  • Page 76 "Segurança"> "Nível personalizado"> "ActiveX e controle de plug-ins ", todas as opções de ActiveXdefinido para ser" Enable ": Especialmente: Enable: Baixar controles ActiveX não assinados Enable: Inicializar e executar scripts de controles ActiveX não marcados como seguros Enable: Executar controles ActiveX e plug-ins 22-3-2012 IP Vision 58...
  • Page 77 Encriptação: pode ser encontrada atrás do SSID na lista de redes sem fios, apenas para o tipo de encriptação utilizada, a palavra-chave da sua rede sem fios pode ser encontrada em baixo do router, se for instalado por profissionais, deverá perguntar à pessoa responsável pela palavra-chave. 22-3-2012 IP Vision 58...
  • Page 78 Apps compatíveis: Por favor, mantenha a verificação da App Store regularmente, em breve estaremos introduzindo nosso app ebode própria para a câmera IP, que lhe dá ainda mais funcionalidades! Pesquisar ebode IPVision! Entretanto, para esta câmera IP, você pode usar as seguintes aplicações:...
  • Page 79: Manuale Per L'utente

    Per accedere alla camera tramite Ethernet al proprio computer desktop - Seguire i passi 1 - 3. Per accedere alla camera tramite Wi-Fi, al vostro notebook tramite Wi-Fi e cellulare tramite Wi-Fi - Seguire i punti 1 - 4. 22-3-2012 IP Vision 58...
  • Page 80 Si consiglia di impostare la fotocamera utilizzando un cavo di rete (cablata), prima è possibile utilizzarlo in modalità wireless. Montare l’antenna Wi-Fi. Collegare l’alimentatore alla telecamera (usare solo l’alimentatore fornito). Collegare il cavo di rete nella telecamera, collegare l’altro capo del cavo al router/switch. 22-3-2012 IP Vision 58...
  • Page 81 Installare il seguente software: IP Camera Tool: Apritre il CD, cliccare “IPCamSetup.exe”— “Next”—“Next”—“Close”. Vedere le 2 foto nella pagina successiva su come raggiungere questo obiettivo. Dopo aver eseguito queste operazioni, apparirà la seguente icona sul desktop: 22-3-2012 IP Vision 58...
  • Page 82 Se si utilizza Windows, sarà necessario anche l'applicazione software ActiveX. Si prega di prendere le seguenti operazioni per installare questo. Le 2 immagini qui sotto mostrano dove trovare i file giusti. ActiveX: Cliccare “Appinstall.exe”—“Next”—“Install”—“Finish”. 22-3-2012 IP Vision 58...
  • Page 83 ATTENZIONE: Potrebbe apparire un Pop di Avviso di Windows Security. Vi sarà richiesto di scegliere un parametro per il firewall. Assicuratevi di scegliere l'opzione "SBLOCCA". La vostra telecamera IP non funzionerà senza sbloccare il firewall. 22-3-2012 IP Vision 58...
  • Page 84 Login: Doppio click sull’icona “IP Camera Tool” presente sul desktop, ricercare l’indirizzo IP, selezionare quello della propria telecamera, Doppio click per accedere alla videata di IE login. Possono essere necessari alcuni minuti prima che l'indirizzo IP compaia nella lista. Username: Admin Password: no password. 22-3-2012 IP Vision 58...
  • Page 85 IE, quindi effettuare nuovamente il login della telecamera per vedere le immagini dal vivo. Reminder: Avete installato il file dal CD Appinstall.exe dai passaggi precedenti? Se non si potrebbe avere qualche errore di certificato nel browser quando si cerca di accedere alla telecamera. 22-3-2012 IP Vision 58...
  • Page 86 22-3-2012 IP Vision 58...
  • Page 87 “IE” browser > “Tool” > “Internet Options” > “Security”> “Custom Level” > “ActiveX control and Plug-ins” : abilitare tutte le opzioni ActiveX : “Enable”. Specialmente: ABILITA/Enable: Scarica controlli ActiveX senza firma ABILITA/Enable: Scarica controlli ActiveX giudicati non sicuri ABILITA/Enable: Lancia I controlli e I plug-ins ActiveX 22-3-2012 IP Vision 58...
  • Page 88 Lan Wireless può essere trovato sul fondo del router se installato professionale, si potrebbe anche chiedere alla persona che ha installato il router wireless per la password corretta. 22-3-2012 IP Vision 58...
  • Page 89 Apps compatibili: Per favore, continuate a controllare il negozio App regolarmente, presto ci sarà l'introduzione nostra app ebode per la telecamera IP, che offre funzionalità ancora di più! Cerca ebode IPVision. Nel frattempo, per questa telecamera IP, è possibile utilizzare le applicazioni seguenti:...
  • Page 90 DECLARATION OF CONFORMITY Hereby, ebode declares that this IP Vision 58 is in compliance with the essential requirements and other relevant provisions of the following Directives: 1) Directive 1999/5/EC of the European Parliament and of the Council of 9 March 1999 on...
  • Page 91 Dansk [Danish]: Dette udstyr er i overensstemmelse med de væsentlige krav og andre relevante bestemmelser i Direktiv 1999/5/EF. Polski [Polish]: Urz dzenie jest zgodne z ogólnymi wymaganiami oraz szczególnymi warunkami okreslonymi Dyrektyw UE: 1999/5/EC 22-3-2012 IP Vision 58...
  • Page 92 Notes 22-3-2012 IP Vision 58...
  • Page 93 22-3-2012 IP Vision 58...