Publicité
Liens rapides
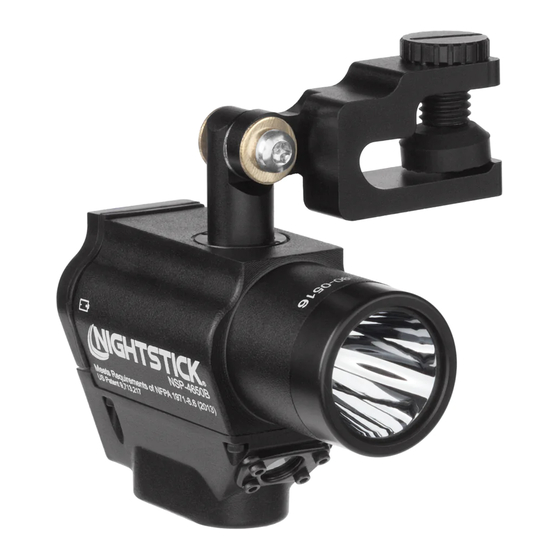
Instruction Manual
FORTEM
US PATENT 9,713,217
WARNINGS
y NOT FOR USE ABOVE HAZARDOUS LOCATIONS
y DO NOT use in explosive atmospheres, near fl ammable liquids, or where explosion
proof lamps are required.
y DO NOT use in the proximity of vehicles or equipment when there is a risk of fl ammable
liquids coming into contact with the fl ashlight.
y DO NOT expose the batteries to water or salt water, or allow the batteries to get wet.
y DO NOT store the batteries with metallic objects that may cause a short circuit.
y Immediately discontinue use of the batteries if they emit an unusual smell, feel hot,
change color, change shape or appear abnormal in any way.
y Keep out of the reach of children.
Strobe Warning
Exposure to strobing lights may cause dizziness, disorientation, and nausea. A very small
percentage of people suffer from photosensitive epilepsy and may experience seizures or
blackouts triggered by strobing lights. For more information from the EPILEPSY FOUNDATION
about photosensitivity and seizures, please visit
symptoms linked to this condition should consult a doctor before using this product.
INSTALLING BATTERIES INTO THE 4650
Image 1
Image 2
y Loosen the screw on the battery compartment door.
y Insert batteries using the orientation markings on the back of the battery compartment
door. (Image 1)
y Close the battery door fully, then tightening the screw until it is hand tight. (Image 2)
CAUTION: Do not cross-thread or strip the screw threads.
y Test the operation of the light (see OPERATION below).
INSTALLING THE 4650 ON TO THE HELMET
y Choose the side of the helmet you wish to mount the light on.
y Rotate the mount to orient the clamp with thumbscrew on top.
y Open the clamp completely and fully seat over helmet brim, ensuring the clamp clears
any rubber helmet trim. (Image3)
y Tighten the clamp fi rmly with included Allen wrench. (Image 4)
SCAN FOR MOUNTING
INSTRUCTION VIDEO
https://youtu.be/Ta0i7U-92hM
SETTING THE ANGLE OF THE LIGHT
y Twist the light left or right on the vertical pivot until beam pattern is in an ideal position.
y The tension on the mount is meant to be fi rm to maintain the aim.
y Once aimed, the mount allows the user to position light above or below the brim by
rotating up or down as needed.
OPERATION
The 4650 has the following lighting modes: Constant-on high, medium and low fl ashlight;
constant-on high, medium and low fl oodlight, strobe and Dual-Light mode. The 4650 has two
switches, the fl ashlight switch (closest to the front of the light) and the fl oodlight switch (closest
to the rear of the light) providing access to all modes.
CONSTANT-ON: FLASHLIGHT / FLOODLIGHT
Press the fl ashlight or fl oodlight switch until it clicks, then release for constant-on in high-
brightness mode. Press and release this same switch again to turn the light off.
SELECT BRIGHTNESS LEVEL: FLASHLIGHT / FLOODLIGHT
Press and hold the fl ashlight or fl oodlight switch. The light will cycle from high to medium
to low and back at a rate of approximately one mode per second. It will continue to cycle
through the various modes as long as the fl ashlight switch is held down. When the desired
brightness level is reached, release the switch and the light will remain in that brightness
Bayco Products, Inc. • 640 South Sanden Blvd. • Wylie, TX 75098 • 1-800-233-2155 • 1-469-326-9400 • www.nightstick.com
NSP-4650B
®
www.epilepsy.com
. Anyone who has had
Image 3
Image 4
mode. Press and hold the switch again to cause the light to cycle from last selected mode.
Press and release the fl ashlight switch to turn the light off.
STROBE
Press the fl ashlight switch quickly twice to activate the strobe function. Press switch
once more to turn the strobe function off.
DUAL-LIGHT
Dual-Light allows the user to turn on both the fl ashlight and the fl oodlight at the same
time. Press each switch to turn on each lighting mode. Press and release again to turn
the light off.
WARRANTY
LIMITED LIFETIME WARRANTY
Bayco Products, Inc. warrants this product to be free from defects in workmanship and
materials for the original purchaser's lifetime. The Limited Lifetime Warranty includes the
LEDs, housing and lenses. Rechargeable batteries, chargers, switches, electronics and
included accessories are warranted for a period of two years with proof of purchase. Normal
wear and failures which are caused by accidents, misuse, abuse, faulty installation and
lightning damage are excluded.
We will repair or replace this product should we determine it to be defective. This is the
only warranty, expressed or implied, including any warranty of merchantability or fi tness for
a particular purpose.
For a complete copy of the warranty, go to ww.baycoproducts.com/bayco-product-
support/warranties. Retain your receipt for proof of purchase.
FORTEM
AVERTISSEMENTS
y NE PAS UTILISER AU-DESSUS D'ENDROITS DANGEREUX.
y NE PAS utiliser ce produit dans une atmosphère explosive, à proximité de liquides
infl ammables, ou dans des endroits exigeant un éclairage antidéfl agrant.
y NE PAS utiliser ce produit à proximité de véhicules ou d'équipement quand des liquides
infl ammables pourraient entrer en contact avec la lampe torche.
y NE PAS exposer les batteries à l'eau ou à l'eau salée, et ne pas laisser les batteries
se mouiller.
y NE PAS ranger les batteries à proximité d'objets métalliques qui pourraient causer un
court-circuit.
y Arrêtez immédiatement d'utiliser les batteries si elles émettent une odeur inhabituelle,
sont brûlantes au toucher, changent de forme, ou en cas de toute autre anomalie.
y Ne pas laisser pas à la portée des enfants
Avertissement stroboscopique
L'exposition à des lumières stroboscopiques peut causer des étourdissements, une
désorientation et des nausées. Un très faible pourcentage de personnes souffrent d'épilepsie
photosensible et peuvent avoir des convulsions ou des évanouissements déclenchés par des
lumières stroboscopiques. Pour plus d'informations sur la photosensibilité et les saisies de la
FONDATION EPILEPSY, rendez-vous sur www.epilepsy.com. Toute personne qui a eu des
symptômes liés à cette condition devrait consulter un médecin avant d'utiliser ce produit.
INSTALLATION DES PILES DANS LA LAMPE 4650
y Pour installer les piles au lithium CR123A dans la lampe 4650, commencer par dévisser
la vis de la porte du compartiment à piles.
y Insérer les deux piles dans le compartiment à piles en vous assurant de porter
une attention particulière à l'orientation des bornes inscrites au verso de la porte du
compartiment à piles. (Image 1)
y Installer de nouveau la vis du compartiment à piles en appuyant sur la porte complètement
fermée puis en serrant la vis jusqu'à ce qu'elle soit serrée à la main. AVERTISSEMENT :
Ne pas fausser le fi letage ou briser les fi lets de la vis. (Image 2)
y Tester par la suite le fonctionnement de votre lampe de poche (Voir FONCTIONNEMENT
ci-dessous)
INSTALLATION DE LA LAMPE 4650 SUR LE CASQUE
y Choisissez le côté du casque sur lequel vous souhaitez fi xer la lampe.
y Faites pivoter le support pour que la vis de serrage de la pince soit vers le haut
y Ouvrez complètement la pince et placez-la bien à plat sur le bord du casque en veillant à ce
qu'elle dépasse complètement le bord en caoutchouc du casque, le cas échéant. (Image 3)
y Serrez fermement la pince avec la clé Allen fournie. (Image 4)
SCANNER POUR LA VIDÉO D'INSTRUCTION DE MONTAGE
RÉGLAGE DE L'ANGLE DE LA LAMPE
y Tournez la lampe vers la gauche ou la droite sur le pivot vertical jusqu'à ce que le
faisceau soit dans la position idéale.
y Le pivot du support est plutôt ferme afi n de maintenir l'angle de la lampe.
y Une fois l'angle de la lampe ajusté, le support permet à l'utilisateur de positionner la
lampe au-dessus ou au-dessous du bord du casque en la faisant pivoter vers le haut ou
le bas, au besoin.
FONCTIONNEMENT
La lampe 4650 est équipé des modes d'éclairage suivants : lampe de poche à haute
luminosité et éclairage constant, lampe de poche à luminosité moyenne et éclairage constant,
lampe de poche à luminosité basse et éclairage constant, lampe projecteur à haute luminosité
INS-NSP-4650-20
Mode d'emploi
NSP-4650B
®
Publicité

Manuels Connexes pour NightStick FORTEM NSP-4650B


Sommaire des Matières pour NightStick FORTEM NSP-4650B
- Page 1 à luminosité basse et éclairage constant, lampe projecteur à haute luminosité Bayco Products, Inc. • 640 South Sanden Blvd. • Wylie, TX 75098 • 1-800-233-2155 • 1-469-326-9400 • www.nightstick.com INS-NSP-4650-20...
- Page 2 Bayco Products, Inc. • 640 South Sanden Blvd. • Wylie, TX 75098 • 1-800-233-2155 • 1-469-326-9400 • www.nightstick.com INS-NSP-4650-20...