DELTA DORE CLT 8000 TYXAL+ Mode D'emploi
Masquer les pouces
Voir aussi pour CLT 8000 TYXAL+:
- Notice d'installation (2 pages) ,
- Guide d'installation (73 pages) ,
- Mode d'emploi (11 pages)
Publicité
Liens rapides
CLT 8000 TYXAL+
www.deltadore.com
Notice d'installation
FR
Installation guide
EN
Installationsanleitung
DE
Guida di installazione
IT
Manual de instalación
ES
Instrukcja instalacji
PL
Installatiehandleiding
NL
LS14500 x 3 - 3.6 V - 7,8 Ah - Lithium
Autonomie 10 ans - Autonomy 10 years
868,30 MHz et 868,95 MHz (EN 300 220) - 100 m
IP
EN 50131-3 / RTC 50131-3 / EN 50131-6 /
RTC 50131-6 / EN 50131-1 Grade 2
Autoprotection à l'ouverture et à l'arrachement / Tamper alarm on opening or removal of unit /
Sabotagekontakt : Auslösung beim Öffnen und Abreißen / Autoprotezione all'apertura e alla rimozione
forzata / Autoprotección contra la apertura y el vandalismo /
/ Automatische bescherming tegen opening en losrukken
3
Fixation / Mounting / Montage / Fissaggio / Fijación / Mocowanie / Bevestiging
1
2
Ê Séparez les
Ë Tracez et percez les trous
FR
2 parties du boîtier.
D1, D2 et D3.
Ê Separate the
Ë Mark and drill holes
EN
2 parts of the unit.
D1, D2 and D3.
Ê Öffnen Sie das
Ë Bohrstellen markieren und
DE
Gehäuse, indem Sie die
Löcher D1, D2 und D3 bohren.
zwei Gehäuseteile
trennen.
Ê Separare le 2 parti del
Ë Tracciare dei segni e fare dei
IT
prodotto.
fori D1,D2 e D3
Ê Separe las 2 partes de
Ë Señale y perfore los orificios
ES
la carcasa.
D1, D2 y D3.
Ê Oddziel obie
Ë
PL
D1, D2 i D3.
Ê Scheid de twee delen
Ë Markeer en boor de gaten
NL
van de behuizing.
D1, D2 en D3.
abc
def
ghi
jkl
mno
pqrs
tuv
wxyz
Consumption stand-by : < 10 μA
Consumption : 120 mA max.
Ý
300m
-10°C / +70°C
-10°C / +55°C
IP 31
IK 06
75%
89 x 168 x 24 mm
270 gr.
R&TTE 1999/5/CE
Environmental class II
Important product information (Ë Ì)
3
D1
HAUT
UP
V2
C
V3
D2
D3
Ø max = 3 mm
Ì Fixez le socle avec les vis V1, V2
et V3.
à ne pas détériorer ou perdre
la pièce en caoutchouc
saire à l'autoprotection).
Ì Mount the base using screws V1,
V2 and V3.
Do not damage or lose the
rubber part
C
(required for the
tamper alarm).
Ì Sockel mit Schrauben V1, V2 und
V3 befestigen.
Gummiteil nicht beschädigen
C
oder verlieren
eschutz).
Ì Fissare il supporto con le viti V1,V2
e V3.
Non danneggiare o perdere
la parte in gomma
all'autoprotezione).
Ì Fije la base con los tornillos V1, V2
y V3.
no deteriore o pierda la pieza
de caucho
C
(necesaria para la
autoprotección).
Ì
Ì Bevestig de basis met de vijzen V1,
V2 en V3.
Wees voorzichtig dat u het
rubberen deel niet beschadigt/
C
verliest
(nodig voor bescherming
tegen vandalisme).
Contenu / Contents / Inhalt / Contenuto / Contenido /
abc
def
ghi
jkl
mno
pqrs
tuv
wxyz
1
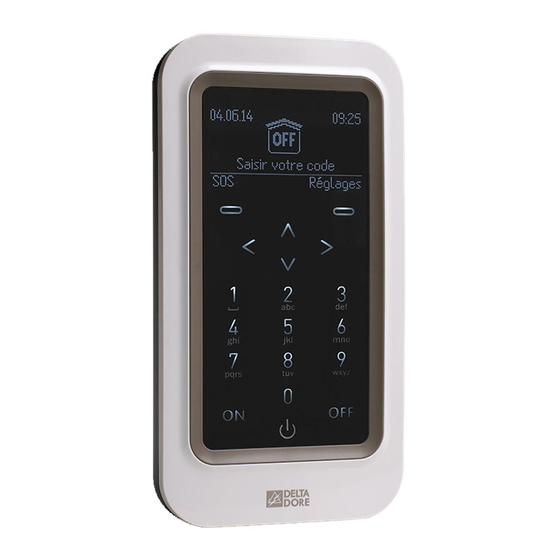
Présentation / Presentation / Beschreibung / Presentazione / Presentación / Prezentacja /
Voorstelling
Avant d'utiliser le clavier, vous devez l'associer au système (voir notice installation système).
FR
Before using the keypad, you must associate it with the system (refer to system installation guide).
EN
Vor der Verwendung der Bedieneinheit müssen Sie diese dem System zuordnen (siehe
DE
Installationsanleitung System).
Prima di utilizzare la tastiera, associarla al sistema (Vedi istruzioni «Sistema»).
IT
Antes de utilizar el teclado, debe asociarlo con el sistema (ver manual de instalación del sistema).
ES
PL
Voordat u het toetsenbord gebruikt, moet u het koppelen aan het systeem (zie handleiding).
NL
2
Emplacement / Location / Einbauort / Posizionamento / Ubicación / Lokalizacja / Locatie
abc
def
ghi
jkl
mno
pqrs
tuv
wxyz
Il est conseillé d'installer le clavier près d'un des accès principaux, si possible protégé par un détecteur
FR
d'intrusion, et à hauteur du regard pour faciliter les manipulations.
It is advisable to install the keypad near one of the main entrances, if possible protected by an intrusion
EN
detector mounted at eye level for easier use.
Die Bedieneinheit sollte an einem der Hauptzugänge zur bequemeren Bedienung in Augenhöhe
DE
installiert, und möglichst durch einen Einbruchmelder geschützt werden.
E'consigliato installare la tastiera vicino ad un accesso principale, se possibile protetta da un sensore di
IT
V1
intrusione, e all'altezza uomo per facilitare l'utilizzo.
Se recomienda instalar el teclado cerca de uno de los accesos principales, protegido con un detector
ES
de intrusión si es posible, y a la altura de la vista para facilitar su manipulación.
PL
Het wordt aanbevolen om het toetsenbord in de buurt van een van de hoofdingangten te installeren,
NL
indien mogelijk beveiligd door een bewegingsmelder, en op ooghoogte.
4
Mise en service / Activation / Inbetriebnahme / Attivazione / Activación / Uruchamianie /
Inbedrijfstelling
C
(néces-
1
Lithium battery
(für Sabotag-
3 x LS 14500 3,6 V
Ê Mettez en place le bloc piles
FR
en respectant son sens.
Ê Fit the battery unit, observing
EN
C
(necessaria
the right polarity.
Ê Batterie-Block unter Beach-
DE
tung der Polung einsetzen.
Ê Inserire il blocco batterie
IT
rispettando i poli
Ê Coloque todas las pilas
ES
respetando la polaridad.
C
Ê
PL
Ê Plaats het batterijblok in de
NL
juiste richting.
Bloc piles à l'intérieur /
Battery unit inside /
Mit Batterie-Block /
Blocco batterie all'interno /
Bloque de pilas en el interior /
Zestaw baterii wewn¹trz /
Batterijblok binnenin
abc
def
ghi
jkl
mno
pqrs
tuv
wxyz
2
Ë Refermez le boîtier et verrouillez-le.
Ë Close and lock the unit.
Ë Gehäuse schließen und verriegeln.
Ë Richiudere il prodotto e bloccarlo.
Ë Cierre la carcasa.
Ë
Ë Sluit de behuizing en vergrendel deze.
/ Inhoud
Instructions
Important
Product
Informations
Publicité

Manuels Connexes pour DELTA DORE CLT 8000 TYXAL+


Sommaire des Matières pour DELTA DORE CLT 8000 TYXAL+
- Page 1 Contenu / Contents / Inhalt / Contenuto / Contenido / / Inhoud Bloc piles à l’intérieur / CLT 8000 TYXAL+ Instructions Battery unit inside / Mit Batterie-Block / Blocco batterie all’interno / www.deltadore.com Bloque de pilas en el interior / Important Notice d’installation Zestaw baterii wewn¹trz /...
- Page 2 Code d’accès / Access code / Zugangscode / Codice d’accesso / Código de acceso / / Toegangscode A la mise en service, le code installateur est 123456. El código de instalación para la activación es 123456. Pour créer, modifier ou supprimer un code d’accès, Para crear, modificar o eliminar el código de acceso reportez-vous à...