Publicité

Les langues disponibles
  • FR

Les langues disponibles

  • FRANÇAIS, page 35

Liens rapides

ISTRUZIONI PER INSTALLAZIONE, USO E MANUTENZIONE
INSTRUCTIONS FOR INSTALLATION, USE AND MAINTENANCE
GEBRAUCHS-, INSTALLATIONS- UND WARTUNGSANWEISUNGEN
INSTRUCCIOES PARA LA INSTALACIÓN, USO Y MANTENIMIENTO
PELER 20
MODE D'EMPLOI ET D'ENTRETIEN
INSTRUÇÕES DE USO E MANUTENÇÃO
IT
EN
FR
DE
ES
PT

Publicité

Table des Matières
loading

Sommaire des Matières pour Olimpia splendid PELER 20

  • Page 1 PELER 20 ISTRUZIONI PER INSTALLAZIONE, USO E MANUTENZIONE INSTRUCTIONS FOR INSTALLATION, USE AND MAINTENANCE MODE D’EMPLOI ET D’ENTRETIEN GEBRAUCHS-, INSTALLATIONS- UND WARTUNGSANWEISUNGEN INSTRUCCIOES PARA LA INSTALACIÓN, USO Y MANTENIMIENTO INSTRUÇÕES DE USO E MANUTENÇÃO...
  • Page 3 9 - Installare l’apparecchio secondo le istruzioni del costruttore. Un’errata installazione può causare danni a persone, animali o cose, IT - 1 PELER 20...
  • Page 4 nei confronti dei quali il costruttore non può essere considerato res- ponsabile. 10 - In caso di incompatibilità tra la presa e la spina dell’apparecchio, far sostituire la presa con altra di tipo adatto da personale professional- mente qualificato, il quale accerti che la sezione dei cavi della presa sia idonea alla potenza assorbita dall’apparecchio.
  • Page 5 La targa è situata sul retro dell’apparecchio. 41 - E’ severamente vietato rimuovere o installare il filtro dell’aria (17) o il filtro in carta bagnato (18) durante il funzionamento come umidificatore. IT - 3 PELER 20...
  • Page 6: Principali Caratteristiche E Funzionamento

    1- principaLi caratteristiche e funzionamento • Funzioni raffreddatore e umidificatore • Oscillazione orizzontale automatica, oscilla- • Funzione timer: 1H, 2H, 4H, 8H; zione verticale manuale; • Telecomando a infrarossi; • Facile da spostare grazie alle ruote piroettanti; • Ripristino livello con aggiunta di acqua dall’alto •...
  • Page 7 LED velocità “silenzioso” b1. Tasto oscillazione c4. LED velocità bassa b2. LED oscillazione c5. LED velocità media b3. LED timer (1H) c6. LED velocità alta b4. LED timer (2H) c7. Tasto velocità aria 1c - teLecomando IT - 5 PELER 20...
  • Page 8 1d - uso deL teLecomando Il telecomando fornito a corredo è lo strumento che Vi permette di utilizzare l’ap- parecchiatura nel modo più comodo. E’ uno strumento da maneggiare con cura ed in particolare: • Evitare di bagnarlo (non va pulito con acqua o lasciato alle intemperie). •...
  • Page 9: Operazioni Preliminari

    (3) come illustrato in figura. • Far scorrere la leva della pom- pa (3) verso il basso, in modo che la pompa (4) sia pronta per il funzionamento. IT - 7 PELER 20...
  • Page 10 • Scegliere la posizione idonea de- ll’apparecchio rispettando quando riportato nelle pagine precedenti. • Se desiderato, è possibile bloccare le ruote dell’apparecchio premendo l’apposita leva presente sulle ruote. 2a - riempimento E’ necessario aggiungere acqua nel serbatoio (7) prima che la funzione raffred- datore/umidificatore sia accesa.
  • Page 11 • Utilizzare sempre acqua pulita. • L’apparecchio potrebbe produrre un leggero odore o l’acqua nel serbatoio (7) potrebbe essere leggermente colorita durante il primo utilizzo; questi eventi sono normali ed assolutamente non nocivi per la salute dell’utilizza- tore. IT - 9 PELER 20...
  • Page 12: Istruzioni Di Funzionamento

    3- istruzioni di funzionamento 1. Inserire la spina nella presa di corrente. Quando l’apparecchio viene acceso per la prima volta emette due “beep” e si posiziona in stand-by; tutti i tasti sono disabilitati ad eccezione del tasto on/off. Per accendere l’apparecchio premere il tasto on/off (C1) (si sente un beep) Per spegnere l’apparecchio premere di nuovo il tasto on/off (C1) (si sente un beeeep) Ad ogni pressione di un tasto si sente un beep.
  • Page 13 2 - naturale (A5): l’apparecchio funziona variando in continuo la velocità dell’aria. Il grafico indicato nella prossima pagina mostra le variazioni dell’aria in base alla velocità selezionata. Il LED mostra solamente la velocità iniziale dell’aria; altri cambiamenti non vengono segnalati. IT - 11 PELER 20...
  • Page 14 Velocità alta Velocità media Velocità bassa 18 21 69 72 T=90s Modalità naturale a velocità alta Velocità alta Velocità media Velocità bassa 30 33 69 72 T=90s Modalità naturale a velocità media Velocità alta Velocità media Velocità bassa 18 21 45 48 69 72 T=90s...
  • Page 15 Il pannello comandi è spento e non è possibile eseguire alcuna funzione. Al ripristino della tensione l’apparecchio attende 30 secondi per poi riprende- re la funzione impostata prima del blackout. L’apparecchio rimane spento se il blackout è avvenuto mentre lo stesso era spento. IT - 13 PELER 20...
  • Page 16: Manutenzione Quotidiana

    b. Se il tasto on viene premuto entro 30 secondi dal ripristino dell’alimentazio- ne, la funzione impostata viene recuperata immediatamente. c. Anche il conteggio a ritroso della funzione timer viene salvato ed ogni man- canza di tensione ammette non più di 5 minuti di errore (ignorando la durata del blackout).
  • Page 17: Prima Di Riporre L'apparecchio A Fine Stagione

    • Assicurarsi quindi che siano asciutti e verificare che il serbatoio dell’acqua non contenga acqua residua. • Avvolgere il cavo di alimentazione (5) attorno all’apposito avvolgicavo (13). • Riporre l’apparecchio nella sua confezione originale e conservarlo in un luogo fres- co e asciutto. IT - 15 PELER 20...
  • Page 18: Smaltimento

    6- smaLtimento Il simbolo sul prodotto o sulla confezione indica che il prodotto non deve essere considerato come un normale rifiuto domestico, ma deve essere portato nel punto di raccolta appropriato per il riciclaggio di apparecchiature elettriche ed elettroniche. Provvedendo a smaltire questo prodotto in modo appropriato si contribuisce ad evitare le potenziali conseguenze negative per l’ambiente e per la salute che potrebbero derivare da uno smaltimento inadeguato del prodotto.
  • Page 19 7 - Children must be supervised to ensure they do not play with the ap- pliance. 8 - If the supply cord is damaged, it must be replaced by the manufac- turer, its service agent or similarly qualified persons in order to avoid a hazard. EN - 1 PELER 20...
  • Page 20 9 - Install the appliance according to the manufacturer’s instructions. An incorrect installation can cause damage to people, animals or property for which the manufacturer accepts no responsibility. 10 - If the appliance’s plug is incompatible with the socket, have the socket replaced with a suitable one by a qualified technician, who must ascer- tain that the section of the socket cables is compatible with the power absorbed by the appliance.
  • Page 21 The plate can be found on the back of the appliance. 41 - It is severely prohibited to remove or install the air filter (17) or the wet paper filter (18) during while the humidifier function is running. EN - 3 PELER 20...
  • Page 22 1- MAIN FEATURES AND FUNCTIONING • Cooling and humidifier functions • Easy to move thanks to the pirouetting wheels; • Timer function: 1H, 2H, 4H, 8H; • Drying function; • Infrared remote control; • Memorisation function in case of power out- •...
  • Page 23 C3. “Silent” speed LED B1. Oscillation key C4. Low speed LED B2. Oscillation LED C5. Medium speed LED B3. Timer LED (1H) C6. High speed LED B4. Timer LED (2H) C7. Air speed key 1c - REMOTE CONTROL EN - 5 PELER 20...
  • Page 24 1d - USE OF THE REMOTE CONTROL The supplied remote control is the tool which allows You to use the appliance in the most comfortable manner. It must be handled with care and, in particular: • Avoid wetting it (it must not be cleaned with water or left exposed to adverse weather conditions).
  • Page 25 • After removing the appliance from the packaging, remove the pump lever lock (3) as shown in figure. • Let the pump lever (3) slide downwards, so that the pump (4) is ready for operation. EN - 7 PELER 20...
  • Page 26 • Choose a suitable position for the appliance observing what is indicated in the previous pages. • If desired, it is possible to lock the appliance wheels by pressing the specific lever located on the wheels themselves. 2a - FILLING It is necessary to add water in the tank (7) before the cooling/humidifier function is activated.
  • Page 27 • The appliance could produce a slight smell or the water in the tank (7) could be slightly colour- ed during first use; this events are normal and absolutely harm- less for the user’s health. EN - 9 PELER 20...
  • Page 28 3- INSTRUCTIONS FOR OPERATION 1. Insert the plug in the power socket. When the appliance is switched on for the first time, it emits two “beeps” and switches to stand-by mode; all the keys are disabled except for the ON/OFF key. Press the ON/OFF key (C1) to switch the appliance on (a beep is heard) Press the ON/OFF key (C1) again to switch the appliance off (a beeeep is heard)
  • Page 29 2 - Natural (A5): the appliance works changing air speed continuously. The chart in the next page shows air variations depending on the selected speed. The LED only shows the air initial speed; other changes are not reported. EN - 11 PELER 20...
  • Page 30 High speed Medium speed Low speed 18 21 69 72 T=90s Natural mode at high speed High speed Medium speed Low speed 30 33 69 72 T=90s Natural mode at medium speed High speed Medium speed Low speed 18 21 45 48 69 72 T=90s...
  • Page 31 The control panel is switched off and it is not possible to run any function. When voltage is restored, the appliance waits 30 seconds and then resumes the function set before the blackout. The appliance remains switched off if the blackout occurred while it was al- ready switched off. EN - 13 PELER 20...
  • Page 32 B. If the ON key is pressed within 30 seconds after power restoration, the set function is immediately recovered. C. The timer function counting down is saved and each loss of voltage allows not more than 5 minutes of error (ignoring the duration of the blackout). 3n - SAFETY FUNCTION AGAINST THE ACCIDENTAL PROLONGED This function can prevent the appliance from working for a long period of time in case the user forgets to turn it off or if he leaves when power is interrupted and...
  • Page 33 • Then, make sure they’re dry and check that the water tank doesn’t contain any residual water. • Wrap the power cord (5) around the specific cable coiler (13). • Place the appliance in its original packaging and store it in a fresh and dry environ- ment. EN - 15 PELER 20...
  • Page 34 6- DISPOSAL This symbol on the product or its packaging indicates that the appliance cannot be treated as normal domestic trash, but must be handed in at a collection point for recycling electric and electronic appliances. Your contribution to the correct disposal of this product protects the environment and the health of your fellow men.
  • Page 35 7 - Les enfants doivent être surveillés afin de s’assurer qu’ils ne jouent pas avec l’appareil. 8 - Si le câble d’alimentation devait apparaitre endommagé, le faire remplacer par le fabricant, par un centre d’assistance autorisé ou par un personnel qualifié afin d’éviter tout risque. FR - 1 PELER 20...
  • Page 36 9 - Installer l’appareil selon les consignes du constructeur. Une installation erronée peut causer des dommages aux personnes, animaux ou choses, vis-à-vis desquels le constructeur ne peut être tenu pour responsable. 10 - En cas d’incompatibilité entre la prise et la fiche de l’appareil, faire remplacer la prise par un autre type approprié...
  • Page 37 électrique. La plaque est située à l’arrière de l’appareil. 41 - Il est sévèrement interdit d’enlever ou d’installer le filtre à air (17) ou le filtre en papier mouillé (18) durant le fonctionnement en tant qu’humidificateur. FR - 3 PELER 20...
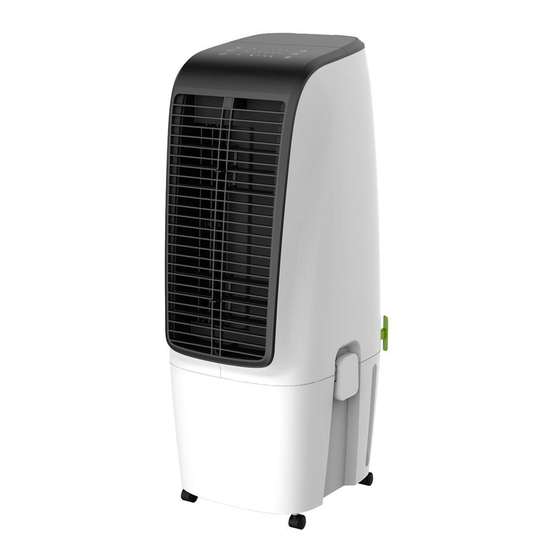
  • Page 38: 1A - Schémas Et Fonctions

    1- principaLes caractéristiques et fonctionnement • Fonction refroidisseur et humidificateur • Oscillation horizontale automatique, oscillation • Fonction minuteur : 1H, 2H, 4H, 8H ; verticale manuelle ; • Télécommande à infrarouges ; • Facile à déplacer grâce aux roues pivotantes ; •...
  • Page 39: 1B - Panneau De Commande

    LED vitesse « silencieux » b1. Touche oscillation c4. LED vitesse basse b2. LED oscillation c5. LED vitesse moyenne b3. LED minuteur (1H) c6. LED vitesse élevée b4. LED minuteur (2H) c7. Touche vitesse de l’air 1c - téLécommande FR - 5 PELER 20...
  • Page 40: 1D - Usage De La Télécommande

    1d - usage de La téLécommande La télécommande fournie est l’instrument qui vous permet d’utiliser l’appareil de la manière la plus pratique possible. C’est un outil à manipuler avec soin et, notamment : • Éviter de le mouiller (il ne doit pas être lavé à l’eau ou laissé exposé aux intempéries).
  • Page 41: Contrôles Préliminaires

    (3) selon l'illustration de la figure. • Faire glisser de la pompe (3) vers le bas, de façon que la pompe (4) soit prête à fonctionner. FR - 7 PELER 20...
  • Page 42 • Choisir la position appropriée de l’appareil en respectant ce qui est mentionné sur les pages précédentes. • Le cas échéant, il est possible de bloquer les roues de l’appareil en pressant le levier qui se trouve sur les roues. 2a - rempLissage Il est nécessaire d’ajouter de l’eau dans le réservoir (7) avant que la fonction refroidisseur/humidificateur s’allume.
  • Page 43 • L’appareil pourrait émettre une légère odeur ou l’eau dans le réservoir (7) pourrait être légèrement colorée au cours de sa première utilisation ; ces événements sont normaux et absolument pas nocifs pour la santé de l’utilisateur. FR - 9 PELER 20...
  • Page 44: Consignes De Fonctionnement

    3- consignes de fonctionnement 1. Insérer la fiche dans la prise de courant. quand l’appareil est allumé pour la première fois, il émet deux « bips sonores » et se positionne en mode veille ; toutes les touches sont désactivées à l’exception de la touche ON/OFF. Pour allumer l’appareil presser la touche on/off (C1) (on entend un bip sonore) Pour éteindre l’appareil presser la touche on/off (C1) (on entend un biiip sonore)
  • Page 45: 3C - Touche Refroidisseur/Humidificateur (A1)

    2 - naturel (A5) : l’appareil fonctionne en variant constamment la vitesse de l’air. Le graphique indiqué à la page suivante montre les variations de l’air selon la vitesse sélectionnée. La LED montre seulement la vitesse initiale de l’air ; d’autres changements ne sont pas signalés. FR - 11 PELER 20...
  • Page 46 vitesse élevée vitesse moyenne vitesse basse 18 21 69 72 T=90s Mode naturel à vitesse élevée vitesse élevée vitesse moyenne vitesse basse 30 33 69 72 T=90s Mode naturel à vitesse moyenne vitesse élevée vitesse moyenne vitesse basse 18 21 45 48 69 72 T=90s...
  • Page 47: 3G - Fonction De Protection De La Pièce

    éteint et aucune fonction ne peut être exécutée. Au moment où le courant est rétabli l’appareil attend 30 secondes pour reprendre ensuite la fonction configurée avant le blackout. L’appareil reste éteint si le blackout a eu lieu pendant que celui-ci était éteint. FR - 13 PELER 20...
  • Page 48: 3N - Fonction De Sécurité Contre L'utilisation Prolongée Accidentelle

    b. Si la touche on est pressée dans un délai de 30 secondes à compter du rétablissement de l’alimentation, la fonction configurée est immédiatement récupérée. c. Même le compte à rebours de la fonction minuteur est enregistré et chaque coupure de courant n’admet pas plus de 5 minutes d’erreur (en ignorant la durée du blackout).
  • Page 49 • S’assurer ensuite qu’ils sont secs et vérifier que le réservoir d’eau ne contient pas d’eau résiduelle. • Enrouler le câble d’alimentation (5) autour de l’enroule-câble prévu à cet effet (13). • Ranger l’appareil dans son emballage d’origine et le conserver dans un lieu frais et sec. FR - 15 PELER 20...
  • Page 50: Données Techniques

    6- éLimination Le symbole sur le produit ou sur l’emballage indique que le produit ne doit pas être considéré comme un normal déchet ménager, mais qu’il doit être amené sur le point de collecte approprié pour recycler les appareils électriques et électroniques. L’élimination de ce produit d’une manière appropriée contribue à...
  • Page 51 Vermeidung von möglichen Gefahren vom Hersteller, von einer autorisierten Servicestelle oder von qualifiziertem Personal ersetzen. 9 - Installieren Sie das Gerät gemäß den Anweisungen des Herstellers. Eine unsachgemäße Installation kann zu Verletzungen von Personen, DE - 1 PELER 20...
  • Page 52 Tieren oder Gegenständen führen, für die der Hersteller nicht verantwortlich gemacht werden kann. 10 - Sollte die Steckdose nicht mit dem Stecker des Geräts kompatibel sein, muss diese von Fachpersonal ausgewechselt und durch eine geeignete ersetzt werden. Dabei ist zu kontrollieren, ob der Kabelquerschnitt der Steckdose für die Leistungsaufnahme des Geräts geeignet ist.
  • Page 53 Angaben auf dem Typenschild mit denen des Stromnetzes übereinstimmen. Das Typenschild befindet sich auf der Rückseite des Geräts. 41 - Es ist strengstens verboten, den Luftfilter (17) oder den nassen Papierfilter (18) während des Betriebs als Befeuchter auszubauen oder zu installieren. DE - 3 PELER 20...
  • Page 54: Wichtigste Eigenschaften Und Funktionsweisen

    1- wichtigste eigenschaften und funktionsweisen • Kühler- und Befeuchterfunktionen • Automatisches horizontales Schwingen, • Timerfunktion: 1H, 2H, 4H, 8H; manuelles vertikales Schwingen; • Infrarot-Fernbedienung; • Leicht zu bewegen dank der Lenkrollen; • Nachfüllen durch Zugabe von Wasser von • Trocknungsfunktion; oben oder durch Abnehmen des Tanks.
  • Page 55 LED Geschwindigkeit „leise“ B1. Taste Schwingfunktion c4. LED niedrige Geschwindigkeit B2. LED Schwingfunktion c5. LED mittlere Geschwindigkeit B3. LED Timer (1H) c6. LED hohe Geschwindigkeit B4. LED Timer (2H) c7. Taste Luftgeschwindigkeit 1c - FERNBEDIENUNG DE - 5 PELER 20...
  • Page 56 1d - geBrauch der fernBedienung Die mitgelieferte Fernsteuerung ermöglicht eine bequeme Nutzung des Geräts. Sie muss mit Sorgfalt behandelt werden, wobei vor allem auf Folgendes zu achten ist: • Darauf achten, dass sie nicht nass wird (nicht mit Wasser reinigen oder der Witterung aussetzen).
  • Page 57: Vorbereitende Massnahmen

    G e r ä t e s a u s d e r Verpackung die Verriegelung des Pumpenhebels (3) wie in der Abbildung dargestellt beseitigen. • Den Pumpenhebel (3) nach unten schieben, so dass die Pumpe (4) betriebsbereit ist. DE - 7 PELER 20...
  • Page 58 • Die geeignete Position des Gerätes unter Beachtung der Anweisungen auf den vorherigen Seiten wählen. • Bei Bedarf können die Lenkrollen des Gerätes durch Drücken des Hebels an den Rollen arretiert werden. 2a - auffÜllen Vor dem Einschalten der Kühler-/Befeuchterfunktion muss dem Tank (7) Wasser zugeführt werden.
  • Page 59 • I m m e r s a u b e r e s Wa s s e r verwenden. • Das Gerät kann einen leichten Geruch entwickeln oder das Wasser im Tank (7) kann sich bei der ersten Benutzung leicht verfärben; dies ist normal und absolut nicht gesundheitsschädlich für den Benutzer. DE - 9 PELER 20...
  • Page 60 3- BetrieBsanweisungen 1. Den Stecker in die Steckdose stecken. Beim ersten Einschalten gibt das Gerät zwei „Pieptöne“ von sich und wechselt in den Standby-Modus; alle Tasten bis auf die ON/ OFF-Taste sind deaktiviert. Zum Einschalten des Geräts auf die ON/OFF-Taste (C1) drücken (ein Piepton ertönt) Zum Ausschalten des Geräts erneut auf die ON/OFF-Taste (C1) drücken (ein langer Piepton ertönt) Bei jedem Drücken einer der Tasten gibt das Gerät einen Piepton ab.
  • Page 61 2 - Natürlich (A5): Das Gerät arbeitet mit kontinuierlicher Änderung der Luftgeschwindigkeit. Die Grafik auf der nächsten Seite zeigt die Änderungen der Luftgeschwindigkeit entsprechend der gewählten Einstellung. Die LED zeigt nur die Anfangsluftgeschwindigkeit an; andere Änderungen werden nicht angezeigt. DE - 11 PELER 20...
  • Page 62 Hohe Geschwindigkeit Mittlere Geschwindigkeit Niedrige Geschwindigkeit 18 21 69 72 T=90s Natürlicher Modus bei hoher Geschwindigkeit Hohe Geschwindigkeit Mittlere Geschwindigkeit Niedrige Geschwindigkeit 30 33 69 72 T=90s Natürlicher Modus bei mittlerer Geschwindigkeit Hohe Geschwindigkeit Mittlere Geschwindigkeit Niedrige Geschwindigkeit 18 21 45 48 69 72 T=90s...
  • Page 63 Funktion ausgeführt werden. Wenn die Stromversorgung wiederhergestellt ist, wartet das Gerät 30 Sekunden und setzt dann die vor dem Stromausfall eingestellte Funktion fort. Das Gerät bleibt ausgeschaltet, wenn der Stromausfall während des Ausschaltens des Geräts aufgetreten ist. DE - 13 PELER 20...
  • Page 64: Tägliche Wartung

    B. Wenn die on-Taste innerhalb von 30 Sekunden nach dem Wiedereinschalten der Stromversorgung gedrückt wird, wird die eingestellte Funktion sofort wiederhergestellt. c. Die Rückwärtszählung der Timerfunktion wird ebenfalls gespeichert und ein Stromausfall erlaubt nicht mehr als 5 Minuten im Fehlerzustand (ohne Berücksichtigung der Dauer des Stromausfalls).
  • Page 65: Vor Der Einlagerung Des Gerätes Am Ende Der Saison

    • Die Filter gemäß den Anweisungen für die tägliche Wartung reinigen. • Danach sicherstellen, dass sie trocken sind und der Wassertank kein Restwasser enthält. • Das Netzkabel (5) um die Kabelaufwicklung (13) wickeln. • Das Gerät in seiner Originalverpackung an einem kühlen, trockenen Ort lagern. DE - 15 PELER 20...
  • Page 66: Entsorgung

    6- entsorgung Das Symbol auf dem Produkt oder auf der Verpackung zeigt an, dass das Produkt nicht als normaler Hausmüll betrachtet werden darf, sondern zur entsprechenden Sammelstelle für das Recycling von Elektro- und Elektronikgeräten gebracht werden muss. Die ordnungsgemäße Entsorgung dieses Produkts trägt dazu bei, mögliche negative Auswirkungen auf Umwelt und Gesundheit zu vermeiden, die sich aus einer unsachgemäßen Entsorgung des Produkts ergeben könnten.
  • Page 67 7 - Los niños deben ser vigilados parar cerciorarse de que no jueguen con el aparato. 8 - Si el cable de alimentación está dañado, hágalo sustituir por el fabri- cante, por un centro de asistencia autorizado o por personal cualifi- cado, para prevenir cualquier riesgo. ES - 1 PELER 20...
  • Page 68 9 - Instale el aparato según las instrucciones del fabricante. Una instalación errónea puede causar dañ os a personas, animales o cosas, de las cuales el fabricante no podrá ser considerado responsable. 10 - En caso de incompatibilidad entre la toma y la clavija del aparato, haga sustituir la toma con otra del tipo adecuado por personal profesionalmente cualificado; éste debe verificar que la sección de los cables de la toma sea adecuada a la potencia del aparato. En general se desaconseja el uso de adaptadores y/o alargaderas; si su uso es indispensable, de- ben responder a las normas de seguridad vigentes y su capacidad de...
  • Page 69 39 - Utilice solamente una toma de corriente idónea para este aparato. 40 - Antes de conectar eléctricamente el aparato, asegúrese de que los datos de la placa respondan a los de la red de distribución eléctrica. La placa se encuentra en la parte trasera del aparato. 41 - Está severamente prohibido remover o instalar el filtro del aire (17) o el filtro de papel mojado (18) durante el funcionamiento como humi- dificador. ES - 3 PELER 20...
  • Page 70: Características Principales Y Funcionamiento

    1- caractErÍsticas principalEs y funcionamiEnto • Funciones refrigerador y humidificador • Oscilación horizontal automática, oscilación • Función temporizador: 1H, 2H, 4H, 8H; vertical manual; • Control remoto de infrarrojos; • Se mueve fácilmente gracias a las ruedas • Recuperación nivel con adición de agua giratorias; desde arriba o a través de la remoción del • Función de secado; tanque. • Función de memorización en el caso de falta • Función de protección contra la escasez de de electricidad; agua; • Seguridad contra el utilizo prolongado accidental; • Cuatro niveles de velocidad: alta, media, baja • Advertencia acústica presión de las teclas: y silencioso;...
  • Page 71 LED velocidad “silencioso” b1. Tecla oscilación c4. LED velocidad baja b2. LED oscilación c5. LED velocidad media b3. LED temporizador (1H) c6. LED velocidad alta b4. LED temporizador (2H) c7. Tecla velocidad aire 1c - mando a distancia ES - 5 PELER 20...
  • Page 72 1d - uso dEl mando a distancia El mando a distancia incluido con el aparato es una herramienta que Os permite utilizar el equipo de la manera mas cómoda. Es una herramienta que se debe manejar con cuidado y, en particular: • Evite mojarlo (no se debe limpiarlo con agua o dejado a la intemperie). • Evite que caiga al suelo o que choque contra un objeto violentamente. • Evite la exposición directa a los rayos solares. • El mando a distancia funciona con la tecnología de infrarrojos. •...
  • Page 73: Operaciones Preliminares

    (3) tal como se muestra en la figura. • Haga deslizar la palanca de la bomba (3) hacia abajo, de modo que la bomba (4) sea lista para el funcionamiento. ES - 7 PELER 20...
  • Page 74 • Elija la posición idónea del aparato observando lo que está indicado en las páginas precedentes. • Si deseado, es posible bloquear las ruedas del aparato presionando la demarcada palanca en las ruedas. 2a - llEnado Es necesario añadir agua en el tanque (7) antes de que la función refrigerador/ humidificador sea activada. El agua puede ser añadida desde la parte superior del aparato o quitando el tanque (7) del agua: - Para añadir agua de la parte superior, abra la tapa de lle- nado (1), vierta lentamente el agua en el tanque (7) y vuelva a posicionar la tapa (1) en su...
  • Page 75 • El aparato podría producir un ligero olor o el agua en el tanque (7) podría ser ligeramente colo- reada durante el primer utilizo; estos eventos son normales y absolutamente no peligrosos para la salud del usuario. ES - 9 PELER 20...
  • Page 76 3- instruccionEs dE funcionamiEnto 1. Inserte el enchufe en la toma de corriente. El aparato emite dos “bip” y pasa automáticamente al modo stand-by cuando se enciende por la primera vez; todas las teclas están desactivadas excepto por la tecla ON/OFF. Para encender el aparato, presione la tecla on/off (C1) (se oye un bip) Para apagar el aparato, presione la tecla on/off (C1) una otra vez (se oye un biiiip)
  • Page 77 1 - normal (A4): el aparato funciona constantemente a la velocidad seleccionada. 2 - natural (A5): el aparato funciona variando continuamente la velocidad del aire. El gráfico indicado en la próxima página muestra las variacio- nes del aire en función de la velocidad seleccionada. El LED muestra solamente la velocidad inicial del aire; no señala otras variaciones. ES - 11 PELER 20...
  • Page 78 velocidad alta velocidad media Velocidad baja 18 21 69 72 T=90s modo natural a velocidad alta velocidad alta velocidad media Velocidad baja 30 33 69 72 T=90s modo natural a velocidad media velocidad alta velocidad media Velocidad baja 18 21 45 48 69 72 T=90s...
  • Page 79 Si se presiona la tecla on/off antes de que pasen 20 minutos, el tiempo restante de la función de secado no se guarda. 3m - funciÓn dE mEmoriZaciÓn En El caso dE falta dE ElEctricidad a. Cuando el aparato está encendido, la unidad emite 10 “bip” cuando se recu- pera la alimentación después de una caída o falta de electricidad. El panel de mandos está apagado y no está posible ejecutar cualquiera fun- ción. Cuando se restablece la tensión el aparato espera 30 segundos y después reactiva la función configurada antes del apagón. El aparato permanece apagado si el apagón ocurrió mientras lo mismo era apagado. ES - 13 PELER 20...
  • Page 80: Mantenimiento Diario

    b. Si se presiona la tecla on dentro de 30 segundos desde el restablecimiento de la alimentación, la función seleccionada se recupera inmediatamente. c. También la cuenta regresiva de la función temporizador se guarda y cada falta de electricidad no permite más de 5 minutos de error (ignorando la du- ración del apagón). 3n - funciÓn dE sEguridad contra El utiliZo prolongado accidEntal Esta función puede evitar que el aparato funcione por un largo periodo de tiempo en el caso de que el usuario se olvide apagarlo o en el caso de que lo mismo se alegue cuando la alimentación se interrumpe y después restablece. La función permite que el aparato se apague al cabo de 15 horas de funciona- miento si el temporizador está apagado. Si el temporizador está encendido, el aparato se apaga al termino del tiempo configurado.
  • Page 81: Antes De Guardar El Aparato Al Final De La Temporada

    5- antEs dE guardar El aparato al final dE la tEmporada • Limpie los filtros observando las instrucciones suministradas para el mantenimien- to diario. • Luego asegúrese de que estén secos y verifique que el tanque del agua no con- tenga agua residual. • Envuelva el cable de alimentación (5) alrededor del demarcado enrollacable (13). • Posicione el aparato en su envase original y presérvelo en un lugar fresco y seco. ES - 15 PELER 20...
  • Page 82: Datos Técnicos

    6- EliminaciÓn El símbolo presente en el aparato o en el embalaje indica que el producto no debe ser considerado como un residuo doméstico normal; por el contrario, debe ser transportado a un punto de recogida apropiado para el reciclaje de aparatos eléctricos y electrónicos. La correcta eliminación de este aparato contribuye a evitar potenciales conse- cuencias negativas para el ambiente y para la salud. Para información más detallada sobre el reciclaje de este producto, contacte con la oficina comunal, con el servicio local de eliminación de residuos o con la tienda en la que el mismo ha sido adquirido.
  • Page 83 8 - Se o cabo de alimentação apresentar danos deverá ser substituído pelo fabricante, um Centro de assistência técnica autorizado ou por pessoal qualificado para prevenir qualquer risco possível. 9 - Instalar o aparelho de acordo com as instruções do fabricante. Uma instalação errada pode causar danos a pessoas, animais ou a PT - 1 PELER 20...
  • Page 84 coisas, pelos quais o fabricante não poderá ser considerado respon- sável. 10 - Em caso de incompatibilidade entre a tomada e o plugue do equi- pamento, providenciar que pessoal profissionalmente qualificado substitua a tomada por outra de tipo adequado, ele deverá também se certificar que a seção dos cabos da tomada seja apropriada para a potência absorvida pelo equipamento.
  • Page 85 39 - Usar somente uma tomada de corrente adequada para este aparelho. 40 - Antes de conectar eletricamente certificar-se de que os dados da placa correspondam aos da rede de distribuição elétrica. A placa está situada na traseira do aparelho. 41 - É terminantemente proibido remover ou instalar o filtro do ar (17) ou o filtro em papel molhado durante o funcionamento como umidificador. PT - 3 PELER 20...
  • Page 86 1- principais caracterÍsticas e FunciOnamentO • Funções resfriador e umidificador • Oscilação horizontal automática, oscilação • Função timer: 1H, 2H, 4H, 8H; vertical manual; • Controle remoto a infra-vermelho; • Fácil a deslocar graças às rodas pivotantes; • Restabelecimento do nível com acréscimo • Função de secagem; de água por cima ou por meio da remoção • Função de memorização em caso de falta do reservatório. de energia; • Função de proteção contra a falta de água; • Segurança contra o uso prolongado acidental; •...
  • Page 87 LED velocidade “silencioso” B1. Tecla oscilação c4. LED velocidade baixa B2. LED oscilação c5. LED velocidade média B3. LED timer (1H) c6. LED velocidade alta B4. LED timer (2H) c7. Tecla velocidade do ar 1c - cOntrOle remOtO PT - 5 PELER 20...
  • Page 88 1d - usO dO cOntrOle remOtO O controle remoto fornecido juntamente é a ferramenta com a qual você poderá usar o equipamento da forma mais confortável. É um instrumento a ser manuseado com cuidado, e especialmente: • Evitar molhá-lo (não deverá ser limpo com água ou deixado exposto às intempéries).
  • Page 89: Operações Preliminares

    • Não colocar o aparelho diretamente em cima de tapetes, toalhas, cobertores ou outras superfícies absorventes. • Depois de ter removido o apa- relho da embalagem, remover o bloco da alavanca da bomba (3) conforme ilustrado na figu- • Deslizar a alavanca da bomba (3) para baixo, de modo que a bomba (4) esteja pronta para o funcionamento. PT - 7 PELER 20...
  • Page 90 • Escolher a posição apropriada do aparelho respeitando as instruções das páginas anteriores. • Se desejar, é possível bloquear as rodas do aparelho por pressionar a alavanca específica situada nas rodas. 2a - enchimentO É necessário adicionar água no reservatório (7) antes que a função resfriador/ umidificador esteja ligada.
  • Page 91 • O aparelho poderia produzir um leve cheiro ou a água no reserva- tório (7) poderia estar levemente colorida durante o primeiro uso; isso é normal e absolutamente inofensivo para a saúde do usu- ário. PT - 9 PELER 20...
  • Page 92: Instruções De Funcionamento

    3- instruções de FunciOnamentO 1. Inserir o plugue na tomada elétrica. Ao ser ligado o aparelho emite pela primeira vez dois “bips” e se posiciona em stand-by; toda as teclas estão desabilitadas, exceto a tecla ON/OFF. Para ligar o aparelho, pressionar a tecla On/OFF (C1) (ouve-se um bip) Para desligar o aparelho, pressionar novamente a tecla On/OFF (C1) (ouve-se um biiip) Cada vez que pressionar uma tecla se ouve um bip.
  • Page 93 1 - normal (A4): o aparelho funciona constantemente com a velocidade programada. 2 - natural (A5): o aparelho funciona variando continuamente a velocidade do ar. O gráfico indicado na próxima página mostra as variações do ar de acordo com a velocidade selecionada. O LED mostra somente a velocidade inicial do ar; outras alterações não são indicadas. PT - 11 PELER 20...
  • Page 94 velocidade alta velocidade média Velocidade baixa 18 21 69 72 T=90s modalidade natural em velocidade alta velocidade alta velocidade média Velocidade baixa 30 33 69 72 T=90s modalidade natural em velocidade média velocidade alta velocidade média Velocidade baixa 18 21 45 48 69 72 T=90s...
  • Page 95 O painel de comandos está desligado e não é possível efetuar nenhuma função. Quando voltar a energia o aparelho aguarda 30 segundos para retomar a função programada antes do blackout. O aparelho permanece desligado se o blackout ocorreu enquanto o mesmo estava desligado. PT - 13 PELER 20...
  • Page 96: Manutenção Diária

    B. Se a tecla On é pressionada dentro de 30 segundos a partir do restabelecimento da alimentação, a função programa é recuperada imediatamente. c. A contagem regressiva da função timer é salva e cada falta de energia permite não mais do que 5 minutos de erro (ignorando a duração do blackout).
  • Page 97 5- antes de guardar O aparelhO nO Fim da estaçãO • Limpar os filtros seguindo as instruções fornecidas para a manutenção diária. • Certificar-se então que os filtros estejam secos e verificar se o reservatório de água contém água residual. • Enrolar o cabo de alimentação (5) ao redor do enrolador de cabo específico (13). • Guardar o aparelho na sua embalagem original e conservá-lo em um local fresco e seco. PT - 15 PELER 20...
  • Page 98: Dados Técnicos

    6- eliminaçãO O símbolo sobre o produto ou sobre a embalagem indica que o produto não deve ser considerado como um resíduo normal doméstico, mas deve ser levado até um ponto de recolha adequado para a reciclagem de aparelhagens elétricas e eletrônicas.

Table des Matières