National Instruments cDAQ-9185 Démarrage Rapide

Manuels Connexes pour National Instruments cDAQ-9185


Sommaire des Matières pour National Instruments cDAQ-9185
- Page 1 Extended Temperature, Ethernet CompactDAQ Chassis cDAQ -9185/9189 Quick Start Démarrage rapide Erste Schritte クイックスタート 시작하기 快速入门...
- Page 2 Caution Before installing your device, read all product documentation to ensure compliance with safety, EMC, and environmental regulations. Attention Avant d’installer votre périphérique, lisez toute la documentation se rapportant au produit pour vous assurer du respect des règles concernant la sécurité, la CEM et l’environnement. Achtung Lesen Sie vor der Inbetriebnahme des Geräts die Produktdokumentation, um die Einhaltung der Sicherheitsvorschriften,...
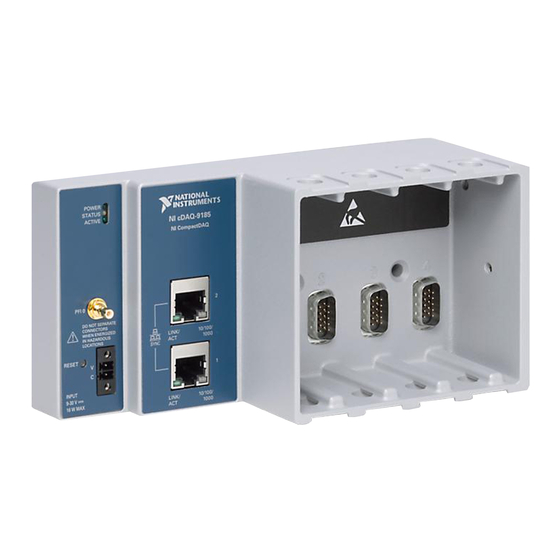
- Page 3 Contents I Contenu I Inhalt 内容 I 내용 I 内容 NI-DAQmx DVD Documentation Power Power Screwdriver Connector Supply cDAQ-9185 or cDAQ-9189 POWER POWER STATUS STATUS NI cDAQ-9185 NI cDAQ-9189 ACTIVE ACTIVE NI CompactDAQ NI CompactDAQ PFI 0 PFI 0 DO NOT SEPARATE...
- Page 4 Start Here I Commencez ici I Hier beginnen 開始 I 시작 I 入门...
- Page 5 NI LabVIEW NI-DAQmx First, install application development software (if applicable). Then install NI-DAQmx driver software. Commencez par installer le logiciel de développement d’applications (le cas échéant). Ensuite, installez le driver NI-DAQmx. Installieren Sie zuerst die Entwicklungsumgebung (sofern zutreffend) und anschließend den NI-DAQmx-Treiber.
- Page 6 Connect the cDAQ chassis to earth ground. Then install C Series modules. Refer to the module getting started guide for signal connections. Connectez le châssis cDAQ à la terre. Ensuite, installez les modules de la Série C. Veuillez consulter les guides d’installation des modules pour les connexions du signal. Erden Sie das cDAQ-Chassis.
- Page 7 Connect the cDAQ chassis to a network port or directly to the network card in your computer. Then connect the power supply. Raccordez le châssis cDAQ à un port réseau ou directement à la carte réseau de l’ordinateur. Ensuite, connectez l’alimentation. Verbinden Sie das cDAQ-Chassis mit einem Netzwerkport oder direkt mit der Netzwerk- karte des Computers.
- Page 8 Measurement & Automation Explorer (NI MAX) Open MAX. If the device is listed, right-click it and select Add Device. If it is not listed, right-click Network Devices and select Find Network NI-DAQmx Devices. Select a device or manually enter the hostname or IP address. Click the troubleshooting link for help. Ouvrez MAX.
- Page 9 Take your fi rst measurement in MAX. Right-click any module and select Test Panels. Click Test Panels. Click Start to verify measurement functionality. Prenez votre première mesure dans MAX. Cliquez avec le bouton droit sur un module et sélectionnez Panneaux de test. Cliquez sur Démarrer pour vérifi er la fonctionnalité de mesure. Führen Sie die erste Messung im MAX durch.
- Page 10 cdaqmounting ni.com/manuals 9185 or 9189 Pinouts Examples In MAX, right-click module name ni.com/info daqmxexp Getting Started with a Real-Time Host Demonstrations ni.com/manuals ni.com/daq/videos cDAQ-9185/9189 User Manual Synchronization Services and Support ni.com/info syncacc ni.com/services SYNC...
- Page 11 For patents covering National Instruments products/technology, refer to the appropriate location: Help»Patents in your software, the patents.txt file on your media, or the National Instruments Patents Notice at ni.com/patents. You can find information about end-user license agreements (EULAs) and third-party legal notices in the readme file for your NI product.