Table des Matières

Publicité

Les langues disponibles
  • FR

Les langues disponibles

  • FRANÇAIS, page 3

Liens rapides

Guide d'utilisation ............................................. 3
User's guide...................................................... 14
Manual de instrucciones .................................. 24
Gebrauchsanleitung ........................................ 35
Manuale d'uso ................................................. 46
Gebruiksaanwijzing ......................................... 57

Publicité

Table des Matières
loading

Sommaire des Matières pour EYENIMAL Dog Videocam

  • Page 1 Guide d’utilisation ..........3 User’s guide............14 Manual de instrucciones ........24 Gebrauchsanleitung ........35 Manuale d’uso ..........46 Gebruiksaanwijzing ......... 57...
  • Page 2 NUM’AXES declares that the equipment below: EYENIMAL Dog Videocam complies to all dispositions of the part 15 of the FCC rules This device complies with part 15 of the FCC. Operation is subject to the following conditions: (1) this device may not cause harmful interference, and (2) this device must accept any interference received including interferences that may cause undesired operation.
  • Page 3: Table Des Matières

    Avant d’utiliser votre caméra, lisez attentivement les explications de ce guide que vous conserverez pour toute référence ultérieure. Table des matières Caractéristiques techniques ..................4 Composition et présentation de la caméra Dog Videocam ..........5 Première utilisation ....................6 Charge de la batterie ....................6 Mise en place et ajustement de la caméra ..............6 Enregistrer en mode «...
  • Page 4: Caractéristiques Techniques

    ● Caractéristiques techniques Dimensions 84x26 mm Poids (caméra + attache) Etanchéité A l’immersion 2.0 (grande vitesse) Alimentation Batterie Li-polymer 460mAh Autonomie Jusqu’à 150 minutes Adaptateur 5V DC/500mAh Consommation <0.7W Mémoire interne Mémoire flash 4GO Mémoire externe Class4 Mini SD Card (supporte 2GO à 8GB) Resolution 736x480 Pixels Format Video...
  • Page 5: Composition Et Présentation De La Caméra Dog Videocam

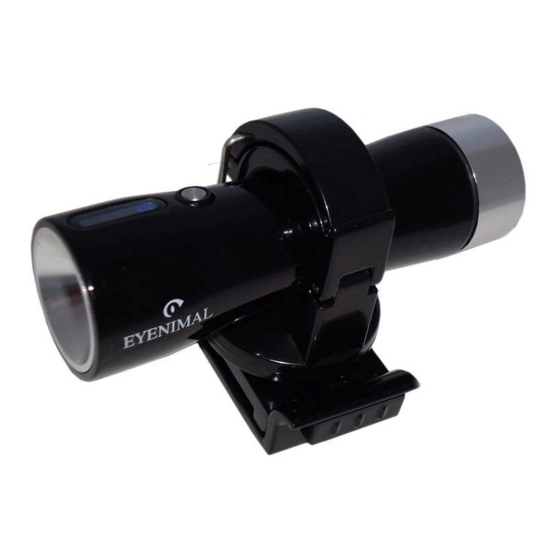
    ● Composition et présentation de la caméra Dog Videocam  Composition - une caméra numérique - un câble USB - ce guide d’utilisation - une attache caméra - un bouchon en métal perforé ® - une casquette EYENIMAL  Présentation Bouton Marche/arrêt...
  • Page 6: Première Utilisation

    ● Première utilisation Il est impératif de charger entièrement la batterie de la caméra avant la ère ère utilisation (durée de la 1 charge : 8 heures). ● Charge de la batterie Pour procéder à la charge de la caméra, celle-ci doit être impérativement éteinte. Pour charger la caméra, veuillez procéder de la manière suivante : ...
  • Page 7 ® 2/ Fixer l’attache de la caméra sur une sangle ou sur la casquette EYENIMAL Pour fixer l’attache de la caméra sur le collier du chien, veuillez procéder de la manière suivante :  Ouvrez l’attache en poussant le bouton dans le sens indiqué par la flèche.
  • Page 8 3/ Orienter l’angle de vue de la caméra ® Une fois la caméra fixée au cou du chien ou sur la casquette EYENIMAL , pensez à régler l’angle de vue en tournant l’attache de la caméra vers le haut ou vers le bas.
  • Page 9: Enregistrer En Mode « Continu

    ● Enregistrer en mode « Continu » Le mode « Continu » permet de filmer en ininterrompu. Pour sélectionner ce mode, positionnez le sélecteur de mode sur la position 1 (Cf. schémas § Présentation). Pour démarrer l’enregistrement, appuyez pendant 5 secondes sur le bouton marche/arrêt situé...
  • Page 10: Sessions D'enregistrement

    Fig. 10 Fig. 11 Bouchon étanche à Bouchon perforé pour l’immersion enregistrer les sons Le bouchon perforé permet d’enregistrer les sons mais il n’assure pas l’étanchéité de la caméra. La caméra sera endommagée de manière irréversible si elle est immergée dans l’eau et ne sera pas prise en garantie. ●...
  • Page 11: Régler Le Fuseau Horaire Et La Date Des Vidéos

    ● Partager vos vidéos Partagez les meilleures vidéos de votre chien en les postant sur www.eyenimal.com Droit à l’image et respect de la vie privée : la mise en ligne d’images ou de vidéos, sans accord écrit préalable, des personnes apparaissant sur celles-ci et pouvant être identifiées, est totalement interdite.
  • Page 12: Garantie

    Si vous omettez l’un de ces éléments, le service après-vente NUM’AXES vous facturera la réparation. ● Garantie EYENIMAL garantit le produit contre les défauts de fabrication pendant 1 an à compter de la date d’acquisition. Les frais de port aller et retour du produit sont à la charge exclusive de l’acheteur.
  • Page 13: Enregistrement De Votre Produit

    Photos et dessins non contractuels. ● Enregistrement de votre produit Vous pouvez enregistrer votre produit sur notre site web www.eyenimal.com ● Collecte et recyclage de votre appareil en fin de vie Le pictogramme apposé sur votre produit signifie que l’équipement ne peut être mêlé...
  • Page 14 Before using your pet cam, please read the instructions in this guide carefully and keep it for future reference. Index Technical specifications ..................15 Contents and description of the camera Dog Videocam ..........16 First use ......................17 Charge of the battery..................... 17 Fitting the video cam ..................... 17 Recording continuously ..................
  • Page 15: Technical Specifications

    ● Technical specifications Product Size Length 84mm / diameter 26mm Physical weight (including bracket) 2.0 (high speed) Power supply Embedded 460mAh Li-polymer Battery Working times Up to 150 minutes Power Adaptor 5V DC/500mAh Power Consumption <0.7W Internal Memory Built in 4GB memory External Memory Class4 Mini SD Card (supports 2GB up to 8GB) Resolution...
  • Page 16: Contents And Description Of The Camera Dog Videocam

    ● Contents and description of the camera Dog Videocam  Contents - 1 EYENIMAL Pet Cam - 1 USB cable - This user’s guide - a video cam mount - a perforated metal cap ® - an EYENIMAL  Description...
  • Page 17: First Use

    ● First use It is necessary to fully charge the battery of your video cam before the first use (duration of the 1 charge: 8 hours). ● Charge of the battery To charge your product, the video cam must be necessarily turned off. To charge your product, proceed in the following way: ...
  • Page 18 ® 2/ Attach the video cam mount to a strap or the EYENIMAL Proceed as follows to attach the video cam mount to your dog's collar:  Open the mount by pushing the button in the direction shown by the arrow.
  • Page 19: Recording Continuously

    Fitting the video cam to the EYENIMAL 3/ Angle the video cam as required ® When the video cam is fitted on the dog's neck or on the EYENIMAL cap, remember to adjust the viewing angle by rotating the video cam mount upwards or downwards.
  • Page 20: Recording When Movement Is Detected

    To start recording, hold the on/off button on the top of the video cam in for 5 seconds. The indicator light will flash blue: the video cam is recording. To stop the recording/turn off the video cam, hold the on/off button in for 5 seconds. ●...
  • Page 21: Recording Sessions

    ● Recording sessions Videos are divided into sessions of 30 min. When the memory is full, the video cam turns itself off automatically. It is then necessary to delete all or any of the sessions to be able to free memory to record again.
  • Page 22: Share Your Videos

    Depending on the extent of the problem, you may have to return your product for service and repair. ● Warranty EYENIMAL warranty the product against all production defects for 1 year after purchase. All postage and packing charges will be the purchaser’s sole responsibility.
  • Page 23: Warranty Conditions

    ▪ If the product is found to be defective, EYENIMAL will either decide to repair or to replace it. No claim may be made against EYENIMAL, particularly in relation to incorrect use or breakdown.
  • Page 24 Antes de utilizar su cámara digital lea con cuidado las instrucciones de esta guía y guárdelas para su consulta en el futuro. Índice Características Técnicas ..................25 Contenido y descripción de la cámara Dog Videocam ..........26 Primera utilización ....................27 Carga de la cámara ....................27 Ajuste de la cámara ....................27 Grabar en modo «...
  • Page 25: Características Técnicas

    ● Características técnicas Dimensiones 84x26 mm Peso (cámara + gancho de sujeción) Estanqueidad A la inmersión 2.0 (gran velocidad) Alimentación Batería Litio-polímero de 460mAh Autonomía Hasta 150 minutos Adaptador 5V DC/500mAh Consumo <0,7W Memoria interna Memoria flash 4GO Memoria externa Mini-tarjeta SD Class4 (acepta de 2GO a 8GB) Resolución 736x480 píxeles...
  • Page 26: Contenido Y Descripción De La Cámara Dog Videocam

    ● Contenido y descripción de la cámara Dog Videocam  Contenidos - una cámara digital para mascotas - un cable USB - esta guía del usuario - un gancho de sujeción de la cámara - un tapón de metal perforado ®...
  • Page 27: Primera Utilización

    ● Primera utilización Antes de utilizar la cámara por primera vez, debe cargarla totalmente (duración de la primera carga: 8 horas). ● Carga de la cámara Para cargar el producto, la cámara debe estar obligatoriamente fuera de servicio. Para cargar la batería, proceda de la siguiente manera: ...
  • Page 28 2/ Fijar el gancho de sujeción de la cámara en una correa o en la gorra ® EYENIMAL Para fijar el gancho de sujeción de la cámara en el collar del perro, proceda del siguiente modo:  Abra el gancho de sujeción empujando el botón en el sentido indicado por la flecha.
  • Page 29 3/ Orientar el ángulo de visión de la cámara Una vez que haya fijado la cámara al cuello del perro o a la gorra EYENIMAL®, piense en ajustar el ángulo de visión girando el gancho de sujeción de la cámara hacia arriba o hacia abajo.
  • Page 30: Grabar En Modo « Continuo

    ● Grabar en modo « Continuo » El modo “Continuo” permite grabar de forma ininterrumpida. Para seleccionar este modo, coloque el selector de modo en la posición 1 (véanse los esquemas § Presentación). Para empezar la grabación, pulse durante 5 segundos el botón de encendido/apagado ubicado en la parte superior de la cámara.
  • Page 31: Sesiones De Grabación

    Fig. 10 Fig. 11 Tapón de metal para Tapón de metal garantizar la perforado para grabar estanqueidad los sonidos El tapón de metal perforado permite grabar los sonidos mientras que la cámara graba, pero no garantiza la estanqueidad de la cámara. La cámara quedará...
  • Page 32: Compartir Vídeos

    ● Compartir vídeos Comparta los mejores videos de su gato o su perro con miles de personas en el mundo. Publique su vídeo en la página video de www.eyenimal.com Derecho a la imagen y al respeto de la vida privada: La publicación de imágenes o vídeos en Internet sin el acuerdo previo y escrito de...
  • Page 33: Solución De Problemas

    ● Garantía EYENIMAL garantiza el producto contra todos los defectos de fabricación durante 1 año tras la compra. Todos los costes de franqueo y embalaje correrán únicamente a cuenta del comprador. ● Condiciones de la garantía La garantía será...
  • Page 34: Recogida Y Reciclaje De Su Equipo Al Final De Su Vida Útil

    Adoptando este comportamiento, hará un gesto con el medio ambiente, contribuyendo así a la preservación de los recursos naturales y a la protección de la salud humana. contact@eyenimal.com www.eyenimal.com...
  • Page 35 Sie sie auf, um sich später darauf beziehen zu können. Inhalt Technische Spezifikationen ..................36 Bestandteile und Beschreibung der Dog Videocam für Tiere ........37 Erste Inbetriebnahme .................... 38 Aufladen der Batterie ..................... 38 Justierung der Kamera ................... 38 Endlos-Aufnahme ....................
  • Page 36: Technische Spezifikationen

    ● Technische Spezifikationen Maße 84x26 mm Gewicht (Kamera + Befestigung) Dichtigkeit Gegen Eintauchen 2.0 (Hochgeschwindigkeit) Spannungsversorgung Li-Polymer-Akku 460mAh Autonomie Bis zu 150 Minuten Netzteil 5V DC/500mAh Verbrauch <0.7W Interner Speicher Flash-Speicher 4GB Externer Speicher Mini SD Card Class4 (unterstützt 2GB bis 8GB) Auflösung 736x480 Pixel Video-Format...
  • Page 37: Bestandteile Und Beschreibung Der Dog Videocam Für Tiere

    ● Bestandteile und Beschreibung der Dog Videocam für Tiere  Bestandteile - Eine Digitalkamera für Tiere - USB-Kabel - Diese Gebrauchsanleitung - Ein Kamerabefestigung - Ein Deckel aus perforiertem Metall ® - Eine Kappe EYENIMAL  Beschreibung Start/ Stopp Objektiv...
  • Page 38: Erste Inbetriebnahme

    ● Erste Inbetriebnahme Vor dem ersten Gebrauch der Videokamera muss die Batterie mindestens 8 Stunden lang geladen werden. ● Aufladen der Batterie Bevor Sie mit dem Aufladen der Kamera beginnen, muss diese unbedingt ausgeschaltet sein. Zum Aufladen der Kamera, gehen Sie bitte wie folgt vor: ...
  • Page 39 2/ Befestigen der Kamerabefestigung an einem Riemen oder an der Kappe ® EYENIMAL Zum Befestigen der Kamera am Halsband des Hundes, gehen Sie bitte wie folgt vor:  Öffnen Sie die Befestigung, indem Sie den Knopf in Pfeilrichtung drücken. Abb. 3 ...
  • Page 40 Befestigen der Kamerabefestigung an der Kappe EYENIMAL 3/ Ausrichten des Sichtwinkels der Kamera ® Nachdem Sie die Kamera am Hals des Hundes oder auf der Kappe EYENIMAL befestigt haben, achten Sie darauf, den Sichtwinkel einzustellen, indem Sie die Befestigung der Kamera nach oben oder nach unten drehen.
  • Page 41: Endlos-Aufnahme

    ● Endlos-Aufnahme Im Endlos-Aufnahmemodus wird ununterbrochen aufgenommen. Um diesen Modus auszuwählen, stellen Sie den Modus-Auswahlschalter auf die Position 1 (siehe Abbildungen im Abschnitt „Beschreibung“). Zum Starten der Aufnahme, drücken Sie die Start-/Stopp-Taste auf der Oberseite der Kamera 5 Sekunden lang. Die Kontrollleuchte blinkt blau: Die Kamera nimmt auf. Zum Beenden der Aufnahme bzw.
  • Page 42: Aufnahmen

    Abb. 10 Abb. 11 Deckel aus Metalldeckel perforiertem Metall Der Deckel aus perforiertem Metall erlaubt die Aufnahme des Tons, während die Kamera aufnimmt, aber er kann die Dichtigkeit der Kamera nicht mehr sicherstellen. Die Kamera wird irreversibel beschädigt, wenn sie in Wasser getaucht wird, und der Garantieanspruch erlischt.
  • Page 43: Einstellen Der Zeitzone Und Des Datums Der Videos

    > Neu > Textdokument Es ist wichtig, dass die Datei im Ordner „Wechseldatenträger (X:)“ erstellt wird, und nicht im Ordner „EYENIMAL“. 3. Benennen Sie das neue „Textdokument“ in „Setdate“ um. 4. Öffnen Sie das Dokument „Setdate“. Speichern Sie das Datum und die lokale Uhrzeit in folgender Form: Beispielsweise muss 12:09:01, am 03.
  • Page 44: Fehlerbehebung

    Besuche www.eyenimal.com für die Kundenbetreuung. ● Garantie EYENIMAL garantiert das Produkt für 1 Jahr ab Kaufdatum gegen alle Herstellungsfehler. Alle Versand- und Verpackungskosten gehen ausschließlich zu Lasten des Käufers. ● Garantiebedingungen Die Garantie kann nur dann gewährt werden, wenn der Kaufbeweis (Rechnung oder Kassenbeleg) dem Händler oder der Firma EYENIMAL vorliegt.
  • Page 45: Registrieren Ihres Produktes

    ● Registrieren Ihres Produktes Ihr Produkt kann auf unserer Website unter www.eyenimal.com registriert werden. ● Entsorgung und Recycling des Geräts nach Ende der Lebensdauer Dieses Gerät entspricht der EU-Richtlinie 2002/96/EC. Die durchgestrichene Abfalltonne , die auf diesem Gerät abgebildet ist, bedeutet, dass dieses Produkt nach dem Ende seiner Betriebszeit getrennt von den Haushaltsabfällen...
  • Page 46 Prima di utilizzare la videocamera digitale leggere attentamente le istruzioni contenute in questo manuale e conservalo per riferimenti futuri. Indice Specifiche tecniche ....................47 Contenuto e descrizione della Dog Videocam............. 48 Primo utilizzo ......................49 Ricarica della batteria .................... 49 Posizionamento della camera .................. 49 Registrare in modalità...
  • Page 47: Specifiche Tecniche

    ● Specifiche tecniche Dimensioni 84x26 mm Peso (videocamera + attacco) 63 g Impermeabilità All’immersione 2.0 (alta velocità) Alimentazione Batteria Li-polimero 460mAh Autonomia Fino a 150 minuti Adattatore 5V DC/500mAh Consumo <0.7W Memoria interna Memoria flash 4 Gb Memoria esterna Class4 Mini SD Card (supporta da 2Gb a 8GB) Risoluzione 736x480 Pixel Formato video...
  • Page 48: Contenuto E Descrizione Della Dog Videocam

    ● Contenuto e descrizione della Dog Videocam  Contenuto - videocamera digitale per animali domestici - cavo USB - Manuale d’uso - un attacco videocamera - un tappo in metallo forato ® - un berretto EYENIMAL  Descrizione Accendere e spegnere...
  • Page 49: Primo Utilizzo

    ● Primo utilizzo Prima di usare la camera per la prima volta, è necessario ricaricare completamente la batteria (durata della prima ricarica: 8 ore). ● Ricarica della batteria Prima di procedere alla ricarica del prodotto, assicuratevi che sia spento. Per ricaricare la batteria del collare procedere nel modo seguente: Svitare il tappo in metallo situato sul retro della videocamera.
  • Page 50 ® 2/ Fissare l’attacco della videocamera su una cinghia o sul berretto EYENIMAL Per fissare l’attacco della videocamera sul collare del cane, procedere nel modo seguente:  Aprire l’attacco spingendo il bottone nel senso indicato dalla freccia. Fig. 3 Aprire l’attacco ...
  • Page 51 Fissare l’attacco della videocamera sul berretto EYENIMAL 3/ Orientare l’angolo di ripresa della videocamera ® Una volta fissata la videocamera al collo del cane o sul berretto EYENIMAL , è necessario regolare l’angolo di ripresa girando l’attacco della videocamera verso l’alto o verso il basso.
  • Page 52: Registrare In Modalità "Continua

    ● Registrare in modalità “Continua” La modalità “Continua” permette di filmare ininterrottamente. Per selezionare questa modalità, posizionare il selettore di modalità sulla posizione 1 (cfr. schemi § Presentazione). Per avviare la registrazione, premere per 5 secondi il tasto per accendere/spegnere situato sulla parte superiore della videocamera.
  • Page 53: Sessioni Di Registrazioni

    Fig. 10 Fig. 11 Tappo impermeabile Tappo forato Il tappo in metallo forato permette di registrare i suoni mentre la videocamera filmando assicura più l'impermeabilità della videocamera. La videocamera sarà danneggiata in modo irreversibile se è immersa nell’acqua e non sarà coperta da garanzia. ●...
  • Page 54: Impostare Il Fuso Orario E La Data Dei Video

    ● Condividere i propri video Condividete i migliori video del vostro gatto o cane con migliaia di persone in tutto il mondo. Caricate il video sulla www.eyenimal.com Diritto all’immagine e privacy: La messa online di immagini o filmati, senza previo accordo scritto, delle persone che vi appaiono e che possono essere identificate è...
  • Page 55: Ricerca E Riparazione Di Un Guasto

    “Formatta” e spuntare la casella “Formattazione veloce” per avviare la formattazione. Se il problema persiste, contattare il distributore o contattaci www.eyenimal.com servizio clienti. ● Garanzia EYENIMAL garantisce il prodotto da qualsiasi difetto di fabbrica per 1 anno dopo l’acquisto. Tutte spese spedizione...
  • Page 56: Raccogliere E Riciclare Il Dispositivo Quando Non Funziona Più

    In caso di rottamazione, il prodotto deve essere consegnato presso un punto di raccolta adeguato per il trattamento, la valorizzazione e il riciclaggio degli scarti elettronici o riconsegnato al vostro rivenditore. In questo modo contribuite alla conservazione delle risorse naturali e alla protezione delle salute umana. contact@eyenimal.com www.eyenimal.com...
  • Page 57 Voordat u uw camera gebruikt, moet u de uitleg in deze gebruiksaanwijzing, die u voor later gebruik moet bewaren, aandachtig lezen. Inhoudsopgave Technische specificaties ..................58 Samenstelling en voorstelling van de Dog Videocam camera ........59 Eerste gebruik ...................... 60 De accu opladen....................60 De camera plaatsen en aanpassen................60 Opnemen in de modus "Continu"...
  • Page 58: Technische Specificaties

    ● Technische specificaties Afmetingen 84 x 26 mm Gewicht 63 g (camera + bevestiging) Weerstand Tegen onderdompeling 2.0 (hoge snelheid) Voeding Li-polymeeraccu van 460 mAh Autonomie Tot 150 minuten Adapter 5 V DC / 500 mAh Verbruik < 0,7 W Intern geheugen Flashgeheugen van 4 GB Extern geheugen...
  • Page 59: Samenstelling En Voorstelling Van De Dog Videocam Camera

    ● Samenstelling en voorstelling van de Dog Videocam camera  Samenstelling - een digitale camera - een USB-kabel - deze gebruiksaanwijzing - een camerabevestiging - een dop in geperforeerd metaal ® - een EYENIMAL  Voorstelling Aan-uit- knop Lens Controlelampje...
  • Page 60: Eerste Gebruik

    ● Eerste gebruik Het is absoluut noodzakelijk dat u de accu van uw EYENIMAL Dog Videocam camera vóór het 1 gebruik volledig oplaadt (duur van de 1 oplaadbeurt: 8 uur). ● De accu opladen Om uw camera te kunnen opladen, moet deze absoluut zijn uitgeschakeld.
  • Page 61 ® 2/ De bevestiging van de camera vastmaken aan een riem of aan de EYENIMAL Om de bevestiging van de camera vast te maken aan de halsband van de hond, gaat u als volgt te werk:  Open de bevestiging door in de richting van de pijl op de knop te duwen.
  • Page 62 3/ De camera in de gewenste opnamehoek richten ® Denk eraan, zodra de camera rond de hals van de hond of op de EYENIMAL pet is bevestigd, om de opnamehoek in te stellen door de bevestiging naar boven of naar beneden te draaien.
  • Page 63: Opnemen In De Modus "Continu

    ● Opnemen in de modus "Continu" Met de modus "Continu" kan er onafgebroken worden gefilmd. Zet de moduskeuzeschakelaar in stand 1, om deze modus te selecteren (cf. schema's § Voorstelling). Druk 5 seconden lang op de aan-uitknop op de bovenzijde van de camera, om de opname te starten.
  • Page 64: Opnamesessies

    Fig. 10 Fig. 11 een dop in metaal een dop in geperforeerd metaal Met de dop in geperforeerd metaal kunnen de geluiden worden opgenomen terwijl de camera filmt, maar is de dichtheid van de camera niet langer gegarandeerd. De camera zal onherstelbare schade oplopen als deze wordt ondergedompeld in water, die niet onder de garantie zal vallen.
  • Page 65: De Tijdzone En De Datum Van De Video's Instellen

    > Nieuw > Tekstdocument Het is belangrijk dat het bestand wordt aangemaakt in de map "Verwisselbare schijf (X:) ", en niet in de map "EYENIMAL". 3. Geef het nieuwe "Tekstdocument" een nieuwe naam en noem het "Setdate". 4. Open het document "Setdate". Sla de datum en het plaatselijke tijdstip op, en neem...
  • Page 66: Wanneer De Camera Slecht Functioneert

    "verwisselbare schijf (X:)", selecteer "Formatteren" en vink het vakje "Snel formatteren" aan, om het formatteren te starten. Blijft het probleem bestaan, verzend dan een e-mail naar contact@eyenimal.com of bel de klantenservice op het nummer +33 (0)1 42 74 78 66.
  • Page 67: Registratie Van Uw Product

    Foto's en tekeningen zijn niet contractueel. ● Registratie van uw product U kunt uw product registreren op onze website www.eyenimal.com ● Inzameling en recycling van uw apparaat op het einde van de levensduur Het op uw product aangebrachte pictogram betekent dat de uitrusting niet bij het huisvuil mag worden gegooid.
  • Page 68 Indice A...

Table des Matières