Télécharger Imprimer la page

Publicité

Les langues disponibles
  • FR

Les langues disponibles

  • FRANÇAIS, page 9

Liens rapides

REgistER youR PRoDuct!
www
Thank you for choosing this ARNOVA product. We hope that you will enjoy using it and that it will give you satisfaction for many
years to come. Once you unpack your ARNOVA product, we recommend that you take a few minutes to register it
http://arnovatech.com/register
(
?
NEED HELP?
On our Website: See the Frequently Asked Questions section on
Contact our Technical Support Team: Visit
Please register your product before contacting Technical Support (see Register your Product ).
UserGuide_Arnova_9G2_PN110116_book.indd 1
Ä
On the web at http://arnovatech.com/register
). This will allow you to get access to ARNOVA technical support (
http://arnovatech.com/support
As we are often updating and improving our products, your device's software may have
a slightly different appearance or modified functionality than presented in this Quick Start Guide.
http://arnovatech.com/support
http://arnovatech.com/faq
for e-mail support.
).
1
14/10/2011 16:33:52

Publicité

loading

Sommaire des Matières pour Arnova 9 G2

  • Page 1 On the web at http://arnovatech.com/register Thank you for choosing this ARNOVA product. We hope that you will enjoy using it and that it will give you satisfaction for many years to come. Once you unpack your ARNOVA product, we recommend that you take a few minutes to register it http://arnovatech.com/register...
  • Page 2 Yellow: battery charged. Micro-SD card slot Hardware Reset Micro-USB port: to connect your ARNOVA to your computer, using the included USB cable (to transfer files) Power connector USB Host port: to connect a keyboard, a mouse or a mass storage USB device.
  • Page 3 Connect the supplied power cable to the ARNOVA Power connector and to a wall outlet. The ARNOVA device will turn on and start charging. The Power indicator light is red while the battery is charging. It will turn yellow when the battery is fully charged.
  • Page 4 Wifi NEtWoRk For this procedure to work, you need to be in a WiFi zone that will allow you to connect to it. Every time the ARNOVA is in range of a network that you have already configured once, it will attempt to make a connection.
  • Page 5 Your ARNOVA device is equipped with a capacitive touchscreen. Use your finger pulp to navigate. Home Screen Settings shortcut These are the default Android™ Web Browser EMail shortcuts ( Web browser shortcut etc.). Tap on an icon to open the corresponding application.
  • Page 6 Applications tab, on the right side of the screen, turns into a recycle bin) and release your finger. Adding more applications with APPSLIB : With the ARNOVA connected to the Internet, tap on the AppsLib icon . This online library of free and purchasable applications has thousands of fun games and useful applications to download and use.
  • Page 7 PLayiNg muL timEDia fiLEs From the Home screen, tap on the video, audio or photo icon. The ARNOVA will display a list of files or folders corresponding to the selected category. Tap on an item to start playing it. Only in Video and Photo modes: to display/hide the on-screen controls, tap anywhere on the screen.
  • Page 8 Once all your file transfers are finished, close Windows® Explorer and any other program that may have read or written to the ARNOVA. Click on the ‘safely remove’ icon in the system tray, next to the clock. You can now unplug the USB cable.
  • Page 9 Sur Internet : http://arnovatech.com/register Merci d’avoir choisi ce produit ARNOVA. Nous espérons que vous aurez plaisir à l’utiliser et qu’il vous donnera satisfaction pendant de nombreuses années. Après avoir déballé votre produit ARNOVA, nous vous conseillons de prendre quelques minutes pour l’enregistrer http://arnovatech.com/register...
  • Page 10 Emplacement pour cartes Micro-SD Réinitialisation de l’appareil. Port micro-USB : permet de connecter votre ARNOVA à un ordinateur, à l’aide du câble USB fourni (pour transférer des fichiers) Connecteur d’alimentation Port USB hôte : permet de connecter un clavier, une souris ou une clé USB.
  • Page 11 Branchez le câble d’alimentation fourni sur le connecteur d’alimentation de l’ARNOVA et sur une prise secteur. Votre ARNOVA s’allume et commence à se charger. Le témoin de charge est rouge lorsque la batterie est en charge. Il est jaune lorsque la batterie est complètement chargée.
  • Page 12 Pour suivre cette procédure, vous devez vous situer dans une zone WiFi vous permettant de vous connecter. Chaque fois que l’ARNOVA détectera un réseau que vous avez déjà configuré, il tentera de s’y connecter. Pour configurer un nouveau réseau WiFi, allez sur l’écran d’accueil, appuyez sur Paramètres...
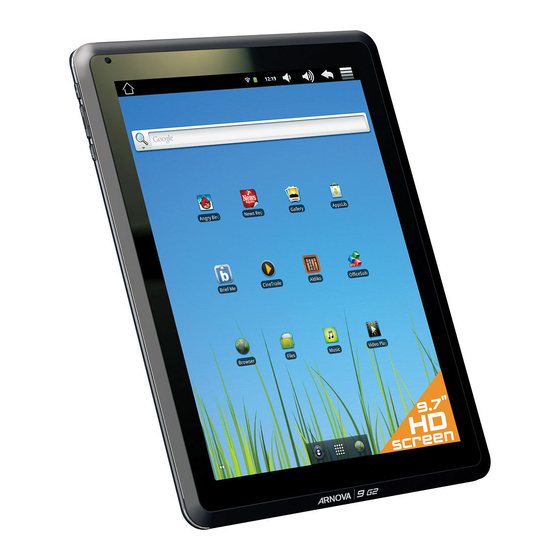
  • Page 13 L’iNtERfacE DE L’aRNova Votre ARNOVA est équipé d’un écran tactile capacitif. Utiliser la pulpe de votre doigt pour naviguer. Ecran d’accueil Raccourci Paramètres Voici les raccourcis Android™ Navigateur Web par défaut ( Raccourci Navigateur Web E-mail , etc.). Appuyez sur une icône pour ouvrir l’application...
  • Page 14 Applications , sur la droite, se transforme en corbeille lorsque vous maintenez un élément appuyé) et relâchez votre doigt. Ajouter d’autres d’applications avec APPSLIB : Connectez votre ARNOVA à un réseau WiFi, puis appuyez sur l’icône AppsLib . Ce portail de téléchargement vous propose des milliers d’applications gratuites et payantes: jeux, outils pratiques.
  • Page 15 LEctuRE DE ficHiERs muL timéDia Sur l’écran d’accueil, appuyez sur l’icône vidéo, audio ou photo. L’ARNOVA affiche la liste de fichiers/dossiers correspondant à la catégorie sélectionnée. Appuyez sur un élément pour l’ouvrir. Uniquement dans les modes Vidéo et Photo : pour afficher/masquer les options disponibles, appuyez n’importe où sur l’écran.
  • Page 16 Une fois que tous les transferts de fichiers sont terminés, fermez Windows Media® Player ou tout autre programme susceptible d’utiliser l’ARNOVA. Cliquez ensuite sur l’icône de retrait du périphérique en toute sécurité dans la barre des tâches, à côté de l’horloge. Vous pouvez à présent déconnecter le câble USB.
  • Page 17 ÄIm Internet unter http://arnovatech.com/register Vielen Dank, dass Sie sich für dieses Produkt von ARNOVA entschieden haben. Wir hoffen, Sie werden viel Freude daran haben und dass es Ihnen für viele Jahre zuverlässige Dienste leisten wird. Nachdem Sie Ihr ARNOVA-Produkt ausgepackt haben, empfehlen wir Ihnen, sich ein paar Minuten Zeit zu nehmen, und es zu registrieren ( http://arnovatech.com/register...
  • Page 18 Ladeanzeige: Rote Anzeige: Akku wird geladen / Gelbe Anzeige: Akku geladen microSD Karten Slot Hardware-Reset Micro USB Port: Um Ihren ARNOVA mit Ihrem Computer zu verbinden, verwenden Sie das mitgelieferte USB Kabel (um Dateien zu übertragen). Stromanschluß USB Host Port : Zur Verwendung einer Tastatur, einer Maus oder ein USB-Stick EIN/AUS Taste: Zum Ein-/Ausschalten des Geräts.
  • Page 19 Leistungsanzeige rot. Diese wechselt zu Gelb, sobald der Akku vollständig geladen ist. Installationsassistent Wenn Sie Ihren ARNOVA das erste Mal in Betrieb nehmen, leitet Sie der Installationsassistent durch einige Bildschirme, um Ihnen dabei zu helfen, die grundlegenden Einstellungen vorzunehmen. Sprache, Land, Uhrzeit usw.
  • Page 20 Wifi-NEtzWERkvERBiNDuNg Dazu müssen Sie sich in Reichweite eines WiFi-Netzes befinden. Der ARNOVA wird eine Verbindung mit einem der bereits konfigurierten Netzwerke herstellen. Einstellungen Um ein neues WiFi Netzwerk einzurichten, tippen Sie auf dem Desktop auf Einstellungen Drahtlos & Netzwerke Unter wählen Sie...
  • Page 21 DiE aRNova BENutzERoBERfLÄcHE Ihr ARNOVA-Gerät ist mit einem kapazitiven touchscreen ausgerüstet. Die Bedienung erfolgt über die Fingerspitze. Hauptfenster Web-Browser Shortcut Dies sind Desktop-Verküpfungen Web-Browser von Android™ ( Mail , usw.). Tippen Sie auf ein Icon, Einstellungen Shortcut um die entsprechende Anwendung zu öffnen.
  • Page 22 Mülleimer (dieser erscheint auf der rechten Seite des Displays) anstatt des Applikations -Tab. Applikationen hinzufügen - APPSLIB: Wenn Sie Ihren ARNOVA mit dem Internet verbunden haben, tippen Sie auf das AppsLib Ikon . Diese Onlinebibliothek bietet Ihnen tausende zum Teil kostenlose Apps wie Unterhaltung, Spiele und weitere nützliche Anwendungen zum herun- terladen und verwenden.
  • Page 23 Tippen Sie auf der Startseite auf die icons Video, Audio oder Foto. Der ARNOVA zeigt nun eine Liste von Dateien oder Ordern an, je nach gewählter Kategorie. Tippen Sie auf eine Datei, um diese abzuspielen. Nur in den Modi Video und Foto: Um Bildschirmsteuerungen ein- oder auszublenden, tippen Sie auf eine beliebige Stelle im Bildschirm.
  • Page 24 ÜBERtRagEN voN mEDiaDatEiEN Verbinden Sie Ihren ARNOVA mit dem Computer, mit Hilfe des mitgeliefertem USB-Kabels. Daraufhin schaltet sich der ARNOVA ein. Innerhalb weniger Sekunden erscheint der ARNOVA als Symbol auf Ihrem Computer. Sie können Ihre Media-Dateien durch Kopieren/Einfügen in die jeweiligen Ordner auf Ihren ARNOVA entweder mit dem Windows®...
  • Page 25 ÄEn Internet en http://arnovatech.com/ register Gracias por haber elegido este producto ARNOVA. Esperamos que sea de su total agrado y lo pueda disfrutar durante muchos años. http://arnovatech.com/ Una vez desempaquetado su producto ARNOVA, dedique unos pocos minutos de su tiempo para registrarlo ( register http://arnovatech.com/support...
  • Page 26 Toma de auriculares Indicador de carga Rojo: batería cargando / Amarillo: batería cargada Ranura para tarjetas micro SD Restablecimiento del equipo Puerto micro-USB: para conectar el ARNOVA a un ordenador, mediante el cable USB incluido (para transferir archivos). está Conector de alimentación Puerto host USB: para conectar un teclado, un ratón o un dispositivo de...
  • Page 27 Conecte el cable de alimentación suministrado al conector de alimentación del ARNOVA y a una toma eléctrica de pared. El ARNOVA se encenderá y empezará a cargarse. El indicador de carga es de color rojo cuando la batería se está cargando. Es de color amarillo cuando la batería está...
  • Page 28 . Así, el ARNOVA intentará establecer una conexión al punto de acceso WiFi con los parámetros de red introducidos. * Con respecto a los puntos de acceso WiFi gratuitos, no es necesario introducir ninguna información especial. En las redes protegidas, necesitará o bien una clave (serie de caracteres alfanuméricos) de tipo WEP, WPA o WPA2.
  • Page 29 La iNtERfaz DEL aRNova El dispositivo ARNOVA está equipado con una pantalla táctil capacitiva. Utilizar la pulpa de los dedos. Pantalla principal Icono Ajustes Estos son los accesos directos Android™ predeterminados Icono Navegador web Navegador web EMail , etc.). Dé...
  • Page 30 Agregar más aplicaciones - APPSLIB: Conecte el ARNOVA Internet, a continuación, pulse el icono de AppsLib. Esta biblioteca en línea de aplicaciones gratis y adquiribles, tiene miles de juegos y aplicaciones útiles para descargar y utilizar.
  • Page 31 REPRoDuccióN DE aRcHivos muL timEDia En la pantalla principal, pulse el icono de vídeo, audio o fotos. El ARNOVA mostrará una lista de archivos o carpetas correspondientes a la categoría seleccionada. Pinche en un elemento para empezar a reproducirlo. Sólo en los modos Foto y Vídeo: para mostrar/ocultar los controles en pantalla, pinche en cualquier lugar de la pantalla.
  • Page 32 Una vez finalizadas todas las transferencias de archivos, cierre el Explorador de Windows® y cualquier otro programa que pueda haber leído o escrito en el ARNOVA. Haga clic en el icono “Quitar hardware con seguridad” de la bandeja del siste- ma, junto al reloj.
  • Page 33 Grazie per aver scelto questo prodotto ARNOVA. ARNOVA vi augura di poter sfruttare al massimo le possibilità offerte dal prodotto per molti anni. Dopo aver aperto il vostro prodotto ARNOVA, vi suggeriamo di registrarlo; ci vorranno solo pochi minuti http://arnovatech.com/register...
  • Page 34 Indicatore della ricarica Rosso: batteria in carica / Giallo: batteria caricata. Slot per schede micro SD Ripristino hardware Porta micro USB: per collegare ARNOVA al vostro PC, utilizzare il cavo USB (anche per trasferire files). Connettore di alimentazione Porta USB host: per connettere una tastiera, un mouse o una periferica USB di archiviazione di massa come.
  • Page 35 Collegare il cavo di alimentazione fornito al connettore di alimentazione del dispositivo ARNOVA e a una presa a muro. Il dispositivo ARNOVA si accende e viene avviata la ricarica. L’indicatore della carica è rosso quando la batteria è in ricarica.
  • Page 36 REtE WiRELEss Per procedere è necessario trovarsi in una zona WIFI che permetta la connessione. Ogni qualvolta ARNOVA si trova in un raggio di rete che avete già configurato una volta, cercherà una connessione. Per configurare una nuova rete WIFI, andare allo schermo principale,...
  • Page 37 Il dispositivo ARNOVA è dotato di uno capacitivo schermo a sfioramento. Utilizzando la polpa delle dita. Schermata Home [Pagina iniziale] Icona Impostazioni Queste sono le scorciatoie An- Web Browser EMail droid™ ( , ecc.) Icona Web Browser - sfiorare un’icona per aprire l’applicazione corrispondente.
  • Page 38 , sulla parte destra dello schermo, si trasforma in un cestino) quindi rilasciare il dito. Aggiungere altre applicazioni - APPSLIB: connettete il vostro ARNOVA a Internet, poi premete cull’icona AppsLib . Questo portale vi propone di scaricare, gratuitamente e a pagamento, diverse migliaia di applicazioni, come quelle relative a giochi divertenti o a servizi più...
  • Page 39 LEttuRa DEi fiLEs muL timEDia Sulllo schermo tattile, premete sull’icona video, audio o foto. Verrà visualizzato un elenco di fi le o cartelle corrispondenti alla categoria selezionata. Toccare un elemento per riprodurlo. Solo nelle modalità Video e Photo [Foto]: per visualizzare/nascondere i comandi sullo schermo, toccare un’area qualsiasi dello schermo.
  • Page 40 Windows® Explorer (o Finder su Mac®), oppure usando Windows Media® Player. Utilizzare Windows Media Player® (sche- Sync [Sincronizzazione]) per sincronizzare la musica, le foto e i video desiderati nel dispositivo ARNOVA. Per ulteriori informazioni, consultare la Guida di Windows Media Player®.
  • Page 41 Op het internet op http://arnovatech.com/register Ä Dank u voor het kiezen van dit ARNOVA-product. Wij hopen dat u er nog jarenlang plezier aan zult mogen beleven. Wij raden u aan om uw ARNOVA-product te registreren zodra u het uit de verpakking hebt gehaald ( http://arnovatech.com/register...
  • Page 42 Laadindicator Rood: batterij wordt geladen / Geel: batterij is opgeladen. Slot voor micro SD-kaarten Het toestel resetten Micro-USB-poort: met de bijgesloten USB-kabel kunt u uw ARNOVA met uw computer verbinden (om bestanden over te brengen). Stroomaansluiting USB Host-poort: Voor het aansluiten van een toetsenbord, een muis of een USB massa-opslag apparaat.
  • Page 43 Het wordt geel zodra de batterij volledig is opgeladen. Installatiewizard De eerste keer dat u uw ARNOVA opstart, zal de installatiewizard u door een paar schermen leiden om u te helpen met de voornaamste instellingen: taal, land, tijd, enz.
  • Page 44 Wifi-NEtWERkvERBiNDiNg Hiervoor dient u zich in een WiFi-zone te bevinden, zodat u verbinding kunt maken. Telkens dat uw ARNOVA zich in een zone bevindt met een netwerk dat u al geconfigureerd hebt, zal het proberen om hier verbinding mee te maken.
  • Page 45 DE aRNova-iNtERfacE Uw ARNOVA-apparaat is uitgerust met een capacitieve aanraakscherm. Gebruik de vinger pulp. Startscherm Snelkoppeling Instellingen Dit zijn de standaard Android™- snelkoppelingen ( Web Browser EMail , enz.). Druk op een pic- Snelkoppeling Web Browser togram om de betreffende applicatie te openen.
  • Page 46 Applicaties , aan de rechterkant van het scherm, in een prullenbak) en laat u het item tot slot los. Het toevoegen van meer toepassingen - APPSLIB: Met de ARNOVA verbonden met het internet, druk op het pictogram AppsLib . Deze online bibliotheek van gratis en betaalde toepassingen heeft duizenden leuke spelletjes en nuttige toepassingen om te downloaden en te gebruiken.
  • Page 47 Tik in het Beginscherm de video-, audio- of fotopictogram aan. De ARNOVA zal een lijst van bestanden of mappen weergeven die overeenstemmen met de geselecteerde categorie. Tik een item aan om het af te spelen. Alleen in de modus Video en Foto: tik om het even welke plek op het scherm aan om de bedieningsknoppen op het scherm weer te geven of te verbergen.
  • Page 48 De ARNOVA zal worden ingeschakeld. Binnen enkele seconden verschijnt de ARNOVA als een pictogram op uw compu- ter. U kunt uw mediabestanden op de ARNOVA plaatsen door ze ofwel in de betreffende map te kopiëren/met behulp van Windows® Verkenner (of met Zoeken op een Mac®) ofwel met behulp van Windows Media® Player. Gebruik Windows Me- Sync dia Player®...
  • Page 49 Ä Obrigado por escolher este produto ARNOVA. Esperamos que você goste de usá-lo e que ele venha a lhe fornecer satisfação por mui- tos anos futuros. Uma vez que você desembala o seu produto ARNOVA, recomendamos que você leve alguns minutos para registrá-lo (http://arnovatech.com/register).
  • Page 50 Amarelo: bateria carregada. Slot para cartão micro SD Repor hardware Porta Micro-USB: para conectar o ARNOVA no computador, usando o cabo USB incluído (para transferir ficheiros). Conector de alimentação Porta USB host: Para conectar um teclado, um mouse ou um Dispositivo USB de armazenamento em massa.
  • Page 51 Conecte o cabo de alimentação fornecido ao conector de alimentação ARNOVA e para uma tomada de parede. O dispositivo ARNOVA vai ligar e começar a cobrar. A luz indicadora de energia é vermelha, enquanto a bateria está carregando. Ele ficará...
  • Page 52 Para este procedimento de trabalho, você precisa estar em uma área de WiFi que permitirá que você se conecte a ela. To- das as vezes que ARNOVA estiver no alcance de uma rede que você já configurou uma vez, ela tentará fazer uma conexão.
  • Page 53 O dispositivo ARNOVA vem equipado com um ecrã táctil resistente dual touch. Utilize a ponta do dedo para navegar. Ecrã inicial Atalho para Definições Estes são os atalhos Android™ por defeito (Navegador da Atalho para Navegador da Web Web, E-Mail, etc.).
  • Page 54 - Para remover um item na tela Inicial, segure o seu dedo sobre ele, arraste-o até a lixeira (enquanto você segura um item, a guia Aplicações, no lado direito da tela, gire até a lixeira) e solte o seu dedo. Adicionando mais aplicações com APPSLIB: Com o ARNOVA conectado à Internet, toque no ícone AppsLib .
  • Page 55 REPRoDuziR ficHEiRos muL timéDia No ecrã inicial, toque no ícone de vídeo, áudio ou fotografia. O ARNOVA apresentará uma lista de arquivos ou pastas correspondentes à categoria seleccionada. Toque num item para começar a reproduzi-lo. Apenas nos modos Vídeo e Fotografia: para apresentar/ocultar os controlos no ecrã, toque em qualquer sítio no ecrã.
  • Page 56 Depois de terminar todas as transferências de ficheiros, feche o Windows® Explorer, e qualquer outro programa que possa ter sido lido ou escrito para o ARNOVA. Clique no ícone “remover dispositivo com segurança” na bandeja do sistema, ao lado do relógio. Depois, pode desligar o cabo USB.
  • Page 57 National restrictions This device is intended for home and office use in all EU countries (and other countries following the EU directive 1999/5/EC) without any limitation except for the countries mentioned below: Country Restriction Reason/remark Bulgaria None General authorization required for outdoor use and public service France Outdoor use lim-...

Ce manuel est également adapté pour:

10bg2