Publicité
Les langues disponibles
Les langues disponibles
Liens rapides
Gebruiksaanwijzing
NL
Instruction Manual
GB
Bedienungsanleitung
du
Mode d'emploi
fr
Manual de instrucciones
es
Manual de Instruções
pt
Instrukcje użytkowania
pL
Istruzioni per l'uso
i
Stereo powerpack
C D
/
M P 3
/
U S B
Hf-1254
Publicité

Manuels Connexes pour AudioSonic HF-1254

Sommaire des Matières pour AudioSonic HF-1254
- Page 1 Gebruiksaanwijzing Instruction Manual Bedienungsanleitung Mode d’emploi Manual de instrucciones Manual de Instruções Instrukcje użytkowania Istruzioni per l’uso Stereo powerpack Hf-1254 M P 3 U S B...
- Page 3 Gebruiksaanwijzing Geachte klant, • O vermatige geluidsdruk van oortelefoon of hoofdtelefoon kan gehoorbeschadiging veroorzaken. Gefeliciteerd met de aankoop van dit kwaliteitsproduct. • Verwijder de stekker uit het stopcontact om het apparaat volledig uit te schakelen. Lees de gebruiksaanwijzing zorgvuldig door zodat u optimaal gebruik kunt maken van • K ans op explosiegevaar als de batterij onjuist wordt vervangen. dit apparaat. In deze handleiding vindt u alle benodigde aanwijzingen en adviezen Vervang de batterij uitsluitend door hetzelfde of gelijkwaardig type voor het gebruik.
- Page 4 Gebruiksaanwijzing VeIlIGHeIdSINStRUCtIeS • O NDERHOUDSVEREISTEN - Het apparaat moet worden onderhouden door gekwalificeerd personen wanneer: • L EES DE INSTRUCTIES - Alle veiligheids- en bedieningsinstructies moeten worden a. Het netsnoer of de stekker beschadigd is. gelezen voordat het apparaat wordt bediend. b. er vloeistoffen in de behuizing zijn gemorst. • B EWAAR DE INSTRUCTIES - De veiligheids- en bedieningsinstructies moeten c. Het apparaat is blootgesteld aan regen. worden bewaard om eventueel later te kunnen raadplegen. d. Het apparaat is gevallen, of het omhulsel is beschadigd. • V OLG DE WAARSCHUWINGEN - Alle waarschuwingen op het apparaat en in e. Het apparaat niet normaal lijkt te functioneren. de gebruiksaanwijzing moeten in acht worden genomen. • O NDERHOUD - Meer dan het onderhoud wat wordt aangegeven in • V OLG DE INSTRUCTIES - Alle bedieningsinstructies moeten worden opgevolgd. de gebruiksaanwijzing kan niet worden uitgevoerd door de consument. • W ATER EN VOCHT - Het apparaat mag niet worden gebruikt in de buurt van water, Al het andere onderhoud moet worden overgelaten aan gekwalificeerd personeel.
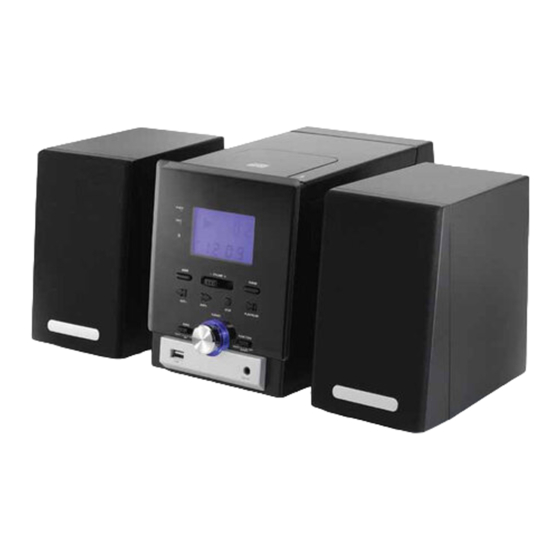
- Page 5 Gebruiksaanwijzing ONdeRdeleNBeSCHRIjVING 1. LCD DISPLAy 1 2. PLAy / PAUSE 2. POWER INDICATIE LAMPJE 1 3. STOP 3. fM ST. INDICATOR 1 4. fUNCTIESCHAKELAAR 4. VOLUMEREGELING 15. AUX IN 5. MODE 1 6. fM-ANTENNE 6. SKIP - 1 7. POWER ON / Off 7. SKIP + 1 8. LUIDSPREKERAANSLUITINGEN (L / R) 8. BAND SCHAKELAAR 1 9. TIJD INSTELLEN 9. USB POORT 2 0. UUR 1 0. fREqUENTIE AfSTEMKNOP...
- Page 6 Gebruiksaanwijzing BAtteRIj INStAllAtIe RAdIO BedIeNING Algemene werking Plaats "cel" formaat batterijen in het batterijvak. Zorg ervoor dat de batterijen correct zijn geplaatst om schade aan de afstandsbediening te vermijden. • Stel de functieschakelaar in op de radio modus. Verwijder altijd de batterijen wanneer de afstandsbediening voor een lange periode • S electeer de gewenste band met behulp van de "BAND"-schakelaar. niet gebruikt zal worden, want dit zal leiden tot lekkage van de batterijen en • S tel radio frequentie op de gewenste zender door middel van de frequentie vervolgens schade aan uw toestel. afstelknop. • R egel met de volume regelaar het gewenste volume niveau. fM / fM-stereo • Z et de "BAND"-schakelaar naar de fM-modus voor mono-ontvangst. • Z et de "BAND"-schakelaar naar fM ST. modus voor fM-stereo-ontvangst. Schuif het afdekplaatje open en installeer de batterij met de polen in de richting die wordt aangegeven op het apparaat. De stereo-indicator licht op. Opmerkingen: Voor een betere ontvangst • H et apparaat moet worden geactiveerd met de power knop op het apparaat alvorens u de afstandsbediening kunt gebruiken.
- Page 7 Gebruiksaanwijzing Afspelen Mode Druk op de "MODE" knop voor of tijdens het afspelen van CD / MP3 disc, • S tel de "fUNCTIE"-schakelaar naar "CD / MP3"-modus. elke druk verandert de functie als volgt: • O pen de CD lade en plaats een CD / MP3 CD met het label naar boven in de CD lade. • S luit de CD lade. 1 - REPEAT 1 (herhaal 1 nummer) • H et apparaat zal gaan draaien als de CD / MP3 CD er in zit. 2 - REPEAT ALBUM (* Alleen voor MP3) Voor CD - Totaal aantal tracks wordt gelezen en weergegeven op het display. 3 - REPEAT ALL (herhaal complete CD) Voor MP3-disc - "MP3" verschijnt op het display. 4 - RANDOM (willekeurig) • H et afspelen start automatisch vanaf de eerste track. 5 - NORMAL PLAyBACK (normale weergave) • D ruk op de "PLAy / PAUSE" toets wanneer u tijdelijk wilt stoppen met afspelen. • D ruk op de "STOP" knop als u klaar bent. PROGRAMMeReN • T ot 20 nummers voor een cd, en 99 nummers voor een MP3 CD kan worden geprogrammeerd in een willekeurige volgorde.
- Page 8 Gebruiksaanwijzing Afspelen • P laats het USB apparaat in de USB poort. (Zorg dat er geen CD in de lade zit) • S tel de functie schakelaar naar "CD / MP3"-modus. • D ruk op de "PLAy / PAUSE" en houd deze voor een paar seconden vast om het USB-modus te betreden. • H et afspelen start automatisch vanaf het eerste nummer. • D ruk op de "STOP" knop als u klaar bent. • D ruk nogmaals op de "PLAy / PAUSE" toets, en het afspelen zal weer starten vanaf de eerste track. Programmeer, mode Het programmeren werkt hetzelfde zoals eerde beschreven bij CD / MP3. Wij verwijzen u naar CD / MP3 OPERATIE voor deze actie. OVeRIGe eIGeNSCHAPPeN Klokinstelfunctie • D ruk op de "tijdsinstelling" knop. (laat deze knop niet los tijdens tijdinstelling) • D ruk op de "UUR" knop om uren in te stellen. • D ruk op de "MINUTEN" knop om de minuten in te stellen.
- Page 9 Instruction Manual Dear customer, • T o be completely disconnect the power input, the mains plug of apparatus shall be disconnected from the mains. Congratulations and thank you for purchasing this high quality product. • D anger of explosion if battery is incorrectly replaced. Replace only with the same Please read the instruction manual carefully so that you will be able to make the best or equivalent type.
- Page 10 Instruction Manual SAfetY INStRUCtIONS • D AMAGE REqUIRING SERVICE - The appliance should be serviced by qualified service personnel when: • R EAD INSTRUCTIONS - All the safety and operating instructions should be read a. The power-supply cord or plug has been damaged. before the appliance is operated. b. Objects have fallen into, or liquid has been spilled into the appliance enclosure. • R ETAIN INSTRUCTIONS - The safety and operating instruction should be retained c. The appliance has been exposed to rain. for future reference. d. The appliance has been dropped, or the enclosure damaged. • H EED WARNINGS - All warnings on the appliance and in the operating instructions e. The appliance does not appear to operate normally. should be adhered to. • S ERVICING - The user should not attempt to service the appliance beyond that • f OLLOW INSTRUCTIONS - All operating instructions should be followed. described in the user operating instructions. All other servicing should be referred • W ATER AND MOISTURE - The appliance should not be used near water, to qualified service personnel.
- Page 11 Instruction Manual lOCAtION Of CONtROl 1. LCD DISPLAy 1 2. PLAy / PAUSE 2. POWER INDICATOR 1 3. STOP 3. fM ST. INDICATOR 1 4. fUNCTION SELECTOR 4. VOLUME CONTROL 1 5. AUX IN 5. MODE 1 6. fM ANTENNA 6. SKIP - 1 7. POWER ON / Off 7. SKIP + 1 8. SPEAKER JACKS (L / R) 8. BAND SELECTOR 1 9. TIME SET 9. USB SLOT 2 0. HOUR...
- Page 12 Instruction Manual BAtteRY INStAllAtION RAdIO OPeRAtION General operation Insert a “Cell” size batteries into the battery compartment. Be sure that the batteries are inserted damage to the remote control. Always remove the batteries when • e t the “fUNCTION” selector to “RADIO” mode. the remote control will not be used for a long period of time, as this will cause • S elect desired band by using the “BAND” selector. leakage to the batteries and subsequently damage to your set. • A djust radio frequency to your desired station by using the “TUNING” control. • A djust the “VOLUME” control to the desired level. fM / fM-stereo reception • S et the “BAND” selector to fM mode for MONO reception. • S et the “BAND” selector to fM ST. mode for fM STEREO reception. Slide out cover and install single "Cell" battery with polarities as shown. The Stereo indicator light up to show fM ST. mode.
- Page 13 Instruction Manual Playback Mode • S et the “fUNCTION” selector to “CD / MP3” mode. Press the “MODE” button before or during playing CD / MP3 disc, • O pen the CD door and place a CD / MP3 disc with the label up in each press switches the mode function as follows: the CD compartment. 1 - REPEAT 1 • C lose the CD door. 2 - REPEAT ALBUM ( *MP3 ONLy ) • f ocus search is performed if disc is inside. 3 - REPEAT ALL for CD disc - Total number of tracks is read and appears on the display. 4 - RANDOM for MP3 disc - “MP3” appears on the display. 5 - NORMAL PLAyBACK • P layback will start automatically from the first track. • A djust the “VOLUME” control to the desired level. • P ress the “PLAy / PAUSE” button again when you want to stop playback temporarily.
- Page 14 Instruction Manual Playback • P lug or slot in USB device to the port. (Make sure no disc on disc tray) • S et the “fUNCTION” selector to “CD / MP3” mode. • P ress and hold the “PLAy / PAUSE” button for a few seconds to entry USB mode. • P layback will start automatically from the first track. • P ress the “STOP” button when finished. • P ress the “PLAy / PAUSE” button again, playback will start from the first track. Program, mode The operation of PROGRAM, MODE are as the same as that of CD / MP3. Please refer to CD / MP3 OPERATION. OtHeR feAtUReS Clock setting • P ress the “TIME SET” button. (Do not release “TIME SET” button during time setting) • P ress the “HOUR” button to set hour. • P ress the “MINUTE” button to set minute.
- Page 15 Bedienungsanleitung Sehr geehrter Kunde, • D er Netzstecker des Geräts darf während des Betriebs nicht blockiert sein und muss leicht zugänglich sein. Wir gratulieren Ihnen und bedanken uns für den Kauf dieses hochwertigen Produkts. • Z um kompletten Abschalten der Stromversorgung Netzstecker ziehen. Bitte lesen Sie sorgfältig die Bedienungsanleitung, damit Sie das Gerät optimal nutzen • B eim falschen Austausch der Batterie besteht Explosionsgefahr. können.
- Page 16 Bedienungsanleitung SICHeRHeItSHINWeISe • K UNDENDIENST – Das Gerät sollte von qualifiziertem Servicepersonal gewartet werden, wenn: • A NLEITUNG LESEN – Alle Sicherheitshinweise und die gesamte a. Netzkabel oder Stecker beschädigt sind. Bedienungsanleitung sollten vor Inbetriebnahme des Geräts gelesen werden. b. G egenstände auf das Gehäuse gefallen sind oder flüssigkeit in das Gehäuse • A UfBEWAHRUNGSHINWEISE – Die Sicherheitshinweise und Bedienungsanleitung des Geräts eingedrungen ist. sollten für späteres Nachschlagen aufbewahrt werden. c. Das Gerät Regen ausgesetzt wurde. • W ARNUNGEN BEACHTEN – Alle Warnungen am Gerät und in der Bedienungsanleitung d. Das Gerät fallen gelassen oder das Gehäuse beschädigt wurde. sollten befolgt werden. e. Das Gerät nicht normal funktioniert. • A NLEITUNG BEfOLGEN – Die gesamte Bedienungsanleitung sollte befolgt werden. • W ARTUNG – Der Nutzer sollte nicht versuchen, am Gerät Wartungsarbeiten • W ASSER UND fEUCHTIGKEIT – Das Gerät darf nicht in der Nähe von Wasser, vorzunehmen, die nicht in der Bedienungsanleitung beschrieben sind.
- Page 17 Bedienungsanleitung POSItION deR BedIeNeleMeNte 1. LCD DISPLAy 1 2. WIEDERGABE / PAUSE 2. BETRIEBSANZEIGE 1 3. STOPP 3. fM ST. ANZEIGE 1 4. fUNKTIONSAUSWAHLSCHALTER 4. LAUTSTÄRKEREGLER 1 5. AUX EIN 5. MODUS 1 6. fM ANTENNE 6. ÜBERSPRINGEN - 1 7. EIN / AUSSCHALTEN 7. ÜBERSPRINGEN + 1 8. LAUTSPRECHERBUCHSEN (L / R) 8. BANDAUSWAHLSCHALTER 1 9. ZEITEINSTELLUNG 9. USB STECKPLATZ 2 0. STUNDE...
- Page 18 Bedienungsanleitung BAtteRIe INStAllIeReN RAdIOBetRIeB Allgemeine bedienung Batterien mit “Zellgröße” in das Batteriefach einlegen. Die Batterien müssen richtig eingelegt werden, um die fernbedienung nicht zu beschädigen. Die Batterien immer • D en "fUNKTIONS"-Wahlschalter auf "RADIO" Modus stellen. entfernen, wenn die fernbedienung über einen längeren Zeitraum nicht benutzt • D as gewünschte Band mit dem "BAND"-Wahlschalter auswählen. wird, weil die Batterien sonst auslaufen und das Gerät beschädigen. • D ie Radiofrequenz mit dem "ABSTIMMUNGS"-Regler auf den gewünschten Sender einstellen. • D en "LAUTSTÄRKE"-Regler auf den gewünschten Pegel einstellen. fM / fM-stereo empfang • f ür MONO Empfang den "BAND"-Wahlschalter auf fM Modus stellen. Deckel aufschieben und eine Batteriezelle laut den abgebildeten Polaritäten installieren. • f ür fM STEREO Empfang den "BAND"-Wahlschalter auf fM ST. Modus stellen. Hinweise: Die Stereoanzeige leuchtet und zeigt den fM ST. Modus an.
- Page 19 Bedienungsanleitung Wiedergabe Modus • D en "fUNKTIONS"-Wahlschalter auf "CD / MP3" Modus stellen. Vor oder während der CD / MP3 Wiedergabe die "MODUS" Taste drücken, • D ie CD Klappe öffnen und eine CD / MP3 Disc mit der Beschriftung nach oben in bei jedem Tastendruck ändert sich die Modusfunktion folgendermaßen: das CD fach legen. 1 - WIEDERHOLEN 1 • D ie CD Klappe schließen. 2 - ALBUM WIEDERHOLEN ( * NUR MP3 ) • W enn die Disc eingelegt ist, wird eine fokussierte Suche durchgeführt. 3 - ALLE WIEDERHOLEN für CD Disc – Die Gesamtanzahl der Titel wird gelesen und auf dem Display angezeigt. 4 - ZUfALLSWIEDERGABE für MP3 Disc - "MP3" wird auf dem Display angezeigt. 5 - NORMALE WIEDERGABE • D ie Wiedergabe wird automatisch ab dem ersten Titel gestartet. • D en "LAUTSTÄRKE"-Regler auf den gewünschten Pegel einstellen. • D ie "WIEDERGABE / PAUSE" Taste erneut drücken, wenn die Wiedergabe vorübergehend gestoppt werden soll.
- Page 20 Bedienungsanleitung Wiedergabe • D as USB Gerät am Port anschließen bzw. einstecken. (Sicherstellen, dass sich keine Disc in der Disc-Lade befindet) • D en "fUNKTIONS"-Wahlschalter auf "CD / MP3" Modus stellen. • D ie "WIEDERGABE / PAUSE" Taste ein paar Sekunden gedrückt halten, um den USB Modus aufzurufen. • D ie Wiedergabe wird automatisch ab dem ersten Titel gestartet. • N ach Beendigung die "STOPP" Taste drücken. • D ie "WIEDERGABE / PAUSE" Taste erneut drücken, die Wiedergabe wird ab dem ersten Titel gestartet. Programm, modus Die Bedienung von PROGRAMM, MODUS ist dieselbe wie für CD / MP3. Bitte in CD / MP3 BEDIENUNG nachschlagen. SONStIGe fUNKtIONeN Uhr einstellen • D ie "ZEIT EINSTELLEN" Taste drücken. (Während der Zeiteinstellung die "ZEIT EINSTELLEN" Taste nicht lösen) • Z um Einstellen der Stunde die "STUNDE" Taste drücken.
- Page 21 Mode d’emploi Cher client, • A ucune source de flamme nue, telle que des bougies allumées, ne doit être posée sur l’appareil. Nous vous félicitons et vous remercions pour l’achat de ce produit de qualité supérieure. • U ne attention particulière doit être portée quant à l’impact environnemental lors Veuillez lire attentivement ce manuel d’instructions afin de faire le meilleur usage possible de la mise au rebut des piles. de cet appareil.
- Page 22 Mode d’emploi • L IGNES D’ALIMENTATION - Si vous utilisez une antenne extérieure, veillez à la Cette étiquette est apposée sur l’appareil comme indiqué afin maintenir à une distance suffisante des lignes électriques. d’informer de la présence d’un composant laser. • I NTRUSION D'OBJET ET DE LIqUIDE - Prenez soin à ce qu'aucun objet ou liquide ne s'introduise dans le boîtier via les ouvertures. L'étiquette est placée à l'intérieur de l'appareil. Comme illustré ici. • A VERTISSEMENT CONCERNANT LES DÉCHARGES ÉLECTROSTATIqUES - Un Avertissement concernant les mesures supplémentaires sur l'appareil. problème au niveau du fonctionnement de l'affichage ou encore l'inactivité des L’appareil contient un laser émettant des rayons lasers dans le respect commandes peut être dû à une décharge électrostatique. Mettez l’appareil hors de la limite du produit laser de classe 1. tension et débranchez-le. Rebranchez-le après quelques secondes. • D ÉGÂTS NÉCESSITANT UNE RÉVISION - L’appareil devra être révisé par un CONSIGNeS de SeCURIte technicien qualifié lorsque : a. Le cordon d'alimentation ou la fiche est endommagé(e). • L IRE LES CONSIGNES - Toutes les consignes de sécurité et d’utilisation doivent être b. Des objets ou des liquides ont été projetés dans le boîtier de l’appareil. lues avant de faire fonctionner l’appareil. c. L'appareil a été exposé à la pluie. • C ONSERVER LES CONSIGNES - Les consignes de sécurité et d'utilisation doivent d. L’appareil a subi une chute ou que le boîtier est endommagé.
- Page 23 Mode d’emploi eMPlACeMeNt deS COMMANdeS 1. ÉCRAN LCD 1 2. LECTURE / PAUSE 2. VOyANT D’ A LIMENTATION 1 3. STOP 3. VOyANT STEREO fM 1 4. SELECTEUR DE fONCTION 4. REGLAGE DU VOLUME 1 5. ENTREE AUX 5. MODE 1 6. ANTENNE fM 6. SAUT - 1 7. MARCHE / ARRET 7. SAUT + 1 8. PRISES HAUT-PARLEUR (G / D) 8. SELECTEUR DE BANDE 1 9. REGLAGE DE L’HEURE 9. PORT USB...
- Page 24 Mode d’emploi INStAllAtION deS PIleS fONCtIONNeMeNt de lA RAdIO fonctionnement général Insérez une pile de type C dans le compartiment prévu à effet. Assurez-vous que les piles sont placées correctement pour éviter d'endommager la télécommande. • P lacez le sélecteur de "fONCTION" en mode "RADIO". Retirez toujours les piles lorsque l’appareil n’est pas utilisé pendant une longue • S électionnez la bande de votre choix en utilisant le sélecteur de "BANDE". période car celles-ci risque de fuir, et d’endommager votre appareil. • S électionnez une fréquence radio en fonction de la station désirée à l’aide de la touche "TUNING" (Syntoniseur). • R églez le volume à l'aide de la molette "VOLUME". Réception fm / fm-stereo • P lacez le sélecteur de "BANDE" en mode fM pour une réception MONO. faites glisser le couvercle et installez les piles de type à « cellule » unique en respectant les polarités comme indiqué. • P lacez le sélecteur de "BANDE" en mode fM ST pour une réception fM STEREO.
- Page 25 Mode d’emploi leCtURe Mode Appuyez sur la touche "MODE" avant ou pendant la lecture du disque CD / MP3; • P lacez le sélecteur de "fONCTION" en mode "CD/MP3". vous changez de mode à chaque fois que vous appuyez sur ce bouton comme suit : • O uvrez le clapet du lecteur et placez un disque CD / MP3 avec l’étiquette vers le haut dans le compartiment CD. 1 - REPETER 1 • f ermez le clapet du lecteur CD. 2 - REPETER ALBUM ( *MP3 SEULEMENT ) • U ne recherche de focalisation est effectuée si le disque est à l’intérieur du lecteur. 3 - REPETER TOUT Pour les disques CD - Le nombre total de plages apparaît sur l'écran. 4 - ALEATOIRE Pour les disques MP3 - "MP3" s'affiche à l'écran. 5 - LECTURE NORMALE • L a lecture débutera automatiquement à la première plage. • R églez le volume à l'aide de la molette "VOLUME". • A ppuyez sur la touche "LECTURE / PAUSE" lorsque vous souhaitez arrêter temporairement la lecture.
- Page 26 Mode d’emploi lecture • B ranchez le périphérique USB au port. (Assurez-vous qu’il n’y a aucun disque dans le tiroir à disque) • P lacez le sélecteur de "fONCTION" en mode "CD/MP3". • A ppuyez sur la touche "LECTURE / PAUSE" et maintenez-la enfoncée quelques secondes pour passer en mode USB. • L a lecture débutera automatiquement à la première plage. • A ppuyez sur la touche "STOP" lorsque la lecture est terminée. • A ppuyez à nouveau sur la touche "LECTURE / PAUSE", la lecture débutera à la première plage. Programme, mode Les fonctions PROGRAM, MODE sont identiques à celles des CD / MP3. Veuillez vous référer au fonctionnement du CD / MP3. AUtReS CARACteRIStIQUeS Réglage de l'heure • A ppuyez sur la touche "REGLAGE DE L'HEURE". (Ne relâchez pas la touche "REGLAGE DE L'HEURE" pendant le réglage de l’heure) • A ppuyez sur la touche "HEURE" pour régler les heures.
- Page 27 Manual de instrucciones Estimado cliente: • U na excesiva presión sonora en los auriculares o cascos puede provocar una pérdida auditiva. Queremos darle la enhorabuena y agradecerle el haber adquirido este producto de • E l enchufe de red de la unidad no debe tener obstrucciones o debe tener un fácil alta calidad. Lea el manual de instrucciones detenidamente para poder sacar el mayor acceso durante su uso pretendido. provecho al aparato. Este manual incluye todas las instrucciones y los consejos necesarios • P ara desconectar completamente la entrada de alimentación, el enchufe de red para utilizar, limpiar y mantener el aparato.
- Page 28 Manual de instrucciones Esta etiqueta se coloca dentro de la unidad. Como se muestra en objetos ni se rocíen líquidos en la carcasa a través de las aberturas. la ilustración. Para advertir contra medidas adicionales en la unidad. • A DVERTENCIA ESD - La pantalla no funciona correctamente o no hay ninguna El equipo contiene un láser que irradia rayos láser según el límite de reacción al manejar el control, puede deberse a una descarga electrostática. producto láser de clase 1. Apague y desenchufe el equipo. Conecte de nuevo después de unos pocos segundos. • D AÑOS qUE NECESITAN ASISTENCIA - El aparato debe ser atendido a por personal INStRUCCIONeS de SeGURIdAd cualificado de servicio cuando: a. El cable de alimentación o el enchufe se hayan dañado. • L EA LAS INSTRUCCIONES - Todas las instrucciones de seguridad y manejo deben b. Hayan caído objetos o se haya derramado líquido sobre el aparato. leerse antes de hacer funcionar el aparato. c. El aparato se haya expuesto a la lluvia. • G UARDE LAS INSTRUCCIONES -Las instrucciones de seguridad y manejo deben d. El aparato se haya caído o la carcasa dañada. guardarse para futuras consultas. e. El aparato no parece funcionar normalmente. • H AGA CASO DE LAS ADVERTENCIAS - Todas las advertencias en el aparato y en • A SISTENCIA - El usuario no debe intentar arreglar el aparato más allá de lo descrito las instrucciones de funcionamiento debe estar adheridas.
- Page 29 Manual de instrucciones POSICIÓN de lOS CONtROleS 1. PANTALLA LCD 1 2. REPRODUCCIÓN/PAUSA 2. INDICADOR DE ALIMENTACIÓN 1 3. PARADA 3. INDICADOR fM ESTÉREO 1 4. SELECTOR DE fUNCIÓN 4. CONTROL DE VOLUMEN 1 5. ENTRADA AUXILIAR 5. MODO 1 6. ANTENA fM 6. SALTO - 1 7. ON/Off (Encender/apagar) 7. SALTO + 1 8. CONECTORES DE ALTAVOZ (I/D) 8. SELECTOR DE BANDA 1 9. AJUSTE DE HORA 9. RANURA USB...
- Page 30 Manual de instrucciones INStAlACIÓN de lA BAteRÍA fUNCIONAMIeNtO de RAdIO funcionamiento general Inserte unas baterías de tamaño "Cell" en el compartimiento de la batería. Asegúrese de que las baterías se insertan correctamente para evitar daños al mando a distancia. • P onga el selector de "fUNCIÓN" en el modo "RADIO". quite siempre las baterías cuando el mando a distancia no se utilice durante un • S eleccione la banda deseada utilizando el selector de "BANDA". periodo de tiempo largo, ya que esto provocará filtraciones de las baterías y en • A juste la frecuencia de radio a su emisora deseada utilizando el control consecuencia se dañará su equipo. de "SINTONIZACIÓN". • A juste el control de "VOLUMEN" al nivel deseado. Recepción de fm / fm-estéreo • P onga el selector de "BANDA" en el modo fM para una recepción MONO. • P onga el selector de "BANDA" en el modo fM ST. para una recepción ESTÉREO.
- Page 31 Manual de instrucciones MOdO Reproducción • P onga el selector de "fUNCIÓN" en el modo "CD /MP3". Apriete el botón "MODO" antes o durante la reproducción de un disco CD/MP3, • A bra la puerta de CD y coloque un disco de CD / MP3 con la etiqueta arriba en cada presión cambia la función del modo de la siguiente manera: el compartimiento de CD. • C ierre la puerta de CD. 1 - REPITE 1 • S i el disco está dentro, se realiza el enfoque. 2 - REPITE ÁLBUM (SOLO *MP3) Para disco de CD - Se lee el número total de pistas y aparece en la pantalla. 3 - REPITE TODO Para disco de MP3 - aparece "MP3" en la pantalla. 4 - ALEATORIO • L a reproducción comenzará automáticamente desde la primera pista. 5 - REPRODUCCIÓN NORMAL • A juste el control de "VOLUMEN" al nivel deseado. • A priete de nuevo el botón "REPRODUCCIÓN / PAUSA" cuando quiera parar temporalmente la reproducción.
- Page 32 Manual de instrucciones Reproducción • C onecte un dispositivo USB en el puerto. (Asegúrese de que no hay disco en la bandeja) • P onga el selector de "fUNCIÓN" en el modo "CD /MP3". • A priete y mantenga el botón "REPRODUCCIÓN / PAUSA" unos pocos segundos para entrar en el modo USB. • L a reproducción comenzará automáticamente desde la primera pista. • A priete el botón "PARAR" cuando termine. • A priete de nuevo el botón "REPRODUCCIÓN / PAUSA", la reproducción empezará desde la primera pista. Programa, modo El funcionamiento de PROGRAMA, MODO es el mismo que el de CD / MP3. Consulte fUNCIONAMIENTO DE CD / MP3. OtRAS CARACteRÍStICAS Ajuste del reloj • A priete el botón "AJUSTE DE HORA". (No suelte el botón "AJUSTE DE HORA" durante el ajuste de la hora) • A priete el botón "HORA" para establecer la hora.
- Page 33 Manual de Instruções Estimado cliente, • O cabo de alimentação da unidade não deve estar obstruído e deve estar num local de fácil acesso durante a utilização prevista. Parabéns e obrigado por ter adquirido este produto de elevada qualidade. • P ara desligar totalmente a alimentação, o cabo de alimentação do aparelho deve Leia este manual de instruções cuidadosamente para que possa utilizar este aparelho • P erigo de explosão se a pilha for substituída de forma incorrecta. da melhor forma. Este manual inclui todas as instruções e conselhos necessários para Substitua apenas pelo mesmo tipo ou equivalente a utilização, limpeza e manutenção do aparelho.
- Page 34 Manual de Instruções INStRUÇÕeS de SeGURANÇA • D ANOS qUE EXIJAM REPARAÇÕES – O aparelho deve ser reparado por pessoal técnico qualificado quando: • L ER INSTRUÇÕES – Deve ler todas as instruções de segurança e de funcionamento a. A tomada ou o cabo de alimentação está danificado. antes de utilizar o aparelho. b. Entraram objectos, ou líquidos, no exterior do aparelho. • G UARDAR INSTRUÇÕES – Deve guardar as instruções de segurança e de c. O aparelho foi exposto a chuva. funcionamento para consulta futura. d. O aparelho caiu ou o exterior está danificado. • A VISOS DE ATENÇÃO – Deve seguir todos os avisos no aparelho e nas instruções e. O aparelho não parece funcionar normalmente. de funcionamento. • R EPARAÇÃO – O utilizador não deve tentar reparar o aparelho para além • S IGA AS INSTRUÇÕES – Deve seguir todas as instruções. do descrito nas instruções de funcionamento do utilizador. Todas as outras • Á GUA E HUMIDADE – O aparelho não deve ser utilizado próximo de água, por reparações devem ser realizadas por pessoal técnico qualificado.
- Page 35 Manual de Instruções lOCAlIZAÇÃO dOS CONtROlOS 1. ECRÃ LCD 1 2. REPRODUZIR/PAUSAR 2. INDICADOR DE ENERGIA 1 3. PARAR 3. INDICADOR DE fM EST. 1 4. SELECTOR DE fUNÇÃO 4. CONTROLO DE VOLUME 1 5. ENTRADA AUX 5. MODO 1 6. ANTENA fM 6. AVANÇAR - 1 7. LIGAR/DESLIGAR 7. AVANÇAR + 1 8. ENTRADAS DE AUSCULTADORES (E/D) 8. SELECOTR DE BANDA 1 9. DEfINIR HORA 9. RANHURA USB 2 0. HORAS...
- Page 36 Manual de Instruções INStAlAÇÃO dA PIlHA fUNCIONAMeNtO dO RÁdIO funcionamento geral Insira uma pilha tamanho “Célula” no compartimento da pilha. Certifique-se de que as pilhas estão inseridas correctamente para evitar danos no comando. • C oloque o selector de "fUNÇÃO" no modo "RÁDIO". Remova sempre as pilhas quando o comando não for utilizado durante um longo • S eleccione a banda desejada utilizando o selector de “BANDA". período de tempo, uma vez que causará fugas das pilhas e consequente dano • A juste a frequência de rádio para a estação desejada utilizando o no aparelho. controlo "SINTONIZAÇÃO". • A juste o controlo de "VOLUME" para o nível desejado. Recepçãp fm/fm-estéreo • D efina o selector de "BANDA" para o modo fM para a recepção MONO. • D efina o selector de "BANDA" para o modo fM EST. para a recepção fM ESTÉREO. Deslize a tampa para for a e instale uma única pilha “Célula” com as polaridades conforme mostrado.
- Page 37 Manual de Instruções MOdO Reprodução • C oloque o selector de "fUNÇÃO" no modo "CD/MP3". Pressione o botão "MODO" antes ou durante a reprodução do disco CD/MP3, • A bra a porta do CD e coloque um disco CD/MP3 com a etiqueta virada para cima sendo que cada vez que pressionar muda a função do modo da seguinte forma: no compartimento de CD. • f eche a porta de CD. 1 - REPETIR 1 • É realizada uma procura se existir um disco no interior. 2 - REPETIR ÁLBUM (*APENAS MP3) Para disco CD – Lê-se o número total de faixas e aparece no ecrã. 3 –REPETIR TUDO Para disco MP3 – Aparece "MP3" no ecrã. 4 –ALEATÓRIO • A reprodução começará automaticamente a partir da primeira faixa. 5 –REPRODUÇÃO NORMAL • A juste o controlo de "VOLUME" para o nível desejado. • P ressione novamente o botão REPRODUZIR/PAUSA" quando pretender parar temporariamente a reprodução.
- Page 38 Manual de Instruções Reprodução • L igue ou insira o dispositivo USB na porta. (Certifique-se de que não está nenhum disco na bandeja de discos) • C oloque o selector de "fUNÇÃO" no modo "CD/MP3". • P ressione e mantenha pressionado o botão "REPRODUZIR/PAUSA" durante alguns segundos para entrar no modo USB. • A reprodução começará automaticamente a partir da primeira faixa. • P ressione o botão "PARAR" quando terminar. • P ressione novamente o botão "REPRODUZIR/PAUSA” e a reprodução começará a partir da primeira faixa. Programa, modo O funcionamento do PROGRAMA, MODO é igual ao de CD/MP3. Consulte fUNCIONAMENTO DO CD/MP3. OUtRAS fUNÇÕeS Configuração do relógio • P ressione o botão "DEfINIR HORA". (Não liberte o botão "DEfINIR HORA" durante a definição da hora) • P ressione o botão "HORAS" para definir as horas.
- Page 39 Instrukcje użytkowania Drogi Kliencie • Z urządzenia należy korzystać w umiarkowanym klimacie. • I nformacje dotyczące wartości znamionowych i oznaczeń znajdują się na Składamy gratulacje i serdeczne podziękowanie za zakup tego wysokiej jakości produktu. spodzie urządzenia. Prosimy przeczytać instrukcje użytkowania dokładnie, aby jak najlepiej użytkować • N admierne ciśnienie akustyczne ze słuchawek dousznych lub nagłownych może urządzenie Podręcznik zawiera wszystkie konieczne instrukcje i porady dotyczące użytkowania, prowadzić do utraty słuchu.
- Page 40 Instrukcje użytkowania Etykieta ta znajduje się wewnątrz urządzenia. Wygląda tak jak ta • O STRZEŻENIE ESD — Z powodu wyładowań elektrostatycznych wyświetlacz przedstawiona na rysunku. Jest to ostrzeżenie dotyczące obsługi może nie działać prawidłowo lub obsługa elementów sterowania może nie dawać otwartego urządzenia. Urządzenie emituje wiązki promieniowania żadnego efektu. Urządzenie należy wyłączyć i odłączyć od zasilania. Po kilku laserowego zgodnie z limitem dla produktu laserowego klasy 1. sekundach należy podłączyć je ponownie. • U SZKODZENIA WyMAGAJĄCE DZIAŁAŃ SERWISOWyCH — Urządzenie powinno zostać sprawdzone przez wykwalifikowanych pracowników serwisu, jeśli: INStRUKCje dOtYCZĄCe BeZPIeCZeŃStWA a. Przewód lub wtyczka zasilająca zostaną uszkodzone. • P RZECZyTAJ INSTRUKCJE — Przed rozpoczęciem użytkowania urządzenia należy b. Przedmioty dostaną się lub płyn wleje się do wnętrza obudowy urządzenia. przeczytać wszystkie instrukcje dotyczące bezpieczeństwa i obsługi. c. Urządzenie zostanie wystawione na działanie deszczu. • Z ACHOWAJ INSTRUKCJE — Instrukcje dotyczące bezpieczeństwa i obsługi należy d. Urządzenie zostanie upuszczone lub obudowa zostanie uszkodzona. zachować w celu odnoszenia się do nich w przyszłości. e. Urządzenie nie będzie działać normalnie. • S TOSUJ SIĘ DO OSTRZEŻEŃ — Należy stosować się do wszystkich ostrzeżeń • S ERWIS — Użytkownik nie powinien samodzielnie wykonywać żadnych czynności znajdujących się na urządzeniu i w instrukcji obsługi.
- Page 41 Instrukcje użytkowania lOKAlIZACjA eleMeNtÓW SteROWANIA 1. WyŚWIETLACZ LCD 1 2. ODTWÓRZ/PAUZA 2. WSKAŹNIK ZASILANIA 1 3. STOP 3. WSKAŹNIK fM ST. 1 4. PRZEŁĄCZNIK fUNKCJI 4. REGULATOR GŁOŚNOŚCI 1 5. GNIAZDO AUX IN 5. TRyB 1 6. ANTENA fM 6. POMIŃ - 1 7. WŁĄCZNIK/WyŁĄCZNIK 7. POMIŃ + 1 8. GNIAZDA GŁOŚNIKA (L/P) 8. PRZEŁĄCZNIK PASMA 1 9. USTAWIENIE ZEGARA 9. GNIAZDO USB 2 0. GODZINy...
- Page 42 Instrukcje użytkowania INStAlACjA BAteRII OBSŁUGA RAdIA Ogólna obsługa Włóż baterię „guzikową” do komory baterii. Baterię należy włożyć prawidłowo, aby uniknąć uszkodzenia pilota zdalnego sterowania. Baterię należy zawsze wyjąć z • U staw przełącznik „fUNKCJI” w pozycji trybu „RADIO”. pilota zdalnego sterowania, jeśli nie będzie on używany przez dłuższy czas, • W ybierz żądane pasmo przy użyciu przełącznika „PASMA”. ponieważ zostawienie jej może być przyczyną wycieku z baterii i w konsekwencji • D ostosuj częstotliwość radiową w celu ustawienia żądanej stacji przy użyciu uszkodzenia urządzenia. pokrętła „STROJENIA”. • U staw żądany poziom głośności za pomocą regulatora „GŁOŚNOŚCI”. Odbiór pasma fm/fm-stereo • U staw przełącznik „PASMA” w pozycji trybu fM w celu odbioru MONO. • U staw przełącznik „PASMA” w pozycji trybu fM ST. w celu odbioru fM STEREO. Wysuń pokrywę i włóż jedną baterię „guzikową” zgodnie ze wskazaną biegunowością.
- Page 43 Instrukcje użytkowania • U staw przełącznik „fUNKCJI” w pozycji trybu „CD/MP3”. tryb • O twórz kieszeń płyty CD i włóż do wnęki płytę CD/MP3 etykietą skierowaną ku górze. Naciśnij przycisk „TRyB” przed rozpoczęciem lub podczas odtwarzania płyty CD/MP3; • Z amknij kieszeń płyty CD. każde naciśnięcie spowoduje przełączenie trybu zgodnie z poniższym schematem: • P o włożeniu płyty wykonane zostanie skanowanie płyty. P łyta CD — odczytana zostanie całkowita liczba ścieżek, a ich wartość pojawi się 1 - POWTÓRZ 1 na wyświetlaczu. 2 - POWTÓRZ ALBUM (*TyLKO MP3) Płyta MP3 — na wyświetlaczu pojawi się wskazanie „MP3”. 3 - POWTÓRZ WSZySTKO • O dtwarzanie rozpocznie się automatycznie od pierwszej ścieżki. 4 - LOSOWO • U staw żądany poziom głośności za pomocą regulatora „GŁOŚNOŚCI”. 5 - NORMALNE ODTWARZANIE • N aciśnij ponownie przycisk „ODTWÓRZ/PAUZA”, aby zatrzymać tymczasowo odtwarzanie.
- Page 44 Instrukcje użytkowania Odtwarzanie • P odłącz urządzenie USB do portu. (Upewnij się, że w kieszeni płyty nie znajduje się żadna płyta). • U staw przełącznik „fUNKCJI” w pozycji trybu „CD/MP3”. • N aciśnij i przytrzymaj przycisk „ODTWÓRZ/PAUZA” przez kilka sekund, aby przejść do trybu USB. • O dtwarzanie rozpocznie się automatycznie od pierwszej ścieżki. • N aciśnij przycisk „STOP”, aby zakończyć odtwarzanie. • N aciśnij ponownie przycisk „ODTWÓRZ/PAUZA”, aby rozpocząć odtwarzanie od pierwszej ścieżki. Programowanie, tryb funkcje PROGRAMOWANIA i TRyBU są takie same, jak w przypadku płyty CD/MP3. Należy zapoznać się z sekcją OBSŁUGA ODTWARZACZA CD/MP3. INNe fUNKCje Ustawienie zegara • N aciśnij przycisk „USTAWIENIE ZEGARA”. (Nie zwalniaj przycisku „USTAWIENIE ZEGARA” podczas ustawiania zegara).
- Page 45 Istruzioni per l’uso Gentile cliente, • S maltire le batterie nel rispetto dell’ambiente. • N on utilizzare l’apparecchio in climi estremi. Ci congratualiamo con lei e la ringraziamo per aver acquistato questo apparecchio di • L a targhetta nominale e le informazioni sono riportate sul fondo dell’apparecchio. elevata qualità . Leggere attentamente il manuale istruzioni per utilizzare l’apparecchio • U na pressione acustica eccessiva proveniente dale cuffie e dagli auricolari può nel miglior modo possible.
- Page 46 Istruzioni per l’uso questa etichetta è riportata all’interno dell’apparecchio, come indicato • A VVERTENZA ESD – Il display non funziona correttamente oppure i controlli nell’illustrazione e sconsiglia di intervenire sull’apparecchio per la non reagiscono: può trattarsi di scarica elettrostatica. Spegnere l’apparecchio e presenza di raggi laser nei limiti indicati per gli apparecchi di classe 1. scollegare la spina dalla presa. Reinfilare la spina nella presa dopo alcuni secondi . • D ANNI CHE RICHIEDONO ASSISTENZA – Gli interventi sull’apparecchio devono essere eseguiti da personale qualificato quando: a. Il cavo di alimentazione o la spina sono danneggiati. IStRUZIONI dI SICUReZZA b. Sono caduti oggetti o sono stati versati liquidi sull’apparecchio. c. L’apparecchio è stato esposto a pioggia. • L EGGERE LE ISTRUZIONI – Leggere tutte le istruzioni di sicurezza e funzionamento d. L’apparecchio è caduto o il coperchio è danneggiato. prima di mettere in funzione l’apparecchio. e. L’apparecchio presenta anomalie. • C ONSERVARE LE ISTRUZIONI – Conservare le istruzioni di sicurezza e • A SSISTENZA – L’utente non deve eseguire interventi sull’apparecchio diversi da funzionamento per riferimento futuro. quelli descritti nelle istruzioni di funzionamento. Tutti gli altri interventi devono • O SSERVARE LE AVVERTENZE – Osservare tutte le avvertenze riportate essere eseguiti da personale qualificato .
- Page 47 Istruzioni per l’uso UBICAZIONe deI COMANdI 1. DISPLAy LCD 1 2. RIPRODUZIONE/PAUSA 2. INDICATORE ALIMENTAZIONE 1 3. ARRESTO 3. INDICATORE fM ST. 1 4. SELETTORE fUNZIONE 4. COMANDO VOLUME 1 5. INGRESSO AUX 5. MODO 1 6. ANTENNA fM 6. SALTO - 1 7. ALIMENTAZIONE ON/Off 7. SALTO + 1 8. SPINOTTI ALTOPARLANTI (S/ D) 8. SELETTORE BANDA 1 9. IMPOSTAZIONE ORARIO 9. SLOT USB 2 0. ORA...
- Page 48 Istruzioni per l’uso INStAllAZIONe BAtteRIe fUNZIONAMeNtO RAdIO funzionamento generale Inserire batterie misura "Cell" nel vano batterie. Inserire le batterie correttamente per evitare danni al telcomando. Rimuovere sempre le batterie quando non si • P ortare il selettore "fUNZIONE" sul modo "RADIO”. utilizza il telecomando per periodi prolungati, per evitare perdite dalle batterie con • S elezionare la banda desiderata con il selettore "BANDA”. conseguenti danni all’apparecchio . • I mpostare la frequenza radio desiderata con il comando "SINTONIZZAZIONE". • P ortare il comando "VOLUME" sul livello desiderato. Ricezione stereo fm / fm • P ortare il selttore "BANDA" sul modo fM per ricezione MONO. • I mpostare il selettore"BANDA" sul modo fM ST. Per ricezione fM STEREO. Aprire il coperchio e installare una batteria "Cell" con le polarità come indicato in figura.
- Page 49 Istruzioni per l’uso Riproduzione MOdO • P ortare il selettore "fUNZIONE" sul modo "CD / MP3". Premere il tasto "MODO" prima o durante la riproduzione del CD / MP3; a ogni • A prire lo sportello CD e collocare un CD/MP3 con l’etichetta verso l’alto nel vano CD. pressione la funzione modo cambia come segue : • C hiudere lo sportello CD. • L a ricerca “fuoco” viene effettuata con il disco all’interno. 1 – RIP. 1 Per CD – Viene letto il numero totale dei brani, che viene mostrato sul display. 2 – RIP. ALBUM ( SOLTANTO *MP3) Per MP3 - "MP3" compare sul display. 3 – RIP. TUTTI • L a riproduzione comincia automaticamente dal primo brano. 4 – CAS. • R egolare il comando "VOLUME" sul livello desiderato. 5 – RIPR. NORM. • P remere nuovamente il tasto "RIPRODUZIONE/PAUSA" quando si desidera interrompere momentaneamente la riproduzione.
- Page 50 Istruzioni per l’uso Riproduzione • C ollegare il dispositivo USB alla porta. (Controllare che non vi siano dischi nello slot) • I mpostare il selettore "fUNZIONE" sul modo "CD / MP3". • T enere premuto il tasto "RIPRODUZIONE/PAUSA" qualche secondo per attivare il modo USB. • L a riproduzione si avvia automaticamente dal primo brano. • A l termine, premere il tasto "STOP". • P remere nuovamente il tasto "RIPRODUZIONE/PAUSA", la riproduzione comincia dal primo brano. Modo programma Il funzionamento del MODO PROGRAMMA è lo stesso del CD/MP3. fare riferimento a fUNZIONAMENTO CD/MP3. AltRe fUNZIONI Impostazione orologio • P remere il tasto "IMPOSTAZIONE ORARIO". (Non rilasciare questo tasto durante l’IMPOSTAZIONE ORARIO) • P remere il tasto "ORA" per impostare l’ora.
- Page 52 Hf-1254 Tristar Europe B.V., Jules Verneweg 87, 5015 BH Tilburg, The Netherlands, www.tristar.eu...