Table des Matières

Publicité

Les langues disponibles
  • FR

Les langues disponibles

  • FRANÇAIS, page 63

Liens rapides

D
Bedienungsanleitung
GB
Operating Instructions
F
Mode d'emploi
I
Instruzioni d'uso
E
Instrucciones de empleo
NL
Gebruiksaanwijzing
D
GB
F
I
E
NL

Publicité

Table des Matières
loading

Sommaire des Matières pour Grasslin Talento 971

  • Page 1 Bedienungsanleitung Operating Instructions Mode d’emploi Instruzioni d’uso Instrucciones de empleo Gebruiksaanwijzing...
  • Page 2: Table Des Matières

    Inhaltsangabe Inhalt Seite Hinweise zur Sicherheit Montage, Inbetriebnahme, Anschluß Bedienelemente Anzeige Allgemeines Werkseitige Einstellung Einstellungen ändern Betriebsart wählen 7.2.1 AU = automatische Umstellung 7.2.2 cHA = wochentagsbezogene Umstellung 7.2.3 no = keine Umstellung Schaltbefehle Impuls-Schaltbefehle Zyklus-Schaltbefehle Lesen – Ändern – Löschen – Reset Handschalter DCF77- Funkbetrieb Technische Daten...
  • Page 3: Hinweise Zur Sicherheit

    Hinweise zur Sicherheit Die Installation muß von einer Fachkraft oder unter deren Leitung und Aufsicht durchgeführt und geprüft werden. Für die Montage: • geeignet für den Einsatz bei Umgebungsbedingungen mit üblicher Verunreinigung • für Wandaufbau das entsprechende Zubehör von Grässlin verwenden.
  • Page 4: Montage, Inbetriebnahme, Anschluß

    Montage, Inbetriebnahme, Anschluß Montage Schaltuhr montieren • auf DIN-Schiene Inbetriebnahme Die Uhrzeit und das Datum wurden im Werk eingestellt. Die Schaltuhr ist im Stromspar-Modus, nur der Doppelpunkt blinkt. Drücken Sie eine beliebige Taste: • die Schaltuhr ist aktiv • sie zeigt Datum und Uhrzeit an. Anschluß...
  • Page 5: Bedienelemente

    Bedienelemente Handschalter Minuten/Sekunden wählen für Zyklus-/Impulsfunktion Minuten einstellen Stunden Jahr einstellen Kalendermonat einstellen Kalendertag bis, für Datumsbereich Sommer-/Winterzeit-Umstellung Reset Impuls wählen Zyklus wählen akutelles Datum, Uhrzeit einstellen Programmeingabe beginnen IR Senden/Empfangen Wochentage wählen Löschen 1 = Montag 2 = Dienstag 3 = …...
  • Page 6: Anzeige

    Anzeige Tag (US Monat) Monat (US Tag) Impuls (Minuten) Impuls (Sekunden) Zyklus (Minuten) Zyklus (Sekunden) Kanal 1 Jahreszahl Dauerbetrieb Handbetrieb Automatikbetrieb Schaltzustand Sommer-/ Winterzeit- Kanal 2 Umstellung Kanal 3 Automatikbetrieb Kanal 4 DCF 77 Funkempfang Impuls 1234567 = Wochentag Stunde Zyklus Jahreszahl Minute...
  • Page 7: Allgemeines

    Allgemeines Schaltprogramm sichern Die Schaltuhr bietet im aktuellen Betriebszustand (Doppelpunkt blinkt) die Möglichkeit das eingegebene Schaltprogramm mit der Funktion: • Back Up – im „Hintergrund“ zu sichern • Restore – wieder in den Vordergrund zu holen • Change – 2 Schaltprogramme im Wechsel zu nutzen Back Up Programm gesichert mit Taste Prog und 1 (Tagestaste)
  • Page 8 Allgemeines Programmieren am Schreibtisch Das Bedienteil können Sie herausnehmen. Das Programmieren erledigen Sie dann bequem am Schreibtisch. Programmieren mit dem Handprogrammiergerät Die komfortabelste Übertragung der Schaltprogramme bietet das Handprogrammiergerät. 6.3.1 Von Schaltuhr zu Schaltuhr (von Bedienteil zu Bedienteil – ohne Netzspannung).
  • Page 9 Allgemeines 6.3.2 Sie erstellen Ihre Schaltprogramme mit der Software auf einem PC. Diese werden dann über die PC- Schnittstelle ins Handprogrammiergerät übertragen. Mit dem Handprogrammiergerät werden jetzt die Schaltprogramme über die Infrarot Schnittstelle in die jeweilige Schaltuhr (Bedienteil) übertragen, siehe Handbuch Software.
  • Page 10 Allgemeines Service 6.4.1 Fehlermeldungen Die Schaltuhr meldet Fehlfunktionen: • Er 04 – bei fehlerhaftem Zugriff auf das EEProm Im Einzelfall kann diese Fehlermeldung erscheinen. Drücken Sie eine beliebige Taste, die Schaltuhr arbeitet ganz normal weiter. Sollte diese Fehlermeldung öfters auftreten, empfehlen wir die Schaltuhr auszutauschen.
  • Page 11: Werkseitige Einstellung

    Werkseitige Einstellung Die Vorgaben entsprechen der mitteleuropäischen Zeit (MEZ). Die Schaltuhr bietet 3 Betriebsarten. Das Datum und die Uhrzeit sowie Betriebsart AU sind eingestellt. Betriebsarten: • AU Automatische Umstellung der Sommerzeit-Regelung, siehe Kapitel 7.2.1 Die Umstellung erfolgt an den vom Gesetzgeber vorbestimmten Daten.
  • Page 12 Werkseitige Einstellung Datumsanzeige drehen (Schreibweise in den USA/GB) -Taste 1x drücken Doppelpunkt blinkt nicht! 2-Taste (Wochentag) 1x drücken (Monat, Tag) -Taste 1x drücken, Eingabe ist beendet. Anpassen an MEZ Empfängt die Schaltuhr das Zeitsignal DCF 77, kann es – je nach Standort –...
  • Page 13: Einstellungen Ändern

    7.1. Einstellungen ändern Hinweis: Bei allen Einstellungen/Änderungen, die Sie vornehmen, ist der Aussteig bzw. Abschluss mit der -Taste jederzeit möglich. Datum und Uhrzeit -Taste 1x drücken Doppelpunkt blinkt nicht! Datum einstellen, ändern: mit Day-Taste Kalendertag mit Month-Taste Kalendermonat mit Year-Taste Kalenderjahr Uhrzeit einstellen, ändern: mit h-Taste Stunden mit m-Taste Minuten...
  • Page 14: Betriebsart Wählen

    7.2 Betriebsart wählen 7.2.1 AU = Automatische Umstellung 7.2.2 cHA = Wochentagsbezogene Umst. 7.2.3 no = keine Umstellung 7.2.1 AU = automatische Umstellung Diese Daten können Sie an dieser Stellen nur lesen. Daten ändern siehe Kapitel 7.1 -Taste 1x drücken Doppelpunkt blinkt nicht! + 1h-Taste 1x drücken Beginn der Sommerzeit,...
  • Page 15: Cha = Wochentagsbezogene Umstellung

    7.2 Betriebsart wählen 7.2.2 cHA = Wochentagsbezogene Umstellung -Taste 1x drücken Doppelpunkt blinkt nicht! + 1h-Taste 1 bzw. 2x drücken, bis cHA erscheint Individuellen Sommerzeit-Beginn einstellen: mit Day-Taste Kalendertag mit Month-Taste Kalendermonat -Taste 1x drücken, blinkt Individuelles Sommerzeit-Ende einstellen: mit Day-Taste Kalendertag mit Month-Taste Kalendermonat Uhr-Taste: Eingabe wird abgebrochen...
  • Page 16: No = Keine Umstellung

    7.2.3 no = keine Umstellung der Sommerzeit -Taste 1x drücken Doppelpunkt blinkt nicht! + 1h-Taste so oft drücken, bis no erscheint Die Schaltuhr arbeitet mit Kalender, jedoch ohne automatische Umstellung. Die manuelle Umstellung kann immer aktiviert werden, mit Taste + 1h. -Taste 1x drücken, Eingabe ist beendet.
  • Page 17: Schaltbefehle

    Schaltbefehle Die Eingabe der Schaltbefehle gilt für alle Arten der Zuordnung: • Impuls – Schaltbefehle, siehe Kapitel 9 • Zyklus – Schaltbefehle, siehe Kapitel 10 Sie bestimmen die Schaltzeiten und den Schaltzustand für den jeweiligen Kanal. Symbol EIN; • Schaltbefehle für jeden Kanal gleich, alle EIN bzw. alle AUS •...
  • Page 18 Wochentage einstellen: 1 2 3 4 5 6 7 (Montag … Sonntag) Schaltzustand einstellen: 1/0 -Taste für jeden Kanal separat wählen = EIN; = AUS Prog.-Taste 1x kurz drücken, der Schaltbefehl ist gespeichert. Ein freier Speicherplatz ist angezeigt – für weitere Eingaben. oder -Taste 1x drücken, Eingabe ist beendet.
  • Page 19: Impuls-Schaltbefehle

    Impuls-Schaltbefehle Sie bestimmen die Zeiten für Impuls-Schaltbefehle, Symbol Impulszeiten sind: 01...99 Sekunden oder 01...99 Minuten. Ein Impuls-Schaltbefehl besteht aus: Startzeit und EIN- oder AUS- Schaltdauer Beispiel: Startzeit Montag bis Freitag 09.00 Uhr EIN-Schaltdauer 10 Sekunden Startzeit EIN-Schaltdauer Startzeit AUS-Schaltdauer Freien Speicherplatz wählen: Prog.-Taste 1x drücken, –...
  • Page 20 Vorwahl für Sekunden oder Minuten - Taste - Taste schrittweise drücken Impulszeit einstellen, von 01 ... 99 Hinweis: Wird die Taste länger gedrückt, erfolgt das Einstellen in Schritten von 05 Prog.-Taste 1x nur kurz drücken, der Schaltbefehl ist gespeichert. Ein freier Speicherplatz ist angezeigt –...
  • Page 21: Zyklus-Schaltbefehle

    10. Zyklus-Schaltbefehle Bestimmte Schaltuhren eignen sich für sekundengenaues EIN und AUS schalten von unterschiedlichen Verbrauchern. Bei einer Schalthäufigkeit im Sekundenbereich können a) Rückwirkungen auf die Qualität von Beleuchtungseinrichtungen (Flicker) b) Beeinträchtigungen des Rundfunkempfangs (Knacke) auftreten Um dies zu vermeiden, achten Sie darauf dass: a) maximal ein Schaltvorgang je Minute stattfindet, bei Nennlast oder ein Schaltvorgang je Sekunden stafffindet, bei maximal 0,28facher Nennlast...
  • Page 22 10. Zyklus-Schaltbefehle Startzeit Endzeit EIN-Schaltdauer 10 Minuten Pause Pause Zyklus-Dauer Zyklus-Dauer 60 Min. 60 Min. Freien Speicherplatz wählen: Prog.-Taste 1 x drücken – –.– – – – – – Eingabe nach Bedarf: – Schaltbefehl, Wochentag(e), Schaltzustand, siehe Kapitel 8 -Taste 1 x drücken 01 Minuten sind angeboten.
  • Page 23 Zykluszeit einstellen, von 01 ... 99 -Taste schrittweise drücken Hinweis: Wird die Taste länger gedrückt, erfolgt das Einstellen in Schritten von 05 EIN - Schaltdauer einstellen, von 01 ... 99 Diese kann nie grösser sein, als die zuvor eingestellte Zykluszeit! -Taste schrittweise drücken Prog.-Taste 1x nur kurz drücken, der Schaltbefehl ist gespeichert.
  • Page 24: Lesen - Ändern - Löschen - Reset

    11. Lesen – Ändern – Löschen – Reset • Sie lesen die Anzahl der freien Speicherplätze/Blocknummern • Sie lesen die Progamminhalte schrittweise • Sie änden, überschreiben die Progamminhalte • Sie löschen die Progamminhalte 11.1 Lesen Freien Speicherplatz wählen: Prog.-Taste 1x drücken –...
  • Page 25 11. Lesen – Ändern – Löschen – Reset 11.2 Ändern Jeder Programminhalt kann individuell verändert/überschrieben werden. Mit Prog-Taste (lesen) rufen Sie den Inhalt auf, den Sie ändern/über- schreiben wollen. Das ändern erfolgt in der gleicher Weise wie die Eingabe neuer Daten (siehe jeweiliges Kapitel).
  • Page 26 11.4 Löschen – alle Schaltbefehle Prog.-Taste 2x drücken, die Anzahl der freien Blocknummern sowie die Anzahl der freien Speicherpätze sind angezeigt. Clear-Taste 1x drücken Im Display erscheint zusätzlich c l und blinkt. Clear-Taste 1x drücken. Alle Inhalte werden gelöscht! Das Display zeigt die Anzahl der max.
  • Page 27: Handschalter

    12. Handschalter Sie verändern – manuell – den momentanen Schaltzustand. Das individuell eingestellte Schaltprogramm bleibt jedoch erhalten. 1 für Kanal 1 2 für Kanal 2 3 für Kanal 3 4 für Kanal 4 = Automatik = Handbetrieb FIX = Dauerbetrieb = AUS = EIN FIX = Dauer EIN...
  • Page 28: Technische Daten

    14. Technische Daten 1, 2, 3 bzw. 4 Kanal Wochenschaltuhr Maße (H x B x T) mm 45 x 108 x 60 Verteilerausschnitt mm 45 x 108 Gewicht g (ca.) Anschluß siehe Geräteaufdruck Leistungsaufnahme siehe Geräteaufdruck Schaltleistung – ohmsche Last (VDE, IEC) 16 A/250 V AC –...
  • Page 29 Contents Contents Page Safety instructions Assembly, putting into operation, connection Control elements Display General Factory setting Changing the settings Selecting the operating mode 7.2.1 AU = Automatic switchover 7.2.2 cHA = Weekday-related switchover 7.2.3 no = No switchover Switching commands Date Single date without/with year Date range without/with year...
  • Page 30 Safety information Installation must be carried out and inspected by a specialist or under his supervision. For assembly: • Suitable for use in ambient conditions with normal contamination levels • Use the appropriate Grässlin accessories for wall surface-mounting. If correctly installed in accordance with VDE 0100, Part 40, the parts with which contact is still possible can be regarded as double-insulated (protection class II).
  • Page 31: Assembly, Putting Into Operation, Connection

    Assembly, putting into operation, connection Assembly Fit the time switch • on a DIN rail • Wall surface-mounting is optional Surface-mounting set for 6 modular spacings Article No. 03.59.0046.2 Putting into operation The time and date have been set at the factory.
  • Page 32: Control Elements

    Control elements Hand switch Select minutes/seconds for cycle/pulse functions Minutes Hours Years Calendar month Calendar day up to, for date range Summer time/winter time switchover Reset Select pulse Select cycle Current date, time settings Begin program input Send/receive IR Priority Select days of the week Delete 1 = Monday...
  • Page 33: Display

    Display Day (US month) Month (US day) Pulse (minutes) Pulse (seconds) Cycle (minutes) Cycle (seconds) Channel 1 Year number Continuous operation Block number Priority Manual operation Automatic operation Switching state Summer time/ winter time Channel 2 switchover Channel 3 Automatic operation Channel 4 DCF 77 Radio reception...
  • Page 34: General

    General Block numbers Block numbers are automatically issued during programming. There are block numbers from 00 ..99 (note block principle). All switching commands without date assignment always receive the block number 00. (Priority 0 is always assigned to the block number 00 –...
  • Page 35 General Back Up Program saved with the key Prog and 1 (Day key) The switching program in the current program foreground is preserved and can be changed as required. If necessary, call up the original switching program again with the Restore function.
  • Page 36 General Programming at the desk The control section can be removed and programming can be conveniently performed at the desk. Programming with the talento taxxi (manual programming unit) The talento taxxi offers the most convenient method for transferring the switching programs. 6.5.1 From time switch to time switch (from control section to control section –...
  • Page 37 General 6.5.2 Compile your switching programs on a PC with the software talento dialog. They are then transferred to the taxxi via the PC interface. With the taxxi, the switching programs are now transferred to the relevant time switch (control section) via the infrared interface.
  • Page 38 General Service 6.6.1 Error messages The time switch signals malfunctions: • Er 04 – in the event of incorrect access to the EEProm. This error message can appear in individual cases. Press any key and the time switch will continue to run normally. If this error message appears often, we recommend that the time switch be replaced.
  • Page 39: Factory Setting

    Factory setting The default values correspond to Central European Time (CET). The time switch offers 3 operating modes. The date and time and the operating mode AU are set. Operating modes: • AU Automatic switchover of the summer time control function, see Section 7.2.1 The switchover takes place on the legally defined date.
  • Page 40 Factory settings Change round date display (USA/GB method) Press the key 1x. The colon does not flash. Press the 2-key (day of the week) 1x. (Month, day) Press the key 1x. The input is ended. Adjusting to CET If the time switch receives the time signal DCF 77, it may be necessary –...
  • Page 41: Changing The Settings

    7.1. Changing the settings Note With all settings/changes which you make, it is possible to abort or complete the entry/change at any time with the key. Date and time Press the key 1x. The colon does not flash. Setting and changing the date: With the Day key –...
  • Page 42: Selecting The Operating Mode

    7.2 Selecting the operating mode 7.2.1 AU = Automatic switchover 7.2.2 cHA = Weekday-related switchover 7.2.3 no = No switchover 7.2.1 AU = Automatic switchover This data can only be read at this point. See Section 7.1 to change data. Press the key 1x.
  • Page 43 7.2 Selecting the operating mode 7.2.2 cHA = Weekday-related switchover Press the key 1x. The colon does not flash. + 1h key once or twice until cHA appears Individual summer time start setting: Calendar day with the Day key Calendar month with the Month key Press the key 1x, flashes.
  • Page 44 7.2.3 no = No summer time switchover Press the key 1x. The colon does not flash. Press the+ 1h key as often as necessary until no appears. The time switch operates with the calendar, but without automatic switchover. The manual switchover function can always be activated with the key + 1h.
  • Page 45: Switching Commands

    Switching commands The input of the switching commands applies to all types of assignment • Switching commands without date assignment, always in block 00, always with priority 0 (standard switching commands). • Switching commands with single date, see Section 9.1 •...
  • Page 46 Setting the days of the week: 1 2 3 4 5 6 7 (Monday … Sunday) Setting the switching state: With the 1/0 key for each channel, separately select = ON; = OFF Briefly press the Prog. key 1x. The switching command is saved. A free memory location is displayed –...
  • Page 47 Entering the date • Switching commands to which a date is assigned are arranged in blocks. Priority 2 is assigned at the same time. Change priority – see Section 10 • The block number is assigned automatically (01 to 99) (switching commands without date assignment always in block 00, always with priority 0), see Section 10 •...
  • Page 48: Single Date Without/With Year

    9.1 Single date without/with year Press the Day, Month or Year key 1x. The current date, a new block number and the priority 2 are always offered. Enter the enquired date: (without or with year) Calendar day with the Day key Calendar month with the Month key Calendar year with the Year key Change priority, see Section 10...
  • Page 49 9.2 Date ranges without/with year Press the Day, Month or Year key 1x. The current date, a new block number and priority 1 are always offered. Enter the enquired starting date: (without or with year) Calendar day with the Day key Calendar month with the Month key Calendar year with the Year key Change priority, see Section 10...
  • Page 50 A free memory location is displayed for further entries. Have you made all date entries for this block ? If so, enter the relevant switching commands, see section 8 Press the key 1 x. The input is completed The display shows the date and time.
  • Page 51 10. Priority Switching commands with the data assignment can be occupied with different priorities (block number 00 and priority 0 is defined for switching commands without date assignment). If you start with a date during programming, a new block number and priority 2 are always offered = default for a single date.
  • Page 52: Date Range Without/With Year

    11. Pulse switching commands If a load with a higher switching frequency – in the seconds range – is switched ON and OFF, it must be ensured that adverse effects on the quality of lighting units (flicker) and faults in radio and television reception are avoieded You determine the times for pulse switching commands, symbol Pulse times are: 01...99 seconds or 01...99 minutes.
  • Page 53 Preselection for seconds or minutes Press the key step-wise. Set the pulse time from 01 ... 99. Note: If the key is pressed for longer, adjustment takes place in steps of 05. Press the Prog. key 1x only briefly. The switching command is saved. A free memory location is displayed –...
  • Page 54: Cycle Switching Commands

    12. Cycle switching commands If a load with a high switching frequency – in the seconds range – is switched ON and OFF, it must be ensured that adverse effects on the quality of lighting units (flicker) and faults in radio and television reception are avoieded You determine the times for cyclical switching commands.
  • Page 55 12. Cycle switching commands Start time End time ON switching duration 10 minutes Pause Pause Cycle duration Cycle duration 60 min. 60 min. Select free memory location: Press the Prog. key 1x. – –.– – – – – – Enter as required: –...
  • Page 56 Setting the cycle time from 01 ... 99 Press the key step-wise Note: If the key is pressed for longer, adjustment takes place in increments of 05. Setting the ON switching duration, 01 ... 99 This can never be greater than the previsously set cycle time.
  • Page 57: Read - Change - Delete - Reset

    13. Read – Change – Delete – Reset • You read the number of free memory locations/block numbers • You read the program contents in steps • You change, overwrite the program contents • You delete the program contents 13.1 Read Select free memory location: Press the Prog.
  • Page 58 Read contents of block 01 to 99: Press the Prog. key 1x for approximately 1 second. Your are in block 01. Read the contents of this block: Press the Prog. key only briefly step-wise. The contents are displayed in turn. If a date range is displayed, „date “...
  • Page 59 13. Read – Change – Delete – Reset 13.2 Change Every program contents can be changed/overwritten individually. With the Prog. key (read), call up the contents which you want to change/overwrite. Changing is performed in the same way as entering new data (see the relevant Section).
  • Page 60 13.4 Delete – all switching commands Press the Prog. key 2x. The number of free block numbers and the number of free memory locations is displayed. Press the Clear key 1x. c l also appears in the display and flashes. Press the Clear key 1x.
  • Page 61: Manual Switch

    14. Manual switch You change – manually – the current switching state. However, the individually set switching program is preserved. 1 for channel 1 2 for channel 2 3 for channel 3 4 for channel 4 = Automatic = Manual mode FIX = continuous operation = OFF = ON...
  • Page 62: Technical Data

    16. Technical data 1, 2, 3 and 4-channel year clock Dimensions (H x W x D) mm 45 x 108 x 60 Distributor cut-out mm 45 x 108 Weight g (approx.) Connection See unit imprint Power consumption See unit imprint Switching capacity –...
  • Page 63 Sommaire Sommaire Page Consignes de sécurité Montage, mise en service, raccordement Touches de programmation Affichage Généralités Programme usine Modifier le programme Sélectionner mode de service 7.2.1 AU = passage automatique 7.2.2 cHA = passage été/hiver selon les jours de la semaine 12 7.2.3 no = pas de changement Fonctions de commutation...
  • Page 64: Consignes De Sécurité

    Consignes de sécurité L'installation doit être effectuée et vérifiée par du personnel qualifié ou sous la direction de celui-ci. Pour le montage: • Approprié à l'utilisation dans des conditions d'environnement normales. • Pour la fixation au mur, utiliser les accessoires correspondants de Grässlin Si le montage a été...
  • Page 65: Montage, Mise En Service, Raccordement

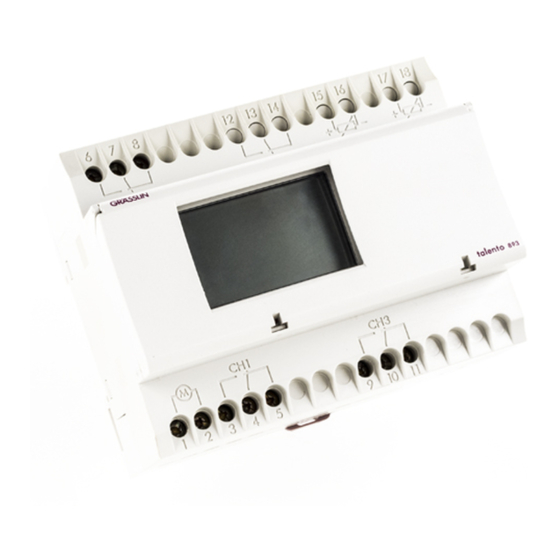
    Montage, mise en service, raccordement Montage Monter l'horloge • sur rail DIN • option murale kit de montage pour 6 TE article no. 03.59.0046.2 Mise en service L'heure et la date sont programmées en usine. L'horloge est en mode eco, seuls les 2 points clignotent.
  • Page 66: Touches De Programmation

    Touches de programmation Interrupteur manuel Choisir minutes/secondes pour fonctions impulsion/cycle les minutes Entrer les heures l'année Entrer le mois Entrer le jour pour plage de date Passage été/hiver Remise Choisir impulsion à zéro Choisir cycle Régler la date et l'heure actuelle Démarrer la programmation IR émission/réception Priorité...
  • Page 67: Affichage

    Affichage Jour (commutation mois) Mois (commutation jour) Impulsion (minutes) Impulsion (secondes) Cycle (minutes) Cycle (secondes) Canal 1 Année Fonctionnement Numéro de bloc permanent Priorité Fonctionnement manuel Fonctionnement Passage automatique été/hiver Etat de commutation Canal 2 Canal 3 Fonctionnement automatique Canal 4 Réception signal DCF 77 Impulsion...
  • Page 68: Généralités

    Généralités Numéros de bloc Des numéros de bloc sont assignés automatiquement pendant la programmation. Les numéros de bloc vont de 00 à 99 (principe de bloc-notes). Toutes les commutations sans assignation de date reçoivent toujours le numéro de bloc 00. (Au numéro de bloc 00 est toujours assigné...
  • Page 69 Généralités Programmation avec le talento taxxi (navette de programmation) Toutes les consignes et figures nécessaires sont documentées dans un mode d'emploi séparé.
  • Page 70: Programme Usine

    Programme usine Les données sont conformes MEZ. L'horloge dispose de 3 modes de fonctionnement. La date, l'heure et le mode de fonctionnement AU sont préréglés. Modes de fonctionnement: • AU Passage automatique été/hiver, voir 7.2.1 le passage se fait selon les dates officielles. •...
  • Page 71 Programme usine Inverser l'affichage de la date (en usage aux Etats-Unis et en Grande-Bretagne) Appuyer 1 fois sur la touche Les 2 points ne clignotent pas! Appuyer 1 fois sur la touche 2 (jour) (mois, jour) Appuyer 1 fois sur la touche L'entrée est terminée.
  • Page 72: Modifier Le Programme

    7.1. Modifier le programme Remarque: Vous pouvez terminer/annuler toute modification en appuyant sur la touche Date et heure Appuyer 1 fois sur la touche Les 2 points ne clignotent pas! Régler, modifier la date: Avec la touche Day le jour Avec la touche Month le mois Avec la touche Year l'année Régler, modifier l'heure:...
  • Page 73: Sélectionner Mode De Service

    7.2 Sélectionner mode de service 7.2.1 AU = Passage automatique 7.2.2 cHA = Passage selon les jours de la semaine 7.2.3 no = Pas de passage 7.2.1 AU = Passage automatique A cet endroit, les données peuvent seulement être lues. Pour modifier les données, voir chapitre 7.1 Appuyer 1 fois sur la touche Les 2 points ne clignotent pas!
  • Page 74: Cha = Passage Été/Hiver Selon Les Jours De La Semaine

    7.2 Sélectionner mode de service 7.2.2 cHA = passage été/hiver selon les jours de la semaine Appuyer 1 fois sur la touche Les 2 points ne clignotent pas! Appuyer 1 ou 2 fois sur la touche + 1h jusqu'à l'apparition de cHA. Régler le commencement individuel de l'heure d'été: avec la touche Day le jour...
  • Page 75: No = Pas De Changement

    7.2.3 no = pas de changement de l'heure d'été Appuyer 1 fois sur la touche Les 2 points ne clignotent pas! Appuyer autant de fois sur la touche + 1h jusqu'à l'apparition de no. L'horloge fonctionne avec calandrier, mais sans passage automatique. Le passage manuel peut toujours être activé...
  • Page 76: Fonctions De Commutation

    Fonctions de commutation L'entrée des fonctions de commutation est valable pour tous les types d'assignation: • Fonctions de commutation sans assignation de date, toujours dans bloc 00, toujours avec priorité 0 (fonctions standard) • Fonctions de commutation avec date individuelle, voir chapitre 9.1 •...
  • Page 77 Entrer les jours de la semaine: 1 2 3 4 5 6 7 (lundi ... dimanche) Régler l'état de commutation: choisir avec la touche 1/0 pour chaque canal séparément MARCHE; ARRÊT Appuyer 1 fois brièvement sur la touche Prog., la fonction de commutation est mémorisée.
  • Page 78: Entrer La Date

    Entrer la date • Les fonctions de commutation, auxquelles une date est assignée, sont rangées en blocs, en même temps la priorité 2 est assignée, modifier priorité - voir chapitre 10. • Le numéro de bloc est assigné automatiquement (01 à 99) (les fonctions de commutation sans assignation de la date toujours en bloc 00, toujours avec la priorité...
  • Page 79: Date Sans/Avec Année

    9.1 Date sans/avec année Appuyer 1 fois sur Day, Month ou Year A chaque fois, la date actuelle, un nouveau numéro bloc et la priorité 2 sont proposés. Entrer la date désirée: (sans ou avec l'année) avec la touche Day le jour avec la touche Month le mois avec la touche Year l'année Modifier la priorité, voir chapitre 10...
  • Page 80: Plages De Date Sans/Avec Année

    9.2 Plages de date sans/avec année Appuyer 1 fois sur la touche Day, Month ou Year A chaque fois, la date actuelle, un nouveau numéro bloc et la priorité 1 sont proposés. Entrer la date initiale désirée: (sans ou avec l'année) avec la touche Day le jour avec la touche Month le mois avec la touche Year l'année...
  • Page 81 Un espacement de mémoire libre est affiché pour entrer d'autres données. Avez-vous effectué toutes les entrées de date pour ce bloc? Si oui, entrez maintenant les fonctions de commutation correspondantes, voir chapitre 8 Appuyer 1 fois sur la touche L'entrée est terminée. La date et l'heure apparaissent sur l'affichage.
  • Page 82: Priorité

    10. Priorité Différentes priorités peuvent être assignées aux fonctions de commutation avec une assignation de date. (Numéro de bloc 00 et priorité 0 sont déterminés pour des fonctions de commutation sans assignation de date) Si la programmation est commencée par une date, un nouveau numéro de bloc et la priorité...
  • Page 83: Fonctions D'impulsion

    11. Fonctions d'impulsion Si un consommateur à nombre d'enclenchement élevé est mis en MARCHE et ARRÊT… - dans l'intervalle d'une seconde -, assurez-vous que des réper- cussions sur la qualité de dispositifs d'éclairage (flicker) et des dérange- ments pendant la réception de la radio et de la télévision sont exclus. Vous déterminer les lignes pour les fonctions d'impulsion, symbole Les temps d'impulsion sont: 01...99 secondes ou 01...99 minutes.
  • Page 84 Présélection pour secondes ou minutes touche m/s Appuyer progressivement sur la touche Régler le temps d'impulsion, de 01 ... 99 Remarque: Si la touche est actionnée pendant plus longtemps, le réglage est effectué en pas de 05 N'appuyer que brièvement sur la touche Prog.
  • Page 85: Fonctions De Cycle

    12. Fonctions de cycle Si un consommateur à nombre d'enclenchement élevé est mis en MARCHE et ARRÊT… - dans l'intervalle d'une seconde -, assurez-vous que des réper- cussions sur la qualité de dispositifs d'éclairage (flicker) et des dérangements pendant la réception de la radio et de la télévision sont exclus. Vous déterminez les lignes pour des fonctions de commutation cycliques Symbole: = durée de cycle...
  • Page 86 12. Fonctions de cycle Temps de démarrage Temps final Durée de commuta- tion MARCHE 10 Pause Pause Durée de cycle Durée de cycle 60 minutes 60 minutes Choisir un emplacement de mémoire libre: Appuyer 1 fois sur la touche Prog. –...
  • Page 87 Régler le temps de cycle, de 01 ... 99 Appuyer progressivement sur la touche Remarque: Si la touche est actionnée pendant plus longtemps, le réglage est effectué en pas de 05 Régler la durée de commutation MARCHE de 01 ... 99 Celle-ci ne peut jamais être supérieure au temps de cycle réglé...
  • Page 88: Lire - Modifier - Effacer - Remise À Zéro

    13. Lire - Modifier - Effacer - Remise à zéro • Vous lisez le nombre des espacements de mémoire libre/numéros de bloc • Vous lisez progressivement les contenus des programmes • Vous modifier, recouvrez les contenus des programmes • Vous effacez les contenus des programmes Choisir un emplacement de 13.1 Lire mémoire libre:...
  • Page 89 Lire le contenu de bloc 01 à 99: Appuyer pendant environ 1 seconde sur la touche Prog., vous êtes en bloc 01. Lire les contenus de ce bloc: Appuyer – progressivement- mais seulement brièvement sur la touche Prog., les contenus sont affichés un après l'autre.
  • Page 90 13. Lire - Modifier - Effacer - Remise à zéro 13.2 Modifier Chaque contenu de programme peut être modifié/récupéré individu- ellement. En appuyant sur la touche Prog. (lire) vous faites appel au contenu que vous désirez modifier/récupéré. La modification des données se fait de la même façon que l'entrée de nouvelles données (voir le chapitre correspondant).
  • Page 91 13.4 Effacer – toutes les fonctions de commutation Appuyer 2 fois sur la touche Prog., le nombre des numéros de bloc libres ainsi que le nombre des emplacements de mémoire libres sont affichés. Appuyer 1 fois sur la touche Clear c l apparaît en plus à...
  • Page 92: Commutateur Manuel

    14. Commutateur manuel Vous modifier - manuellement - l'état de commutation actuel. Cependant, le programme de commutation réglé individuellement se conserve. 1 pour canal 1 2 pour canal 2 3 pour canal 3 4 pour canal 4 = mode programme = mode manuel FIX = mode permanent = arrêt...
  • Page 93: Caractéristiques Techniques

    16. Caractéristiques techniques Horloge 1, 2, 3 ou 4 canaux Dimensions (H x L x P) mm 45 x 108 x 60 Découpe du panneau mm 45 x 108 Poids g (env.) Raccordement Voir schéma sur l'appareil Puissance absorbée: Voir schéma sur l'appareil Pouvoir de coupure –...
  • Page 94 Indice Indice Pagina Consigli per la sicurezza Montaggio, messa in funzione, collegamento Comandi Indicazioni Display Indicazioni generali Impostazione dalla fabbrica Modifica delle impostazioni Scelta tipo di funzionamento 7.2.1 AU = commutazione automatica dell’ora legale 7.2.2 cHA = commutazione semiautomatica dell’ora legale 7.2.3 no = nessuna commutazione Comandi standard...
  • Page 95: Consigli Per La Sicurezza

    Consigli per la Vostra Sicurezza L’installazione dell’apparecchio deve essere effettuata da un’installatore professionalmente qualificato. Per il montaggio: • Indicato per l’impiego in condizioni normali • Per l’installazione a parete usate i relativi accessori Grässlin Se l’apparecchio viene montato secondo lo standard VDE 0100 parte 40 si può...
  • Page 96: Montaggio, Messa In Funzione, Collegamento

    Montaggio, messa in funzione, collegamento Montaggio Montate l’interruttore orario • su barra DIN • su parete (opzionale) Set per montaggio a parete per 6 TE Art.-Nr. 03.59.0046.2 Messa in funzione L’orario e la data vengono impostati dalla fabbrica. L’interruttore orario funziona con risparmio di energia ”Energy Saving“, cioè...
  • Page 97 Elementi di comando Interruttore manuale scegliere i minuti/secondi funzione impulso/ciclo minuti impostare anno impostare mese giorno fino al, per campo date commutazione ora solare/ora legale Reset scegliere l’impulso scegliere il ciclo impostare la data attuale, l’orario Iniziare la programmazione Tramettere/ricevere IR Priorità...
  • Page 98 Anzeige giorno (US mese) mese (US giorno) impulso (minuti) impulso (secondi) ciclo (minuti) ciclo (secondi canale 1 anno funzionemento fisso numero del blocco funzionemento manuale priorità funzionemento automatico stato del comando commutazione ora solare/ canale 2 ora legale canale 3 funzionamento automatico canale 4 ricezione...
  • Page 99: Indicazioni Generali

    Indicazioni generali Numero dei blocchi Durante la programmazione vengono assegnati automaticamente. dei numeri per blocchi. I blocchi vanno da 00 a 99. Tutti i comandi di commutazione ai quali non viene assegnata una data ricevono sempre il numero di blocco 00. (il numero di bloccho 00 ha sempre la priorità...
  • Page 100 Indicazioni generali Back Up Programma definito con i tasti Prog e 1 (tasto giornaliero) Il programma in primo piano rimane Programma attuale salvato e può essere modificato a scelta. In caso di necessità richiamare il programma originale con la funzione Restore.
  • Page 101 Indicazioni generali Programmare seduti alla scrivania Si può programmare l’interruttore orario seduti comodamente alla scrivania perché il modulo orologio può essere facilmente estratto dall’apparecchio Programmare con il talento taxxi (apparecchio di programmazione manuale) La trasmissione più confortevole si effettua con il talento taxxi. 6.5.1 da interruttore orario a interruttore orario (da modulo di comando a modulo di comando –...
  • Page 102 Indicazioni generali 6.5.2 Voi impostate i Vostri programmi di comando con il Software talento dialog su un PC. Questi vengono poi trasmessi attraverso l’interfaccia del PC nel taxxi. Con il taxxi si trasferiscono i programmi attraverso l’interfaccia IR nell’interruttore orario (modulo), vedi libretto talento dialog.
  • Page 103 Indicazioni generali Service 6.6.1 Indicazioni di errore L’interruttore orario indica errori di funzionamento: • Er 04 – in caso di intervento sbagliato sulla EEProm. In casi singoli può apparire questo errore. Premete un tasto qualsiasi, l’interruttore orario continua a lavorare normalmente. Se quest’indicazione dovesse apparire di frequente Vi consigliamo e sostituire l’interruttore orario.
  • Page 104: Impostazione Dalla Fabbrica

    Impostazione dalla fabbrica Le impostazioni della fabbrica sono basate sull’ora dell’Europa Centrale (CET). Sono impostati la data, l’ora nonché il funziona- mento AU. Tipo di funzionamento: • AU commutazione automatica ora solare/ora legale (vedi punto 7.2.1) La commutazione avviene alle date prescritte per legge. Per il funzionamento in Italia, l’orologio è...
  • Page 105 Impostazione dalla fabbrica Invertire giorno con mese (utilizzato in USA/GB) premere il tasto 1 volta i due punti non lampeggiano! premere il tasto 2 (giorno settimanale) 1 volta (mese, giorno) premere il tasto 1 volta la programmazione è conclusa. Adeguamento a CET (ora dell’Europa Centrale) Se l’interruttore orario riceve il segnale radio DCF 77 può...
  • Page 106: Modifica Delle Impostazioni

    7.1. Modifica delle impostazioni Attenzione: Premendo il tasto si può in qualsiasi momento uscire o concludere le impostazioni o le modifiche. Data e orario Premete il tasto una volta i due punti non lampeggiano! Inserire, modificare la data: con il tasto Day il giorno (numero) con il tasto Month il mese (numero con il tasto Year l’anno (ultime due cifre) Inserire, modificare l’ora:...
  • Page 107: Au = Commutazione Automatica Dell'ora Legale

    7.2 Scegliere il tipo di funzionamento 7.2.1 AU = commutazione automatica dell’ora legale 7.2.2 cHA = commutazione semiautomatica dell’ora legale 7.2.3 no = nessuna commutazione 7.2.1 AU = commutazione automatica dell’ora legale Questi dati a questo punto si possono solo leggere. Per la modifica vedi punto 7.1 premete il tasto una volta...
  • Page 108 7.2 Scegliere il tipo di funzionamento 7.2.2 cHA = commutazione semiautomatica dell’ora legale premete il tasto una volta i due punti non lampeggiano! Premete il tasto + 1h una o due volte finchè appare cHA Impostare l’inizio dell’ora legale del Vostro paese: con il tasto Day il giorno con il tasto Month il mese premete una volta il tasto...
  • Page 109: No = Nessuna Commutazione

    7.2.3 no = nessuna commutazione premete il tasto una volta i due punti non lampeggiano! Premete il tasto + 1h finchè non appare no L’interruttore orario lavora con il calendario ma senza commuta- zione automatica. La commutazione manuale può essere attivata in ogni istante con il tasto + 1h.
  • Page 110: Comandi Standard

    Comandi standard L’impostazione dei comandi è valida per tutti i tipi di ordinamento. • Comandi senza assegnazione della data, sempre blocco 00, sempre con priorità 0 (comandi standard) • Comandi con data singola, vedi capitolo 9.1 • Comandi con campo di date, vedi capitolo 9.2 •...
  • Page 111 Impostare i giorni: 1 2 3 4 5 6 7 (lunedi … domenica) Impostare lo stato di comando: scegliere con il tasto 1/0 separatamente per ogni canale = ON; = OFF Premere brevemente una volta tasto Prog., il comando è memorizzato. Viene indicato un posto di memoria libero –...
  • Page 112 Impostazione della data • I comandi ai quali viene assegnata una data vengono ordinati in blocchi, nel contempo viene assegnata la priorità 2; per modificare la priorità vedi capitolo 10 • L’ordinamento dei blocchi avviene automaticamente (da 01 a 99) (comandi senza assegnazione di una data sempre nel blocco 00, sempre con priorità...
  • Page 113: Date Singole Senza/Con Anno

    9.1 Data singola senza/con anno Premete una volta il tasto Day, Month o Year Viene offerto sempre la data attuale, un nuovo numero di blocco e la priorità 2. Impostare la data desiderata: (con o senza anno) con il tasto Day il giorno con il tasto Month il mese con il tasto Year l’anno Modificare la priorità, vedi capitolo 10...
  • Page 114: Campo Date Senza/Con Anno

    9.2 Campo date senza/con anno Premete una volta il tasto Day, Month o Year Viene offerta sempre la data attuale, un nuovo numero di blocco e la priorità 1. Impostare la data d’inizio desiderata: (con o senza anno) con il tasto Day il giorno con il tasto Month il mese con il tasto Year l’anno Modificare la priorità, vedi punto 10...
  • Page 115 Viene indicato un posto di memoria libero – per ulteriori impostazioni. Avete inserito per questo blocco tutte le date? Se si, impostate adesso tutti i relativi comandi, vedi punto 8 oppure Premete il tasto una volta per terminare l’impostazione Nel Display appariranno la data e l’ora attuale.
  • Page 116: Priorità

    10. Priorità I comandi ai quali è stata assegnata una data – una data singola o un periodo di tempo – possono essere inseriti con priorità diverse (il blocco 00 e priorità 0 sono fissi per comandi senza assegnazione di date). Se si inizia la programmazione con una data singola viene sempre asseg- nato un nuovo nummero di blocco e la priorità...
  • Page 117: Comandi Ad Impulsi

    11. Comandi ad impulsi Se un’utenza viene comandata continuamente ON/OFF – con comandi della durata dell’ordine di secondi – bisogna assicurarsi che siano evitati gli effetti retroattivi degli impianti d’illuminazione (Flicker) e i disturbi nella ricezione radio e TV. Scegliete i tempi per i comandi ad impulso. Questi vengono eseguiti nei tempi programmati una volta sola.
  • Page 118 Selezione tra secondi o minuti Con il tasto Impostare il tempo del impulso, da 01 ... 99. Premete il tasto Attenzione: Se il tasto viene premuto più a lungo l’impostazione avviene in passi di 05 Premete il tasto Prog. solo brevemente il comando è...
  • Page 119: Comandi Ciclici

    12. Comandi ciclici Se un utenza viene comandata ON/OFF con intervalli brevi – nell’ambito di secondi – deve essere assicurato che siano evitati effeti reattivi sulla qualità degli impianti d’illuminazione (Flicker) e disturbi nella ricezione radio e televisiva. Siete Voi a definire i tempi per i comandi ciclici Simboli: = durata del ciclo (2...99 sec.
  • Page 120 12. Comandi ciclici Partenza del periodo Fine del periodo Durata del comando ON 10 minuti Pausa Pausa Durata del ciclo Durata del ciclo 60 min. 60 min. Scegliere un posto di memoria libero: Premete una volta il tasto Prog. – –.– – –...
  • Page 121 Impostare il tempo del ciclo, 01 ... 99 Premere il tasto passo passo Attenzione: Se il tasto viene premuto più a lungo l’impostazione avviene in passi di 05 Impostare la durata del comando ON da 01 ... 99 Questa durata non può essere superiore al tempo del ciclo impostato precedentemente premete il tasto...
  • Page 122: Lettura - Modifica - Cancellazione - Reset

    13. Lettura – modifica – cancellarzione – Reset • Leggere il numero dei posti di memoria/blocchi liberi • Leggere i contenuti dei programmi passo passo • Modificare, sovrascrivere il contenuto del programma • Cancellare il contenuto dei programmi 13.1 Lettura Scegliere un posto di memoria libero: Premete il tasto Prog.
  • Page 123 Leggere il contenuto dei blocchi 01 .. 99: Premete una volta il tasto Prog. per ca.1 secondo – siete nel blocco 01. Leggere i contenuti di questo blocco: Premete solo brevemente il tasto Prog. – passo passo –, vengono indicati i programmi contenuti uno dopo l’altro.
  • Page 124 13. Lettura – modifica – cancellarzione – Reset 13.2 Modifica Ogni contenuto può essere modificato individualmente sovrascrivendolo. Potete richiamare (leggere) il contenuto che volete modificare con il tasto Prog. La modifica si fa allo stesso modo dell’inserimento di dati nuovi, vedi i relativi punti.
  • Page 125 13.4 Cancellazione – tutti i comandi Premete il tasto Prog. due volte Nel Display vengono indicati i posti di blocchi ed i posti di memoria liberi. Premete una volta il tasto Clear Nel Display apparirà inoltre c l che lampeggia. Premere il tasto Clear.
  • Page 126: Interruttore Manuale

    14. Interruttore manuale Potete modificare manualmente lo stato di comando momentaneo. Il programma individuale impostato rimane attivo. 1 per canale 1 2 per canale 2 3 per canale 3 4 per canale 4 = Automatico = funzionamento manuale FIX = funzionamento fisso = OFF = ON FIX = fisso ON...
  • Page 127: Dati Tecnici

    16. Dati tecnici 1, 2, 3 o 4 canali orologio annuale Dimensioni (A x L x P) mm 45 x 108 x 60 Dima di foratura mm 45 x 108 Peso g (circa) Collegamento vedi schema sull’apparecchio Assorbimento: vedi schema sull’apparecchio Portata contatti –...
  • Page 128 Índice Índice Pagina Instrucciones de seguridad Montaje, puesta en funcionamiento, conexión Elementos de control Visualización General Ajustes de fábrica Modificación de ajustes Selección de modo de operación 7.2.1 AU = Cambio automático 7.2.2 cHA = Cambio dependiendo del día de la semana 7.2.3 no = Sin cambio Órdenes de conmutación...
  • Page 129 Información de seguridad La instalación deberá ser llevada a cabo e inspeccionada por una persona especializada o bajo la supervisión de dicha persona. En relación al montaje: • Adecuado para su utilización en condiciones ambientales con niveles de contaminación normales •...
  • Page 130: Montaje, Puesta En Funcionamiento, Conexión

    Montaje, Puesta en funcionamiento, Conexión Montaje Ajustar el interruptor horario • en una carril DIN • El montaje en superficie es opcional El montaje en superficie está fijado para 6 módulos Artículo número 03.59.0046.2 Puesta en funcionamiento La hora y fecha han sido ajustados en fábrica.
  • Page 131: Elementos De Control

    Elementos de control Seleccion de Interruptor manual minutos/segundos para funciones de impulsos/ciclos Minutos Ajustar Horas Año Ajustar Día hasta, para serie de fechas conmutador de horario de invierno/horario de verano Reset Seleccionar impulsos Seleccionar ciclos Fecha actual, fijación de hora Iniciar entrada de programa Enviar/Recibir IR Prioridad...
  • Page 132 Pantalla Día (mes US) Mes (día US) Impulsos (minutos) Impulsos (segundos) Ciclos (minutos) Ciclos (segundos) Circuito 1 Año Funcionamiento contínuo Número de bloque Funcionamiento manual Prioridad Funcionamiento automático Estado de conmutación Indicador de horario Circuito 2 de verano/ horario de invierno Circuito 3 Operación...
  • Page 133: General

    General Números de bloque Los números de bloque aparecen de forma automática durante la programación. Hay números de bloque desde 00 ..99 (principio de bloque). Las órdenes de conmutación sin asignación de fecha siempre reciben el número de bloque 00. (La prioridad 0 siempre se asigna al número de bloque 00 –...
  • Page 134 General Back Up Programa memorizado con las teclas Prog y 1 (tecla correspondiente a los días) Programa actual El programa en primer plano queda memorizado, ahora se pueden realizar modificaciones. Si quiere restaurar el programa en su versión original actívelo simplemente con la tecla Restore.
  • Page 135 General Programación en el despacho El panel de mando es extraible. Así puede efectuar la programación cómodamente en su oficina. Programación con el talento taxxi (programador portátil) La introducción más confortable de los programas de conmutación se realiza con el talento taxxi. 6.5.1 De interruptor horario a interruptor horario (de panel de mando a panel de mando –...
  • Page 136 General Elabore sus programas con el software talento dialog 6.5.2 en un PC. Estos programas se transmiten al programador portátil taxxi a través del cable de conexión al PC. Después los programas se introducen a través del puerto de infrarrojos del taxxi en los interruptores horarios (panel de mando), véase manual de instrucciones para el talento dialog.
  • Page 137 General Mantenimiento 6.6.1 Mensajes de error El interruptor horario indica los siguientes mensajes de error: • Er 04 – en caso de acceso erróneo al EEProm Este mensaje puede aparecer ocasionalmente. Pulse cualquier tecla y el interruptor horario volverá a funcionar correctamente. Si este mensaje aparece con frecuencia es recomendable reemplazar el interruptor horario.
  • Page 138: Ajustes De Fábrica

    Ajustes de fábrica Los valores por omisión corresponden al Horario de Europa Central (CET). El interruptor de hora ofrece 3 modos de operación. La fecha, hora y el modo de operación AU están prefijados. Modos de operación: • AU Cambio automático del horario de verano/invierno, véase punto 7.2.1 La conmutación tiene lugar en la fecha legalmente definida •...
  • Page 139 Ajustes de fábrica Cambio de visualizador de fecha fija (método USA/GB) Pulsar el botón 1 vez. Los dos puntos no se iluminan! Pulsar el botón 2 (día de la semana) 1 vez (Mes, día) Pulsar el botón 1 vez. Finaliza la entrada Ajuste según CET Si el interruptor de hora recibe la radio señal de hora DCF 77, puede ser necesario, dependiendo de la localidad, ajustar la hora.
  • Page 140: Modificación De Ajustes

    7.1. Modificación de ajustes Nota: En todas las entradas/cambios que se realicen, es posible suspender o finalizar las entradas/cambios en cualquier momento con el botón Fecha y hora Pulsar el botón 1 vez. Los dos puntos no se iluminan! Ajuste y cambio de fecha: Con el botón Day –...
  • Page 141: Selección De Modo De Operación

    7.2 Selección de modo de operación 7.2.1 AU = Cambio automático 7.2.2 cHA = Cambio en relación al día de la semana 7.2.3 no = Sin cambio 7.2.1 AU = Cambio automático Estos datos únicamente se pueden leer en este punto. Véase el punto 7.1 para cambiar los datos Pulsar el botón 1 vez.
  • Page 142 7.2 Selección de modo de operación 7.2.2 cHA = Cambio en relación al día de la semana Pulsar el botón 1 vez. Los dos puntos no se iluminan! Pulsar el botón + 1h una o dos veces hasta que aparezca el cHA Ajuste de inicio de horario de verano personalizado: Día del año con el botón Day...
  • Page 143: No = Sin Cambio

    7.2.3 no = Sin cambio de horario de verano Pulsar el botón 1 vez. Los dos puntos no se iluminan! Pulsar el botón + 1h las veces que sea necesario hasta que aparezca en pantalla no El interruptor de hora opera con la fecha del año pero sin el cambio automatico.
  • Page 144: Órdenes De Conmutación

    Órdenes de conmutación La entrada de las órdenes de conmutación se aplica a todos los tipos de asignación: • Las órdenes de conmutación sin asignación de fecha, siempre en el bloque 00, siempre con prioridad 0 (órdenes de conmutación estandarizadas) •...
  • Page 145 Ajuste de días de la semana: 1 2 3 4 5 6 7 (Lunes … Domingo) Ajuste de estado de conmutación: Con el botón 1/0 para cada circuito, seleccionar de forma separada = ON; = OFF Pulsar el botón Prog. 1 vez. Se guarda la orden de conmutación.
  • Page 146 Introducción de la fecha • Las órdenes de conmutación a las que se asigna una fecha se disponen en bloques. La prioridad 2 se asigna al mismo tiempo. Cambio de prioridad, véase Punto 10 • El número de bloque se asigna de forma automática (01 a 99) (las órdenes de conmutación sin asignación de fecha siempre en el bloque 00, siempre con la prioridad 0) véase punto 10 •...
  • Page 147: Fecha Única Con/Sin Año

    9.1 Fecha única con/sin año Pulsar el botón Day, Month o Year 1 vez Siempre se ofrecen la fecha actual, un nuevo número de bloque y la prioridad 2. Introducir la fecha requerida: (con o sin año) Día del año con el botón Day Mes del año con el botón Month Año con el botón Year Cambiar la prioridad, véase Punto 10...
  • Page 148: Serie De Fechas Con/Sin Año

    9.2 Serie de fechas con/sin año Pulsar el botón Day, Month o Year 1 vez Siempre se ofrecen la fecha actual, un nuevo número de bloque y la prioridad 1 Introducir la fecha requerida de inicio: (con o sin año) Día del año con el botón Day Mes del año con el botón Month Año con el botón Year...
  • Page 149 Se visualiza una posición de memoria libre – para entradas adicionales. ¿Se han realizado todas las entradas de fecha para este bloque? Si es así, se introducirán ahora las ordenes de conmutación pertinentes, Véase Punto 8 Pulsar el botón 1 vez Finaliza la entrada.
  • Page 150: Prioridad

    10. Prioridad Las órdenes de conmutación con la asignación de datos se pueden ocupar con diferentes prioridades (número de bloque 00 y prioridad 0 se define para órdenes de conmutactión sin asignación de fechas) Si se empieza con una fecha durante la programación, siempre se ofrecen un nuevo número de bloque y la prioridad 2 = en caso de no existir una fech única.
  • Page 151 11. Ordenes de Impulso Si una carga con una frecuencia de conmutación alta, en el ambito de segundos, se conmuta ON y OFF, se debe segurar que se evitan efectos negativos en la calidad de las unidades de ilumición (parpadeo) y fallos en la recepción de radio y televisión.
  • Page 152 Preselección para segundos o minutos Tecla Pulsar el botón repetidamente. Ajustar la duración de impulsos de 01 a 99 Nota: Si el botón se mantiene pulsado, el ajuste tiene lugar en ajuste tiene lugar en pasos de 05 Pulsar el botón Prog. una vez sólo. Se guarda la orden de conmutación.
  • Page 153 12. Órdenes de ciclo Si una carga con una frecuencia de conmutación alta, en el ámbito de segundos, se conmuta ON y OFF, se debe asegurar que se evitan efec- tos negativos en la calidad de las unidades de iluminación (parpadeo) y fallos en la recepción de radio y televisión.
  • Page 154 12. Órdenes de ciclo Hora de inicio Hora de finalización Duración de conmutación en ON 10 minutos Pausa Pausa Duración del ciclo Duración del ciclo 60 minutos 60 minutos Selección de posición de memoria libre: Pulsar el botón Prog. una vez –...
  • Page 155 Ajuste de duración de ciclo de 01 a 99 Pulsar el botón repetidamente Nota: si el botón se pulsa de forma contínua, el ajuste tiene lugar en incrementos de 05 Ajuste de la duración de conmutación de ON, 01 ... 99 No puede ser superior que la hora de ciclo ajustada previamente Pulsar el botón...
  • Page 156: Leer - Cambiar - Borrar - Reajustar

    13. Leer – Cambiar – Borrar – Reajustar • Se puede leer le número de posición de memoria libre/números de bloque • Se puede leer el contenido de programas de forma secuencial • Se puede cambiar, sobregrabar los contenidos del programa •...
  • Page 157 Leer los contenidos del bloque 01 al 99: Pulsar el botón Prog. una vez durante aproximadamente 1 segundo. Se encuentra en el bloque 01. Leer los contenidos de este bloque: Pulsar el botón Prog. repetidamente. Los contenidos se visualizan de forma progresiva.
  • Page 158 13. Leer – Cambiar – Borrar – Reajustar 13.2 Cambiar Los contenidos de cada programa se pueden cambiar o sobregrabar de forma individual. Con el botón Prog (leer), se pueden recibir todos los contenidos que se desee cambiar o reescribir. El cambio se efectùa de la misma manera que la introducción de datos nuevos (véase el punto pertinente).
  • Page 159 13.4 Borrar – todas las órdenes de conmutación Pulsar el botón Prog. 2 veces Se visualiza el número de números de bloque libre y el de situaciones de memoria libre. Pulsar el botón Clear 1 vez c l también aparece en la pantalla y se ilumina Presionar el botón Clear1 vez.
  • Page 160 14. Conmutación manual Es posible cambiar de forma manual el estado de conmutación actual. Sin embargo, se conserva el programa de conmutación establecido. 1 para el Circuito 1 2 para el Circuitol 2 3 para el Circuito 3 4 para el Circuito 4 = Automático = Modo manual FIX = Modo continuo...
  • Page 161 16. Ficha técnica reloj anual 1, 2, 3, 4 circuitos Dimensiones (A x A x F) mm 45 x 108 x 60 Corte de cuadro de distribución en mm 45 x 108 Peso aproximado en gr Conexión véase esquema en la unidad Consumo de energía véase esquema en la unidad Capacidad de conmutación...
  • Page 162 Inhoudsopgave Inhoud Blz. Aanwijzingen voor de veiligheid Montage, Ingebruikname, Aansluiting Bediening Aanduidingen Algemeen Fabrieksmatige instelling Instellingen veranderen Bedrijfssoort kiezen 7.2.1 AU = automatische omschakeling 7.2.2 cHA = vrij instelbare omschakeling 7.2.3 no = geen omschakeling Schakelcommando’s Datum Datum met/zonder jaar Datumbereik met/zonder jaar Prioriteit Impuls –...
  • Page 163: Aanwijzingen Voor De Veiligheid

    Aanwijzingen voor der veiligheid De installatie moet door een vakbekwaam of onder begeleiding van een vakbekwaam installateur uitgevoerd en gecontroleerd worden. Voor de montage • geschikt voor gebruik bij gebieden met de gebruikelijke verontreinigingsvoorwaarden • voor opbouw het bijbehorende opbouwhuis van Grässlin gebruiken.
  • Page 164: Montage, Ingebruikname, Aansluiting

    Montage, ingebruikname, aansluiting Montage Schakelklok monteren • op DIN-Rail • Optie opbouw-wandopbouwset 6TE art.nr. 03.59.0046.2 Ingebruikname De tijd en de datum worden fabrieksmatig ingesteld. De schakelklok bevindt zich in de stroomspaar-modus, alleen de: knippert. Drukt u een willekeurige toets in: •...
  • Page 165: Bediening

    Bediening Handschakelaar Minuten/seconden kiezen voor cyclus-/impulsfunctie minuten instellen seconden jaar instellen kalendermaand tot volgende datumbereik tot, voor datumbereik zomer-/wintertijdomschakeling Reset Impuls kiezen Cyclus kiezen Actuele datum, tijd instellen Programmering beginnen IR-zenden/ontvangen Prioriteit Dag kiezen wissen 1 = maandag 2 = dinsdag 3 = …...
  • Page 166: Aanduidingen

    Aanduidingen Dag (US maand) Maand (US dag) Impuls (minuten) Impuls (seconden) Cyclus (minuten) Cyclus (seconden) Kanaal 1 Jaartal Continue-bedrijf Bloknummer Prioriteit Handmatig bedrijf Automatisch bedrijf Schakeltoestand Zomer-/ wintertijd Kanaal 2 omschakeling Kanaal 3 Automatisch Kanaal 4 bedrijf DCF 77 Antenne-ontvangst Impuls 1234567 = dag Cyclus...
  • Page 167: Algemeen

    Algemeen Bloknummering Bij het programmeren worden automatisch bloknummers vergeven. Er zijn bloknummers van 00 …… 99 (notitiebloksysteem). Alle schakelcommando’s zonder datumtoewijzing krijgen altijd het bloknummer 00 (bloknummer 00 is altijd prioriteit 0 – dit kan niet veranderd worden). Alle schakelcommando’s met datumtoewijzing krijgen bloknummers 01 ..
  • Page 168 Algemeen Back Up Opgeslagen programma met de toets Prog en 1 (dagtoets) Het schakelprogramma in de voorgrond Aktueel programma blijft behouden en kan naar eigen wens veranderd worden. Naar behoefte kunt u met de toets Restore het oorspronkelijke programma weer opvragen.
  • Page 169 Algemeen Programmeren aan tafel Het bediendeel kunt u eruit nemen. Het programmeren gebeurt dan comfortabel aan tafel. Programmeren met de talento taxxi (handprogrammeerapparaat) De comfortabelste manier van programmeren biedt de talento taxxi. 6.5.1 Van schakelklok naar schakelklok (van bediendeel naar bediendeel –...
  • Page 170 Algemeen 6.5.2 U maakt uw schakelprogramma met de Soft-ware talento dialog op een PC. Deze worden dan door de PC-interface naar de taxxi overdragen. Met de taxxi worden nu de schakelprogramma’s door IR-interface naar de desbetreffende schakelklok over gedragen. talento taxxi Aanwijzing: Soft-ware en toebehoor zijn afzonderlijk te bestellen: •...
  • Page 171 Algemeen Service 6.6.1 Foutmeldingen De schakelklok meldt de volgende foutmeldingen: • Er 04 – bij onjuiste toegang op de EEProm, in enkele gevallen kan deze foutmelding verschijnen. Drukt u een willekeurige toets in, de schakelklok werkt normaal door Treedt deze foutmelding vaker op, adviseren wij de klok uit te wisselen.
  • Page 172: Fabrieksmatige Instelling

    Fabrieksmatige instelling De ingegeven instellingen voldoen aan de tijd van midden Europa. De schakelklok biedt 3 bedrijfssoorten. De datum en tijd evenals bedrijfssoort AU zijn ingesteld. Bedrijfssoorten: • AU Automatische omschakeling van de zomertijdregeling, zie hoofdstuk 7.2.1 De omschakeling geschiedt volgens de door de wet vastgestelde data.
  • Page 173 Fabrieksmatige instelling Data-aanduiding draaien (Methode in de USA/GB) toets 1x indrukken “:“ knippert niet 2-toets (dag) 1x indrukken (maand/dag) toets 1x indrukken, ingave is beëindigd. Aanpassen aan Midden Europese Tijd Ontvangt de schakelklok het tijdsignaal DCF 77, kan het afhankelijk van de plaats, bevorderlijk zijn, dat de aanduiding gecorrigeerd moet worden.
  • Page 174: Instellingen Veranderen

    7.1. Instellingen veranderen Aanwijzing: Bij alle instellingen/veranderingen, die u doorvoert, is de bevesti- ging c.q. beëindiging met de toets ieder moment mogelijk. Datum en Tijd toets 1x indrukken “:“ knippert niet Datum instellen, veranderen: met Day toets dag met Month toets maand met Year toets jaar Tijd instellen, veranderen: met h toets uren...
  • Page 175: Bedrijfssoort Kiezen

    7.2 Bedrijfssoort kiezen 7.2.1 AU = automatische omschakeling 7.2.2 cHA = vrij instelbare omschakeling 7.2.3 no = geen omschakeling 7.2.1 AU = automatische omschakeling Deze data kunt u in dit geval alleen aflezen. Data veranderen, zie hoofdstuk 7.1 toets 1x indrukken “:“...
  • Page 176 7.2 Bedrijfssoort kiezen 7.2.2 cHA = vrij instelbare omschakeling toets 1x indrukken “:“ knippert niet + 1h toets 1 resp. 2x indrukken, tot cHA verschijnt Individueel begin van de zomertijd instellen: met Day toets dag met Month toets maand toets 1x indrukken, knippert Individueel begin van de zomertijd instellen:...
  • Page 177: No = Geen Omschakeling

    7.2.3 no = geen omschakeling toets 1x indrukken “:“ knippert niet + 1h toets zo vaak indrukken tot no verschijnt De schakelklok werkt met een kalender, echter zonder automatische omschakeling. De handmatige omschakeling kan altijd geactiveerd worden, met de toets + 1h. toets 1x indrukken, ingave is beëindigd.
  • Page 178: Schakelcommando's

    Schakelcommando’s De ingave van schakelcommando’s geldt voor alle soorten met de indeling: • schakelcommando’s zonder datumtoewijzing, altijd in blok 00, altijd met prioriteit 0 (standaard schakelcommando) • schakelcommando’s met één datum, zie hoofdstuk 9.1 • schakelcommando’s met datumbereik, zie hoofdstuk 9.2 •...
  • Page 179 Dagen instellen: 1 2 3 4 5 6 7 (Maandag … Zondag) Schakeltoestand instellen: 1/0 toets voor elk kanaal apart kiezen = AAN; = UIT Prog toets 1x kort indrukken, het schakelcommando is opgeslagen. Een vrije geheugenplaats is aangegeven – voor verdere ingaven. toets 1x indrukken, ingave is beëindigd.
  • Page 180: Datum

    Datum ingeven • schakelcommando’s, die een datum toegewezen krijgen, worden in blokken geordend, gelijktijdig wordt de prioriteit 2 toegewezen, prioriteit veranderen – zie hoofdstuk 10 • het toewijzen van het bloknummer geschiedt automatisch (0 tot 99) (schakelcommando’s zonder datatoewijzing altijd in blok 00, altijd met prioriteit 0) zie hoofdstuk 10 •...
  • Page 181: Datum Met/Zonder Jaar

    9.1 Datum met/zonder jaar Dag, maand of jaar toets 1x indrukken. De actuele datum, een nieuw bloknummer en de prioriteit 2 wordt altijd aangeboden. Gewenste datum ingeven: (zonder of met jaar) met Day toets dag met Month toets maand met Year toets jaar Prioriteiten veranderen, zie hoofdstuk 10 Prog toets alleen kort indrukken, Deze ingave is opgeslagen!
  • Page 182: Datumbereik Met/Zonder Jaar

    9.2 Datumbereik met/zonder jaar Dag, maand of jaar toets 1x indrukken. De actuele datum, een nieuw bloknummer en de prioriteit 2 wordt altijd aangeboden. Gewenste datum ingeven: (met of zonder jaar) met Day toets dag met Month toets maand met Year toets jaar Prioriteiten veranderen, zie hoofdstuk 10 toets 1x indrukken,...
  • Page 183 Een vrije geheugenplaats is aangeduid – voor verdere ingaven. Heeft u voor dit blok alle data-invoer gedaan? Zo ja, geeft u nu de daartoe behorende schakelcommando’s in, zie hoofdstuk 8 toets 1x indrukken, ingave is beëindigd. Het display duidt de datum en de tijd aan.
  • Page 184: Prioriteit

    10. Prioriteit Schakelcommando’s met een datumtoewijzing kunnen afzonderlijke prioriteiten krijgen. (bloknummer 00 en prioriteit 0 zijn vastgelegd voor schakelcommando’s zonder datumtoewijzing). Wordt bij het programmeren met een datum begonnen, wordt altijd een nieuw bloknummer en prioriteit 2 aangeboden = een kengetal voor een enkele datum.
  • Page 185: Impuls-Schakelcommando's

    11. Impuls-schakelcommando’s Wordt een verbruiker met een hogere schakelfrequentie – in seconden- bereik – AAN- en UIT-geschakeld, moet gecontroleerd zijn, dat invloed op de kwaliteit van Verlichtingsinrichtingen (geflikker) en storingen in het ontvangst – en TV ontvangst vermeden worden. U bepaald de tijden voor Impuls-schakelcommando’s, symbool Impulstijden zijn: 01...99 seconden of 01...99 minuten.
  • Page 186 Voorkeuze voor seconden of minuten -toets -toets stap voor stap indrukken Impulstijd instellen, van 01 ... 99 Aanwijzing: Wordt de toets langer ingedrukt, volgt het instellen in stappen van 05 Prog toets 1x kort indrukken, het schakelcommando is opgeslagen. Een vrije geheugenplaats is aangegeven –...
  • Page 187: Cyclus - Schakelcommando's

    12. Cyclus – schakelcommando’s Wordt een verbruiker met een hoge schakelfrequentie – in seconden- bereik – AAN en UIT geschakeld, moet zeker gesteld zijn, dat invloed op de kwaliteit van verlichtingsinstallaties (geflikker) en storingen in het ontvangst – en televisieontvangst vermeden worden. U bepaald de tijden voor cyclische schakelcommando’s Symbolen: = cyclusduur...
  • Page 188 12. Cyclus – schakelcommando’s Begintijd Eindtijd AAN-schakelduur 10 minuten Pauze Pauze Cyclus-duur Cyclus-duur 60 min. 60 min. Vrije geheugenplaatsen kiezen: Prog toets 1x indrukken – –.– – – – – – Instellen naar behoefte: – schakelcommando, dag(en), schakeltoestand, zie hoofdstuk 8 –...
  • Page 189 Cyclustijd instellen, van 01 ... 99 -toets stap voor stap indrukken Aanwijzing: Wordt de toets langer ingedrukt, geschiedt het instellen in stappen van 05 AAN - schakelduur instellen van 01 ... 99 Deze kan nooit groter zijn, als de bijvoorbaat ingestelde cyclustijd! -toets stap voor stap indrukken Prog toets 1x kort indrukken, het schakelcommando is opgeslagen.
  • Page 190: Lezen - Veranderen - Wissen - Reset

    13. Lezen – Veranderen – Wissen – Reset • u leest het aantal vrije geheugenplaatsen/bloknummers • u leest de programma-inhoud stap voor stap • u verandert, overschrijft de programma-inhoud • u wist de programma-inhoud 13.1 Lezen Vrije geheugenplaatsen kiezen: Prog-toets 1x indrukken –...
  • Page 191 Inhoud van blok 01 tot 99 lezen: Prog-toets ca.1 seconde – 1x indrukken, u zit nu in blok 01. De inhoud van dit blok lezen: Prog-toets kort stap voor stap indrukken, de inhoud wordt op volgorde aangeduid. Is een datumbereik aangeduid, verschijnt in het diplay „date “.
  • Page 192 13. Lezen – Veranderen – Wissen – Reset 13.2 Veranderen De programma inhoud kan individueel veranderd/overschreven worden. Met de prog-toets (lezen) roept u de inhoud op, die u veranderen/ overschrijven wilt. Het veranderen geschiedt op dezelfde wijze als het invoeren van nieuwe gegevens (zie huidige hoofdstuk).
  • Page 193 13.4 Wissen – alle schakelcommando’s Prog-toets 2x indrukken, het aantal vrije bloknummers/ geheugenplaatsen zijn aangeduid. Clear-toets 1x indrukken, in het display verschijnt vervolgens c l en knippert. Clear-toets 1x drukken. Gehele inhoud wordt gewist. Het display toont het bloknummer 0 evenals het maximaal aantal geheugenplaatsen.
  • Page 194: Handschakelaar

    14. Handschakelaar U verandert – handmatig – de huidige schakeltoestand. Het individuele ingestelde schakelprogramma blijft echter wel bewaard. 1 voor kanaal 1 2 voor kanaal 2 3 voor kanaal 3 4 voor kanaal 4 = automatisch = handmatig FIX = duurbedrijf = UIT = AAN FIX = duur AAN...
  • Page 195: Technische Gegevens

    16. Technische gegevens 1, 2, 3 resp. 4 kanaals jaarklok Maten (H x B x D) mm 45 x 108 x 60 Verdeleruitsparing mm 45 x 108 Gewicht gr. (ca.) Aansluiting zie opdruk op apparaat Vermogensopname zie opdruk op apparaat Schakelvermogen: –...
  • Page 196 WA-EKF 3897/06.99/S:MMS/D:Bau/80.10.0937.7...

Table des Matières