Table des Matières
Publicité
Les langues disponibles
Les langues disponibles
Liens rapides
ECO ELECTRICHEAT
TECHNICAL MANUAL. START-UP AND OPERATION ·
MANUEL TECHNIQUE. MISE EN ROUTE ET FONCTIONNEMENT ·
BETRIEBSWEISE
·
MANUALE TECNICO. AVVIAMENTO E FUNZIONAMENTO ·
FUNCIONAMENTO
Protected design and patent pending. Diseño protegido y patente en curso. Dessin ou modèle protégè et brevet en instance. Geschützte
*
Design und zum Patent angemeldet. Disegno protetto e in attesa di brevetto. Projeto protegido e patente pendent.
*
MANUAL TÉCNICO. ARRANQUE Y FUNCIONAMENTO
EDITION: 1
REFERENCES
– 3kW Incoloy
– 6kW Incoloy
– 9kW Incoloy
– 12kW Incoloy 69196
– 18kW Incoloy 69197
TECHNISCHES HANDBUCH. INBETRIEBNAHME UND
MANUAL TÉCNICO. ARRANQUE E
69193
69194
69195
Publicité
Chapitres
Table des Matières

Manuels Connexes pour Astralpool ECO ELECTRICHEAT

Sommaire des Matières pour Astralpool ECO ELECTRICHEAT
- Page 1 – 6kW Incoloy 69194 – 9kW Incoloy 69195 – 12kW Incoloy 69196 – 18kW Incoloy 69197 ECO ELECTRICHEAT TECHNICAL MANUAL. START-UP AND OPERATION · MANUAL TÉCNICO. ARRANQUE Y FUNCIONAMENTO MANUEL TECHNIQUE. MISE EN ROUTE ET FONCTIONNEMENT · TECHNISCHES HANDBUCH. INBETRIEBNAHME UND BETRIEBSWEISE ·...
-
Page 3: Table Des Matières
Operating temperature range: +5ºC to +45ºC Max operating Humidity: 90% without condensation. If the heater is not used for a long period of time (winter), it must be drained to prevent damage. Pg: 3 © ASTRALPOOL 2019 ALL RIGHTS RESERVED. PROPRIETARY DOCUMENT... -
Page 4: Product Description
ATTENTION Power supply must be fitted with a 30 mA. RCD (Residual-Current Device). Serious damages may occur both to heater and installation if not respected. Warranty void if not respected. Pg: 4 © ASTRALPOOL 2019 ALL RIGHTS RESERVED. PROPRIETARY DOCUMENT... - Page 5 Factory default flow direction is from right to left. If changing default flow direction is needed follow the steps described on images 9. Except 12 & 18kW Heater. All other heaters can be connected on a monophasic or triphasic electrical supply. † Pg: 5 © ASTRALPOOL 2019 ALL RIGHTS RESERVED. PROPRIETARY DOCUMENT...
- Page 6 UNIT IS SWITCHED ON AND WORKING BUT AFTER MANY TIME NO WARMER WATER APPRECIATED CAUSE #1: Heating elements out of order. SOLUTION #1: Check resistance between the poles of the heating elements. Replace if necessary. Pg: 6 © ASTRALPOOL 2019 ALL RIGHTS RESERVED. PROPRIETARY DOCUMENT...
-
Page 7: Product Recycling
3.4. When the non-conformance of the Product is a consequence of an incorrect installation or start-up, this warranty will only cover those installations or start-ups included in the contract of sale of the Product and carried out by the salesman or under his/her responsibility. Pg: 7 © ASTRALPOOL 2019 ALL RIGHTS RESERVED. PROPRIETARY DOCUMENT... - Page 8 Rango de funcionamiento: +5ºC a +45ºC Humedad máxima: 90% sin condensación. Si el calentador no se va a utilizar durante un largo periodo de tiempo (invierno), debe ser drenado para evitar daños. Pg: 8 © ASTRALPOOL 2019 ALL RIGHTS RESERVED. PROPRIETARY DOCUMENT...
-
Page 9: Descripcion Del Producto
La acometida eléctrica debe tener instalado un interuptor diferencial de 30mA. Serios daños pueden ocurrir tanto al calentador como a la instalación si no se respeta este punto. Garantía nula si no se respeta. Pg: 9 © ASTRALPOOL 2019 ALL RIGHTS RESERVED. PROPRIETARY DOCUMENT... -
Page 10: Requerimientos De Potencia
9. Excepto los modelos de 12 / 18kW. Todos los demás calentadores son capaces de conexión mono & trifásica. ‡ Pg: 10 © ASTRALPOOL 2019 ALL RIGHTS RESERVED. PROPRIETARY DOCUMENT... -
Page 11: Solucion De Problemas
EL EQUIPO SE CONECTA Y CALIENTA PERO NO SE APRECIA SUBIDA DE TEMPERATURA TRAS VARIAS HORAS CAUSA #1: Elementos calefactores averiados. SOLUCION #1: Verificar la resistencia entre los polos de los elementos calefactores. Reemplazar si es necesario. Pg: 11 © ASTRALPOOL 2019 ALL RIGHTS RESERVED. PROPRIETARY DOCUMENT... -
Page 12: Reciclaje Del Producto
Producto y haya sido realizada por el vendedor o bajo su responsabilidad. Pg: 12 © ASTRALPOOL 2019 ALL RIGHTS RESERVED. PROPRIETARY DOCUMENT... - Page 13 Champ de fonctionnement: +5ºC à +45ºC Humidité maximale: 90% sans condensation. Si l’échageur ne s’utilise pas pendant une certaine période de temps (hiver), il doit être drainé pour éviter dégâts. Pg: 13 © ASTRALPOOL 2019 ALL RIGHTS RESERVED. PROPRIETARY DOCUMENT...
-
Page 14: Description Du Product
Le branchement électrique doit avoir un RCD de 30 mA. Des dommages importants peuvent se produire à l’échanger de chaleur et a l'installation si ce point est ignorée. La garantie est annulée si ce n'est pas respecté. Pg: 14 © ASTRALPOOL 2019 ALL RIGHTS RESERVED. PROPRIETARY DOCUMENT... -
Page 15: Puissance Requise
étapes décrites dans les images 9. Sauf l’échanger de chaleur de 12 / 18kW, tous les autres appareils de chauffage sont capables de connexion § monophasé et triphasée. Pg: 15 © ASTRALPOOL 2019 ALL RIGHTS RESERVED. PROPRIETARY DOCUMENT... - Page 16 L’UNITEE FONCTIONNE, MAI APRES QUELQUE TEMPS, ON NE CONSTATE PAS LE CHAUFFAGE DE L’EAU CAUSE #1: Éléments de chauffage défectueux. SOLUTION #1: Vérifier la résistance entre les poles des éléments chauffants. Remplacer si nécessaire Pg: 16 © ASTRALPOOL 2019 ALL RIGHTS RESERVED. PROPRIETARY DOCUMENT...
- Page 17 été réalisées par le vendeur ou sous sa responsabilité. Pg: 17 © ASTRALPOOL 2019 ALL RIGHTS RESERVED. PROPRIETARY DOCUMENT...
- Page 18 Witterungsbeeinträchtigungen geschützt, im Innenbereich installiert werden. Funktionsbereich: +5ºC bis +45ºC Maximale Feuchtigkeit: 90% ohne Kondenswasser. Sollte der Wärmetauscher lange Zeit nicht benötigt werden (Winter), so muss dieser entwässert werden um Schäden zu meiden. Pg: 18 © ASTRALPOOL 2019 ALL RIGHTS RESERVED. PROPRIETARY DOCUMENT...
-
Page 19: Produkt-Beschreibung
• ACHTUNG Die Hausanschlussleitung muss eine 30mA Differentialsperre haben. Ernste Schäden können am Wärmetauscher und/ oder an der Installation entstehen, sollte dieser Punkt nicht beachtet werden. Garantie-Anspruch entfällt bei Nichtbeachtung. Pg: 19 © ASTRALPOOL 2019 ALL RIGHTS RESERVED. PROPRIETARY DOCUMENT... -
Page 20: Leistungsanforderungen
Werksseitig ist die Wasserflussrichtung von rechts nach links eingestellt. Sollten Sie diese Richtung ändern wollen, folgen Sie gründlich die Schritte beschrieben in der Bilderreihe 9. Ausser das Modell 12 /18 kW. Der Rest kann einphasig, sowie dreiphasig angeschlossen werden. Pg: 20 © ASTRALPOOL 2019 ALL RIGHTS RESERVED. PROPRIETARY DOCUMENT... -
Page 21: Störungsbehebungen
DAS GERÄT IST EINGESCHALTET, HEIZT AUF, ABER DIE WASSERTEMPERATUR STEIGT NICHT AUF URSACHE #1: Heiz-Elemente fehlerhaft. LÖSUNG# #1: Die Resistenz (Heizkörper oder Elemente) zwischen den Polen überprüfen und allenfalls ersetzen falls notwendig. Pg: 21 © ASTRALPOOL 2019 ALL RIGHTS RESERVED. PROPRIETARY DOCUMENT... -
Page 22: Produktentsorgung
Wenn der Mangel am Produkt die Folge nicht korrekter Installation oder Inbetriebnahme ist, tritt die Garantie nur in Kraft, wenn Installation oder Inbetriebnahme im Kaufvertrag des Produkts enthalten sind und vom Verkäufer unter seiner Verantwortung durchgeführt wurden. Pg: 22 © ASTRALPOOL 2019 ALL RIGHTS RESERVED. PROPRIETARY DOCUMENT... - Page 23 Rango di funzionamento: +5ºC a +45ºC Umidità: 90% senza condensazione. Se lo scambiatore non si usa durante un lungo periodo di tempo (inverno), lo scambiatore dovrá essere drenato per evitare danni. Pg: 23 © ASTRALPOOL 2019 ALL RIGHTS RESERVED. PROPRIETARY DOCUMENT...
- Page 24 L’allacciamento elettrico deve essere effettuato per un técnico qualificato, rispettando le leggi ed essigenze dello stato o paese. Ritiri il coperchio della morsettiera per realizzare l’allcciamento elettrico. Vedi immagine 5. • • Installare il cavo elettrico secondo sequenza d’immagini 6. Pg: 24 © ASTRALPOOL 2019 ALL RIGHTS RESERVED. PROPRIETARY DOCUMENT...
- Page 25 La direzione del flusso d’acqua è definita in fabbrica da destra a sinistra.Se bisogna cambiare la direzione, segua attentamente i passi descritti nella sequenza d’immagini 9. Tranne lo scambiatore di 12 / 18kW. Tutti gli altri scambiatori possono allacciarsi in monofasico o trifasico. †† Pg: 25 © ASTRALPOOL 2019 ALL RIGHTS RESERVED. PROPRIETARY DOCUMENT...
- Page 26 L’APPARECCHIO SI CONETTA E RISCALDA, MA NON SI NOTA LA SALITA DI TEMPERATURA DOPO ORE CAUSA #1: Elementi riscaldatori defettuosi. SOLUZIONE #1: Verificare le resistenze tra i poli degli elementi riscaldatori e rimpiazzare se necessario. Pg: 26 © ASTRALPOOL 2019 ALL RIGHTS RESERVED. PROPRIETARY DOCUMENT...
- Page 27 3.4. Quando la mancanza di conformità del Prodotto sia conseguenza di un’incorretta installazione o di un incorretto avviamento, la presente garanzia risponderà solo quando detta installazione o avviamento siano comprese nel contratto di compra-vendita del Prodotto e siano state realizzate dal venditore o sotto la sua responsabilità. Pg: 27 © ASTRALPOOL 2019 ALL RIGHTS RESERVED. PROPRIETARY DOCUMENT...
- Page 28 Faixa de Operação: +5ºC to +45ºC Umidade máxima: 90% sem condensação. Se o aquecedor não está a ser utilizado por um longo período de tempo (inverno), devem ser drenados para evitar danos. Pg: 28 © ASTRALPOOL 2019 ALL RIGHTS RESERVED. PROPRIETARY DOCUMENT...
-
Page 29: Descrição Do Producto
A instalação eléctrica deve ser feita com um interruptor diferencial de 30mA. Podem dar-se danos sérios tanto no aquecedor como na instalação se não respeitar este ponto. A Garantia será anulada se estas indicações não forem Pg: 29 © ASTRALPOOL 2019 ALL RIGHTS RESERVED. PROPRIETARY DOCUMENT... -
Page 30: Requisitos De Potência
água, siga atentamente os passos descritos nas imagens 9. Excepto o aquecedor de 12 / 18kW. Todos os outros aquecedores são capazes de ligação monofásica e ‡‡ trifásica. Pg: 30 © ASTRALPOOL 2019 ALL RIGHTS RESERVED. PROPRIETARY DOCUMENT... -
Page 31: Solução De Problemas
O APARELHO LIGA-SE E AQUECE MAS NÃO SE SENTE A SUBIDA DE TEMPERATURA PASSADAS VÁRIAS HORAS CAUSA #1: Elementos aquecedores avariados. SOLUÇÃO #1: Verificar a resistência entre os pólos dos elementos de aquecimento. Substituir de for necessário. Pg: 31 © ASTRALPOOL 2019 ALL RIGHTS RESERVED. PROPRIETARY DOCUMENT... -
Page 32: Reciclagem Do Produto
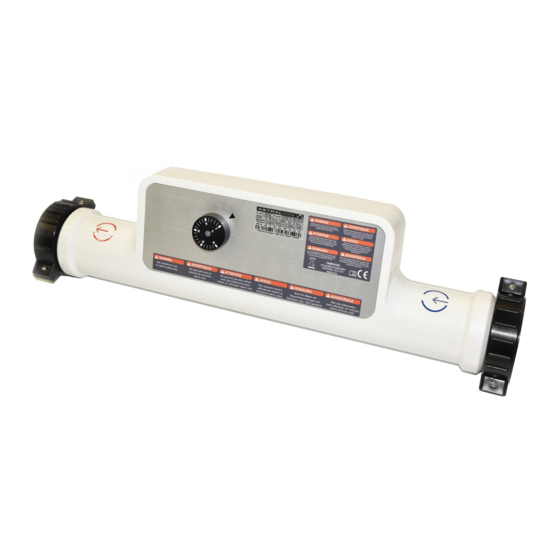
3.4. Quando a falta de conformidade do Produto for consequência de uma incorrecta instalação ou arranque, a presente garantia apenas será válida quando dita instalação ou arranque estiver incluído no contrato de compra do Produto e tenha sido realizada pelo vendedor ou sob a sua responsabilidade. Pg: 32 © ASTRALPOOL 2019 ALL RIGHTS RESERVED. PROPRIETARY DOCUMENT... - Page 33 IMGS 1 END FITTINGS TERMINALES ANCLAJE RACCORDS D'EXTRÉMITÉ ENDARMATUREN RACCORDI TERMINALI RACORES FINAIS FRONT COVER TAPA FRONTAL COUVERCLE FRONTAL FRONT-DECKEL COPERCHIO DISPLAY TAMPA FRONTAL HOLDING CLAMPS GRAPAS DE SUJECCION GRAMPOS DE FIXAÇÃO HALTEKLAMMERN COLLARI DI PRESA SEGURANDO PINÇAS BACK COVER TAPA TRASERA COUVERCLE ARRIÈRE RÜCK-DECKEL...
- Page 34 IMGS 2 IMGS 3 Horizontal & Vertical Mounting. Max installation angle. Montaje Horizontal y vertical. Angulo de instalación máximo. Montage horizontal et vertical. Angle d'installation max. Horizontale und vertikale Montage. Max Einbauwinkel. Montaggio orizzontale e verticale. Angolo massimo installazione. Montagem horizontal e vertical. Ângulo máx.
- Page 35 IMG 4 FILTRARION PUMP FILTER BY-PASS HEATER CHECK VALVE DOSER / CHLORINATOR BOMBA FILTRACION FILTRO BY-PASS CALENTADOR ANTIRRETORNO DOSIFICADOR / CLORADOR POMPE DE FILTRAGE FILTERE BY-PASS CHAUFFAGE ANTI-RETOUR DOSEUR / CHLORINATEUR DOSIERER ODER FILTRATIONSPUMPE FILTER BY-PASS WÄRMETAUSCHER RÜCKLAUFSPERRE WASSERBEHANDLUNGS- ANLAGE POMPA DI FILTRAGGIO FILTRO BY-PASS...
- Page 36 IMG 5 IMGS 6 Locate cable gland Insert cable Screw cable glandto form the seal Localizar pasacables Insertar el cable Apretar el pasacables para formar el sello Localiser presse-étoupe Traverser le câble Kabelverschraubung zur Abdichtung zu bilden Finde Kabelverschraubung Kabel einstecken Am Kabel ziehen um Siegel-Effekt zu sichern Individuare passacavo Traversare il cavo...
- Page 37 IMGS 8 PROTECTIVE EARTH 2.5mm TUBE TIERRA 2.5mm TUBO TERRE DE PROTECTION 2.5mm TUBE SCHUTZERDE 2.5mm TUBE TERRA PROTETTIVA 2.5mm TUBE TERRA DE PROTEÇÃO 2.5mm TUBO NEUTRAL NEUTRO NEUTRE NEUTRAL NEUTRO NEUTRO TERMOSTATO FLOWSWITCH THERMOSTAT FLUJOSTATO THERMOSTAT DÉTECTEUR DE DÉBIT THERMOSTAT PROTECTIVE EARTH DURCHFLUSSSCHALTER...
- Page 38 INTERNAL ELECTRICHEAT TERMOSTATO FLOWSWITCH THERMOSTAT FLUJOSTATO THERMOSTAT DÉTECTEUR DE DÉBIT THERMOSTAT PROTECTIVE EARTH DURCHFLUSSSCHALTER TERMOSTATO TIERRA FLUSSOSTATO TERMOSTATO 3 PH TERRE DE PROTECTION FLUXOTATO SCHUTZERDE TERRA PROTETTIVA TERRA DE PROTEÇÃO BLUE/AZUL/BLEU/BLAU/BLU/AZUL QUOIT/MARRÓN/MARRON/BRAUN/BROWN/MARROM EXTERIOR CONTROL CONTROL EXTERIOR CONTRÔLE EXTÉRIEUR AUSSENKONTROLLE CONTROLE EXTERIOR CONTROLLO ESTERNO INTERNAL ELECTRICHEAT TERMOSTATO...
- Page 39 IMGS 9 Unscrew the 7 screws at the back cover Dettatch the front cover Desatornillar los 7 tornillos de la carcasa trasera Desmontar la carcasa frontal Dévisser les 7 vis du couvercle arrière Démonter le couvercle frontal Die 7 Schrauben am Rückdeckel aufschrauben Den Frontdeckel entfernen Svitare le 7 vite del coperchio posteriore Levare il coperchio frontale...
- Page 40 DIMENSIONS / DIMENSIONES DIMENSIONS GRÖßE / DIMENSIONI DIMENSÓES...
- Page 42 PART Nº DESCRIPTION MODEL CODE STAINLESS STEEL 316 TUBE TUBO INOXIDABLE 316 TUBE ACIER INOXYDABLE 316 69193R0001 ROHR INOX 316 TUBO ACCIAIO INOX 316 TUBO DE AÇO INOXIDAVEL 316 FRONT COVER TAPA FRONTAL COUVERCLE FRONTAL 69193R0002 FRONT-DECKEL COPERCHIO DISPLAY TAMPA FRONTAL ALUMINIUM PLATE PLACA DE ALUMINIO PLAQUE D’ALUMINIUM...
- Page 43 INSTALLATION TEMPLATE – PLANTILLA INSTALACION – MATRICE DE L`INSTALLATION MONTAGEVORLAGE – INSTALLAZIONE MODELLO – MODELO DE INSTALAÇÃO...
- Page 44 INSTALLATION – INSTALACION – INSTALLAZIONE – INSTALAÇÃO • Locate where the heater is to be installed and check the necessary space with the template. Localizar dónde se va a instalar el calentador y comprobar que se dispone de espacio suficiente. •...
- Page 45 Mark on the pipe the two positions indicated on the template. Cut along the solid line. • Marcar el tubo las dos posiciones indicadas en la plantilla. Cortar por la línea contínua. • Marquer le tube les deux positions indiquées dans le patron. Coûter le long de la ligne. •...
- Page 46 Place the template on the holding surface and mark the holes position. Drill subsequently. • Colocar la plantilla en la superficie de apoyo y marcar los agujeros. Taladrar posteriormente. • Placer le patron sur la surface d’appui est marquer les trous est percer. •...
- Page 47 Glue the end fittings. The dotted line marks the surface of the tubing to be glued. • Encolar los racores. La línea punteada marca la zona del tubo a ser encolada. • Coller les raccords. La ligne pointé marque la zone qui doit être coller. •...
- Page 48 Secure the holding clamps. • Fijar las grapas de montaje. • Fixer les pinces de fixation. • • Die Greifzangen fixieren. • Fissare i collari di presa. Fixar os grampos de montagem. •...
- Page 49 Place the gaskets. • Colocar las juntas de estanqueidad. • Monter les baugues d’étanchéité. • • Die Dichtringe montieren. • Montare gli anelli di tenuta. Colocar as juntas de estanqueidade. •...
- Page 50 Place the heater. • Colocar el calentador. • Placer l’échangeur. • • Den Wärmetauscher plazieren. • Piazzare lo scambiatore. Colocar o aquecedor. •...
- Page 51 Place the half nuts. • Colocar las tuercas partidas. • Placer les demis-écrous. • • Die Halb-Verschraubungen plazieren. • Posizionare i mezzi dadi. Colocar as porcas partidas. •...
- Page 52 Screw the half nuts. • Atornillar las tuercas partidas. • Visser les vis à deux pièces. • • Die Muttern anschrauben. • Avvitare les vite a due pezzi. Aparafusar as porcas partidas. •...
- Page 53 • Turn the half nuts till water tightness is achieved. • Girar las tuercas partidas para conseguir la estanqueidad. Tourner les vis à deux pièces jusqu’à obtenir l’étanchéité. • Die Muttern anziehen bis die Dichtheit gegeben ist. • Avvitare fino a che la tenuta si raggiunta. •...
- Page 54 Declares under their own responsibility that all the heaters: Electricheat Excahanger Machine safety directive 2006/42/UE. Electromagnetic compatibility directive 2014/30/UE and its modifications. Low-voltage equipment directive 2014/35/UE. Directive 2000/14/UE concerning noise produced by equipment for outdoors use, as amended by Directive 2005/88/UE. Restrictions in the use of certain risky substances in the electrical and electronic instruments 2011/65/UE (RoHS).
- Page 55 Bescheinigt in alleiniger Verantwortung, dass alle elektrische Wärmetauscher des Typs: Electricheat Excahanger Richtlinie über Maschinensicherheit 2006/42/UE. Richtlinie über elektromagnetische Verträglichkeit 2014/30/UE und ihren Änderungen Richtlinie über Geräte mit Niederspannung 2014/35/UE. Richtlinie 2000/14/UE über umweltbelastende Geräuschemissionen von zur Verwendung im Freien vorgesehenen Geräten und Maschinen, und zuletzt geändert durch die Richtlinie 2005/88/UE.
- Page 56 WE RESERVE THE RIGHT TO CHANGE ALL OR PART OF THE FEATURES OF THE ARTICLES OR CONTENTS OF THIS DOCUMENT, WITHOUT PRIOR NOTICE NOS RESERVAMOS EL DERECHO DE CAMBIAR TOTAL O PARCIALMENTE LAS CARACTERÍSTICAS DE NUESTROS ARTÍCULOS O CONTENIDO DE ESTE DOCUMENTO SIN PREVIO AVISO.