sauter SHD987 Guide D'installation Et D'utilisation

Manuels Connexes pour sauter SHD987


Sommaire des Matières pour sauter SHD987
- Page 1 GUIDE D’INSTALLATION & D’UTILISATION INSTRUCTIONS FOR INSTALLATION AND USE Hotte de cuisine Cooker Hood SHD987...
-
Page 3: Nous Cuisinons Si Bien Ensemble
Votre nouvelle hotte SAUTER s’intègrera harmonieusement dans votre cuisine et alliera parfaitement facilité d’utilisation et performances d’aspiration. Vous trouverez également dans la gamme des produits SAUTER, un vaste choix de fours, de fours à micro-ondes, de tables de cuisson, de lave-vaisselle, et de réfrigérateurs intégrables, que vous pourrez coordonner à... -
Page 4: Table Des Matières
SOMMAIRE 1 / A L’ATTENTION DE L’UTILISATEUR • Consignes de sécurité ____________________________________________________ 03 • Respect de l’environnement ________________________________________________ 04 • Description de votre appareil _______________________________________________ 05 2 / INSTALLATION DE VOTRE APPAREIL • Utilisation en version évacuation ____________________________________________ 06 • Utilisation en version recyclage _____________________________________________ 06 •... -
Page 5: A L'attention De L'utilisateur
1 / A L’ATTENTION DE L’UTILISATEUR - N'utilisez jamais d'appareils à vapeur ou à haute Important pression pour nettoyer votre appareil (exigences Conservez cette notice d'utilisation avec votre relatives à la sécurité électrique). appareil. Si l'appareil devait être vendu ou - Dans le souci d’une amélioration constante de cédé... -
Page 6: A L'attention De L'utilisateur
1 / A L’ATTENTION DE L’UTILISATEUR • RESPECT DE L’ENVIRONNEMENT - Les matériaux d’emballage de cet appareil sont recyclables. Participez à leur recyclage et contribuez ainsi à la protection de l’environnement en les déposant dans les conteneurs municipaux prévus à cet effet. -
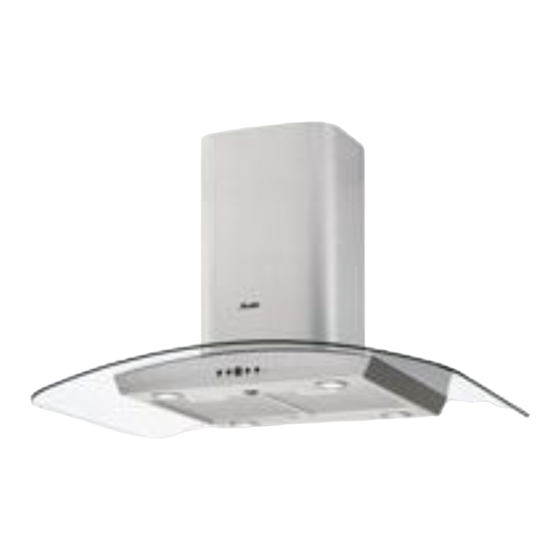
Page 7: Description De Votre Appareil
1 / A L’ATTENTION DE L’UTILISATEUR • DESCRIPTION DE VOTRE APPAREIL Ouïe d’aération Cheminée Cette hotte est équipée d'un système de pilotage automatique pour gérer toutes les fonctions de la hotte. Grace à ce système, l'air de la cuisine reste pure et sans odeur, et cela, sans intervention de la part de l'utilisateur lorsque cette fonction est activeé, la hotte detecte toutes les vapeurs, odeurs et fumées émanantes de la cuisson et allume la hotte automatiquement. -
Page 8: Installation De Votre Appareil
2 / INSTALLATION DE VOTRE APPAREIL - L’appareil doit être débranché pendant l’installation ou dans l’éventualité d’une intervention. - Vérifiez que la tension du réseau correspond à la tension mentionnée sur la plaque signalétique située à l’intérieur de la hotte. - Si l’installation électrique de votre habitation nécessite une modification pour le branchement de votre appareil, faites appel à... -
Page 9: Fr 2 / Installation De Votre Appareil
2 / INSTALLATION DE VOTRE APPAREIL • RACCORDEMENT ELECTRIQUE Lors de l'installation et des opérations d'entretien, l'appareil doit être débranché du réseau électrique, les fusibles doivent être coupés ou retirés. Le raccordement électrique est à réaliser avant la mise en place de l'appareil dans le meuble. Vérifiez que: - la puissance de l'installation est suffisante, - les lignes d'alimentation sont en bon état... -
Page 10: Montage De La Hotte
2 / INSTALLATION DE VOTRE APPAREIL • MONTAGE DE LA HOTTE Attention L’installation doit être conforme aux règlements en vigueur pour la ventilation des locaux. En France, ces règlements sont indiqués dans le DTU 61.1 du CSTB. En particulier, l’air évacué ne doit pas être envoyé... -
Page 11: Clapet Anti-Retour
2 / INSTALLATION DE VOTRE APPAREIL la table de cuisson, doit être au minimum de 650 mm (Fig.7). - Prenez le tuyau supérieur (celui ayant les ouvertures rondes) et enfiler-le sur la structure télescopique, les ouvertures vers le bas; fixez le tuyau sur l’étrier à... -
Page 12: Recyclage
2 / INSTALLATION DE VOTRE APPAREIL • Recyclage - Fixer la structure télescopique sur l’étrier à l’aide des 4 vis (fournies), en faisant passer l’alimentation électrique par l’orifice de l’étrier (Fig.5). Régler la hauteur de la structure télescopique à l’aide des quatre vis de fixation C (Fig.6) en sachant que la hauteur de la hotte est de 90 mm et que la distance de la hotte, par rapport à... -
Page 13: Utilisation De Votre Appareil
3 / UTILISATION DE VOTRE APPAREIL • DESCRIPTION DES COMMANDES CONTROLS (Fig.17): Selon les modèles, l’appareil est muni des types suivants AUTO de commandes: FONCTIONNEMENT AUTOMATIQUE AVEC CAPTEUR: Touche A : allume / éteint l’éclairage. Touche B : active / désactive la fonction “Automatique”. fig. -
Page 14: Entretien Et Nettoyage De Votre Appareil
4 / ENTRETIEN ET NETTOYAGE DE VOTRE APPAREIL Attention Débranchez l'appareil avant de procéder à l'entretien et au nettoyage de l'appareil. Un entretien régulier de votre appareil est une garantie de bon fonctionnement, de bon rendement et de durabilité. Attention Le non-respect des instructions de nettoyage de l'appareil et des filtres peut occasionner des incendies. -
Page 15: Fr 4 / Entretien Et Nettoyage De Votre Appareil
4 / ENTRETIEN ET NETTOYAGE DE VOTRE APPAREIL Démonter ensuite le filtre à charbon (fig.18): pousser la fixation vers l’intérieur et faire pivoter le filtre de façon à retirer les 2 languettes de leurs logements. Réf. filtre à charbon: SHK30AF1 •... -
Page 16: Entretenir Votre Appareil
4 / ENTRETIEN ET NETTOYAGE DE VOTRE APPAREIL Attention Avant toute intervention, la hotte doit être mise hors tension, soit en retirant la prise, soit en actionnant le disjoncteur. • ENTRETENIR VOTRE APPAREIL PRODUITS/ACCESSOIRES ENTRETIEN... COMMENT PROCEDER ? A UTILISER N’utilisez jamais de tampons Pour nettoyer la carrosserie et le hublot... -
Page 17: Anomalies De Fonctionnement
5 / ANOMALIES DE FONCTIONNEMENT SYMPTOMES SOLUTIONS Vérifiez que: La hotte ne fonctionne • il n’y apas de coupure de courant. pas... • une vitesse a été effectivement sélectionnée. Vérifiez que: • la vitesse moteur sélectionnée est suffisante pour la quantité de fumée et de vapeur dégagée. La hotte a un rendement insuffisant... -
Page 18: Relations Consommateurs
à l'écoute de toutes vos remarques, (fig.21). suggestions, propositions aux quelles nous vous répondrons personnellement. > Vous pouvez nous écrire : Service Consommateurs SAUTER BP 9526 95069 CERGY PONTOISE CEDEX > ou nous téléphoner au : Tarif en vigueur à la date d’impression du document. - Page 36 04308127/1...