ViewSonic VPAD10 Guide De L'utilisateur

ViewSonic VPAD10 Guide De L'utilisateur

Masquer les pouces Voir aussi pour VPAD10:
Table des Matières

Publicité

Les langues disponibles
  • FR

Les langues disponibles

  • FRANÇAIS, page 46

Liens rapides

ViewSonic
®
- User Guide
- Guide de l'utilisateur
- Bedienungsanleitung
VPAD10
- Guía del usuario
Tablet PC
- Kullanιcι kιlavuzu
- Pyководство пользователя
Model No. : VS13790

Publicité

Table des Matières
loading

Sommaire des Matières pour ViewSonic VPAD10

  • Page 1 ViewSonic ® - User Guide - Guide de l’utilisateur - Bedienungsanleitung VPAD10 - Guía del usuario Tablet PC - Kullanιcι kιlavuzu - Pyководство пользователя Model No. : VS13790...
  • Page 2: Compliance Information

    ETSI EN 300 328 EN 301 489 EN 301 489 Notified Countries: Germany, UK, Netherlands, Belgium, Sweden, Denmark, Finland, France, Italy, Spain, Austria, Ireland, Portugal, Greece, Luxembourg, Estonia, Latvia, Lithuania, Czech Republic, Slovakia, Slovenia, Hungary, Poland and Malta. ViewSonic VPAD10...
  • Page 3: Important Safety Instructions

    15. DO NOT insert anything into the tablet PC that may result in short circuit or damage the circuit. 16. Power off the tablet PC, if you want to install or remove some external devices, which do not support hot-plug. ViewSonic VPAD10...
  • Page 4 19. Only use Battery Packs approved by the manufacturer or else damage may occur. 20. The tablet PC has apertures to disperse heat. DO NOT place the tablet PC on soft objects (e.g.: bed, sofa, your lap), or else the tablet PC may become hot and the system may halt. ViewSonic VPAD10...
  • Page 5 3.Lead in high temperature type solders (i.e. lead-based alloys containing 85% by weight or more lead). 4.Lead as an allotting element in steel containing up to 0.35% lead by weight, aluminium containing up to 0.4% lead by weight and as a cooper alloy containing up to 4% lead by weight. ViewSonic VPAD10...
  • Page 6 Disclaimer: ViewSonic Corporation shall not be liable for technical or editorial errors or omissions contained herein; nor for incidental or consequential damages resulting from furnishing this material, or the performance or use of this product. In the interest of continuing product improvement, ViewSonic Corporation reserves the right to change product specifications without notice. Information in this document may change without notice. No part of this document may be copied, reproduced, or transmitted by any means, for any purpose without prior written permission from ViewSonic Corporation.
  • Page 7: Product Registration

    Purchase Date: Product disposal at end of product life ViewSonic respects the environment and is committed to working and living green. Thank you for being part of Smarter, Greener Computing. Please visit ViewSonic website to learn more. USA & Canada: http://www.viewsonic.com/company/green/recycle-program/ Europe: http://www.viewsoniceurope.com/uk/support/recycling-information/...
  • Page 8: Table Des Matières

    Front View ..............................1 Rear View ..............................3 Side view ..............................5 Indicators ..............................8 Windows 7 system application ........................10 Using the Camera............................27 Using the Multi-Touch Screen........................27 General hardware problems / possible causes and solutions ..............28 ViewSonic VPAD10...
  • Page 9: Brief Introduction

    Brief introduction Safety Instructions Use the following safety guidelines to help protect yourself and VPAD10. • Do not attempt to service the VPAD10 yourself. Always follow installation instructions closely. • Be sure that nothing rests on the AC adapter's power cable and that the cable is not located where it can be tripped over or stepped on. • Do not cover the AC adaptor with papers or other items that will reduce cooling; also, do not use the AC adapter while it is inside a carrying case. • Use only the AC adapter, power cord, and batteries that area proved for use with this VPAD10. Use of another type of battery or AC adapter may cause risk of fire or explosion. • If you use an extension cable with the AC adapter, ensure that the total ampere rating of the products plugged in to the extension cable does not exceed the ampere rating of the extension cable.
  • Page 10: Package Contents

    Package contents After opening the package, carefully inspect the contents. If any of the items is missing or appear damaged, contact your dealer. The shipping carton should contain the following: STANDARD • A VPAD10 • An AC adapter with power cord • User's guide • Driver CD (Installed on SSD) WARNING This VPAD10 driver put on SSD last partition,be careful do not delete or formate the fles. OPTIONAL The following items are normally optional, but some vendors may include them in the standard package. Some items may not be available in some countries, or some vendors may choose not to carry all the items.
  • Page 11: Exploring The Table Pc

    Exploring the Table PC Front View ViewSonic VPAD10...
  • Page 12  Indicators Refer to "Indicators" on page 8~9 for details.  Power button Turns your VPAD10 on or off.  Function button 1 Press and hold for “Esc” key,short press for call “Tablet input panel”. (If not access the systems, press and hold for the arrow keys"up", short press for the arrow keys "down".) ...
  • Page 13: Rear View

    Rear View ViewSonic VPAD10...
  • Page 14  Speaker Produces sounds from multimedia files or the operating system.  Vents Dissipate heat and keep your VPAD10 at an optimal temperature. ViewSonic VPAD10...
  • Page 15: Side View

    Side view Left side Right side Top side Bottom side ViewSonic VPAD10...
  • Page 16 Connects AC power supply to power the VPAD10 and charge the battery.  Micro SD card slot Insert a Micro SD memory card, you can exchange data material with VPAD10.  Mini VGA port Connect an external display device (such as a monitor or projector) to the Mini VGA video jack of your Notebook with a Mini VGA cable.
  • Page 17  Vents Dissipate heat and keep your VPAD10 at an optimal temperature.  3G SIM card slot Insert a 3G SIM card (can not support PnP), then you can connect to 3G network. (For more information, please contact local Telecom Operators.)
  • Page 18: Indicators

    Indicators ViewSonic VPAD10...
  • Page 19 When the battery is fully charged, it lights up in blue.  Power indicator When the system is on, it lights up in blue. When the system is in Sleep mode, it flashes in blue. When the system is o or in Hibernation mode, the light goes off. ViewSonic VPAD10...
  • Page 20: Windows 7 System Application

    Start use your VPAD10 Connect the VPAD10 to the external power source via the AC adapter, press and hold the power button for 2~3 seconds , then start on your VPAD10. Release the press when the power indicator is light up in blue. And then follow the on-screen instructions to complete the initial Operating system setup.
  • Page 21 Home (desk) The default system desk include:  Recycle Bin,  Virtual keyboard,  Work area, and  Taskbar. Start Menu Taskbar Button Taskbar Area Notication Area Show Desk ViewSonic VPAD10...
  • Page 22: Work Area

    The onscreen area where users can perform their work, as well as store programs, documents, and their shortcuts. you can add Gadgets for give users fast access to personally relevant information and simple tasks — without getting in the way Gadgets(samples) ViewSonic VPAD10...
  • Page 23 Notication area: A short-term source for notications and status, as well as an access point for system- and program-related features that have no presence on the desktop. Thumbnail toolbar Pinned taskbar button Taskbar button Show desktop start button Taskbar area Deskband Notication area ViewSonic VPAD10...
  • Page 24: Connect To A Wireless Networks

    3. Choose a network and then click Connect. If security authentication is not required by the network you are using, there will be a successful message showing that you have connected to the network. ViewSonic VPAD10...
  • Page 25: Bluetooth

    Open Settings.(If adapter off, please turn on.) 2. In the Options tab, select Allow Bluetooth devices to find this computer, and click OK. So, other Bluetooth devices can find your Notebook and make the Bluetooth connection. (You also need to activate the Bluetooth connection feature of the device that you want to connect to.) ViewSonic VPAD10...
  • Page 26 3. Right-click and select Add a Device. Wait for a while and the found active Bluetooth devices will show. (For details about how to activate the device's Bluetooth function, please refer to its documentation.) (The maximum effective range of connection between your VPAD10 and the Bluetooth device is about 10 meters.) 4. Select a Bluetooth device and click Next.
  • Page 27 5. Windows generates a random code number shown on the screen. Type in this code number into the Bluetooth device your VPAD10 is trying to connecting to. Sending a file to a Bluetooth device If your Bluetooth device is capable of sending and receiving data, such as a mobile handset, you can use the Bluetooth connectivity to transfer data wirelessly between your Bluetooth device and Tablet.
  • Page 28 2. In this example, double-click the S88 icon (the S88 handset can transfer data via Bluetooth). 3. Click Send files to your phone (S88). ViewSonic VPAD10...
  • Page 29 4. Click Browse Files to select files to transfer, and then click send. 5. The selected files are now sending to the S88 handset. Once the transfer is done, the Sending Items dialog box will automatically close. (The example shown above is specically for connecting to a mobile handset. When connecting to other types of a Bluetooth device, the steps may vary.) ViewSonic VPAD10...
  • Page 30 Touch Panel Input VPAD10 input panel The VPAD10 input panel is the main input panel used to enter textual content. Writing Board There is also a Writing Board that captures handwriting and converts it to printed text. There are two methods for capturing hand writing: Free writing or Write to Grid.
  • Page 31 2. Write to Grid VPAD10 Settings In order to fully exploit all the Touch features of this system, you should go to "Start" > "Control Panel" and then select “VPAD10 Settings". ViewSonic VPAD10...
  • Page 32 VPAD10 Settings Introduction Display 1. Conguration To congure the pen and touch screen, click the Setup button. Then touch the screen with your finger to complete the touch-screen identication settings. ViewSonic VPAD10...
  • Page 33 “Calibration of the touch screen”. Reset: If you did wrong that with build-in screen calibration, you can click the Reset button to restore the default. Go to Orientation This device’s built-in G-sensor ,you don’t need to do this settings. ViewSonic VPAD10...
  • Page 34 2. Pen and Touch Click the “Go to Pen and Touch” link in the Pen and Touch box. 3. VPAD10 Input Panel Options Click the “Go to Input Panel Settings” link in the VPAD10 Input Panel options. ViewSonic VPAD10...
  • Page 35 Pen and Touch Settings Enable Touch 1. Select the checkbox “Use your finger as an input device” to enable the touch interface. 2. Select the checkbox “Enable multi-touch gestures and inking” to enable multi-touch gestures such as 2 finger zooming. Settings Click the "Settings" button to adjust double tap speed and spatial tolerance, and to test your settings. ViewSonic VPAD10...
  • Page 36 Touch Pointer Select the “Touch pointer” check box to show the touch pointer when fingers interact with items on the screen. In the Advanced Option, you can set the "Touch Pointer Location Option" and "Touch Pointer Appearance and Behavior". Panning In the “Panning” tab, select the “Turn on Single Finger Panning” checkbox to enable single finger panning. Select both checkboxes in the “Gestures” box and select the desired Inertia settings. ViewSonic VPAD10...
  • Page 37: Using The Camera

    Using the Camera The built-in camera allows to participate in video calls and to take pictures. Using the Multi-Touch Screen Multi touch technology allows you to control your computer with one or two fingers simultaneously. A double click is equivalent to tapping a finger twice. Scrolling web pages is as intuitive as moving your finger up and down a page. Use two fingers to zoom in and out of pictures – pinch to zoom out, separate to zoom in. To right click a file, touch it with one finger and tap the screen with a second(you can use one finger to touch the screen for 2~3 seconds too). ViewSonic VPAD10...
  • Page 38: General Hardware Problems / Possible Causes And Solutions

    5. Measures to Extend Battery Life? Adjust the screen brightness to the minimum possible level. Adjust the computer screen to the normal standard. Remove the VPAD10 card if not often used. Turn o the VPAD10 Bluetooth function. Turn o the VPAD10 wireless network function.
  • Page 39 Dry the body and other equipment with fans, and then send it to the nearest VPAD10 repair center to diagnose and repair the VPAD10 by qualied engineers, in order to reduce the damage to the VPAD10.
  • Page 40 External peripheral devices may not compatible with the VPAD10 - such as external USB devices, Micro SD cards that are belong to precision devices; if incorrectly used, they can easily cause the VPAD10 to move to a standby situation when connected to the VPAD10.Incompatible software or drivers - the driver which is not compatible will cause .dll, .sys and .exe extension les and will put the VPAD10 into standby or hibernation mode.
  • Page 41: Customer Support

    Renta y Datos, 29 SUR 721, COL. LA PAZ, 72160 PUEBLA, PUE. Tel: 01.222.891.55.77 CON 10 LINEAS Electroser, Av Reforma No. 403Gx39 y 41, 97000 Mérida, Yucatán. Tel: 01.999.925.19.16 Other places please refer to http://www.viewsonic.com/la/soporte/index.htm#Mexico Latin America (Peru) www.viewsonic.com/la/ T= 0800-54565 soporte@viewsonic.com...
  • Page 42 What the warranty covers: ViewSonic warrants its products to be free from defects in material and workmanship, under normal use, during the warranty period. If a product proves to be defective in material or workmanship during the warranty period, ViewSonic will, at its sole option, repair or replace the product with a like product.
  • Page 43 Exclusion of damages: ViewSonic’s liability is limited to the cost of repair or replacement of the product. ViewSonic shall not be liable for: 1. Damage to other property caused by any defects in the product, damages based upon inconvenience, loss of use of the product, loss of time, loss of profits, loss of business opportunity, loss of goodwill, interference with business relationships, or other commercial loss, even if advised of the possibility of such damages.
  • Page 45 ViewSonic ® - User Guide - Guide de l’utilisateur - Bedienungsanleitung VPAD10 - Guía del usuario Tablet PC - Kullanιcι kιlavuzu - Pyководство пользователя Model No. : VS13790...
  • Page 46: Informations De Conformité

    ETSI EN 300 328 EN 301 489 EN 301 489 Pays concernés: Allemagne, GB, Hollande, Belgique, Suède, Danemark, Finlande, France, Italie, Espagne, Autriche, Irlande, Portugal, Grèce, Luxembourg, Estonie, Lettonie, Lituanie, République tchèque, Slovaquie, Slovénie, Hongrie, Pologne et Malte. ViewSonic VPAD10...
  • Page 47: Instructions Importantes De Sécurité

    11. Le PC tablette et l’adaptateur peut se produisent de la chaleur au cours d’exploitation ou de la charge. NE PAS laisser le PC tablette sur vos genoux ou de toute partie du corps afin d’éviter l’inconfort ou de blessure de l’exposition à la chaleur. ViewSonic VPAD10...
  • Page 48 20. Le PC tablette a un peu de métal en flocons pour disperser la chaleur. Ne pas placer le PC tablette sur des objets souples (par exemple: lit, canapé, les genoux), autrement le PC tablette peut s’échauffer et arrête le système d’exploitation. ViewSonic VPAD10...
  • Page 49: Déclaration De Conformité Rohs (Lsdeee)

    4. Le plomb en tant qu’élément d’alliage dans l’acier contenant jusqu’à 0,35 % de plomb en poids, dans l’aluminium contenant jusqu’à 0,4 % de plomb en poids et dans les alliages de cuivre contenant jusqu’à 4 % de plomb en poids. ViewSonic VPAD10...
  • Page 50 Dans un but d’amélioration continue du produit, ViewSonic Corporation se réserve le droit de changer les spécifications du produit sans préavis. Les informations dans ce document peuvent changer sans préavis.
  • Page 51: Enregistrement Du Produit

    Date d’achat : Tuotteen hävittäminen sen elinkaaren lopussa ViewSonic respecte l’environnement et fait des efforts allant dans le sens d’un environnement de travail et de vie écologiques. Merci d’oeuvrer aussi pour une informatique plus intelligente et plus écologique. Pour en savoir plus, veuillez visiter le site web de ViewSonic.
  • Page 52 Vue de derrière ............................3 Vue de côté ..............................5 Indicateurs ..............................8 Système d'application Windows 7 ........................ 10 Utilisation de la caméra ..........................27 Utilisation de l’écran multi-tactile ........................27 Problèmes généraux / causes probables et solutions .................. 28 ViewSonic VPAD10...
  • Page 53: Introduction Rapide

    électrique ne dépasse pas la limite d’intensité de la rallonge électrique. • So vous déplacez le VPAD10 entre des endroits avec des différences extrêmes de température et/ou d'humidité, de la buée peut apparaître sur ou à l'intérieur du VPAD10. Pour éviter d'endommager le VPAD10, attendez jusqu'à ce que la buée se soit évaporée avant d'utiliser le VPAD10.
  • Page 54: Contenu De La Boîte

    • CD du pilote (installé sur le SSD) AVERTISSEMENT Le pilote du VPAD10 est sur la dernière partition du SSD, ne supprimez pas et ne formatez pas ces fichiers. OPTIONNEL Les éléments suivants sont, normalement, en option mais certains revendeurs peuvent les inclure dans la boîte standard. Certains éléments peuvent ne pas s’appliquer dans certains pays, ou certains revendeurs peuvent décider de ne pas tous les offrir.
  • Page 55: Découverte Du Pc Tablet

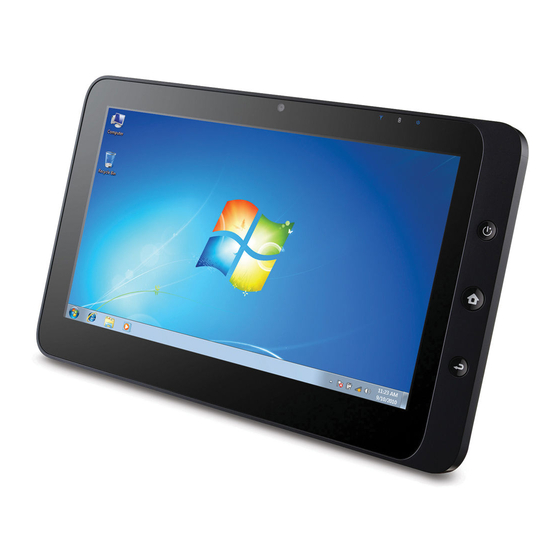
    Découverte du PC Tablet Vue de devant ViewSonic VPAD10...
  • Page 56  Indicateurs Voir la section "Indicateurs" des pages 8-9 pour plus de détails.  Bouton Marche Pour allumer et éteindre le VPAD10.  Bouton Fonction 1 Appuyez sans arrêter pour la touche "Esc", appuyez une fois pour ouvrir "Panneau d'entrée Tablet".
  • Page 57: Vue De Derrière

    Vue de derrière ViewSonic VPAD10...
  • Page 58  Haut-parleur Reproduit le son des fichiers multimédia ou du système d'exploitation.  Fentes Pour permettre à la chaleur de sortir afin que le VPAD10 reste à la température optimale. ViewSonic VPAD10...
  • Page 59: Vue De Côté

    Vue de côté Gauche Droite Dessus Dessous ViewSonic VPAD10...
  • Page 60 Branchez sur une source d'alimentation CA pour alimenter le VPAD10 et charger la batterie.  Fente pour carte Micro SD Insérez une carte mémoire Micro SD, vous pouvez alors échanger des données avec le VPAD10.  Port mini VGA Branchez un appareil d'afffichage externe (par exemple un moniteur ou un projecteur) sur la prise vidéo Mini VGA de votre ordina- teur portable avec un câble Mini VGA.
  • Page 61  Fentes Pour permettre à la chaleur de sortir afin que le VPAD10 reste à la température optimale.  Fente pour carte SIM 3G Insérez une carte SIM 3G (ne supporte pas PnP) pour vous connecter à un réseau 3G.
  • Page 62: Indicateurs

    Indicateurs ViewSonic VPAD10...
  • Page 63 Lorsque la batterie est complètement chargée, il s'allume bleu.  Indicateur d'alimentation Lorsque le système est allumé, il s'allume bleu. Lorsque le système est en Veille, il clignote bleu. Lorsque le système est éteint ou en Hibernation, il s'éteint. ViewSonic VPAD10...
  • Page 64: Système D'application Windows 7

    Branchez le VPAD10 sur une source d'alimentation externe en utilisant l'adaptateur secteur, appuyez pendant 2~3 secondes sur le bouton Marche pour allumer le VPAD10. Arrêtez d'appuyer lorsque l'indicateur d'alimentation s'allume bleu. Suivez alors les instructions qui s'affichent sur l’écran pour faire les réglages préliminaires du système d'opération.
  • Page 65 Accueil (bureau) Le bureau par défaut du système contient :  Corbeille,  Clavier virtuel, Zone de travail et  Barre des tâches. Menu Bouton Tâche Zone de la barre Zone de Afficher le bureau Démarrer des tâches notification ViewSonic VPAD10...
  • Page 66: Zone De Travail

    La partie de l'écran où les utilisateurs peuvent travailler, ainsi que stocker des programmes, des documents et des raccourcis. Vous pouvez ajouter des gadgets pour un accès plus rapide aux informations et aux tâches les plus utilisées - sans difficulté. Gadgets (exemples) ViewSonic VPAD10...
  • Page 67: Barre Des Tâches

    Barre d’outils des miniatures Bouton fixe de la barre des tâches Bouton de la barre des tâches Afficher le bureau Bouton Démarrer Zone de la barre des tâches Bandes du bureau Zone de notification ViewSonic VPAD10...
  • Page 68: Connexion À Un Réseau Sans Fil

    3. Choisissez un réseau, puis cliquez sur Connect (Connecter). Si une identification de sécurité n'est pas requise par le réseau que vous utilisez, un message s'affichera indiquant que vous avez réussi à vous connecter au réseau. ViewSonic VPAD10...
  • Page 69: Bluetooth

    2. Dans l'onglet Options, sélectionnez Allow Bluetooth devices to find this computer (Permettre aux appareils Bluetooth de détecter cet ordinateur), et cliquez sur OK. Les appareils Bluetooth pourront alors détecter votre ordinateur portable et établir la connexion Bluetooth. (Vous devez aussi activer la fonction de connexion Bluetooth de l'appareil que vous voulez connecter.) ViewSonic VPAD10...
  • Page 70 (Pour plus de détails sur l'activation de la fonction Bluetooth de l'appareil, référez-vous au manuel.) (La portée maximum effective de connexion entre votre VPAD10 et un appareil Bluetooth est approximativement 10 mètres.) 4. Sélectionnez un appareil Bluetooth et cliquez sur Next (Suivant).
  • Page 71: Envoyer Un Fichier Sur Un Appareil Bluetooth

    5. Windows produira un code numérique aléatoire, affiché sur l'écran. Entrez ce code numérique sur l'appareil Bluetooth que vous voulez connectez au VPAD10. Envoyer un fichier sur un appareil Bluetooth Si votre appareil Bluetooth est capable de recevoir et d'envoyer des données, par ex. un téléphone portable, vous pourrez utili- ser la fonction Bluetooth pour transférer sans fil des données entre votre appareil Bluetooth et le Tablet.
  • Page 72 2. Dans cet exemple, double-cliquez sur l'icône S88 (le téléphone portable S88 peut envoyer des données via Bluetooth). 3. Cliquez sur Send files to your phone (Envoyer les fichiers sur votre téléphone) (S88). ViewSonic VPAD10...
  • Page 73 5. Les fichiers sélectionnés sont alors envoyés sur le téléphone portable S88. Lorsque le transfert est terminé, la boîte de dia- logue Sending Items (Envoi des éléments) se fermera automatiquement. (L'exemple ci-dessus est pour vous connecter à un téléphone portable seulement. Lorsque vous vous connectez à d'autres appa- reils Bluetooth, les étapes peuvent être différentes.) ViewSonic VPAD10...
  • Page 74: Panneau Tactile De Saisie

    Panneau tactile de saisie Panneau de saisie du VPAD10 Le panneau de saisie du VPAD10 est le panneau de saisie principal pour entrer du texte. Tableau d'écriture Il y a aussi un tableau d'écriture qui permet de capturer de l'écriture à la main et de la convertir en texte imprimé. Il y a deux mo- des pour capturer de l'écriture à...
  • Page 75: Réglages Du Vpad10

    2. Ecrire dans Grille. Réglages du VPAD10 Pour pouvoir utiliser correctement toutes les fonctions tactiles de ce système, vous devez aller dans "Start (Démarrer)" > "Control Panel (Panneau de configuration)" et sélectionner "VPAD10 Settings (Réglages du VPAD10)". ViewSonic VPAD10...
  • Page 76: Introduction Aux Réglages Du Vpad10

    Introduction aux réglages du VPAD10 Display (Affichage) 1. Conguration (Configuration) Pour configurer le stylet et l'écran tactile, cliquez sur le bouton Setup (Réglage). Puis touchez l'écran avec un doigt pour faire les réglages d'identification de l'écran tactile. ViewSonic VPAD10...
  • Page 77 Reset (Réinitialiser) : Si vous avez fait une erreur lors du calibrage de l'écran, vous pouvez cliquer sur le bouton Reset (Réinitialiser) pour restaurer les réglages originaux. Go to Orientation (Aller dans Orientation) Cet appareil possède un capteur G intégré, vous n'avez pas besoin de faire ces réglages. ViewSonic VPAD10...
  • Page 78 Cliquez sur le lien "Go to Pen and Touch (Aller au stylet et tactile)" dans l'écran Stylet et tactile. 3. VPAD10 Input Panel Options (Options du panneau de saisie du VPAD10) Cliquez sur le lien "Go to Input Panel Settings (Aller aux réglages du panneau de saisie)" dans les options du panneau de saisie du VPAD10.
  • Page 79: Réglages Du Stylet Et Tactile

    2. Cochez la case "Enable multi-touch gestures and inking (Activer gestures multi-touché et liens)" pour activer les gestures multi- touché telles que zoom avec 2 doigts. Settings (Réglages) Cliquez sur le bouton "Settings (Réglages)" pour ajuster la vitesse de double appui et la tolérance spaciale, et pour tester ces régla- ges. ViewSonic VPAD10...
  • Page 80 Panning (Défilement) Dans l'onglet "Panning (Défilement)", cochez la case "Turn on Single Finger Panning (Activer défilement à un doigt)" pour activer le défilement à un doigt. Cochez les deux cases dans "Gestures (Gestures)" et sélectionnez les réglages d'inertia désirés. ViewSonic VPAD10...
  • Page 81: Utilisation De La Caméra

    Utilisez deux doigts pour faire un zoom avant ou arrière sur des images - rapprochez les doigts pour faire un zoom arrière, éloignez-les pour faire un zoom avant. Pour cliquer-droit sur un fichier, touchez-le avec un doigt et pressez sur l'écran pen- dant une seconde (vous pouvez utiliser un doigt pour presser aussi sur l'écran 2-3 secondes). ViewSonic VPAD10...
  • Page 82: Problèmes Généraux / Causes Probables Et Solutions

    Réduisez la luminosité de l'écran au minimum possible. Ajustez l'écran de l'ordinateur sur le standard normal. Enlevez la carte VPAD10 si elle n'est pas souvent utilisée. Eteignez la fonction Bluetooth du VPAD10. Eteignez la fonction de connexion réseau sans fil du VPAD10.
  • Page 83 8. Le VPAD10 est connecté en ligne via un réseau sans fil mais n'arrive toujours pas à se connecter à un autre ordinateur. Vérifiez si le pilote de l'appareil a été installé correctement. Si le pilote n'a pas été installé correctement, appuyez sur [Start (Démar- rer)] ->...
  • Page 84: Contacter Les Distributeurs

    Des périphériques externes peuvent être incompatibles avec le VPAD10 - par exemple des clés USB, des cartes Micro SD appar- tenants à des appareils de haute précision ; si elles sont utilisées incorrectement, elle peuvent causer au VPAD10 d'entrer en mode veille lorsque connecté...
  • Page 85: Service Clientèle

    France et autres pays www.viewsoniceurope.com/uk/Support/ francophones en www.viewsoniceurope.com/fr/ service_fr@viewsoniceurope.com Calldesk.htm Europe T (Numéro vert)= 1-866-463-4775 Canada www.viewsonic.com T= 1-424-233-2533 service.ca@viewsonic.com F= 1-909-468-3757 www.viewsoniceurope.com/chfr/support/ Suisse www.viewsoniceurope.com/chfr/ service_ch@viewsoniceurope.com call-desk/ www.viewsoniceurope.com/befr/support/ Belgique (Français) www.viewsoniceurope.com/befr/ service_be@viewsoniceurope.com call-desk/ Luxembourg www.viewsoniceurope.com/lu/support/ www.viewsoniceurope.com/lu/ service_lu@viewsoniceurope.com (Français) call-desk/ ViewSonic VPAD10...
  • Page 86 éléments recycls ou remis en état. Durée effective de la garantie : Le PC tablette de ViewSonic est garanti pendant une période d’1 an à partir de la date d’achat de l’acheteur original. Protection de la garantie : La présente garantie vaut uniquement pour le premier acquéreur.
  • Page 87: Limitation Des Garanties Implicites

    Exclusion des dommages : La responsabilité de viewsonic se limite au coût de réparation ou de remplacement du produit. La sociéte viewsonic ne pourra pas être tenue responsable: 1.
  • Page 89 ViewSonic ® - User Guide - Guide de l’utilisateur - Bedienungsanleitung VPAD10 - Guía del usuario Tablet PC - Kullanιcι kιlavuzu - Pyководство пользователя Model No. : VS13790...
  • Page 90: Übereinstimmungserklärung

    Gerät erfüllt die folgenden Konformitätsnormen: ETSI EN 300 328 EN 301 489 EN 301 489 Länder: Deutschland, Großbritannien, Niederlande, Belgien, Schweden, Dänemark, Finnland, Frankreich, Italien, Spanien, Österreich, Irland, Portugal, Griechenland, Luxemburg, Estland, Lettland, Litauen, Tschechien, Slowakei, Slowenien, Ungarn, Polen, Malta. ViewSonic VPAD10...
  • Page 91: Wichtige Sicherheitsanweisungen

    NICHT auf Ihrem Schoss oder irgendeinem Körperteil, um Unbehagen oder Verletzung aus Hitzestrahlen zu vermeiden. 12. EINGEBEN-NENNWERT: Verweisen Sie ans Nennwertskleber auf dem Notizbuch PC und stellen Sie sicher, dass der Netz- Adapter mit der Bewertung übereinstimmt. Benutzen Sie nur die Zubehöre oder Zusätze, die vom Hersteller spezifiziert werden. ViewSonic VPAD10...
  • Page 92 19 erwenden Sie nur Batterie-Sätze, die durch Hersteller genehmigt werden, sonst können Schaden auftreten. 20 Den Tablet-PC hat wenige kleine Metallflocke, damit Hitze zerstreut. Legen Sie den Tablet-PC NICHT auf weichen Gegenstände (z.B.: Bett, Sofa, Ihr Schoss) oder sonst können den Tablet-PC heiß werden und den Systemsbetrieb halten. ViewSonic VPAD10...
  • Page 93 Blei in hochschmelzenden Loten (d.h. Lötlegierungen auf Bleibasis mit einem Massenanteil von mindestens 85% Blei). Blei als Legierungselement in Stahl mit einem Bleianteil von bis zu 0,35 Gewichtsprozent, in Aluminium mit einem Bleianteil von bis zu 0,4 Gewichtsprozent und in Kupferlegierungen mit einem Bleianteil von bis zu 4 Gewichtsprozent. ViewSonic VPAD10...
  • Page 94 The prediction engine of the input method is TOUCHPAL, provided by COOTEK. Disclaimer: ViewSonic Corporation shall not be liable for technical or editorial errors or omissions contained herein; nor for incidental or consequential damages resulting from furnishing this material, or the performance or use of this product.
  • Page 95 Um Ihren zukünftigen Anforderungen entgegen zu kommen und weitere Produktinformationen zu erhalten, sobald sie zur Verfügung stehen, registrieren Sie Ihr Produkt im Internet unter der URL: www.viewsonic.com. Mit Hilfe des ViewSonic®-Assistenten auf der CD-ROM können Sie außerdem das Registrierungsformular ausdrucken, das Sie dann per Post oder Fax an ViewSonic®...
  • Page 96 Übersicht über den Tablet-PC ........................1 Vorderansicht ............................... 1 Rückansicht ..............................3 Seitenansicht ............................... 5 Anzeigen ..............................8 Windows 7-Systemanwendung ........................10 Kamera verwenden ............................27 Multi-Touch-Bildschirm verwenden ....................... 27 Allgemeine Hardware-Probleme / mögliche Ursachen und Lösungen ............28 ViewSonic VPAD10...
  • Page 97: Kurze Einleitung

    Sie das AC-Netzteil zudem nicht, während es sich in einer Tragetasche befindet. • Verwenden Sie nur das AC-Netzteil, das Netzkabel und die Batterien, die zum Einsatz mit diesem VPAD10 geeignet sind. Die Verwendung anderer Batterien, Netzteile oder Kabel kann Brand- und Stromschlaggefahr bergen.
  • Page 98: Lieferumfang

    • Bedienungsanleitung • Treiber-CD (auf SSD installiert) WARNUNG Der VPAD10-Treiber befindet sich auf der letzten Partition der SSD; achten Sie darauf, die Dateien nicht zu löschen bzw. die Partition nicht zu formatieren. Optional Die folgenden Komponenten sind üblicherweise optional; einige Händler legen sie jedoch möglicherweise dem Standardpaket bei.
  • Page 99: Übersicht Über Den Tablet-Pc

    Übersicht über den Tablet-PC Vorderansicht ViewSonic VPAD10...
  • Page 100  Anzeigen Einzelheiten entnehmen Sie bitte dem Abschnitt „Anzeigen“ auf Seite 8 bis 9.  Ein-/Austaste Hiermit schalten Sie Ihren VPAD10 ein oder aus.  Funktionstaste 1 Zur Betätigung als „Esc“-Taste gedrückt halten; zum Aufrufen des „Tablet-Eingabebereich(s)“ kurz drücken. (Wenn Sie nicht auf das System zugreifen, fungiert sie beim Gedrückthalten als Aufwärts- und beim kurzen Drücken als Abwärtsta- ste.)
  • Page 101: Rückansicht

    Rückansicht ViewSonic VPAD10...
  • Page 102  Lautsprecher Gibt den Ton von Multimedia-Dateien bzw. dem Betriebssystem aus.  Belüftungsöffnungen Gibt Wärme aus und gewährleistet eine optimale Temperatur des VPAD10. ViewSonic VPAD10...
  • Page 103: Seitenansicht

    Seitenansicht Links Rechts Oben Unten ViewSonic VPAD10...
  • Page 104  Netzanschluss Hierüber schließen Sie den VPAD10 zur Stromversorgung und zum Aufladen des Akkus an eine AC-Steckdose an.  MicroSD-Kartenschlitz Hier können Sie eine microSD-Speicherkarte einstecken und Datenmaterial mit dem VPAD10 austauschen.  Mini-VGA-Port Schließen Sie über ein Mini-VGA-Kabel ein externes Anzeigegerät (z. B. einen Monitor oder Projektor) am Mini-VGA-Videoan- schluss Ihres Notebooks an.
  • Page 105  Belüftungsöffnungen Gibt Wärme aus und gewährleistet eine optimale Temperatur des VPAD10.  3G-SIM-Kartenschlitz Hier stecken Sie eine 3G-SIM-Karte (keine PnP-Unterstützung) ein; dann können Sie eine Verbindung zu einem 3G-Netzwerk herstellen. (Weitere Informationen erhalten Sie bei Ihren Telekommunikationsdienstleistern.) ViewSonic VPAD10...
  • Page 106: Anzeigen

    Anzeigen ViewSonic VPAD10...
  • Page 107 Wenn der Akku vollständig aufgeladen ist, leuchtet die Anzeige blau.  Betriebsanzeige Wenn das System eingeschaltet ist, leuchtet die Anzeige blau. Wenn sich das System im Ruhezustand befindet, blinkt die Anzeige blau. Wenn das System ausgeschaltet ist oder sich im Tiefschlafmodus befindet, leuchtet die Anzeige nicht. ViewSonic VPAD10...
  • Page 108: Windows 7-Systemanwendung

    Inbetriebnahme Ihres VPAD10 Schließen Sie den VPAD10 über das AC-Netzteil an eine externe Stromversorgung an; halten Sie die Ein-/Austaste 2 bis 3 Se- kunden gedrückt; starten Sie dann Ihren VPAD10. Nehmen Sie den Finger von der Taste, sobald die Betriebsanzeige blau leuchtet.
  • Page 109 Startbildschirm (Desktop) Der Standard-Desktop des Systems beinhaltet:  Papierkorb,  Virtuelle Tastatur,  Arbeitsbereich und  Taskleiste. Start-Menü Taskleistenschaltflächen Taskleistenbereich Infobereich Desktop anzeigen ViewSonic VPAD10...
  • Page 110 Arbeitsbereich Dem Arbeitsbereich, in dem Sie Ihre Arbeit ausführen sowie Programme, Dokumente und Verknüpfungen einfügen können, lassen sich Gadgets hinzufügen, die schnellen Zugriff auf persönlich wichtige Informationen und einfache Aufgaben bieten - ohne dabei zu stören. Gadgets (Beispiele) ViewSonic VPAD10...
  • Page 111 Infobereich: Hier erhalten Sie kurz und knapp Benachrichtigungen und Statusinformationen; außerdem können Sie auf system- und programmzugehörige Funktionen zugreifen, die sich nicht auf dem Desktop befinden. Miniaturbild-Werkzeugleiste Angeheftete Taskleistenschaltflächen Taskleistenschaltfläche Desktop anzeigen Start-Schaltfläche Taskleistenbereich Angepasste Taskleiste Infobereich ViewSonic VPAD10...
  • Page 112 Gefahren zu deaktivieren.) 3. Wählen Sie ein Netzwerk und klicken Sie auf „Connect (Verbinden)“. Wenn das von Ihnen genutzte Netzwerk keine Sicher- heitsauthentifizierung erfordert, erscheint eine Meldung die anzeigt, dass eine Verbindung zum Netzwerk hergestellt werden konnte. ViewSonic VPAD10...
  • Page 113: Bluetooth

    2. Wählen Sie im Options (Optionen)-Register „Allow Bluetooth devices to find this computer (Bluetooth-Geräte können diesen Computer ermitteln)“; klicken Sie dann auf „OK“. Nun können andere Bluetooth-Geräte Ihr Notebook finden und eine Bluetooth- Verbindung herstellen. (Zudem müssen Sie die Bluetooth-Verbindung des Gerätes aktivieren, mit dem Sie eine Verbindung herstellen möchten.) ViewSonic VPAD10...
  • Page 114 (Einzelheiten zur Aktivierung der Bluetooth-Funktion externer Geräte entnehmen Sie bitte deren Dokumentation.) (Die maximale effektive Verbindungsreichweite zwischen Ihrem VPAD10 und dem Bluetooth-Gerät beträgt etwa 10 Meter.) 4. Wählen Sie ein Bluetooth-Gerät und klicken Sie auf „Next (Weiter)“. ViewSonic...
  • Page 115 5. Windows generiert einen zufälligen Zifferncode und zeigt diesen auf dem Bildschirm an. Geben Sie diesen Zifferncode am Bluetooth-Gerät ein, das eine Verbindung mit Ihrem VPAD10 herstellen möchte. Eine Datei an ein Bluetooth-Gerät senden Wenn Ihr Bluetooth-Gerät Daten senden und empfangen kann (z. B. ein mobiles Handgerät), können Sie die Bluetooth-Verbin- dung zur drahtlosen Datenübertragung zwischen Bluetooth-Gerät und Tablet-PC nutzen.
  • Page 116 2. In diesem Beispiel doppelklicken Sie auf das S88-Symbol (das S88-Handgerät kann Daten via Bluetooth übertragen). 3. Wählen Sie „Send files to your phone (S88) (Dateien an Ihr Telefon (S88) senden). ViewSonic VPAD10...
  • Page 117 5. Die ausgewählten Dateien werden nun an das S88 gesendet. Sobald die Übertragung abgeschlossen ist, wird das Dialog- fenster „Sende Element(e)“ automatisch geschlossen. (Das oben gezeigte Beispiel bezieht sich speziell auf die Verbindung mit einem mobilen Handgerät. Wenn Sie andere Bluetooth- Geräte verbinden, können die Schritte variieren.) ViewSonic VPAD10...
  • Page 118 Sensoreingabebereich VPAD10 - Eingabebereich Das Eingabe-Panel des VPAD10 ist das Haupteingabe-Panel zur Texteingabe. Schreibblock Zudem gibt es den Schreibblock, über den handschriftlicher Text eingegeben und in gedruckten Text umgewandelt werden kann. Es gibt zwei Möglichkeiten zur handschriftlichen Eingabe: „In Freihandstil schreiben“ und „Zeichen für Zeichen schreiben“.
  • Page 119 2. Zeichen für Zeichen schreiben VPAD10 - Einstellungen Damit Sie alle Touch-Funktionen dieses Systems vollständig nutzen können, sollten Sie „Start“ > „Control Panel (Systemsteuerung)“ aufrufen und dann „VPAD10 Settings (Tablet PC-Einstellungen)“ auswählen. ViewSonic VPAD10...
  • Page 120 Einführung in die VPAD10-Einstellungen Display (Anzeige) 1. Conguration (Konfiguration) Klicken Sie zur Konfiguration von Stift und Touchscreen auf die „Setup (Einrichtung)“-Schaltfläche. Berühren Sie dann zum Ab- schließen der Touchscreen-Identifizierungseinstellungen den Bildschirm mit Ihrem Finger. ViewSonic VPAD10...
  • Page 121 Reset (Zurücksetzen): Wenn Sie die integrierte Bildschirmkalibrierung falsch durchgeführt haben, klicken Sie zum Wiederherstel- len der Standardeinstellungen auf die „Reset (Zurücksetzen)“-Schaltfläche. Go to Orientation (Zur Ausrichtung wechseln) Aufgrund des in diesem Gerät integrierten G-Sensors müssen Sie diese Einstellungen nicht vornehmen. ViewSonic VPAD10...
  • Page 122 2. Pen and Touch (Stift- und Fingereingabe) Klicken Sie im Stift- und Fingereingabe-Feld auf „Go to Pen and Touch (Zu "Stift und Fingereingabe" wechseln)“. 3. VPAD10 Input Panel Options (Tablet PC-Eingabebereichoptionen) Klicken Sie unter den Tablet PC-Eingabebereichoptionen auf „Go to Input Panel Settings (Zu den Eingabebereichseinstellungen wechseln)“.
  • Page 123 2. Wählen Sie zur Aktivierung der Mehrfingerbewegungen (z. B. Zoomen mit zwei Fingern) das Kontrollkästchen „Enable multi- touch gestures and inking (Mehrfingerbewegungs- und Freihandfunktionalität aktivieren)“. Settings (Einstellungen) Klicken Sie zum Anpassen der Geschwindigkeit und Entfernungstoleranz beim Doppeltippen auf „Settings (Einstellungen)“; testen Sie Ihre Einstellungen. ViewSonic VPAD10...
  • Page 124 Im „Panning (Verschiebung)“-Register können Sie durch Auswahl des „Turn on Single Finger Panning (Verschiebung mit einem Finger)“-Kontrollkästchens Elemente mit nur einem Finger verschieben. Wählen Sie im „Gestures (Bewegungen)“-Feld beide Kontrollkästchen; wählen Sie dann die gewünschten Inertia settings (Träg- heitseinstellungen). ViewSonic VPAD10...
  • Page 125: Kamera Verwenden

    Verkleinern aufeinander zu und zum Vergrößern voneinander weg. Berühren Sie zum Rechtsklick auf eine Datei diese mit einem Finger und tippen Sie dann mit einem zweiten Finger auf den Bildschirm (alternativ können Sie den Bildschirm auch mit nur einem Finger zwei bis drei Sekunden lang berühren). ViewSonic VPAD10...
  • Page 126: Allgemeine Hardware-Probleme / Mögliche Ursachen Und Lösungen

    5. Welche Maßnahmen kann ich zur Verlängerung der Akkubetriebslebenszeit ergreifen? Passen Sie die Bildschirmhelligkeit so gering wie möglich an. Passen Sie den Computerbildschirm auf den normalen Wert an. Entfernen Sie VPAD10-Karte, falls Sie nicht häufig genutzt wird. Deaktivieren Sie die Bluetooth-Funktion des VPAD10. Deaktivieren Sie die Drahtlosnetzwerk-Funktion des VPAD10.
  • Page 127 10. Was mache ich, falls versehentlich Wasser in den VPAD10 eingedrungen ist? Achten Sie in jedem Fall darauf, dass der VPAD nicht mit Strom versorgt wird; andernfalls kann dies den VPAD10 ernsthaft be- schädigen. Ziehen Sie das Netzkabel und entfernen Sie alle angeschlossenen externen Geräte (z. B.: Laufwerke). Trocknen Sie die Flüssigkeit, die über dem VPAD10 verschüttet wurde;...
  • Page 128 Vertreiber können bestimmen, ob der Computer an den Laden eingeschickt werden muss. Bitte halten Sie beim Anruf des Vertreibers folgende Informationen bereit: 1. Um welche Konfiguration/welches Modell handelt es sich bei Ihrem VPAD10? Der Vertreiber benötigt Informationen über die Peripheriegeräte, die Sie verwenden.
  • Page 129: Kundendienst

    Für technische Unterstützung oder Kundendienst für Ihr Gerät sehen Sie bitte in der unten stehenden Tabelle nach, oder wenden Sie sich an Ihren Händler. HINWEIS: Sie benötigen die Seriennummer Ihres Geräts. Land/Region Website Telefone E-mail Deutschland www.viewsoniceurope.com/de/ www.viewsoniceurope.com/de/support/call-desk/ service_de@viewsoniceurope.com Österreich www.viewsoniceurope.com/aus/ www.viewsoniceurope.com/aus/support/call-desk/ service_at@viewsoniceurope.com Schweiz (Deutsch) www.viewsoniceurope.com/chde/ www.viewsoniceurope.com/chde/support/call-desk/ service_ch@viewsoniceurope.com ViewSonic VPAD10...
  • Page 130: Eingeschränkte Garantie Viewsonic® Notizbuch Pc

    überholte Teile und Komponenten enthalten. Gültigkeitsdauer der Garantie: Der Tablet-PC von ViewSonic ist ab Erstkaufdatum durch eine einjährige Garantie auf Verarbeitungsfehler abgedeckt Die Garantie gilt für folgende Personen: Diese Garantie gilt nur für den Ersterwerb durch den Endverbraucher.
  • Page 131 Garantieansprüche, einschliesslich der impliziten Garantie der Marktgängigkeit und der eignung für einenbestimmten Zweck, ausgeschlossen. Ausschluss von Schadensersatzansprüchen: Die Haftung von viewsonic ist auf die Kosten für die Reparatur oder den Ersatz des Produkts beschränkt. Viewsonicübernimmt keine Haftung für: 1. Sachschäden, die durch Produktfehler verursacht wurden, Schäden durch Hindernisse, Verlust des Produkts, Zeitverlust, entgangenen Gewinn, entgangene Geschäfte, Vertrauensschäden, Störungen von...
  • Page 133 ViewSonic ® - User Guide - Guide de l’utilisateur - Bedienungsanleitung VPAD10 - Guía del usuario Tablet PC - Kullanιcι kιlavuzu - Pyководство пользователя Model No. : VS13790...
  • Page 134: Información De Conformidad

    ETSI EN 300 328 EN 301 489 EN 301 489 Países notificados: Alemania, Reino Unido, Holanda, Bélgica, Suecia, Dinamarca, Finlandia, Francia, Italia, España, Austria, Irlanda, Portugal, Grecia, Luxemburgo, Estonia, Letonia, Lituania, República Checa, Eslovaquia, Eslovenia, Hungría, Polonia y Malta. ViewSonic VPAD10...
  • Page 135: Advertencias Importantes De Seguridad

    PC en las rodillas o en cualquier otra parte de su cuerpo para evitar la incomodidad o daño por el calor. 12. Índice de entrada: Respecto al índice de entrada en su Tablet PC, asegure que el adaptador de potencia cumpla con el índice. Solamente utilice los accesorios indicados por el manufacturero. ViewSonic VPAD10...
  • Page 136 20. Su Tablet PC tiene unas piezas metálicas para dispersa el calor. No ponga su Tablet PC sobre objetos blandos como la cama, el sofa, las rodillas,etc. Si no, su Tablet PC se volverá caluroso y el sistema de operación suspendrá. ViewSonic VPAD10...
  • Page 137 4. Plomo como elemento aleador en acero que contenga hasta un 0,35% de plomo en peso, aluminio que contenga hasta un 0,4% de plomo en peso y como aleación de cobre que contenga hasta un 4% de plomo en peso. ViewSonic VPAD10...
  • Page 138 The prediction engine of the input method is TOUCHPAL, provided by COOTEK. Renuncia: ViewSonic Corporation no se hace responsable de los errores técnicos o editoriales contenidos en el presente documento, ni de los daños incidentales o consecuentes resultantes del mal uso de este material, o del rendimiento o uso de este producto.
  • Page 139: Registro Del Producto

    Para que nuestros productos se ajusten a sus futuras necesidades, así como para recibir información adicional sobre el producto cuando esté disponible, regístrelo a través de Internet en: www.viewsonic.com. El CD-ROM del Asistente de ViewSonic® le ofrece también la posibilidad de imprimir el formulario de registro para enviarlo por correo o fax a ViewSonic®.
  • Page 140 Vista posterior .............................. 3 Vista lateral ..............................5 Indicadores ..............................8 Aplicación para sistemas con Windows 7 ....................10 Utilizar la función Cámara ..........................27 Utilizar la pantalla multitáctil ......................... 27 Problemas generales de hardware, causas posibles y soluciones .............. 28 ViewSonic VPAD10...
  • Page 141: Breve Introducción

    Siga las pautas de seguridad que se indican a continuación para protegerse usted mismo y al dispositivo VPAD10. • No intente reparar usted mismo el dispositivo VPAD10. Siga siempre las instrucciones de instalación al pie de la letra. • Asegúrese de que no hay ningún objeto que descanse sobre el cable de alimentación del adaptador de CA y que dicho cable no se encuentra en ningún lugar donde se pueda pisar o tropezar con él.
  • Page 142: Contenido Del Paquete

    • Guía del usuario • CD con los controladores (instalados en SSD) ADVERTENCIA El controlador de este dispositivo VPAD10 está colocado en última partición SSD. Tenga cuidado para no eliminar o formatear los archivos. OPCIONAL Los siguientes artículos suelen ser opcionales, pero algunos proveedores pueden incluirlos en el paquete estándar. Some items may not be available in some countries, or some vendors may choose not to carry all the items.
  • Page 143: Explorar Su Tablet Pc

    Explorar su Tablet PC Vista frontal ViewSonic VPAD10...
  • Page 144 Consulte la sección "Indicadores" en la página 8~9 para obtener detalles.  Botón Encendido y apagado Permite encender y apagar el dispositivo VPAD10.  Botón de función 1 Mantenga presionado este botón para la tecla “Esc”. Presiónelo brevemente para llamar al “Panel de entrada de su Tablet”.
  • Page 145: Vista Posterior

    Vista posterior ViewSonic VPAD10...
  • Page 146  Altavoz Produce sonido de los archivos multimedia o del sistema operativo.  Conductos de ventilación Permiten disipar el calor y mantener una temperatura óptima en el dispositivo VPAD10. ViewSonic VPAD10...
  • Page 147: Vista Lateral

    Vista lateral Lateral izquierdo Lado derecho Lado superior Lado inferior ViewSonic VPAD10...
  • Page 148  Conector de alimentación Permite conectar la fuente de alimentación de CA para proporcionar energía al dispositivo VPAD10 y cargar la batería.  Ranura para tarjetas Micro SD Permite insertar una tarjeta de memoria Micro SD. Puede intercambiar material de datos con el dispositivo VPAD10.
  • Page 149  Conductos de ventilación Permiten disipar el calor y mantener una temperatura óptima en el dispositivo VPAD10.  Ranura para tarjetas SIM 3G Inserte una tarjeta SIM 3G (no se admite PnP) para poder conectarse a una red 3G. (Para obtener más información, póngase en contacto con los operadores de telecomunicaciones locales.)
  • Page 150: Indicadores

    Indicadores ViewSonic VPAD10...
  • Page 151 Cuando el sistema está encendido, se ilumina en color azul. Cuando el sistema se encuentra en el modo de suspensión, parpadea en color azul. Cuando el sistema está apagado o se encuentran el modo de hibernación, la luz se apaga. ViewSonic VPAD10...
  • Page 152: Aplicación Para Sistemas Con Windows 7

    Comenzar a utilizar el dispositivo VPAD10 Conecte el dispositivo VPAD10 a una fuente de alimentación externa mediante el adaptador de CA, mantenga presionado el botón de encendido y apagado durante 2~3 segundos y encienda dicho dispositivo. Deje de presionar el botón cuando el indicador de encendido se ilumine en color azul.
  • Page 153 El escritorio predeterminado del sistema incluye los siguientes elementos:  Papelera de reciclaje,  Teclado virtual,  Área de trabajo y  Barra de tareas. Menú Inicio Botones de la Área de la Área de Mostrar escritorio barra de tareas barra de tareas notificación ViewSonic VPAD10...
  • Page 154: Área De Trabajo

    Se trata del área de la pantalla en la que los usuarios pueden realizar su trabajo así como almacenar programas, documentos y sus accesos directos. Puede agregar Gadgets para proporcionar a los usuarios acceso rápido a información personalmente relevante y tareas sencillas (sin obstáculos). Gadgets (muestras) ViewSonic VPAD10...
  • Page 155 Barra de herramientas de miniaturas Botón de la barra de tareas fijado Botón de la barra de tareas Mostrar escritorio Botón Inicio Área de la barra de tareas Banda del escritorio Área de notificación ViewSonic VPAD10...
  • Page 156: Conectarse A Una Red Inalámbrica

    3. Elija una red y haga clic en Connect (Conectar). Si la red que utiliza no requiere autenticación de seguridad, aparecerá un mensaje indicando que se ha conectado a la red correctamente. ViewSonic VPAD10...
  • Page 157: Bluetooth

    Bluetooth encuentren este equipo) y haga clic en OK (Aceptar). Por tanto, otros dispositivos Bluetooth pueden encontrar el equipo portátil y establecer una conexión Bluetooth. (También es necesario activar la función de conexión Bluetooth del dispositivo al que desea conectarse.) ViewSonic VPAD10...
  • Page 158 (Para obtener detalles sobre cómo activar la función Bluetooth del dispositivo, consulte la documentación del mismo.) (El alcance efectivo máximo de la conexión entre los dispositivos VPAD10 y Bluetooth es de 10 metros aproximadamente.) 4. Seleccione un dispositivo Bluetooth y haga clic Next (Siguiente).
  • Page 159 5. Windows genera un número de código aleatorio que se muestran pantalla. Escriba este número de código en el dispositivo Bluetooth al que está intentando conectarse su VPAD10. Enviar un archivo a un dispositivo Bluetooth Si el dispositivo Bluetooth es capaz de enviar y recibir datos, como por ejemplo un teléfono móvil, puede utilizar la conectividad Bluetooth para transferir datos de forma inalámbrica entre dicho dispositivo y su Tablet.
  • Page 160 2. En este ejemplo, haga doble clic en el icono S88 (el teléfono móvil S88 puede transferir datos a través de la funcionalidad Bluetooth). 3. Haga clic en Send files to your phone (S88) (Enviar archivos al teléfono (S88)). ViewSonic VPAD10...
  • Page 161 5. Los archivos seleccionados se enviarán ahora al teléfono móvil S88. Una vez terminada la transferencia, el cuadro de diálogo Sending Items (Enviando elementos) se cerrará automáticamente. (El ejemplo mostrado anteriormente es específico para conectarse a un teléfono móvil. Cuando se conecte a otros tipos de dispositivo Bluetooth, los pasos pueden ser diferentes.) ViewSonic VPAD10...
  • Page 162 Especificación de información mediante el panel táctil Panel de entrada del dispositivo VPAD10 El panel de entrada del dispositivo VPAD10 es el panel de entrada principal utilizado para especificar contenido de texto. Tablero de escritura También existe un tablero de escritura que captura el texto manuscrito y lo convierte en texto que impreso. Existen dos métodos para capturar texto manuscrito: Escribir a mano alzada o Escribir carácter a carácter.
  • Page 163 2. Escribir carácter a carácter Configuración del dispositivo VPAD10 Para obtener el máximo provecho de todas las funciones táctiles de este sistema, elija "Start" (Inicio) > "Control Panel" (Panel de control) y, a continuación, seleccione “VPAD10 Settings" (Configuración del dispositivo VPAD10). ViewSonic VPAD10...
  • Page 164 Introducción a la configuración del dispositivo VPAD10 Display (Visualización) 1. Configuration (Con figuración) Para configurar el lápiz y la pantalla táctil, haga clic en el botón Setup (Configuración). A continuación, toque la pantalla con el dedo para completar la configuración de identificación de la pantalla táctil.
  • Page 165 Reset (Restablecer): Si la calibración de la pantalla integrada no se realizó correctamente, puede hacer clic en el botón Reset (Restablecer) para restaurar la calibración predeterminada. Go to Orientation (Ir a orientación) El sensor G está integrado en este dispositivo, no es necesario realizar esta configuración. ViewSonic VPAD10...
  • Page 166 Haga clic en el vínculo “Go to Pen and Touch” (Ir a Lápiz y panel táctil) que se encuentra en el cuadro Lápiz y entrada táctil. 3. VPAD10 Input Panel Options (Opciones del panel de entrada del dispositivo VPAD10) Haga clic en el vínculo “Go to Input Panel Settings” (Ir a la configuración de Panel de entrada) que aparece en las opciones del panel de entrada del dispositivo VPAD10.
  • Page 167 2. Active la casilla “Enable multi-touch gestures and inking” (Habilitar movimientos multitoque y entradas manuscritas) para habilitar los movimientos multitoque, como por ejemplo zoom con dos dedos. Settings (Configuración) Haga clic en el botón "Settings" (Configuración) para ajustar la velocidad de doble toque y la tolerancia espacial, y probar la configuración. ViewSonic VPAD10...
  • Page 168 En la ficha “Panning” (Panorámica), active la casilla “Turn on Single Finger Panning” (Activar movimiento panorámico con un dedo) para habilitar el movimiento panorámico con el dedo. Active ambas casillas en el cuadro “Gestures” (Movimientos) y seleccione el valor que desee en Inertia settings (Configuración de inercia). ViewSonic VPAD10...
  • Page 169: Utilizar La Función Cámara

    Utilice dos dedos para ampliar y reducir las imágenes (pellizcar para reducir, separar para ampliar). Para hacer clic con el botón secundario en un archivo, tóquelo con un dedo y toque la pantalla con otro dedo (también puede utilizar un dedo para tocar la pantalla durante 2~3 segundos). ViewSonic VPAD10...
  • Page 170: Problemas Generales De Hardware, Causas Posibles Y Soluciones

    Ajuste el brillo de la pantalla al nivel mínimo posible. Ajuste la pantalla del equipo al valor estándar normal. Quite la tarjeta VPAD10 si no se utiliza con frecuencia. Desactive la función Bluetooth del dispositivo VPAD10. Desactive la función de red inalámbrica del dispositivo VPAD10.
  • Page 171 8. El dispositivo VPAD10 ha estado en línea a través de una vez inalámbrica pero todavía no puede conectarse a otro equipo. Compruebe si el controlador del dispositivo está correctamente instalado. Si el controlador no está instalado correctamente, presio- ne [Start] (Inicio) ->...
  • Page 172 VPAD10 pase a un estado de espera cuando se conectan al mismo. El software o los controladores incompatibles, provocarán que los archivos con la extensión .dll, .sys y .exe no funcionen y pondrán el dispositivo VPAD10 en el modo de espera o hibernación.
  • Page 173 Renta y Datos, 29 SUR 721, COL. LA PAZ, 72160 PUEBLA, PUE. Tel: 01.222.891.55.77 CON 10 LINEAS Electroser, Av Reforma No. 403Gx39 y 41, 97000 Mérida, Yucatán. Tel: 01.999.925.19.16 Other places please refer to http://www.viewsonic.com/la/soporte/index.htm#Mexico Latin America (Peru) www.viewsonic.com/la/ T= 0800-54565 soporte@viewsonic.com...
  • Page 174 Período de validez de la garantía: ViewSonic Tablet PC tiene una garantía de 1 año en mano de obra a partir de la fecha de compra del primer comprador Destinatario de la garantía: Esta garantía sólo es válida para el primer comprador de este producto.
  • Page 175 Exclusión de daños: La responsabilidad de viewsonic se limita al coste de la reparación o sustitución del producto. Viewsonic no se hace responsable de: 1. Daños a otras pertenencias causados por defectos del producto, inconvenientes, pérdida de uso del producto, de tiempo, de beneficios, de oportunidades comerciales, de fondo de comercio, interferencia en relaciones comerciales u otras pérdidas comerciales, incluso si existe el conocimiento de la posibilidad de dichos daños.
  • Page 177 ViewSonic ® - User Guide - Guide de l’utilisateur - Bedienungsanleitung VPAD10 - Guía del usuario Tablet PC - Kullanιcι kιlavuzu - Pyководство пользователя Model No. : VS13790...
  • Page 178 ETSI EN 300 328 EN 301 489 EN 301 489 EN 62209-2 Onaylayan Ülkeler: Almanya, Birleşik Krallık, Hollanda, Belçika, İsveç, Danimarka, Finlandiya, Fransa, İtalya, İspanya, Avusturya, İrlanda, Portekiz, Yunanistan, Luüksemburg, Letonya, Litvanya, Çek Cumhuriyeti, Slovakya, Slovenya, Macaristan, Polonya ve Malta. ViewSonic VPAD10...
  • Page 179: Önemli Güvenlik Yönergeleri

    önlemek için tablet bilgisayarı dizinizin veya vücudunuzun herhangi bir kısmına KOYMAYIN. 12. GİRİŞ DEĞERİ: Tablet bilgisayarınızdaki değer etiketine bakın ve Güç Adaptörünün bu değere uygun olduğundan emin olun. Yalnızca ViewSonic tarafından önerilen aksesuarları kullanın. 13. Tablet bilgisayarınızı açmadan önce, ana ünite ve takılan aygıtlar arasındaki bağlantıyı kontrol edin.
  • Page 180 18. Tablet bilgisayarı SÖKMEYİN. Bilgisayarınızdaki onarım işlemlerini yalnızca sertifikalı bir servis teknisyeni gerçekleştirmelidir. 19. Yalnızca ViewSonic tarafından onaylanmış Pil Paketlerini kullanın. 20. Tablet bilgisayarda ısıyı dağıtmak için havalandırmalar vardır. Tablet bilgisayar ısınabileceğinden ve sistem durabileceğinden, tablet bilgisayarı yumuşak nesnelerin (örneğin, yatak, kanepe, diziniz) üstüne KOYMAYIN .
  • Page 181 2. Katot ıºın tüplerinin, elektronik bileºenlerin, flörosan tüplerinin ve elektronik seramik parçalarının (örn. Piezoelektronik cihazlar) camındaki kurºun. 3. Yüksek sıcaklık türündeki lehimlerde bulunan kurºun (örn. Ağırlığının %85’i veya daha fazlası kurºuna dayalı olan alaºımlar). 4. Ağırlığının %0.35’ine kadar çelik, ağırlığının %0.4’ü kadar alüminyum ve ağırlığının %4’ü kadar bakır bulunan alaºımdaki kurºun. ViewSonic VPAD10...
  • Page 182 Telif Hakkı Bilgileri Telif Hakkı © ViewSonic® Corporation, 2010. Tüm Hakları saklıdır. ViewSonic in üç kuþlu simgesi, OnView, ViewMatch ve ViewMeter ViewSonic Corporation þirketinin tescilli ticari markalarýdýr. Android is a trademark of Google Inc. Use of this trademark is subject to Google Permissions.
  • Page 183: Ürün Kaydı

    Ürün ömrünün bitiminde ürünün imha edilmesi ViewSonic, çevreye saygı gösterir ve çevreci çalışmaya ve yaşamaya bağlıdır. Daha Akıllı, Daha Çevreci Bilgisayar Kullanımının bir parçası olduğunuz için teşekkür ederiz. Daha fazla bilgi almak için lütfen ViewSonic web sitesini ziyaret edin. ABD & Kanada: http://www.viewsonic.com/company/green/recycle-program/ Avrupa: http://www.viewsoniceurope.com/uk/support/recycling-information/...
  • Page 184 Önden Görünüm ............................1 Arkadan Görünüm ............................3 Yandan görünüm ............................5 Göstergeler ..............................8 Windows 7 sistem uygulaması ........................10 Kamerayı Kullanma ............................27 Çok Dokunuşlu Ekranı Kullanma ........................27 Genel donanım sorunları / olası nedenler ve çözümleri ................28 ViewSonic VPAD10...
  • Page 185: Kısa Giriş

    • AC adaptörünü soğutmayı azaltacak şekilde kağıtlarla veya başka öğelerle kapatmayın; ayrıca AC adaptörünü taşıma çan- tası içindeyken kullanmayın. • Yalnızca bu VPAD10 ile kullanılması onaylanan alanlarda AC adaptörünü, güç kablosunu ve pilleri kullanın. Başka türde pil veya AC adaptörünün kullanılması yangına veya patlamaya neden olabilir.
  • Page 186: Paket Içeriği

    • Kullanıcı kılavuzu • Sürücü CD'si (SSD'de yüklü) UYARI Bu VPAD10 sürücüsü SSD'nin son bölümüne yerleştirilmiştir, dosyaları silmediğinizden veya biçimlendirmediğinizden emin olun. İSTEĞE BAĞLI Aşağıdaki öğeler normal olarak isteğe bağlıdır, ancak bazı satıcılar standart pakete dahil edebilirler. Bazı öğeler bazı ülkelerde bu- lunmayabilir veya bazı...
  • Page 187: Tablet Pc'yi Keşfetme

    Tablet PC'yi Keşfetme Önden Görünüm ViewSonic VPAD10...
  • Page 188  Göstergeler Ayrıntılar için "Göstergeler", sayfa 8~9 konusuna bakın.  Güç düğmesi VPAD10'unuzu açar veya kapatır.  İşlev düğmesi 1 "Esc" tuşuna basın ve basılı tutun, kısa bir süre basıldığında "Tablet giriş paneli" çağrılır. (Sisteme erişilemezse, "yukarı" ok tuşu işlevi için basın ve basılı tutun, "aşağı" ok tuşu işlevi için kısa bir süre basın.) ...
  • Page 189: Arkadan Görünüm

    Arkadan Görünüm ViewSonic VPAD10...
  • Page 190  Hoparlör Multimedya dosyaları veya işletim sisteminden sesler üretir.  Havalandırma delikleri Isıyı dışarı çıkarır ve VPAD10'unuzu optimal bir sıcaklıkta tutar. ViewSonic VPAD10...
  • Page 191: Yandan Görünüm

    Yandan görünüm Sol taraf Sağ taraf Üst taraf Alt taraf ViewSonic VPAD10...
  • Page 192 AC güç kaynağını VPAD10'un gücüne bağlar ve pili şarj eder.  Mikro SD kartı yuvası Bir Mikro SD bellek kartı takın, VPAD10 ile veri malzemeleri alıp verebilirsiniz.  Mini VGA bağlantı noktası Dizüstü bilgisayarınızın Mini VGA video jakına bir Mini VGA kablosuyla harici bir görüntüleme cihazı (monitör veya projektör gibi) bağlayın.
  • Page 193  Havalandırma delikleri Isıyı dışarı çıkarır ve VPAD10'unuzu optimal bir sıcaklıkta tutar.  3G SIM kartı yuvası 3G SIM kartı (PnP desteklemez) taktıktan sonra 3G ağa bağlanabilirsiniz. (Daha fazla bilgi için, lütfen yerel Telekom Operatörlerine başvurun.) ViewSonic VPAD10...
  • Page 194: Göstergeler

    Göstergeler ViewSonic VPAD10...
  • Page 195 Pil şarj olurken kırmızı yanar. Pil azken kırmızı yanıp söner. Pil tam olarak şarj olduğunda mavi yanar.  Güç göstergesi Sistem açıkken mavi yanar. Sistem Uyku modundayken mavi yanıp söner. Sistem kapalıyken veya Hazırda Bekleme modundayken ışık söner. ViewSonic VPAD10...
  • Page 196: Windows 7 Sistem Uygulaması

    Windows 7 sistem uygulaması VPAD10'unuzu kullanmaya başlama VPAD10'u harici güç kaynağına AC adaptörü aracılığıyla bağlayın, güç düğmesine basın ve 2~3 saniye basılı tutun, sonra VPAD10'unuzu başlatın. Güç göstergesi mavi yandığında düğmeyi bırakın. Ve sonra başlangıç İşletim sistemi ayarları için ekran talimatlarını...
  • Page 197 Ana (masaüstü) Varsayılan sistem masaüstünde şunlar bulunur:  Geri Dönüşüm Kutusu,  Sanal klavye,  Çalışma alanı ve  Görev çubuğu. Başlat Görev Çubuğu Görev Çubuğu Bildirim Alanı Masaüstünü Göster Menüsü Düğmesi Alanı ViewSonic VPAD10...
  • Page 198: Çalışma Alanı

    Çalışma alanı Kullanıcıların işlerini gerçekleştirebildikleri ve programları, belgeleri ve kısayollarını depoladıkları ekran alanı. Kullanıcıların kişisel olarak ilgilendikleri bilgilere ve basit görevlere hızlı bir şekilde işlerine engel olmadan erişebilmeleri için araçlar ekleyebilirsiniz Araçlar (örnekler) ViewSonic VPAD10...
  • Page 199 Bildirim alanı: Bildirim ve durumların yayınlandığı, aynı zamanda masaüstünde bulunmayan sistemle ve programla ilgili özelliklere erişim noktasıdır. Küçük resim araç çubuğu Sabitlenmiş görev çubuğu düğmesi Görev çubuğu düğmesi Masaüstünü göster başlat düğmesi Görev çubuğu alanı Masa bandı Bildirim alanı ViewSonic VPAD10...
  • Page 200 (Havada seyahat ediyorsanız, güvenliği riske atma olasılığına karşı lütfen kablosuz ağı kapattığınızdan emin olun.) 3. Bir ağ seçin ve sonra Connect (Bağlan'ı) tıklatın. Güvenlik kimlik doğrulaması kullandığınız ağda gerekmiyorsa, ağa başarılı bir şekilde bağlandığınızı söyleyen bir mesaj gösterilecektir. ViewSonic VPAD10...
  • Page 201: Bluetooth

    2. Options (Seçenekler) sekmesinde, Allow Bluetooth devices to find this computer (Bu bilgisayarı bulmak için Bluetooth cihaz- lara izin ver) öğesini seçin ve OK'i (Tamam) tıklatın. Böylece, diğer Bluetooth cihazları Ağınız bulabilir ve Bluetooth bağlantısı yapı- labilir. (Bağlanmak istediğiniz cihazın Bluetooth bağlantısı özelliğini de etkinleştirmeniz gerekir.) ViewSonic VPAD10...
  • Page 202 3. Sağ tıklatın ve Add a Device (Cihaz Ekle) öğesini seçin. Biraz beklediğinizde bulunan etkin Bluetooth cihazları gösterilir. (Cihazın Bluetooth işlevini etkinleştirme hakkında ayrıntılar için, lütfen belgelerine bakın.) (VPAD10 ve Bluetooth cihazınız arasındaki bağlantı için maksimum etkin aralık yaklaşık 10 metredir.) 4. Bir Bluetooth cihazı seçin ve Next'i (İleri) tıklatın.
  • Page 203 5. Windows, ekranda gösterilen rastgele bir kod numarası üretir. Bu kod numarasını VPAD10'unuzun bağlanmaya çalıştığı Blu- etooth cihazınıza yazın. Bir Bluetooth cihazına bir dosya gönderme Bluetooth cihazınız (örneğin mobil ahize) veri gönderebiliyor ve alabiliyorsa, verileri kablosuz olarak Bluetooth cihazınız ve Tablet'iniz arasında aktarmak için Bluetooth bağlantısını...
  • Page 204 2. Bu örnekte, S88 simgesini çift tıklatın (S88 ahizesi verileri Bluetooth yoluyla aktarabilir). 3. Send files to your phone (Dosyaları telefonunuza gönderin) (S88) öğesini tıklatın. ViewSonic VPAD10...
  • Page 205 4. Aktarılacak dosyaları seçmek için Browse Files (Dosyalara Gözat’a) tıklayın ve ardından send (Gönder’e) tıklayın. 5. Seçili dosyalar şimdi S88 ahizesine gönderilir. Aktarma bittiğinde, Sending Items (Öğeler Gönderiliyor) iletişim kutusu otoma- tik olarak kapanır. (Yukarıda gösterilen örnek özellikle bir mobil ahize bağlantısı içindir. Başka Bluetooth cihazı türlerine bağlanırken adımlar değişe- bilir.) ViewSonic VPAD10...
  • Page 206 Dokunmatik Panel Girişi VPAD10 giriş paneli VPAD10 giriş paneli, metin içeriği girmek için kullanılan ana giriş panelidir. Yazma Tahtası Bu, ayrıca el yazısını yakalayan ve yazılan metne dönüştüren bir Yazma Tahtasıdır. El yazısını yakalamak için iki yöntem vardır: Serbest yazma ve Kılavuza Yazma.
  • Page 207 2. Kılavuza Yazma VPAD10 Ayarları Bu sistemin tüm Dokunmatik özelliklerinden tam olarak yararlanabilmek için, "Start" (Başlat) > "Control Panel" (Denetim Masası) na gidin ve sonra "VPAD10 Settings" i (VPAD10 Ayarları) seçin. ViewSonic VPAD10...
  • Page 208 VPAD10 Ayarlarına Giriş Display (Görüntü) 1. Conguration (Yapılandırma) Kalem ve dokunmatik ekranı yapılandırmak için, Setup (Kurulum) düğmesini tıklatın. Dokunmatik ekran tanımlama ayarlarını ta- mamlamak için parmağınızla ekrana dokunun. ViewSonic VPAD10...
  • Page 209 "Dokunmatik ekranın kalibrasyonu". Reset (Sıfırlama): Yerleşik ekran kalibrasyonunda yanlış değişiklikler yaptıysanız, varsayılanı geri yüklemek için Reset (Sıfırla) düğmesini tıklatabilirsiniz. Go to Orientation (Yönlendirmeye gidin) Bu cihazın yerleşik G-sensörü için bu ayarları yapmanız gerekmez. ViewSonic VPAD10...
  • Page 210 Kalem ve Dokunma kutusundaki "Go to Pen and Touch" (Kalem ve Dokunmaya Gidin) bağlantısını tıklatın. 3. VPAD10 Input Panel Option (VPAD10 Giriş Paneli Seçenekleri) VPAD10 Giriş Paneli seçeneklerindeki "Go to Input Panel Settings" (Giriş Paneli Ayarlarına Gidin) bağlantısını tıklatın. ViewSonic...
  • Page 211 2. 2 parmakla yakınlaştırma gibi çok dokunuşlu hareketleri etkinleştirmek için "Enable multi-touch gestures and inking" (Çok doku- nuşlu hareketleri ve bağlantıyı etkinleştir) onay kutusunu seçin. Settings (Ayarlar) Çift dokunma hızını ve uzamsal toleransı ayarlamak ve ayarlarınızı test etmek için "Settings" (Ayarlar) düğmesini tıklatın. ViewSonic VPAD10...
  • Page 212 Panning (Kaydırma) "Panning" (Kaydırma) sekmesinde, tek parmakla kaydırmayı etkinleştirmek için "Turn on Single Finger Panning" (Tek Parmakla Kaydırmayı Aç) onay kutusunu seçin. "Gestures" (Hareketler) kutusundaki her iki onay kutusunu da seçin ve istenen Inertia settings (Eylemsizlik ayarlarını) seçin. ViewSonic VPAD10...
  • Page 213: Kamerayı Kullanma

    – uzaklaştırmak için parmaklarınızı bir araya getirin, yakınlaştırmak için ayırın. Bir dosyayı sağ tıklatmak için, bir parmağınızla dokunun ve ekrana ikinci parmağınızla dokunun (bir parmağınızı kullana- rak ekrana 2~3 saniye de dokunabilirsiniz). ViewSonic VPAD10...
  • Page 214: Genel Donanım Sorunları / Olası Nedenler Ve Çözümleri

    5. Pil Ömrünü Artırmak İçin Önlemler Nelerdir? Ekran parlaklığını olası minimum seviyeye ayarlayın. Bilgisayar ekranını normal standarda ayarlayın. Sık kullanılmıyorsa VPAD10 kartı çıkarın. VPAD10 Bluetooth işlevini kapatın. VPAD10 kablosuz ağ işlevini kapatın. Güç yapılandırması ayarının "Save power" (Güç tasarrufu) modunda olduğundan emin olun.
  • Page 215 10. VPAD10 içine yanlışlıkla su girdiyse bu sorun nasıl çözülür? Bu durumda, VPAD10'un güç kaynağını bağlamayın, aksi halde VPAD10'a daha ciddi zarar verebilir. Güç kaynağını ve güç kab- losunu çıkarın, harici cihaz (sürücü gibi) takılıysa çıkarın. VPAD10'a sıçrayan sıvıyı kurutun; üniteye zarar gelmesini önlemek için lekeleri yumuşak bir bezle silin.
  • Page 216 Harici USB cihazları, hassas cihazlara ait Mikro SD kartlar gibi dış çevre cihazları VPAD10 ile uyumlu olmayabilir; yanlış kullanı- lırlarsa, kolaylıkla VPAD10'a bağlandığında VPAD10'un bekleme moduna geçmesine neden olabilir. Sürücüyle uyumlu olmayan, uyumsuz yazılım veya sürücüler .dll, .sys ve .exe uzantılı dosyaların çalışmamasına neden olur ve VPAD10'u bekleme veya hazırda bekleme moduna geçirir.
  • Page 217 Müşteri Desteği Teknik destek veya ürün servisi için aşağıdaki tabloya bakınız veya yetkili satıcınız ile temasa geçiniz. NOT: Ürün seri numarasını vermeniz gerekecektir. Ülke Web sitesi Telefon E-posta www.viewsoniceurope.com/tr/ Türkiye http://www.viewsoniceurope.com/tr/ service_tr@viewsoniceurope.com support/call-desk/ ViewSonic VPAD10...
  • Page 218: Sınırlı Garanti

    ürünle değiştirecektir. Değiştirme ürünü veya parçaları yeniden üretilen veya yenilenen parçaları veya komponentleri içerebilir. Garanti ne kadar geçerlidir: ViewSonic Tablet Bilgisayar, müşterinin ürünü satın alma tarihinden itibaren 1 yıl boyunca işçilik hatalarına karşı garantilidir. Garanti neyi kapsamamaktadır: Bu garanti sadece ürünü...
  • Page 219 Nasıl hizmet alırım: 1. Garanti altında hizmet almak ile ilgili bilgi için ViewSonic Müşteri Desteği ile temasa geçiniz (lütfen Müşteri Desteği sayfasına bakınız).Ürünün seri numarasını vermeniz gerekecektir. 2. Garanti altında hizmet almak için aşağıdakileri sağlamanız gerekecektir (a) satış tarihi bulunan satış makbuzu, (b) adınız, (c) adresiniz, (d) sorunun açıklaması ve (e) ürünün seri numarası.
  • Page 221 ViewSonic ® - User Guide - Guide de l’utilisateur - Bedienungsanleitung VPAD10 - Guía del usuario Tablet PC - Kullanιcι kιlavuzu - Pyководство пользователя Model No. : VS13790...
  • Page 222: Соответствие Стандартам

    EC). Это оборудование соответствует следующим стандартам: ETSI EN 300 328 EN 301 489 EN 301 489 Страны: Германия, Великобритания, Нидерланды, Бельгия, Швеция, Дания, Финляндия, Франция, Италия, Испания, Австрия, Ирландия, Португалия, Греция, Люксембург, Эстония, Латвия, Литва, Чехия, Словакия, Словения, Венгрия, Польша и Мальта. ViewSonic VPAD10...
  • Page 223: Инструкция По Безопасности

    в соответствии с местным законодательством по утилизации электроники. Батарея должна быть отдана в переработку. Проконсультируйтесь с органами местного самоуправления или с местным представительством ViewSonic о том, как должна осуществляться утилизация. 11. Данный планшетный ПК и его блок питания могут незначительно нагреваться в процессе работы и/или...
  • Page 224 батареи. 18. Не разбирайте данный планшетный ПК. Это должен делать только сертифицированный специалист. 19. Разрешается использовать только те аккумуляторные батареи, которые были сертифицированы ViewSonic для использования с данным планшетным ПК. 20. Данный планшетный ПК имеет вентиляционные отверстия для отвода тепла. Не рекомендуется класть...
  • Page 225 3. Свинец в высокотемпературных припоях (напр., легирующий элемент на основе свинца, содержащий по весу 85% свинца или более). 4. Свинец как легирующий элемент стали с содержанием свинца до 0.35% веса, алюминия с содержанием свинца до 0.4% веса, а также как медного сплава с содержанием свинца до 4% веса. ViewSonic VPAD10...
  • Page 226: Авторские Права

    Авторские права © Корпорация ViewSonic®, 2010. С сохранением всех прав. Торговые наименования ViewSonic, OnView, ViewMatch, ViewMeter и логотип компании с изображением трех птиц являются зарегистрированными товарными знаками компании ViewSonic. Android is a trademark of Google Inc. Use of this trademark is subject to Google Permissions.
  • Page 227: Регистрация Изделия

    Дата покупки: Утилизация продукта по истечении срока эксплуатации Компания ViewSonic заботится о состоянии окружающей среды и обязуется направить все свои усилия на создание экологически чистых условий работы и жизни. Компания признательна за ваш вклад в более «умные» и экологически чистые информационные технологии. Для получения дополнительной информации посетите...
  • Page 228 Вид спереди ..............................1 Вид сзади ..............................3 Вид сбоку ..............................5 Индикаторы ..............................8 Использование операционной системы Windows 7 ................. 10 Использование камеры ..........................27 Использование мультитач-экрана ......................27 Типовые аппаратные проблемы, их возможные причины и решения ............ 28 ViewSonic VPAD10...
  • Page 229: Краткое Описание

    Кроме того, не допускается использовать сетевой блок питания, когда он находится в чехле для переноски. • Используйте только сетевой блок питания, кабель питания и аккумуляторы, предназначенные для использования с планшетным ПК VPAD10. Использование аккумулятора или сетевого блока питания другого типа может привести к возгоранию или взрыву.
  • Page 230: Комплект Поставки

    • Руководство пользователя • Образ компакт-диска с драйверами (расположен на SSD-диске) ПРЕДУПРЕЖДЕНИЕ Драйверы VPAD10 хранятся на последнем разделе SSD-диска, соблюдайте осторожность, чтобы не удалить эти файлы и не отформатировать данный раздел. ДОПОЛНИТЕЛЬНО Перечисленные предметы обычно являются дополнительными, но некоторые поставщики включают их в стандартный...
  • Page 231: Внешний Вид Планшетного Пк

    Внешний вид планшетного ПК Вид спереди ViewSonic VPAD10...
  • Page 232  Индикаторы Подробные сведения см. в разделе «Индикаторы» на стр. 8–9.  Кнопка питания Эта кнопка служит для включения и выключения планшетного ПК VPAD10.  Функциональная кнопка 1 Длительное нажатие этой кнопки соответствует нажатию клавиши «Esc», кратковременное нажатие позволяет вызвать...
  • Page 233: Вид Сзади

    Вид сзади ViewSonic VPAD10...
  • Page 234  Динамик Динамик воспроизводит содержимое мультимедийных файлов и звуки операционной системы.  Вентиляционные отверстия Эти отверстия служат для отвода тепла и поддержания оптимальной температуры планшетного ПК VPAD10. ViewSonic VPAD10...
  • Page 235: Вид Сбоку

    Вид сбоку Левая панель Правая панель Верхняя панель Нижняя панель ViewSonic VPAD10...
  • Page 236  Гнездо питания. Это гнездо служит для подключения к планшетному ПК VPAD10 блока питания и для зарядки аккумулятора.  Гнездо для карты памяти Micro SD Установите в это гнездо карту памяти Micro SD для обмена данными с планшетным ПК VPAD10.
  • Page 237  Вентиляционные отверстия Эти отверстия служат для отвода тепла и поддержания оптимальной температуры планшетного ПК VPAD10.  Гнездо для SIM-карты 3G-связи Вставьте в это гнездо SIM-карту 3G-связи (режим «PnP» не поддерживается) для подключения к сотовой сети 3G-связи. (За дополнительной информацией обращайтесь к операторам связи.)
  • Page 238: Индикаторы

    Индикаторы ViewSonic VPAD10...
  • Page 239 Когда аккумулятор полностью заряжен, этот индикатор светится синим цветом.  Индикатор питания Когда система включена, этот индикатор светится синим цветом. Когда система находится в спящем режиме, этот индикатор мигает синим цветом. Когда система выключена или находится в режиме гибернации, этот индикатор не светится. ViewSonic VPAD10...
  • Page 240: Использование Операционной Системы Windows 7

    Использование операционной системы Windows 7 Начало использования планшетного ПК VPAD10 Подключите планшетный ПК VPAD10 к электрической сети при помощи сетевого блока питания, нажмите и удерживайте кнопку питания 2–3 секунды, после этого планшетный ПК VPAD10 включится. Отпустите кнопку, когда индикатор питания...
  • Page 241 Рабочий стол По умолчанию на рабочем столе операционной системы отображаются следующие элементы:  «Корзина»,  виртуальная клавиатура,  рабочая область и  панель задач. Меню Кнопка панели Область Область Кнопка «Пуск» задач панели задач уведомлений «Свернуть все окна» ViewSonic VPAD10...
  • Page 242 В рабочей области экрана пользователи могут выполнять свои задачи, а также хранить программы, документы и ярлыки. На рабочую область можно добавлять гаджеты (мини-приложения), обеспечивающие быстрый доступ к полезной информации и выполнение простых задач без открытия каких-либо программ. Примеры гаджетов ViewSonic VPAD10...
  • Page 243 Область уведомлений – это место кратковременного отображения уведомлений и информации о состоянии, а также точка доступа к функциям системы и программ, которые не отображаются на рабочем столе. Панель инструментов миниатюр Закрепленная кнопка Кнопка «Свернуть все окна» Кнопка панели задач панели задач Кнопка «Пуск» Область панели задач Панель Область уведомлений приложений ViewSonic VPAD10...
  • Page 244 подключать компьютер к защищенным беспроводным сетям. При нахождении на борту самолета обязательно выключайте модуль беспроводной ЛВС во избежание угрозы безопасности полета. 3. Выберите сеть и нажмите «Connect (Подключиться)». Если для используемой сети не требуется проверка подлинности, отобразится сообщение об успешном подключении к сети. ViewSonic VPAD10...
  • Page 245 2. На вкладке «Options (Параметры)» установите флажок «Allow Bluetooth devices to find this computer (Разрешить устройствам Bluetooth обнаруживать этот компьютер)» и нажмите кнопку «OK». После этого другие Bluetooth-устройства смогут обнаруживать данный планшетный ПК и устанавливать Bluetooth-соединение. (Также необходимо активировать функцию Bluetooth-соединения на устройстве, которое требуется подключить.) ViewSonic VPAD10...
  • Page 246 3. Щелкните правой кнопкой мыши и выберите пункт «Add a Device (Добавить устройство)». Дождитесь отображения списка обнаруженных активных Bluetooth-устройств. (Подробные сведения об активации функции Bluetooth см. в документации устройства. ) (Максимальный радиус действия соединения между планшетным ПК VPAD10 и Bluetooth-устройством составляет приблизительно 10 метров.) 4. Выберите Bluetooth-устройство и нажмите кнопку «Next (Далее)».
  • Page 247 5. Windows сгенерирует случайный цифровой код, который отобразится на экране. Введите этот цифровой код на Bluetooth-устройстве, к которому подключается планшетный ПК VPAD10. Отправка файла на Bluetooth-устройство Если Bluetooth-устройство может отправлять и принимать данные как, например, мобильный телефон, можно использовать Bluetooth-соединение для передачи данных между Bluetooth-устройством и планшетным ПК.
  • Page 248 2. В показанном примере следует дважды щелкнуть значок «S88» (телефон S88 может передавать данные посредством Bluetooth). 3. Нажмите пункт «Send files to your phone (Отправка файлов на телефон (S88))». ViewSonic VPAD10...
  • Page 249 4. Нажмите кнопку «Browse Files (Обзор файлов)», чтобы выбрать файлы для передачи, а затем нажмите «send (Отправить)». 5. Выбранные files (файлы) будут отправлены на телефон S88. После завершения передачи диалоговое окно «Sending Items (Отправка объектов)» автоматически закроется. Выше приведен пример подключения к мобильному телефону. При подключении к другим Bluetooth-устройствам процедура может отличаться. ViewSonic VPAD10...
  • Page 250 Панель сенсорного ввода Панель ввода планшетного ПК VPAD10 Панель ввода представляет собой главное средство ввода текста на планшетном ПК VPAD10. Панель рукописного ввода Также предусмотрена панель рукописного ввода, распознающая и преобразующая рукописный текст в печатный. Доступно два способа распознавания рукописного текста: свободный рукописный ввод и ввод отдельных знаков.
  • Page 251 2. Ввод отдельных знаков Настройки планшетного ПК VPAD10 Для полного использования всех сенсорных функций данного компьютера следует открыть пункты «Start (Пуск)» > «Control Panel (Панель управления)», а затем выбрать пункт «VPAD10 Settings (Параметры планшетного компьютера VPAD10)». ViewSonic VPAD10...
  • Page 252 Общие сведения о настройках VPAD10 Display (Экран) 1. Conguration (Настройка) Для настройки пера и сенсорного экрана нажмите кнопку «Setup (Настройка)». Затем касайтесь сенсорного экрана пальцем для завершения калибровки сенсорного экрана. ViewSonic VPAD10...
  • Page 253 см. в разделе «Calibration of the touch screen (Калибровка сенсорного экрана)». Reset (Сброс): позволяет Reset (cброс) стандартные настройки в случае некорректной калибровки экрана встроенными средствами Windows. Go to Orientation (Перейдите к ориентации) Встроенный акселерометр данного компьютера автоматически определяет ориентацию экрана, поэтому использование этой ссылки не требуется. ViewSonic VPAD10...
  • Page 254 Нажмите ссылку «Go to Pen and Touch (Перейти к разделу Перо и сенсорный ввод)» в разделе «Перо и сенсорный ввод». 3. VPAD10 Input Panel Options (Параметры панели ввода планшетного ПК VPAD10) Нажмите ссылку «Go to Input Panel Settings (Перейти к разделу параметры панели ввода)» в разделе «Параметры панели...
  • Page 255 2. Установите флажок «Enable multi-touch gestures and inking (Включить мультисенсорные жесты и ввод)», чтобы включить жесты мультитач, например увеличение двумя пальцами. Settings (Параметры) Нажмите кнопку «Settings (Параметры)» для настройки скорости двойного касания и пространственного доступа и проверки настройки. ViewSonic VPAD10...
  • Page 256 касания)» и «Touch Pointer Appearance and Behavior (Внешний вид и поведение указателя касания)». Panning (Прокрутка) На вкладке «Panning (Прокрутка)» установите флажок «Turn on Single Finger Panning (Включить панорамирование пальцем)», чтобы включить прокрутку одним пальцем. Установите оба флажка в разделе «Gestures (Жесты)» и настройте параметр «Inertia settings (Инерция)». ViewSonic VPAD10...
  • Page 257: Использование Камеры

    пальца вверх или вниз по странице. Двумя пальцами можно увеличивать и уменьшать масштаб изображений – сводите пальцы вместе для уменьшения масштаба, разводите пальцы для увеличения масштаба. Для выполнения правого щелчка файла удерживайте его одним пальцем и коснитесь экрана другим пальцем (либо можно удерживать один палец на экране в течение 2–3 секунд). ViewSonic VPAD10...
  • Page 258: Типовые Аппаратные Проблемы, Их Возможные Причины И Решения

    5. Как можно продлить время работы компьютера от аккумулятора? Установите минимально возможную яркость экрана. Выберите стандартную настройку экрана. Извлеките из планшетного ПК VPAD10 карту памяти, если она не используется. Отключите функцию Bluetooth планшетного ПК VPAD10. Отключите функцию беспроводной ЛВС планшетного ПК VPAD10.
  • Page 259 Не настроена учетная запись у поставщика услуг Интернета (ISP), обратитесь за помощью в компанию, предоставляющую услуги Интернета. 8. Планшетный ПК VPAD10 подключен к беспроводной сети, но не может подключиться к другому компьютеру. Удостоверьтесь, что драйвер сетевого адаптера установлен должным образом. Если драйвер не установлен должным...
  • Page 260 карты Micro SD, которые являются сложными устройствами. В случае их неправильного использования при их подключении планшетный ПК VPAD10 может перейти в режим ожидания. Имеются несовместимые драйверы или программное обеспечение – несовместимый драйвер может содержаться в файлах с расширениями .dll, .sys и .exe и...
  • Page 261: Служба Поддержки

    приведенной ниже, или обратитесь в организацию, в которой Вы приобрели данное изделие. ПРИМЕЧАНИЕ: Вам будет нужен серийный номер данного изделия. Страна или регион Веб-сайт Список телефонов Адрес электронной почты Россия www.viewsoniceurope.com/ru/ www.viewsoniceurope.com/ru/support/call-desk/ service_ru@viewsoniceurope.com Беларусь (Русский) www.viewsoniceurope.com/ru/ www.viewsoniceurope.com/ru/support/call-desk/ service_br@viewsoniceurope.com Латвия (Русский) www.viewsoniceurope.com/ru/ www.viewsoniceurope.com/ru/support/call-desk/ service_lv@viewsoniceurope.com ViewSonic VPAD10...
  • Page 262: Гарантийный Срок

    на аналогичное. Заменяемое изделие или детали могут содержать отремонтированные или восстановленные детали и компоненты. Гарантийный срок: На планшетный ПК ViewSonic предоставляется гарантия сроком 1 год со дня приобретения планшетного ПК первоначальным покупателем, которая распространяется на производственный брак. Субъект гарантии: Гарантия распространяется только на первого конечного покупателя.
  • Page 263 (b) свою фамилию, (c) свой адрес, (d) описание неисправности и (e) серийный номер изделия. 3. Доставьте или отправьте изделие оплаченной посылкой в заводской упаковке в сервисный центр, уполномоченный корпорацией ViewSonic, или в корпорацию ViewSonic. 4. За дополнительной информацией или адресом ближайшего сервисного центра ViewSonic обращайтесь в корпорацию ViewSonic. Ограничение подразумеваемых гарантий: Не...

Ce manuel est également adapté pour:

Vs13790

Table des Matières