Pioneer DEH-80PRS Manuel D'installation
Masquer les pouces
Voir aussi pour DEH-80PRS:
- Mode d'emploi (60 pages) ,
- Manuel d'installation (45 pages)

Manuels Connexes pour Pioneer DEH-80PRS


Sommaire des Matières pour Pioneer DEH-80PRS
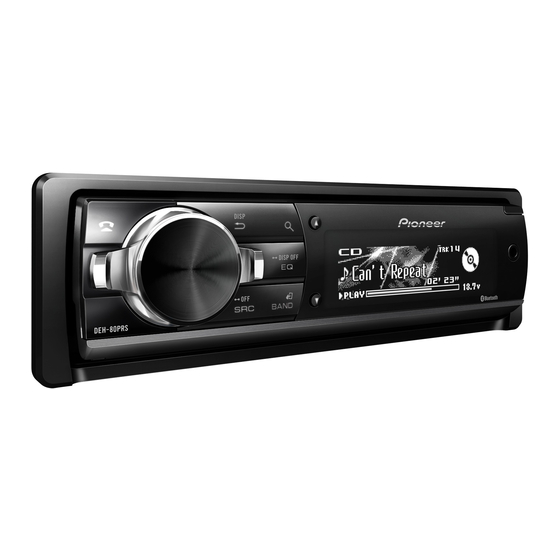
- Page 1 CD RDS RECEIVER AUTORADIO CD RDS REPRODUCTOR DE CD CON RECEPTOR RDS DEH-80PRS Installation Manual Manuel d’installation Manual de instalación...
-
Page 2: Power Cord
12 V DC). If the vehicle is equipped with a key may result in battery drain. nal. input2) at the same time, use a Pioneer glass antenna, connect it to the antenna g Red USB cable (CD-U50E) in addition to the booster power supply terminal. - Page 3 Section Connections Connections ! If using this system, we recommend that this White: Middle range left + Power amp (sold separately) White/black: Middle range left * unit’s internal amp is turned off. Gray: Middle range right + Standard mode with internal amp For details, refer to the operation manual.
-
Page 4: Audio Input
Section Connections Installation Important Use a thin, flathead screwdriver to If connecting the unit to a car Use commercially available parts when instal- change the DSP switch on the bottom of this ! Check all connections and systems before ling. stereo with no RCA output unit. -
Page 5: Fastening The Front Panel
Section Installation Installation # Make sure that the unit is installed securely in ! Releasing the front panel allows easier ac- Attach the holders to both sides of the place. An unstable installation may cause skipping cess to the trim ring. front panel. -
Page 6: When Installing The Microphone On The Sun Visor
Section Installing the microphone Installing the microphone Install the microphone clip on the steer- CAUTION ing column. It is extremely dangerous to allow the micro- phone lead to become wound around the steer- ing column or shift lever. Be sure to install the unit in such a way that it will not obstruct driv- ing. -
Page 8: Connexions
USB Pioneer. cendie ou un dysfonctionnement. ter un incendie, de la fumée ou un dysfonc- ! Pour éviter un court-circuit, une surchauffe... -
Page 9: Amplificateur De Puissance (Vendu Séparément)
Section Connexions Connexions Blanc : Avant gauche + Blanc : Médiums gauche + 8 Gris Blanc/noir : Avant gauche * Blanc/noir : Médiums gauche * 9 Gris/noir Gris : Avant droite + Gris : Médiums droite + a Vert ... -
Page 10: Entrée Audio
Section Connexions Connexions Lors de la connexion de Changement entre les modes ATTENTION l’appareil à un système stéréo entrée RCA N’utilisez pas l’appareil en mode standard du véhicule avec la sortie RCA quand un système de haut-parleurs pour le % Utilisez un tournevis plat fin pour chan- ... -
Page 11: Montage Avant/Arrière Din
Section Installation Installation Important 4 Vis 1 Anneau de garniture Montage avant/arrière DIN 5 Vis (M4 × 8) 2 Encoche ! Vérifiez toutes les connexions et tous les sys- Cet appareil peut être installé correctement soit # Assurez-vous que l’appareil est correctement mis ! Retirer la face avant permet d’accéder plus tèmes avant l’installation finale. -
Page 12: Installation Du Microphone
Section Installation Installation du microphone 1 Vis Fixez les supports des deux côtés de la PRÉCAUTION face avant. Il est extrêmement dangereux de laisser le fil du microphone s’enrouler autour de la colonne de direction ou du levier de vitesse. Assurez-vous d’installer cet appareil de telle manière qu’il ne gêne pas la conduite. -
Page 13: Réglage De L'angle Du Microphone
Section Installation du microphone Installez le clip microphone sur la colonne de direction. 1 Bande double face 2 Installez le clip microphone sur la face arrière de la colonne de direction. 3 Serre-fils Réglage de l’angle du microphone L’angle du microphone peut être réglé. -
Page 14: Cable De Alimentación
Envuelva con cinta adhesiva damente a las partes metálicas de la carroce- nal de potencia de un amplificador de poten- Pioneer (CD-U50E) además del cable las partes en contacto con piezas metálicas ría del automóvil. El cable a tierra del para proteger el cableado. - Page 15 Sección Conexiones Conexiones Blanco: izquierdo de gama media + e Negro (toma de tierra del chasis) Blanco/negro: izquierdo de gama media * Conectar a una parte metálica limpia, sin Gris: derecho de gama media + pintura. Gris/negro: derecho de gama media * f Amarillo ...
- Page 16 Sección Conexiones Conexiones Utilice un destornillador fino y plano Si se conecta la unidad al equipo para cambiar el interruptor del DSP situado de audio de un automóvil sin en la parte inferior de esta unidad. salida RCA ...
- Page 17 Sección Instalación Instalación Importante 2 Muro cortafuego o soporte de metal Montaje delantero/posterior Extraer la unidad 3 Correa metálica ! Compruebe todas las conexiones y sistemas de DIN Retire el anillo de guarnición. 4 Tornillo antes de la instalación final. 5 Tornillo (M4 ×...
-
Page 18: Fijación Del Panel Delantero
Sección Instalación Instalación del micrófono Fijación del panel delantero Fije la carátula a la unidad, usando los PRECAUCIÓN tornillos de fijación. Si no tiene previsto retirar el panel delantero, Es muy peligroso que el cable del micrófono se éste se puede fijar con los tornillos y los sopor- enrolle alrededor de la columna de dirección o tes suministrados. -
Page 19: Ajuste Del Ángulo Del Micrófono
Sección Instalación del micrófono Instale la abrazadera del micrófono en la columna de dirección. 1 Cinta adhesiva de doble cara 2 Instale la abrazadera del micrófono en la parte trasera de la columna de dirección. 3 Abrazadera Ajuste del ángulo del micrófono Se puede ajustar el ángulo del micrófono. - Page 20 TEL: 55-9178-4270 先鋒股份有限公司 台北市內湖區瑞光路407號8樓 電話 : 886-(0)2-2657-3588 先鋒電子(香港)有限公司 香港九龍長沙灣道909號5樓 電話 : 852-2848-6488 ã 2011 PIONEER CORPORATION. All rights reserved. ã 2011 PIONEER CORPORATION. Tous droits de reproduction et de traduction réservés. Printed in Thailand Imprimé en Thaïlande <KOKZX> <11L00000> <CRD4618-A/N> UC...