Publicité

Les langues disponibles

Les langues disponibles

Liens rapides

INSTRUCTION MANUAL
GUIDE D'UTILISATION
MANUAL DE INSTRUCCIONES
DW160/DW161
Right Angle Drill
Perceuse d'angle
Taladro de ángulo recto
INSTRUCTIVO DE OPERACIÓN, CENTROS DE SERVICIO Y PÓLIZA
DE GARANTÍA. ADVERTENCIA: LÉASE ESTE INSTRUCTIVO ANTES
DE USAR EL PRODUCTO.

Publicité

Table des Matières
loading

Sommaire des Matières pour DeWalt DW160

  • Page 1 INSTRUCTIVO DE OPERACIÓN, CENTROS DE SERVICIO Y PÓLIZA INSTRUCTION MANUAL DE GARANTÍA. ADVERTENCIA: LÉASE ESTE INSTRUCTIVO ANTES DE USAR EL PRODUCTO. GUIDE D'UTILISATION MANUAL DE INSTRUCCIONES DW160/DW161 Right Angle Drill Perceuse d’angle Taladro de ángulo recto...
  • Page 2: Important Safety Instructions

    Important Safety Instructions IF YOU HAVE ANY QUESTIONS OR COMMENTS ABOUT THIS OR ANY D WALT TOOL, CALL US TOLL FREE AT: WARNING: When using electric tools, basic safety precautions 1-800-4-D WALT (1-800-433-9258) should always be followed to reduce risk of fire, electric shock, and personal injury, including the following: READ ALL INSTRUCTIONS Double Insulation...
  • Page 3 Safety Instructions For All Tools better and safer performance. Follow instructions for lubricating and changing accessories. Inspect tool cords periodically and if • KEEP WORK AREA CLEAN. Cluttered areas and benches invite damaged, have repaired by authorized service facility. Inspect injuries.
  • Page 4 • CHECK DAMAGED PARTS. Before further use of the tool, a FIG. 1 guard or other part that is damaged should be carefully checked HOLES IN CHUCK to determine that it will operate properly and perform its intended function. Check for alignment of moving parts, binding of moving parts, breakage of parts, mounting, and any other conditions that may affect its operation.
  • Page 5 Drilling CAUTION: Wear appropriate hearing protection during use. Under some conditions and duration of use, noise from this product 1. Always turn off tool and disconnect from power supply when may contribute to hearing loss. attaching or changing bits or accessories. SAVE THESE INSTRUCTIONS 2.
  • Page 6 as in Figure 5, or holding the head of the drill with one hand and FIG. 5 operating the paddle switch with the other hand, holding the back end of the drill as in Figure 6. Drilling in Wood Holes in wood can be made with the same twist drills used for metal. PADDLE These bits may overheat unless pulled out frequently to clear chips SWITCH...
  • Page 7 HIGH-SPEED HOLE SAWS (use with mandrels) FREE WARNING LABEL REPLACEMENT: If your warning labels SAW OUTSIDE FOR CONDUIT SIZES FOR PIPE TAP SIZES become illegible or are missing, call 1-800-4-DEWALT for a free DIAMETERS replacement. 5/8" Built in mandrel; no separate mandrel 3/4"...
  • Page 8: Règles De Sécurité Générales

    RÈGLES DE SÉCURITÉ GÉNÉRALES POUR TOUT RENSEIGNEMENT SUPPLÉMENTAIRE SUR CET OUTIL OU TOUT AUTRE OUTIL D WALT, COMPOSER SANS AVERTISSEMENT! Vous devez lire et comprendre toutes les FRAIS LE NUMÉRO: instructions. Le non-respect, même partiel, des instructions ci-après 1 800 4-D WALT (1 800 433-9258) entraîne un risque de choc électrique, d’incendie et/ou de blessures graves.
  • Page 9: Importantes Mesures De Sécurité

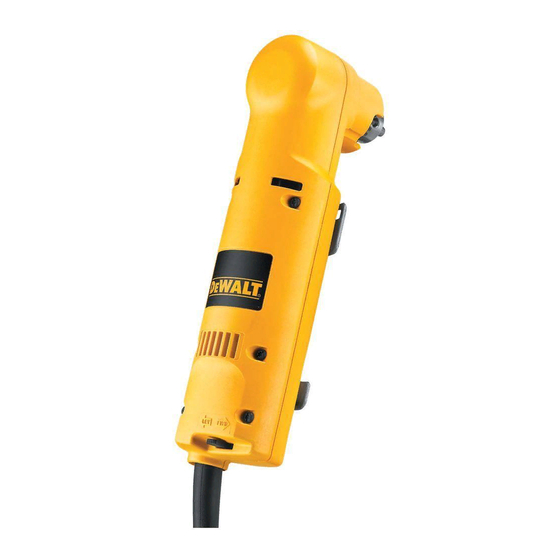
    Importantes mesures de sécurité chaussures à semelle antidérapante pour travailler à l’extérieur. Protéger la chevelure si elle est longue. AVERTISSEMENT : Afin de réduire les risques d’incendie, de • PORTER DES LUNETTES DE SÉCURITÉ. Porter également un secousses électriques ou de blessures lorsqu’on utilise des outils masque respiratoire si le travail de coupe produit de la poussière.
  • Page 10 au fonctionnement de l’outil. L’utilisation d’un cordon de calibre FIG. 1 inférieur occasionne une baisse de tension entraînant une perte de CARTER DU MANDRIN puissance et la surchauffe. Le tableau suivant indique le calibre approprié selon la longueur du cordon et les mentions de la plaque signalétique de l’outil.
  • Page 11: Interrupteur

    les planchers ou tout autre endroit où peuvent se trouver des fils «120 V c.a.» signifie que l’outil fonctionne seulement à l’aide d’une sous tension, NE PAS TOUCHER AUX COMPOSANTS alimentation en courant alternatif et jamais sur du courant continu. MÉTALLIQUES DE L’OUTIL.
  • Page 12 Perçage Toujours mettre l’outil hors tension et le débrancher lorsqu’on en change les forets ou les accessoires. 2. N’utiliser que des forets bien affûtés. Pour le BOIS : forets hélicoïdaux, à langue d’aspic, à simple spirale ou des emporte- pièce; pour le MÉTAL : forets hélicoïdaux en acier de coupe FIG.
  • Page 13 Accessoires servir de un ou de deux doigts pour actionner l’interrupteur. On peut également le saisir de façon inversée avec la paume de la On peut se procurer séparément les accessoires recommandés pour main contre la tête de l’outil et un ou deux doigts pour actionner l’outil chez les détaillants ou au centre de service de la région.
  • Page 14 FORETS DE MAÇONNERIE À ARBRE ROND donnent des droits légaux spécifiques. L’utilisateur peut également Ces forets ont une pointe au carbure en optimisant le rendement et se prévaloir d’autres droits selon l’état ou la province qu’il habite. en prolongeant la durée dans la plupart des utilisations. En outre, la garantie suivante couvre les outils D WALT.
  • Page 15: Instrucciones Importantes De Seguridad

    PRECAUCION: UTILICE SOLAMENTE REFACCIONES ORIG- INALES CUANDO HAGA SERVICIO A SU HERRAMIENTA. Epecificaciones (DW160,DW161) Reemplace los cordones eléctricos dañados. Tensión de alimentación 120 V CA/CD...
  • Page 16 • COLOQUESE ANTEOJOS DE SEGURIDAD. Póngase también apropiado. No modifique o haga cambios en la clavija por ningún motivo. una mascarilla contra el polvo si lo produce la operación que va a efectuar. Instrucciones de seguridad para todas • NO ABUSE DEL CABLE ELECTRICO. Nunca levante la las herramientas herramienta por el cordón ni tire de éste para desconectarlo del •...
  • Page 17 • CABLES DE EXTENSION. Utilice únicamente extensiones de 3 • VERIFIQUE LAS PARTES DAÑADAS. Antes de seguir hilos con clavijas de 3 patas y tomas de corriente de 3 polos que empleando cualquier herramienta, es indispensable verificar con acepten la clavija de la herramienta. Repare o reemplace los mucho cuidado que las guardas u otras partes dañadas puedan cables dañados.
  • Page 18 Disminuciones en el voltaje mayores a 10% harán que la herramienta pierda fuerza y se sobrecaliente. Todas las herramientas DeWalt se han probado en fábrica; si ésta no operara, verifique la toma de corriente del sitio.
  • Page 19 a las manecillas del reloj. Esto aflojará al portabrocas para poder destornillarlo a mano. Taladrado 1. Apague siempre la herramienta y desconéctela de la toma de corriente cuando cambie de brocas o accesorios. 2. Utilice exclusivamente brocas afiladas. Para taladrar MADERA FIG.
  • Page 20 o sujetando la cabeza del taladro con una mano y operando el PRECAUCION: El empleo de cualquier accesorio no recomen- interruptor de paleta con la otra mano, sujetando el extremo dado para utilizarse con esta herramienta puede ser peligroso. posterior del taladro como se observa en la figura 6. Por seguridad en el uso, los siguientes accesorios deberán utilizarse Taladrado en madera solamente en tamaños iguales o menores a los señalados en la tabla...
  • Page 21 DIAMETRO PROFUNDIDAD DIAMETRO autorizadas que empleen siempre refacciones legítimas DeWALT. DE BROCA UTILIZABLE DE VASTAGO PARA REPARACION Y SERVICIO DE SUS HERRAMIENTAS 3,8 mm (3/16”) 38,1 mm (1 1/2”) 3,8 mm (3/16”)
  • Page 22: Póliza De Garantía

    Póliza de Garantía Garantía Completa Las herramientas industriales D WALT están garantizadas durante IDENTIFICACIÓN DEL PRODUCTO: un año a partir de la fecha de compra. Repararemos, sin cargos, Sello o firma del Distribuidor. cualquier falla debida a material o mano de obra defectuosos. Por Nombre del producto: __________ Mod./Cat.: _____________ favor regrese la unidad completa, con el transporte pagado, a Marca: _____________________ Núm.
  • Page 24 Copyright © 1997,2002 The following are trademarks for one or more DeWALT power tools: the yellow and black color scheme; the “D” shaped air intake grill; the array of pyramids on the handgrip; the kit box configuration; and the array of lozenge-shaped humps on the surface of the tool.

Ce manuel est également adapté pour:

Dw161

Table des Matières