
Manuels Connexes pour Velleman LADYBUG


Sommaire des Matières pour Velleman LADYBUG
- Page 1 KSR6 USER MANUAL GEBRUIKERSHANDLEIDING MODE D’EMPLOI MANUAL DEL USUARIO BEDIENUNGSANLEITUNG INSTRUKCJA OBSŁUGI MANUAL DO UTILIZADOR...
- Page 2 Riesgo de asfixia – incluye piezas pequeñas. No apto para niños menores de 3 años. Edad recomendada: 14+. No exponga este equipo a lluvia, humedad, polvo, temperaturas extremas ni a ningún tipo de salpicadura o goteo. Evite usar excesiva fuerza. V. 03 – 28/08/2019 ©Velleman nv...
- Page 3 Perigo de asfixia devido às peças pequenas. Não aconselhável para crianças com idades inferiores a 3 anos. Idade recomendada: 14+. Proteger da chuva, humidade, respingos e gotejamento, quedas e manuseamento abusivo, calor extremo e poeira. V. 03 – 28/08/2019 ©Velleman nv...
-
Page 4: General Guidelines
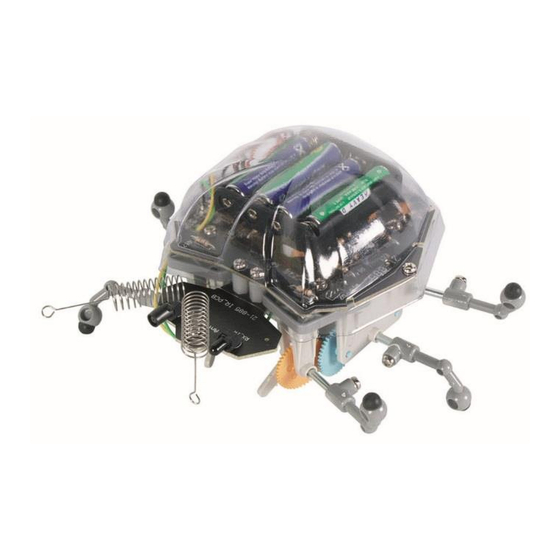
The KSR6 uses infrared emitting diodes as "eyes" to avoid obstacles in its path. The Ladybug automatically makes a left turn when it detects an object. It continues to move forward as long as there's no detection. - Page 5 Quant. IC socket (fig.1 #13) BAT. battery connector (fig.1 #14) slide switch (fig.1 #17) variable resistor (fig.1 #16) M1 (+/-) pins (fig.1 #15) M2 (+/-) type LM324 To IR_PCB pin header (fig. 1 #8) V. 03 – 28/08/2019 ©Velleman nv...
-
Page 6: Gearbox Assembly
D: gear brackets (2) for corner wheel/leg gears E: gear brackets (2) for corner wheel/leg gears F: motor mounting bracket (1) G: top plate (1) H: wheels (6) I: legs (6) J: rubber feet for legs (6) V. 03 – 28/08/2019 ©Velleman nv... - Page 7 KSR6 Assembly V. 03 – 28/08/2019 ©Velleman nv...
-
Page 8: Mechanical Assembly
(fig. 8). Connect the battery holder to the battery connector (BAT, see PCB assembly). 3. Fix the PCB to the gearbox and put the wires through the holes at the right side of the device (fig. 9). V. 03 – 28/08/2019 ©Velleman nv... - Page 9 KSR6 4. Connect the wires to the pins on the M-terminals (fig. 10): 5. Mount the body to the rest of the KSR6 (fig. 11). Wiring Diagram (fig. 12) V. 03 – 28/08/2019 ©Velleman nv...
- Page 10 © COPYRIGHT NOTICE The copyright to this manual is owned by Velleman nv. All worldwide rights reserved. No part of this manual may be copied, reproduced, translated or reduced to any electronic medium or otherwise without the prior written consent of the copyright holder.
-
Page 11: Algemene Richtlijnen
De KSR6 maakt gebruik van infrarood-diodes als 'ogen' om obstakels op zijn weg te omzeilen. De Ladybug draait automatisch naar links wanneer het een voorwerp detecteert. Het blijft vooruit bewegen zolang er geen detectie is. -
Page 12: Montage
Monteer de IC voet, de batterijconnector, de schuifschakelaar, de regelbare weerstand, de pinnen, de IC en de pinheader. Onderdeel Beschrijving Hoev. IC voet (fig.1 #13) batterijconnector (fig.1 #14) BAT. schuifschakelaar (fig.1 #17) regelbare weerstand (fig.1 #16) M1 (+/-) pinnen (fig.1 #15) M2 (+/-) type LM324 V. 03 – 28/08/2019 ©Velleman nv... -
Page 13: Montage Tandwielkast
E: Bevestigingsplaten (2) voor de tandwielen van de wielen/poten op de hoeken F: Bevestigingsplaat voor de motoren (1) G: topplaat (1) H: wielen (6) I: poten (6) J: rubber voetjes voor de poten (6) Montage (zie figuren tabel) V. 03 – 28/08/2019 ©Velleman nv... -
Page 14: Mechanische Montage
4. Smeer wat fijne machineolie op de assen van de tandwielen als de KSR6 niet soepel loopt. Gebruik dit toestel enkel met originele accessoires. Velleman nv is niet aansprakelijk voor schade of kwetsuren bij (verkeerd) gebruik van dit toestel. Voor meer informatie over dit product en de laatste versie van deze handleiding, zie www.velleman.eu. -
Page 15: Directives Générales
Si l’appareil a été endommagé pendant le transport, ne pas l’installer et consulter votre revendeur. Le KSR6 a des 'yeux' diodes IR lui permettant de contourner des obstacles dans sa route. Le Ladybug tourne automatiquement à gauche quand il détecte un objet. Il continue en avant tant qu'il n'y a pas de détection. - Page 16 (fig. 1 #8) Montez la diode IR, le phototransistor et la barrette femelle: (voir figures 3a et 3b). Pièce Description Qté TX_IR diode IR (fig.1 #4) RX_IR phototransistor (fig.1 #5) From Main_Board barrette femelle (fig.1 #9) V. 03 – 28/08/2019 ©Velleman nv...
-
Page 17: Montage De La Boîte D'engrenages
3. Quand il détecte un obstacle, il tourne automatiquement à gauche. S'il n'y a pas d'obstacle, il continue tout droit. 4. Réglez la résistance variable pour modifier la distance de détection (vers la gauche: plus sensible, vers la droite: moins sensible). V. 03 – 28/08/2019 ©Velleman nv... -
Page 18: Problèmes Et Solutions
4. Lubrifiez les axes des pignons avec un peu d'huile de graissage fine si votre KSR6 ne bouge pas aisément. N’employer cet appareil qu’avec des accessoires d’origine. La SA Velleman ne peut, dans la mesure conforme au droit applicable être tenue responsable des dommages ou lésions (directs ou indirects) pouvant résulter de l’utilisation de cet appareil. -
Page 19: Normas Generales
Si el aparato ha sufrido algún daño en el transporte no lo instale y póngase en contacto con su distribuidor. El KSR6 utiliza diodos de emisión IR como "ojos" para evitar obstáculos. El "Ladybug" gira automáticamente a la izquierda al detectar un obstáculo. Avanza siempre en línea recta mientras no haya obstáculo. - Page 20 Monte los soportes del CI, el conector de alimentación, el deslizador, la resistencia variable, los polos, el CI y el conector. Pieza Descripción Cantidad soporte del CI (fig.1 #13) conector de alimentación (fig.1 #14) BAT. deslizador (fig.1 #17) resistencia variable (fig.1 #16) M1 (+/-) polos (fig.1 #15) M2 (+/-) tipo LM324 V. 03 – 28/08/2019 ©Velleman nv...
- Page 21 E: placas de montaje (2) para los piñones de las ruedas/patas en las esquinas F: placa de montaje para motores (1) G: placa superior (1) H: ruedas (6) I: patas (6) J: pie de goma para patas (6) Montaje: véase las figuras en la lista. V. 03 – 28/08/2019 ©Velleman nv...
-
Page 22: Montaje Mecánico
4. Lubrique los ejes de los piñones con un poco de aceite fino de máquina si el KSR6 no se mueve de forma flexible. Utilice este aparato sólo con los accesorios originales. Velleman NV no será responsable de daños ni lesiones causados por un uso (indebido) de este aparato. Para más información sobre este producto y la versión más reciente de este manual del usuario, visite nuestra página www.velleman.eu. -
Page 23: Allgemeine Richtlinien
Überprüfen Sie, ob Transportschäden vorliegen. Sollte dies der Fall sein, verwenden Sie das Gerät nicht und wenden Sie sich an Ihren Händler. Der KSR6 verwendet Infrarot-Dioden als 'Augen' um Hindernisse zu umgehen. Der 'Ladybug' dreht automatisch nach links wenn er ein Objekt detektiert. Er geht immer geradeaus solange er nichts detektiert. -
Page 24: Beschreibung
Montieren Sie die IC-Fassung, den Batterieanschluss, den Schiebeschalter, den regelbaren Widerstand, die Pins, IC und die Stiftleiste. Teil Beschreibung Menge IC-Fassung (Abb.1 #13) Batterieanschluss (Abb.1 #14) BAT. Schiebeschalter (Abb.1 #17) regelbarer Widerstand (Abb.1 #16) M1 (+/-) Pins (Abb.1 #15) M2 (+/-) Typ LM324 V. 03 – 28/08/2019 ©Velleman nv... -
Page 25: Montage Zahnradkasten
C: Schutzplatten für Zahnräder Außenseite/Ecken (4) D: Befestigungsplatten Zahnräder Außenseite/Ecken (2) E: Befestigungsplatten Zahnräder Außenseite/Ecken (2) F: Befestigungsbügel Motor (1) G: Hauptplatte (1) H: Räder (6) I: Beine (6) J: Gummifüße (6) Montage (siehe Abb.) V. 03 – 28/08/2019 ©Velleman nv... -
Page 26: Probleme Und Lösungen
4. Schmieren Sie die Achsen der Zahnräder mit feinem Maschinenöl wenn der KSR6 nicht störungsfrei läuft. Verwenden Sie dieses Gerät nur mit originellen Zubehörteilen. Velleman NV übernimmt keine Haftung für Schaden oder Verletzungen bei (falscher) Anwendung dieses Gerätes. Für mehr Informationen zu diesem Produkt und die neueste Version dieser Bedienungsanleitung, siehe www.velleman.eu. -
Page 27: Instrukcja Obsługi
W razie wątpliwości należy skontaktować się z lokalnym organem odpowiedzialnym za utylizację odpadów. Dziękujemy za zakup produktu Velleman! Prosimy o dokładne zapoznanie się z instrukcją obsługi przed użyciem urządzenia. Nie montować ani nie używać urządzenia, jeśli zostało uszkodzone podczas transportu - należy skontaktować... - Page 28 (rys. 1, nr 14) przełącznik suwakowy (rys. 1, nr 17) reostat (rys. 1, nr 16) M1 (+/-) wtyki (rys. 1, nr 15) M2 (+/-) typ LM324 listwa precyzyjna To IR_PCB (rys. 1, nr 8) V. 03 – 28/08/2019 ©Velleman nv...
- Page 29 D: uchwyty (2) do kół zębatych nóg/kół narożnych E: uchwyty (2) do kół zębatych nóg/kół narożnych F: uchwyt montażowy silnika (1) G: płyta góra (1) H: koła (6) I: nogi (6) J: stopki gumowe do nóg (6) V. 03 – 28/08/2019 ©Velleman nv...
-
Page 30: Wykrywanie I Usuwanie Usterek
© INFORMACJA O PRAWACH AUTORSKICH Właścicielem praw autorskich do niniejszej instrukcji jest firma Velleman nv. Wszelkie prawa są zastrzeżone na całym świecie. Żadna część niniejszej instrukcji nie może być kopiowana, powielana, tłumaczona ani przenoszona na jakikolwiek nośnik elektroniczny (lub w inny sposób) bez wcześniejszej pisemnej zgody właściciela praw autorskich. -
Page 31: Normas Gerais
O KSR6 utiliza diodos emissores de infravermelhos como "olhos" para evitar os obstáculos que se atravessam no seu caminho. O Ladybug (Joaninha) vira automaticamente à esquerda assim que detecta um objecto. Continua a andar para a frente assim que já não houver detecção. - Page 32 Berg. ID da peça descrição Quantid tomada IC (fig.1 #13) BAT. conector da bateria (fig.1 #14) interruptor deslizante (fig.1 #17) resistor variável (fig.1 #16) M1 (+/-) pinos (fig.1 #15) M2 (+/-) pinos (fig.1 #15) V. 03 – 28/08/2019 ©Velleman nv...
- Page 33 E: suportes (2) para as engrenagens de canto da roda/perna F: suporte de montagem do motor (1) G: placa superior (1) H: rodas (6) I: pernas (6) J: pés em borracha para as pernas (6) V. 03 – 28/08/2019 ©Velleman nv...
-
Page 34: Montagem Mecânica
Podem alterar-se as especificações e o conteúdo deste manual sem aviso prévio. © DIREITOS DE AUTOR A Velleman NV detém os direitos de autor deste manual do utilizador. Todos os direitos mundiais reservados. É estritamente proibido reproduzir, traduzir, copiar, editar e gravar este manual do utilizador ou partes deste sem prévia autorização escrita por parte da detentora dos direitos. - Page 35 Velleman®; worden. - se calcula gastos de transporte de y a Velleman® si el aparato ya no está • Bij reparaties buiten de waarborgperiode zullen transportkosten aangerekend cubierto por la garantía.
- Page 36 Velleman® Service- und Qualitätsgarantie wymienione wyżej warunki są bez uszczerbku dla wszystkich komercyjnych gwarancji. Seit der Gründung in 1972 hat Velleman® sehr viel Erfahrung als Verteiler in der Powyższe postanowienia mogą podlegać modyfikacji w zależności od Elektronikwelt in über 85 Ländern aufgebaut.