Table des Matières
Publicité
Les langues disponibles
Les langues disponibles
Liens rapides
TO PREVENT FIRE OR ELECTRIC SHOCK HAZARD, DO
NOT EXPOSE THIS PRODUCT TO RAIN OR MOISTURE.
CAUTION
RISK OF ELECTRIC
SHOCK DO NOT OPEN
THE LIGHTNING FLASH AND
ARROW- HEAD WITHIN THE
CAUTION: TO REDUCE THE RISK OF
TRIANGLE IS A WARNING SIGN
ELECTRIC SHOCK, DO NOT REMOVE
THE BACK, NO USER SERVICEABLE
ALERTING YOU OF
PARTS INSIDE. REFER SERVICING TO
"DANGEROUS VOLTAGE"
QUALIFIED SERVICE PERSONNEL.
INSIDE THE RADIO.
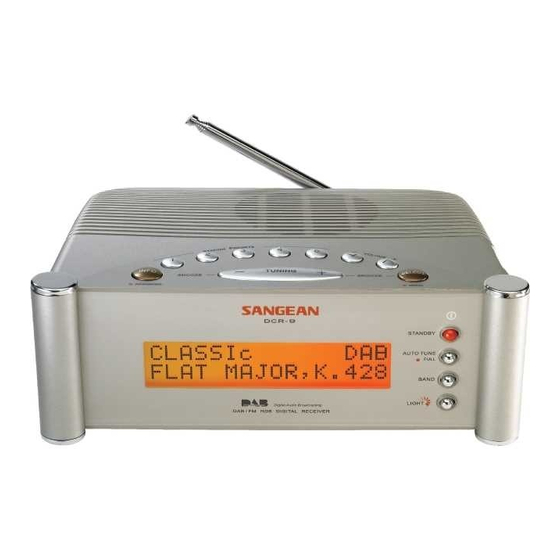
DCR-9/DCR-209
FM RDS/DAB digital clock radio
WARNING:
!
THE EXCLAMATION POINT
WITHIN THE TRIANGLE IS A
WARNING SIGN ALERTING
YOU OF IMPORTANT
INSTRUCTIONS ACCOMPANYING
THIS RADIO.
Please read this manual before use
Operating instruction
Mode d'emploi
Instruccions de manejo
Gebruiksaanwijzing
Bedienungsanleitung
GB
F
E
NL
D
Publicité
Chapitres
Table des Matières

Manuels Connexes pour Sangean DCR-9


Sommaire des Matières pour Sangean DCR-9
- Page 1 DCR-9/DCR-209 FM RDS/DAB digital clock radio Operating instruction Mode d’emploi Instruccions de manejo Gebruiksaanwijzing Bedienungsanleitung WARNING: TO PREVENT FIRE OR ELECTRIC SHOCK HAZARD, DO NOT EXPOSE THIS PRODUCT TO RAIN OR MOISTURE. CAUTION RISK OF ELECTRIC SHOCK DO NOT OPEN...
-
Page 2: Table Des Matières
Contents IMPORTANT SAFETY INSTRUCTIONS ....... 2 Snooze function .............. 18 Controls ................3-4 Sleep timer ..............19 Mains operation ..............5 Headphone socket ............20 Operating your radio - DAB ..........6 Display backlight ............20 Selecting a station - DAB ..........7 Aerials ................ -
Page 3: Important Safety Instructions
IMPORTANT SAFETY INSTRUCTIONS 11. Only use attachments/accessories specified by the 1. Read these instructions. manufacturer. 2. Keep these instructions. 12. Use only with the cart, stand, tripod, bracket, or table specified 3. Heed all warnings. by the manufacturer, or sold with the apparatus. When a cart is used, use caution when moving the cart/apparatus combination 4. -
Page 4: Controls
Controls (Front) 1. StandBy button 2. Autotune button 3. Waveband button 4. Light button... - Page 5 Controls (Top) 5. Telescopic aerial 6. Headphone socket 7. Select button 8. Volume up/down buttons 9. Tuning up/down buttons 10. Preset buttons 11. Info button...
-
Page 6: Mains Operation
Mains operation 1. Place the unit on a flat surface. Plug the mains lead into a wall socket and switch on the wall socket. 2. The display will show "DAB digital radio" for a few seconds before returning to clock display. 3. -
Page 7: Operating Your Radio - Dab
Operating your radio - DAB 1. Fully extend the telescopic aerial. 2. Press the StandBy button to switch on your radio. 3. If this is the first time the radio is used a quick scan DAB channels will be carried out. The display will show "Autotune Quick scan". If the radio has been used before the last used station will be selected. -
Page 8: Selecting A Station - Dab
Selecting a station - DAB 1. The top line of the display shows the name of the station currently selected. 2. Press the Tuning up or down buttons to step through the list of available stations. 3. Press and release the Select button to select the station. The display may show "Tuning"... -
Page 9: Secondary Services - Dab
Secondary services - DAB 1. Certain radio stations have one or more secondary services associated with them. If a station has a secondary service associated with it the display will show " " next to the station name on the station list. -
Page 10: Finding New Stations - Dab
Finding new stations - DAB As time passes new stations may become available. To find new stations proceed as follows:- 1. Press and release the AutoTune button, the display will show "Autotune Quick Scan". Your radio will perform a scan of the DAB frequencies. -
Page 11: Manual Tuning - Dab
Manual Tuning - DAB Manual tuning allows you to tune directly to the various DAB Band III channels. 1. Press and hold in the Select button until the display shows "Manual tune". 2. Press the Tuning up or down buttons to find the required DAB channel. -
Page 12: Operating Your Radio - Fm
Operating your radio - FM 1. Fully extend the telescopic aerial. 2. Press the StandBy button to switch on your radio. The display will show "DAB digital radio" for a few seconds. 3. Press the Band button to select the FM band. 4. -
Page 13: Manual Tuning - Fm
Manual tuning - FM 1. Press the StandBy button to switch on your radio. 2. Press the FM/DAB button to select the FM band. Fully extend the Telescopic aerial . 3. Press the Tuning up or down buttons to tune to a station. The frequency will change in steps of 50kHz. -
Page 14: Display Modes - Fm
Display modes - FM On FM the bottom line of the display can be set to any of the following modes:- 1. Press the Info button to cycle through the various modes. a. Scrolling text Displays scrolling text messages such as artist/track name, phone in number etc. -
Page 15: Recalling A Preset Station - Dab And Fm
Presetting stations - DAB and FM There are 5 memory presets for each of the 2 wavebands. 1. Press the StandBy button switch on the radio. 2. Tune to the required station as previously described. 3. Press and hold down the required Preset button until the display shows e.g. -
Page 16: System Reset
System reset If your radio fails to operate correctly, or some digits on the display are missing or incomplete carry out the following procedure. 1. Press and hold in the Info button until the display shows the software version. 2. Press the Info button twice the display will show System reset. 3. -
Page 17: Setting The Alarm Time
Setting the alarm time 1. Repeatedly press and release the Info button until the display shows Alarm Status. 2. Press the Select button the display will show Alarm Time Set. The minutes digits will begin to flash in the display. Set the required minute using the Tuning Up/Down buttons. -
Page 18: Selecting Alarm Type
Selecting alarm type Your clock radio can be set so as to wake you to either radio or beep type alarm. 1. Repeatedly press and release the Info button until the display shows Alarm Status. 2. Press either the Tuning Up or Down buttons to enter alarm type setting. -
Page 19: Cancelling Alarms
Cancelling alarms 1. Whilst an alarm is sounding it can be cancelled for 24hours by pressing the Standby button. 2. To permanently cancel an alarm proceed as follows:- 3. Repeatedly press and release the Info button until the display shows Alarm Status. 4. -
Page 20: Sleep Timer
Sleep timer The sleep timer can only be set when the power (Standby) is on. 1. Repeatedly press and release the Info button until the display shows Sleep Status. Press the Select button to select Sleep On. 3. Select the required sleep time (1- 99 minutes) using the Tuning Up or Down buttons. -
Page 21: Headphone Socket
Headphone socket A 3.5mm Headphone Socket located on the right-hand end of your radio is provided for use with either headphones or an earpiece. Inserting a plug automatically mutes the internal loudspeaker. Display backlight 1. The display backlight has eight levels including off and can be set by repeatedly pressing and releasing the Light button. -
Page 22: Aerials
Aerials As supplied your clock radio is fitted with a telescopic aerial. Should this prove inconvenient a separate wire aerial can be fitted in place of the telescopic aerial. A spanner is provided to allow removal of the telescopic aerial. The wire aerial can then be plugged in place of the telescopic aerial. -
Page 23: General
General Do not allow this unit to be exposed to moisture (e.g. dripping or splashing) or to temperatures exceeding 70 degrees centigrade. It is recommended that the DAB band be used wherever possible as better results in terms of quality and freedom from interference will usually be obtained than on the FM band. - Page 25 Table des matières IMPORTANTES MESURES DE SÉCURITÉ....25 Fonction de rappel d’alarme........41 Commandes............26-27 Mise en veille programmable........42 Fonctionnement sur le réseau électrique..... 28 Prise casque ............43 Utilisation de votre radio - DAB ......... 29 Rétroéclairage de l’affichage........43 Sélection d’une station - DAB ........
-
Page 26: Importantes Mesures De Sécurité
IMPORTANTES MESURES DE SÉCURITÉ 12. Utilisez l’appareil uniquement avec le chariot, le stand, le trépied, 1. Veuillez lire les présentes instructions. le crochet ou la table spécifiés par le fabricant, ou vendus avec l’appareil. Lorsqu’un chariot est utilisé, veillez à éviter lorsque 2. -
Page 27: Commandes
Commandes (Face avant) 1. Bouton de veille 2. Bouton Autotune 3. Bouton de gamme d’ondes 4. Bouton d’éclairage... - Page 28 Commandes (Face supérieure) 5. Antenne téléscopique 6. Prise pour casque 7. Bouton de sélection 8. Boutons de volume + / - 9. Boutons de syntonisation + / - 10. Boutons de présélection 11. Bouton Info...
-
Page 29: Fonctionnement Sur Le Réseau Électrique
Fonctionnement sur le réseau électrique 1. Placez l’appareil sur une surface plane. Branchez le cordon électrique dans la prise de courant et allumez celle-ci. 2. L’affichage indiquera “DAB digital radio” pendant quelques secondes puis repassera à l’affichage de l’heure. 3. L’heure sera automatiquement établie après que votre réveil-radio ait été... -
Page 30: Utilisation De Votre Radio - Dab
Utilisation de votre radio - DAB 1. Déployez entièrement l’antenne téléscopique. 2. Appuyez sur le Bouton de veille pour allumer votre radio. 3. Si c’est la première fois que votre radio est utilisée, un balayage rapide des canaux DAB sera effectué. L’affichage indiquera «Autotune Quick scan». -
Page 31: Sélection D'une Station - Dab
Sélection d’une station - DAB 1. La ligne supérieure de l’affichage indique le nom de la station actuellement sélectionnée. 2. Appuyez sur les Boutons de syntonisation + ou – pour parcourir la liste des stations disponibles. 3. Appuyez puis relâchez le Bouton de sélection pour sélectionner la station. -
Page 32: Services Secondaires - Dab
Services secondaires - DAB 1. Certaines stations sont également associées à un ou plusieurs services secondaires. Si une station dispose d’un service secondaire, l’affichage indiquera “ “ à côté du nom de la station dans la liste de stations. Le service secondaire apparaîtra alors immédiatement après le service primaire lorsque vous parcourrez la liste de syntonisation. -
Page 33: Trouver De Nouvelles Stations - Dab
Trouver de nouvelles stations - DAB Au fil du temps, de nouvelles stations peuvent devenir accessibles. Pour trouver de nouvelles stations, procédez comme suit:- 1. Appuyez puis relâchez le Bouton AutoTune, l’affichage indiquera “Autotune Quick Scan”. Votre radio effectuera un balayage des fréquences DAB. -
Page 34: Syntonisation Manuelle - Dab
Syntonisation manuelle - DAB La syntonisation manuelle vous permet de régler directement vous-même les différents canaux DAB Bande III. 1. Appuyez sur le Bouton de sélection et maintenez celui-ci enfoncé jusqu’à ce que l’affichage indique «Manual tune». 2. Appuyez sur les Bouton de syntonisation + ou - pour trouver canal DAB voulu. -
Page 35: Utilisation De Votre Radio - Fm
Utilisation de votre radio - FM 1. Déployez entièrement l’antenne téléscopique. 2. Appuyez sur le Bouton de veille pour allumer votre radio. L’affichage indiquera “DAB digital radio” pendant quelques secondes. 3. Appuyez sur le Bouton de bandes pour sélectionner la bande FM. -
Page 36: Syntonisation Manuelle - Fm
Syntonisation manuelle - FM 1. Appuyez sur le Bouton de veille pour allumer votre radio. 2. Appuyez sur le Bouton FM/DAB pour sélectionner la bande FM. Déployez entièrement l’antenne téléscopique . 3. Appuyez sur les Boutons de syntonisation + ou – pour régler une station. -
Page 37: Modes D'affichage - Fm
Modes d’affichage - FM En FM, la ligne inférieure de l’affichage peut être réglée sur un des modes suivants :- 1. Appuyez sur le Bouton Info pour vous déplacer entre les différents modes. a. Défilement texte Affiche des messages avec défilement de texte tels que nom d’artiste/piste, numéro d’appel, etc. -
Page 38: Présélection De Stations - Fm
Présélection de stations - DAB et FM Votre appareil permet 5 présélections mémorisées pour chacune des 2 gammes d’ondes. 1. Appuyez sur le Bouton de veille pour allumer la radio. 2. Réglez la station voulue tel que précédemment décrit. 3. Appuyez sur le Bouton de présélection voulu et maintenez ce dernier enfoncé... -
Page 39: Réinitialisation Du Système
Réinitialisation du système Si votre radio ne fonctionne pas comme il se doit, ou si certains chiffres n’apparaissent pas sur l’affichage ou sont incomplets, procédez comme suit. 1. Appuyez sur le Bouton Info et maintenez ce dernier enfoncé jusqu’à ce que l’affichage indique la version du logiciel. 2. -
Page 40: Introduction De L'heure De Réveil
Introduction de l’heure de réveil 1. Appuyez puis relâchez à plusieurs reprises le Bouton Info jusqu’à ce l’affichage indique Alarm Status. 2. Appuyez sur le Bouton de sélection et l’affichage indiquera Alarm Time Set. Les chiffres des minutes commenceront à clignoter dans l’affichage. -
Page 41: Sélection Du Type D'alarme
Sélection du type d’alarme Votre radio-réveil peut être réglé pour vous réveiller avec la radio ou avec un signal sonore. 1. Appuyez puis relâchez à plusieurs reprises le Bouton Info jusqu’à ce que l’affichage indique Alarm Status. 2. Appuyez sur un des Boutons de réglage + ou – pour entrer dans les paramètres du type d’alarme. -
Page 42: Annulation Des Alarmes
Annulation des alarmes 1. Lorsqu’une alarme retentit, elle peut être annulée pour 24 heures en appuyant sur le Bouton de veille. 2. Pour annuler définitivement l’alarme, procédez comme suit :- 3. Appuyez puis relâchez à plusieurs reprises le Bouton Info jusqu’à... -
Page 43: Mise En Veille Programmable
Mise en veille programmable La mise en veille programmable ne peut être activée que lorsque l’appareil est en marche (Standby). 1. Appuyez puis relâchez à plusieurs reprises le Bouton Info jusqu’à ce que l’affichage indique Sleep Status. 2. Appuyez sur le Bouton de sélection pour sélectionner Sleep On. -
Page 44: Prise Casque
Prise casque Une Prise casque de 3,5mm est située sur l’extrémité droite de votre radio et peut être utilisée pour un casque ou des écouteurs. Lorsqu’une fiche est insérée, le haut-parleur interne passe automatiquement en sourdine. Rétroéclairage de l’affichage 1. Le rétroéclairage de l’affichage propose huit niveaux, y compris l’extinction, et peut être réglé... -
Page 45: Antennes
Antennes Tel qu’il vous est fourni, votre réveil-radio est équipé d’une antenne téléscopique. Si toutefois, cette antenne s’avérait inadaptée, une antenne filaire séparée peut venir remplacer l’antenne téléscopique. Une clé pour contre-écrou est fournie pour permettre de retirer l’antenne téléscopique. L’antenne filaire peut alors être connectée à la place de l’antenne téléscopique. -
Page 46: Généralités
Généralités Faites en sorte que cette radio ne soit pas exposée à l’humidité (ex. éclaboussures ou ruissellement) ou à des températures supérieures à 70 degrés centigrades. Il est recommandé d’utiliser la bande DAB à chaque fois que cela s’avère possible car de meilleurs résultats en termes de qualité... - Page 48 Contenido INSTRUCCIONES IMPORTANTES DE SEGURIDAD . 48 Cancelación de alarmas ........... 64 Controles ............49-50 Función Dormitar............64 Funcionamiento con la red eléctrica ......51 Temporizador de dormir ........... 65 Funcionamiento de su equipo de radio - DAB ..... 52 Conector de auriculares ...........
-
Page 49: Instrucciones Importantes De Seguridad
INSTRUCCIONES IMPORTANTES DE SEGURIDAD 11. Utilice sólo los accesorios especificados por el fabricante. 1. LEA ESTAS INSTRUCCIONES. 12. Utilice solamente un carrito, soporte, trípode, sujeción o mesa 2.CONSERVEESTASINSTRUCCIONES. especificada por el fabricante o vendida con el equipo. Cuando se utilice un carrito debe tener cuidado al transportar 3. -
Page 50: Controles
Controles (Frontal) 1. Botón StandBy 2. Botón Auto Tune (Sintonía automática) 3. Botón Band (Bandas) 4. Botón Light (Luz) - Page 51 Controles (Parte superior) 5. Antena telescópica 6. Conector de auriculares 7. Botón Select (Seleccionar) 8. Botones Sube/Baja el volumen 9. Botón Sintonía arriba o abajo 10. Botones de presintonía 11. Botón Info...
-
Page 52: Funcionamiento Con La Red Eléctrica
Funcionamiento con la red eléctrica 1. Coloque el equipo en una superficie plana. Conecte el otro extremo del cable de la red eléctrica en una toma de corriente de la pared . 2. La pantalla mostrará el mensaje “DAB digital radio” (radio digital DAB) antes de volver a la pantalla de reloj. -
Page 53: Funcionamiento De Su Equipo De Radio - Dab
Funcionamiento de su equipo de radio - DAB 1. Extienda totalmente la antena telescópica. 2. Pulse el botón StandBy para encender el equipo de radio. 3. Si ésta es la primera vez que se utiliza el equipo de radio se llevará... -
Page 54: Selección De Una Emisora - Dab
Selección de una emisora - DAB 1. La línea superior de la pantalla muestra el nombre de la emisora actualmente seleccionada. 2. Pulse el botón Sintonía arriba o abajo para desplazarse por la lista de emisoras disponibles. 3. Pulse y suelte el botón Select (Seleccionar) para seleccionar la emisora. -
Page 55: Servicios Secundarios - Dab
Servicios secundarios - DAB 1. Ciertas emisoras de radio disponen de uno o más servicios secundarios asociados. Si una emisora tuviese un servicio secundario asociado se mostrará el símbolo “ “ junto al nombre de la emisora en la lista de emisoras. El servicio secundario aparecerá... -
Page 56: Localización De Emisoras Nuevas - Dab
Localización de emisoras nuevas - DAB Con el paso del tiempo podrían aparecer emisoras nuevas. Para localizar emisoras nuevas haga lo siguiente: 1. Pulse y suelte el botón Sintonía automática, la pantalla mostrará el mensaje “Autotune Quick scan” (exploración rápida de sintonía automática). -
Page 57: Sintonía Manual - Dab
Sintonía manual - DAB La sintonía manual le permite sintonizar directamente los distintos canales DAB de la Banda III. 1. Pulse y mantenga pulsado el botón Select hasta que la pantalla muestre el mensaje “manual tune” (sintonía manual). 2. Pulse el botón Sintonía arriba o abajo para encontrar el canal DAB que desee. -
Page 58: Funcionamiento De Su Equipo De Radio -Fm
Funcionamiento de su equipo de radio - FM 1. Extienda totalmente la antena telescópica. 2. Pulse el botón StandBy para encender el equipo de radio. La pantalla mostrará el mensaje “DAB digital radio” (radio digital DAB) durante unos segundos. 3. Pulse el botón Banda para seleccionar la banda FM. 4. -
Page 59: Sintonía Manual - Fm
Sintonía manual - FM 1. Pulse el botón StandBy para encender el equipo de radio. 2. Pulse el botón FM/DAB para seleccionar la banda FM. Extienda totalmente la antena telescópica. 3. Pulse el botón Sintonía arriba o abajo para sintonizar una emisora. -
Page 60: Modos De Visualización - Fm
Modos de visualización - FM En la línea inferior de la pantalla en FM, podrá ajustar los siguientes modos:- 1. Pulse el botón Info para pasar por los distintos modos. a. Desplazamiento de texto Muestra mensajes de texto desplazándose, como por ejemplo, nombre del artista / canción, número de llamada telefónica, etc. -
Page 61: Presintonía De Emisoras - Fm
Presintonía de emisoras – DAB y FM Hay 5 presintonías de memoria para cada una de las 2 bandas. 1. Pulse el botón StandBy del equipo de radio. 2. Sintonice la emisora que desee como se explicó anteriormente. 3. Pulse y mantenga pulsado el botón de presintonía que desee hasta que la pantalla muestre, por ejemplo: “Preset 1 stored”... -
Page 62: Restaurar El Sistema
Restaurar el sistema Si la radio no funciona correctamente o algunos dígitos de la pantalla faltan o están incompletos, lleve a cabo el siguiente procedimiento: 1. Pulse y mantenga pulsado el botón Info hasta que la pantalla muestre la versión de software. 2. -
Page 63: Configuración Del Tiempo De Alarma
Configuración del tiempo de alarma 1. Pulse varias veces y suelte el botón Info hasta que la pantalla muestre Alarm Status (Estado de alarma). 2. Pulse el botón Select la pantalla mostrará Alarm Time Set (Configuración del tiempo de alarma). Los dígitos de los minutos empezarán a parpadear en la pantalla. -
Page 64: Selección Del Tipo De Alarma
Selección del tipo de alarma Su radio reloj puede fijarse para que le despierte con la alarma con radio o la alarma con ‘bip’. 1. Pulse varias veces y suelte el botón Info hasta que la pantalla muestre Alarm Status (Estado de alarma). 2. -
Page 65: Cancelación De Alarmas
Cancelación de alarmas 1. Se puede cancelar una alarma que está sonando durante 24 horas pulsando el botón Standby. 2. Para cancelar una alarma permanentemente haga lo siguiente: 3. Pulse varias veces y suelte el botón Info hasta que la pantalla muestre Alarm Status (Estado de alarma). -
Page 66: Temporizador De Dormir
Temporizador de dormir El temporizador de dormir sólo puede ajustarse cuando el equipo está encendido (Standby). 1. Pulse varias veces y suelte el botón Info hasta que la pantalla muestre Sleep Status (Estado de dormir). 2. Pulse el botón Select para seleccionar Sleep On (dormir activado). -
Page 67: Conector De Auriculares
Conector de auriculares El equipo dispone de un conector de auriculares de 3,5mm ubicado en el extremo derecho de su radio para ser utilizado con sus auriculares o audífonos. Al conectarlos se silencia automáticamente el altavoz interno Iluminación posterior de la pantalla 1. -
Page 68: Antenas
Antenas El equipo de radio reloj se suministra con una antena telescópica. Si esta opción no fuese la más conveniente, se puede colocar una antena de cable separada en lugar de la antena telescópica. Se incluye una llave para quitar la antena telescópica. La antena de cable puede conectarse en el lugar de la antena telescópica. -
Page 69: Datos Generales
Datos generales No permita que este equipo esté expuesto a la humedad (por ejemplo, salpicaduras ni goteos) o a temperaturas superiores a 70 grados centígrados. Se recomienda utilizar la banda DAB siempre que sea posible, ya que se obtienen mejores resultados en cuanto a calidad y ausencia de interferencias, en comparación con la banda FM. - Page 71 Inhoud BELANGRIJKE VEILIGHEIDSINSTRUCTIES..... 71 Slaap/Snooze-functie..........87 Besturingen............72-73 Slaaptimer .............. 88 Netvoeding ………............ 74 Mof koptelefoon............89 Uw radio besturen - DAB ……........75 Weergave achterlicht..........89 Een station selecteren - DAB ........76 Antennes..............90 Secundaire bereiken - DAB ........77 Specificaties ……............
-
Page 72: Belangrijkeveiligheidsinstructies
BELANGRIJKEVEILIGHEIDSINSTRUCTIES 11. Gebruik alleen verbinding/hulpstukken die door de fabrikant 1. Lees deze instructies. worden aangegeven. 2. Bewaar deze instructies. 12. Gebruik alleen met het karretje, standaard, drievoet, haak, of tafel die de fabrikant aanraadt, of die met het toestel worden 3. -
Page 73: Besturingen
Besturingen(voorkant) 1. Standby-knop 2. Automatisch afstemknop 3. Golfbandknop 4. Lichtknop... - Page 74 Besturingen (bovenkant) 5. Telescopische antenne 6. Mof koptelefoon 7. Selectieknop 8. Volume op/neer-knoppen 9. Afstem op/neer-knoppen 10. Preset-knoppen 11. Info-knop...
-
Page 75: Netvoeding
Netvoeding 1. Plaats de eenheid op een plat oppervlak. Steek de stekker in een stopcontact en schakel deze aan. 2. De display toont nu gedurende enkele seconden “DAB digital radio” voordat het naar de klokweergave terugkeert. 3. Nadat uw klokradio voor een paar minuten op een DAB-station is afgestemd, wordt de kloktijd automatisch ingesteld. -
Page 76: Uw Radio Besturen - Dab
Uw radio besturen - DAB 1. Trek de telescopische antenne helemaal uit. 2. Druk op de knop StandBy om uw radio aan te zetten. 3. Als dit de eerste keer dat u de radio gebruikt, wordt er een snelle scan naar DAB-kanalen uitgevoerd. De display toont nu “Autotune Quick scan”... -
Page 77: Een Station Selecteren - Dab
Een station selecteren - DAB 1. In de bovenste regel van de display wordt de naam van het huidig geselecteerde station weergeven. 2. Druk op de op/neer-knoppen voor afstemmen om door de lijst van verschillende stations te gaan. 3. Druk even op de knop Select om het station te selecteren. De display toont “Tuning”... -
Page 78: Secundaire Bereiken - Dab
Secundaire bereiken - DAB 1. Bepaalde radiostations hebben meer dan een secundaire bereiken ter beschikking. Als een station een secundair bereik ter beschikking heeft, dan toont de display “ “ naast de stationsnaam op de stationslijst. Het secundaire bereik verschijnt dan onmiddellijk na het primaire bereik als u door de afstemlijst gaat. -
Page 79: Nieuwe Stations Zoeken - Dab
Nieuwe stations zoeken - DAB Terwijl de tijd passeert komen er nieuwe stations beschikbaar. Om nieuwe stations te zoeken, gaat u als volgt te werk:- 1. Druk even op de knop AutoTune. De display toont “Autotune Quick Scan” (Snelle scan autom. Afstemming). Uw radio scand de DAB-frequenties. -
Page 80: Handmatig Afstemmen - Dab
Handmatig afstemmen - DAB Met handmatig afstemmen kunt u rechtstreeks op verschillende DAB - Band III-kanalen afstemmen. 1. Houdt de knop Select ingedrukt, totdat de display “Manual tune” (handmatig afstemmen) weergeeft. 2. Druk op de knoppen Tuning op of neer om het gewenste DAB-kanaal te zoeken. -
Page 81: Uw Radio Besturen - Fm
Uw radio besturen - FM 1. Trek de telescopische antenne volledig uit. 2. Druk op de knop StandBy om uw radio aan te zetten. De display toont voor een paar seconden “DAB digital radio”. 3. Druk op de knop Band om de FM-band te selecteren. 4. -
Page 82: Handmatig Afstemmen - Fm
Handmatig afstemmen - FM 1. Druk op de knop StandBy om uw radio aan te zetten. 2. Druk op de knop FM/DAB om de FM-band te selecteren. Trek de telescopische antenne helemaal uit. 3. Druk op de knoppen Tuning op of neer om op een station af te stemmen. -
Page 83: Displaymodi - Fm
Displaymodi - FM Bij FM kunt u de onderste regel van de display op een van de volgende modi instellen:- 1. Druk op de knop Info om door de verschillende modi te gaan. a. Roltekst Geeft roltekstberichten weer zoals artiesten/track-naam, telefoonnummer, enz. -
Page 84: Vooraf Ingestelde Stations - Fm
Vooraf ingestelde stations - DAB en FM Voor elke 2 golfbanden zijn er 5 geheugen-presets. 1. Druk op de knop StandBy om de radio aan te zetten. 2. Stem op het gewenste station af, zoals hiervoor is beschreven. 3. Houdt de vereiste knop Preset ingedrukt totdat de display bijv. “Preset 1 stored”... -
Page 85: Opnieuw Instellen Van Systeem
Opnieuw instellen van systeem Als uw radio niet goed werkt, of op de display worden een paar cijfers gemist of de display is onvolledig, dan dient u de volgende procedure uit te voeren. 1. Houd de knop Info ingedrukt totdat de display de softwareversie toont. -
Page 86: De Alarmtijd Instellen
De alarmtijd instellen 1. Druk onophoudelijk even op de knop Info totdat de display Alarm Status toont. 2. Druk op de knop Select. De display toont Alarm Time Set (Alarmtijd ingesteld). De cijfers van de minuten beginnen te knipperen in de display. Stel de gewenste minuten in door de knoppen Tuning Op/Neer te gebruiken. -
Page 87: Alarmtype Selecteren
Alarmtype selecteren U kunt uw klokradio zo instellen dat u of met radio-alarm of een piepalarm wordt wakker gemaakt. 1. Druk onophoudelijk even op de knop Info totdat de display Alarm Status toont. 2. Druk op een van de Tuning Op of Neer-knoppen om het type alarm in te stellen. -
Page 88: Alarmen Annuleren
Alarmen annuleren 1. Zodra het alarm afgaat kunt u het voor 24 uur annuleren, door op de knop Standby te drukken. 2. Om een alarm permanent te annuleren, gaat u als volgt te werk:- 3. Druk onophoudelijk even op de knop Info totdat de display Alarm Status toont. -
Page 89: Slaaptimer
Slaaptimer U kunt de slaaptimer alleen instellen als de klokradio aan is (Standby). 1. Druk onophoudelijk even op de knop Info totdat de display Sleep Status toont. 2. Druk op de knop Select om Sleep On (slapen aan) wordt geselecteerd. 3. -
Page 90: Mof Koptelefoon
Mof koptelefoon Aan de rechterkant van uw radio zit een koptelefoonmof van 3.5 mm. Deze kunt u voor een koptelefoon of voor oorpluggen gebruiken. Door er een plug in te steken, wordt de interne luidspreker automatisch stilgezet. Weergave achterlicht 1. De weergave van het achterlicht heeft acht niveaus, inclusief uit. U kunt deze instellen door onophoudelijk even op de knop Light (licht) te drukken. -
Page 91: Antennes
Antennes Bij het afleveren is uw radio voorzien van een telescopische antenne. Als dit ongemakkelijk blijkt te zijn, dan kunt u op de plaats van de telescopische antenne een aparte draadantenne plaatsen. Er wordt een steeksleutel geleverd om de telescopische antenne te verwijderen. -
Page 92: Algemeen
Algemeen Stel deze eenheid niet bloot aan vocht (bijv. Druppels of spatten) of aan temperaturen die de 70 graden centigraad overschrijden. Het wordt aangeraden de DAB-band te gebruiken wanneer dit mogelijk is. U krijgt hierdoor betere resultaten op het gebied van kwaliteit en u blijft vrij van storingen, in tegenstelling tot de FM-band. - Page 94 Inhalt WICHTIGE SICHERHEITSHINWEISE ...... 94 Sleep-Timer ............111 Bedienelemente .……………....…....95-96 Kopfhöreranschluss ........…..112 Netzbetrieb .....….....…....97 Hintergrundbeleuchtung ......…... 112 Bedienung des Radios - DAB ......…..98 Antennen .............. 113 Einen Sender auswählen - DAB..…......99 Technische Daten ..........113 Unterprogramme (Secondary Services) - DAB...…..
-
Page 95: Wichtige Sicherheitshinweise
WICHTIGE SICHERHEITSHINWEISE 1. Lesen Sie diese Anleitung durch. 11. Verwenden Sie nur die vom Hersteller angegebenen Zusatzgeräte/Zubehörteile. 2. Bewahren Sie diese Anleitung gut auf. 12. Verwenden Sie das Gerät nur mit dem vom Hersteller 3. Beachten Sie alle Warnhinweise. angegebenen oder mit dem Gerät zusammen verkauften Wagen, Ständer, Stativ, Träger oder Tisch. -
Page 96: Bedienelemente (Vorderseite)
Bedienelemente (Vorderseite) 1. Standby-Taste 2. Taste für die automatische Sendereinstellung 3. Frequenzbereichstaste 4. Beleuchtungstaste... -
Page 97: Bedienelemente
Bedienelemente (Oben) 5. Teleskopantenne 6. Kopfhöreranschluss 7. Auswahltaste 8. Lautstärkeregler 9. Sendereinstelltasten 10. Voreinstellungstasten 11. Infotaste... -
Page 98: Netzbetrieb
Netzbetrieb 1. Stellen Sie das Gerät auf eine ebene Fläche. Stecken Sie den Netzstecker in die Wandsteckdose. 2. Auf dem Display wird für einige Sekunden „DAB digital radio“ angezeigt, bevor es wieder zur Uhranzeige zurückkehrt. 3. Die Uhrzeit wird automatisch einstellt, nachdem ein paar Minuten lang ein DAB-Sender eingestellt war. -
Page 99: Bedienung Des Radios - Dab
Bedienung des Radios - DAB 1. Ziehen Sie die Teleskopantenne vollständig aus. 2. Drücken Sie die Standby-Taste, um das Radio einzuschalten. 3. Wenn das Radio zum ersten Mal eingeschaltet wird, werden die DAB-Sender schnell durchsucht. Auf dem Display wird „Autotune Quick scan“ (Schnellsuche) angezeigt. Wenn das Radio bereits benutzt wurde, wird der zuletzt verwendete Sender eingestellt. -
Page 100: Einen Sender Auswählen - Dab
Einen Sender auswählen - DAB 1. In der oberen Zeile des Displays wird der Name des gerade eingestellten Senders angezeigt. 2. Drücken Sie die Sendereinstelltasten, um durch die Liste der verfügbaren Sender zu blättern. 3. Drücken Sie kurz die Auswahltaste, um den Sender einzustellen. Auf dem Display wird „Tuning“... -
Page 101: Unterprogramme (Secondary Services) - Dab
Unterprogramme (Secondary Services) - DAB 1. Einige Radiosender sind mit einem oder mehreren Unterprogrammen verknüpft. Wenn ein Sender ein Unterprogramm besitzt, wird auf dem Display in der Senderliste neben dem Sendernamen “ “ angezeigt. Das Unterprogramm wird dann sofort nach dem Hauptprogramm angezeigt, wenn Sie durch die Senderliste blättern. -
Page 102: Automatische Auswahl - Dab
Neue Sender suchen - DAB Mit der Zeit stehen möglicherweise neue Sender zur Verfügung. So suchen Sie neue Sender: 1. Drücken Sie kurz die Taste für die automatische Sendereinstellung. Die Anzeige zeigt „Autotune Quick Scan“ (Automatische Sendereinstellung, Schnellsuche). Das Radio durchsucht die DAB-Frequenzen. -
Page 103: Manuelle Sendereinstellung - Dab
Manuelle Sendereinstellung - DAB Sie können die verschiedenen DAB-Band-III-Sender auch direkt manuell einstellen. 1. Halten Sie die Auswahltaste gedrückt, bis auf dem Display „Manual tune“ (Manuelle Einstellung) angezeigt wird. 2. Drücken Sie die Sendereinstelltasten, um den gewünschten DAB-Sender zu suchen. 3. -
Page 104: Bedienung Des Radios - Fm
Bedienung des Radios - FM 1. Ziehen Sie die Teleskopantenne vollständig aus. 2. Drücken Sie die Standby-Taste, um das Radio einzuschalten. Auf dem Display wird für einige Sekunden „DAB digital radio“ angezeigt. 3. Drücken Sie die Frequenzbereichstaste, um den FM-Bereich auszuwählen. -
Page 105: Manuelle Sendereinstellung - Fm
Manuelle Sendereinstellung - FM 1. Drücken Sie die Standby-Taste, um das Radio einzuschalten. 2. Drücken Sie die Frequenzbereichstaste, um den FM-Bereich auszuwählen. Ziehen Sie die Teleskopantenne vollständig aus. 3. Drücken Sie die Sendereinstelltasten, um einen Sender einzustellen. Die Frequenz ändert sich in Schritten von 50 kHz. 4. -
Page 106: Anzeigemodi - Fm
Anzeigemodi - FM Für die untere Zeile des Displays können im FM-Bereich die folgenden Modi ausgewählt werden: 1. Drücken Sie die Infotaste, um die verschiedenen Modi zu durchlaufen. Zeigt Rolltextnachrichten, z. B. den a. Rolltext Künstler/Track-Namen oder eine Telefonnummer. Zeigt die Art des Senders, z.B. Pop, b. - Page 107 Sender voreinstellen - DAB und FM Für jeden der 2 Frequenzbereiche stehen 5 Speicherplätze zur Verfügung. 1. Drücken Sie die Standby-Taste, um das Radio einzuschalten. 2. Stellen Sie gemäß der obigen Beschreibung den gewünschten Sender ein. 3. Halten Sie die gewünschte Voreinstellungstaste gedrückt, bis das Display z.B.
-
Page 108: System Zurücksetzen
System zurücksetzen Wenn das Radio nicht richtig funktioniert oder einige Zeichen auf dem Display nicht oder unvollständig angezeigt werden, gehen Sie folgendermaßen vor. 1. Halten Sie die Infotaste gedrückt, bis auf dem Display die Software-Version angezeigt wird. 2. Drücken Sie zweimal die Infotaste. Auf dem Display wird „System reset“... -
Page 109: Weckzeit Einstellen
Weckzeit einstellen 1. Drücken Sie mehrmals kurz die Infotaste, bis das Display “Alarm Status” anzeigt. 2. Drücken Sie die Auswahltaste. Auf dem Display wird „Alarm Time Set“ (Weckzeit einstellen) angezeigt. Die Minutenziffern auf dem Display blinken. Stellen Sie mit den Sendereinstelltasten die gewünschte Minute ein. -
Page 110: Art Des Weckrufs Einstellen
Art des Weckrufs einstellen Der Radiowecker kann eingestellt werden, dass er Sie entweder mit dem Radio oder einem Piepton weckt. 1. Drücken Sie mehrmals kurz die Infotaste, bis das Display „Alarm Status“ anzeigt. 2. Drücken Sie eine der Sendereinstelltasten, um die Art des Weckrufs einzustellen. -
Page 111: Wecker Ausschalten
Wecker ausschalten 1. Wenn der Wecker ertönt, kann er für 24 Stunden mit der Standby-Taste ausgeschaltet werden. 2. Um den Wecker dauerhaft auszuschalten, gehen Sie folgendermaßen vor: 3. Drücken Sie mehrmals kurz die Infotaste, bis das Display „Alarm Status“ anzeigt. 4. -
Page 112: Sleep-Timer
Sleep-Timer Der Sleep-Timer kann nur eingestellt werden, wenn das Gerät eingeschaltet ist (Standby). 1. Drücken Sie mehrmals kurz die Infotaste, bis das Display „Sleep Status“ anzeigt. 2. Drücken Sie die Auswahltaste, um „Sleep On“ einzustellen. 3. Wählen Sie mit den Sendereinstelltasten die gewünschte Sleep-Zeit (1 –... -
Page 113: Kopfhöreranschluss
Kopfhöreranschluss An der rechten Seite des Radios befindet sich eine Kopfhöreranschluss (3,5 mm). Durch das Einstecken des Steckers wird der interne Lautsprecher des Radios automatisch stummgeschaltet. Hintergrundbeleuchtung 1. Die Hintergrundbeleuchtung des Displays hat acht Stufen (einschließlich “Aus”) und kann durch wiederholtes kurzes Drücken der Beleuchtungstaste eingestellt werden. -
Page 114: Antennen
Antennen Der Radiowecker ist mit einer Teleskopantenne ausgerüstet. Sollte sich dies als unpraktisch erweisen, kann gesondert eine Drahtantenne anstelle der Teleskopantenne eingesetzt werden. Ein Schraubenschlüssel liegt bei, um die Teleskopantenne zu entfernen. Die Drahtantenne kann dann anstelle der Teleskopantenne hineingesteckt werden. Hinweis: In Gebieten, in denen Signale nur schwach empfangen werden, kann sich die Drahtantenne als weniger leistungsfähig als die Teleskopantenne erweisen. -
Page 115: Allgemeines
Allgemeines Setzen Sie dieses Gerät nicht Feuchtigkeit (z.B. Tropf- oder Spritzwasser) oder Temperaturen über 70° C aus. Der DAB-Bereich sollte wenn immer möglich verwendet werden, da er im Vergleich zum FM-Bereich bessere Qualität und weniger Störgeräusche bietet. - Page 116 381L601A...