Lifetime 6406 Manuel De L'utilisateur
Masquer les pouces
Voir aussi pour 6406:
- Instructions d'assemblage (76 pages) ,
- Instructions d'assemblage (76 pages)
Table des Matières
Publicité
Liens rapides
VISIT THE LIFETIME WEB SITE:
WWW.LIFETIME.COM
For Assistance, including missing or broken parts,
Call Customer Service at:
1 (800) 225-3865
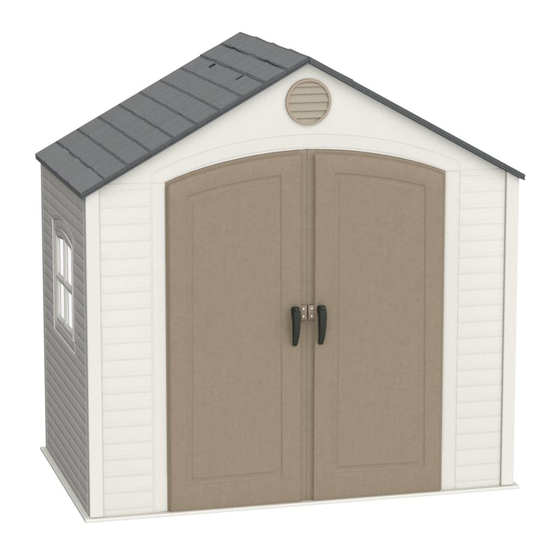
8' x 5' Outdoor Shed
Hangar Extérieur de 8' x 7.5'
MODEL #6406
ASSEMBLY
INSTRUCTIONS AND
OWNER'S MANUAL
MANUEL DE
L'UTILISATEUR
avec Instructions de Montage
Save this instruction in the event that the manufacturer has to be contacted for replacement parts.
®
Publicité
Table des Matières

Manuels Connexes pour Lifetime 6406


Sommaire des Matières pour Lifetime 6406
- Page 1 ® VISIT THE LIFETIME WEB SITE: WWW.LIFETIME.COM For Assistance, including missing or broken parts, Call Customer Service at: 1 (800) 225-3865 8’ x 5’ Outdoor Shed Hangar Extérieur de 8’ x 7.5’ MODEL #6406 ASSEMBLY INSTRUCTIONS AND OWNER’S MANUAL MANUEL DE L’UTILISATEUR...
- Page 2 2. En cas improbable de retrait de produit du marché ou de modifi cation affectant la sécurité, nous pouvons nous prévenir immédiatement et montage. directement. 3. Vous avez le choix entre la réception des Avis aux Clients Privilégiés et celle des promotions visant les nouveaux articles Lifetime. www.lifetime.com Level Surface Notice / Avis concernant une surface de niveau: Surface must be leveled before installation.
- Page 3 IMPORTANT! Please Read...
-
Page 4: Important ! Veuillez Lire
IMPORTANT ! Veuillez lire... -
Page 5: Parts List
Parts List Liste des pièces Boîte 1 (Grande boîte) Box 1 (Smaller Box) Truss Support Hardware Bag [1001882] Sac d’accessoires de l’appui d’entretoise [1001882] BN00300 1/4” Cap Nut BN00300 Écrou capuchon de 1/4” No. ID de pièce Description Quantité Part # Description BB04500 Tige fi... - Page 6 Before Beginning! / Avant de commencer Remove the Parts List from the center of this Détachez la liste des pièces du centre de ce manuel Note: Any platform or similar structure should be built above ground in order to avoid water pooling inside shed. manual, and locate color “Construction Tips”...
- Page 7 OPTION 2: Filled Wood Frame Item Qty. Square up the frame by measuring OPTION 2: Cadre en bois imprégné 2” x 4” x 53” treated board* from corner to corner. Measurement A 2” x 4” x 96” treated board* Be sure you use lumber that is treated and approved for should equal Measurement B.
- Page 8 Assemble Front Corner / Montage de l’angle avant Assemble Floor / Montage du plancher CAUTION Fold Left Front Corner Panel (105). Fit tabs of panel into the front left corner (while facing shed) of Lay Outer Floor Panel (109) fl at on the ground. Sharp objects may damage your your fl...
- Page 9 Assemble Left Wall / Montage du mur gauche Assemble Back Wall / Montage du mur arriere SS (10) Insert two Wall Panels (108) along back side of shed. Snap either a Wall Panel (108) or the Window Wall Panel (125) into SS (15) place along shorter side of shed.
- Page 10 Install Back Shelf / Installation de l’étagère arrière Assemble Right Wall / Montage du mur de droite SS (8) Snap either a Wall Panel (108) or the Window Wall Panel (125) into Insert two Shelf Support Channels (AF) into slots on back wall (align with Truss place along shorter side of shed.
-
Page 11: Install Corner Shelf / Installation De L'étagère D'angle 9A
Install Corner Shelf / Installation de l’étagère 10 Left Door Assembly d’angle HM (2) Fold up edges of Corner Shelf (121). Line-up holes in Corner Rest Left Door (118) with front side down. Position Deadbolt Shelf with top set of pre-made holes in Right Front Corner Panel Latches (HM) in slots at top and bottom of door then slide (Not Actual Size) and secure with screws (SS). -
Page 12: Avant De Commencer Le Montage
11 Right Door Assembly Before Beginning Assembly Remove this Parts List and Hardware Identifi er Rest Right Shed Door (119) with front side down, then from the Instructions and take an inventory of all slide Door End Channel (AE ) onto the door. Two Adults Required for Assembly parts in both boxes. -
Page 13: Pièces Du Hangar
Pièces du hangar Shed Parts (Les dimensions ne sont pas réelles) (Not Actual Size) Front view Back view Back view Front view **U.S. and Canada customers ONLY** IF ASSISTANCE IS NEEDED, DO NOT CONTACT THE STORE!!! CALL OUR CUSTOMER SERVICE DEPARTMENT at 1 (800) 225-3865 HOURS: 7:00 a.m. -
Page 14: Shed Hardware / Pièces Du Hangar
Shed Hardware / Pièces du hangar (Actual Size) (Les dimensions sont réelles) HB (2) HH (2) HR (2) Screwdriver Hardware Bags: 7/16” Wrenches (2) 1004666 You may need to nudge the Door End Channel to make the holes line up with the gap in the door. - Page 15 Front Gable Assembly / Montage du mur pignon Install Doors and Front Gable / Installation des portes et toit pignon avant Insert End Plugs (GB) into ends of Gable Support Square HO (1) Tube (AF). Attach Gable Support Square Tube to Front Slide one spacer (HO) onto bottom hinge pin of Left Shed Door and place GA (6) Gable (111), and secure with screws (GA).
- Page 16 Assemble Rear Gable / Install Front Gable. Montage du toit pignon arrière Installez le toit pignon. SS (4) Assemble two halves of the Rear Gable. Assemblez les deux moitiés du toit pignon arrière. Hardware Bags: Screwdriver 1001634 Top Hinge pins fi t into holes on underside of Front Gable Les broches supérieures entrent dans les trous situés sous le toit pignon avant.
- Page 17 Assemble Truss / Assemblage de l’entretoise Slide a Threaded Rod (SA) through the Truss Support Brace and the top of the Truss Connector. Attach Brace (AB) to two Roof HL (2) Deslice un Vástago Roscado a través del Soporte de la Truss Channels (AC) (one on each SA (1) Cabriada y de la parte superior del Conector de Cabriada.
- Page 18 Truss & Roof Installation / Installation de l’entretoise et du toit Secure the Roof Panel to the Front Gable and Truss Channel with all but the very top screws (SS). Slide the metal Roof Support (AG) (not actual size) AG (1) Place a Truss into the fi...
- Page 19 Follow steps 16b-16d and install a Roof Panel and Roof Install Rear Gable. Support on opposite side. Montage du pignon arrière (not actual size) AG (1) SS (14) Suivez les étapes 16b-16d et montez un panneau et support de toit sur le côté...
- Page 20 Position and Secure Rear Roof Cap (116) along Rear Gable. Install last Roof Panel. Montage du dernier panneau de toit Positionnez et fi xez le chapeau de toit arrière (116) sur le toit SS (4) SS (11) pignon arrière. Hardware Bags: #2 Screwdriver (1) 1001634 Hardware Bags:...
-
Page 21: Shelf Installation / Montage Des Étagères
Shelf Installation / Montage des étagères Battery Light Installation Insert Shelf Brackets into notches below the 8 foot shelf. Place Light (BF) can be installed above Right Corner shelf or on the Short Shelves on brackets and secure with screws. Front Gable. -
Page 22: Anchor The Shed / Ancrage Du Hangar
Align Doors / Alignement des portes Insert Gable Clips in Back Wall Introduisez les clips de pignon dans le mur arrière In some cases, the shed doors may not completely line up at the tops (fi g. 1). When this happens, identify which side is higher and use a shim (BE) to slightly raise the back corner of the high side until doors line up (fi... -
Page 23: Pegboard Locations / Emplacements Du Panneau Perforé
6420 30” Shed Extension Kit: Améliorez votre hangar Lifetime® Outdoor Shed par l’achat des kits ou des pièces de rechange suivants. Appelez notre Service à la Clientèle au numéro: 1 (800) 225-3865 ** Les clients situés à l’extérieur des États-Unis ou du Canada peuvent s’adresser au magasin pour assistance. - Page 24 2. Cette garantie n’est pas transférable et est expressément limitée à la réparation ou au remplacement du produit défectueux. Si le produit est déclaré défectueux selon les termes de cette garantie, Lifetime Products, Inc. réparera ou remplacera les parties défectueuses gratuitement pour l’acheteur. Les frais d’expéditions aller et retour de l’usine ne sont pas couverts et sont à la charge de l’acheteur.
- Page 25 CLAIMS IF PARTS ARE UNAVAILABLE OR OBSOLETE. 1. Lifetime outdoor sheds are warranted to the original purchaser to be free from defects in material or workmanship for a period of ten years from the date of original retail purchase. The word “defects” is defi ned as imperfections that impair the use of the product.