Table des Matières
Publicité
Les langues disponibles
Les langues disponibles
Liens rapides
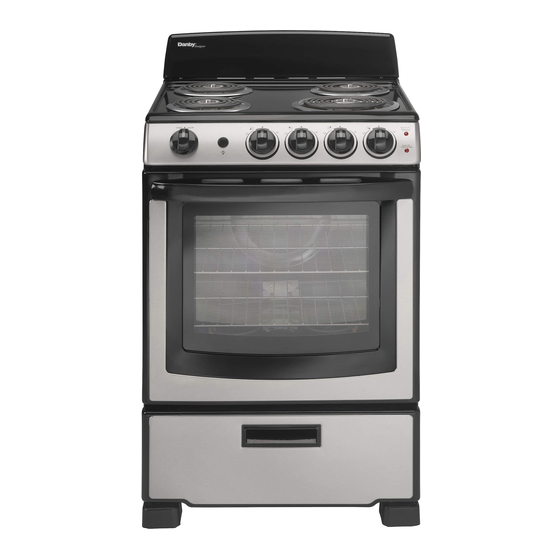
ELECTRIC RANGE
Owner's Manual.............................1 - 15
CUISINIÈRE ÉLECTRIQUE
Manuel du propriétaire.................16 - 30
www.Danby.com
DANBY PRODUCTS LIMITED, ONTARIO, CANADA N1H 6Z9
DANBY PRODUCTS INC., FINDLAY, OHIO, USA 45840
OWNER'S MANUAL
MANUEL DU PROPRIÉTAIRE
MODEL * MODÈLE
DER244WC
DER244BSSC
DER245BSS
DER245BSSC
2019.02.25
Publicité
Table des Matières

Manuels Connexes pour Danby Designer DER244WC


Sommaire des Matières pour Danby Designer DER244WC
- Page 1 OWNER’S MANUAL MANUEL DU PROPRIÉTAIRE ELECTRIC RANGE MODEL * MODÈLE Owner’s Manual......1 - 15 DER244WC DER244BSSC CUISINIÈRE ÉLECTRIQUE DER245BSS Manuel du propriétaire....16 - 30 DER245BSSC www.Danby.com DANBY PRODUCTS LIMITED, ONTARIO, CANADA N1H 6Z9 2019.02.25 DANBY PRODUCTS INC., FINDLAY, OHIO, USA 45840...
-
Page 2: Need Help
Welcome Welcome to the Danby family. We are proud of our quality products and we believe in dependable service. We suggest that you read this owner’s manual before plugging in your new appliance as it contains important operation information, safety information, troubleshooting and maintenance tips to ensure the reliability and longevity of your appliance. -
Page 3: Important Safety Information
Important Safety Information READ AND FOLLOW ALL SAFETY INSTRUCTIONS WARNING - TIP OVER HAZARD • A child or adult can tip the appliance and be killed. • Verify the anti-tip bracket has been properly installed and engaged to the fl oor or wall. •... -
Page 4: General Safety Requirements
Important Safety Information READ AND FOLLOW ALL SAFETY INSTRUCTIONS GENERAL SAFETY REQUIREMENTS COOK TOP SAFETY REQUIREMENTS Ensure the appliance is properly installed and Use the proper pan size. This appliance is equipped grounded by a qualifi ed technician. with four burners of different sizes. Select utensils that have fl... - Page 5 Important Safety Information READ AND FOLLOW ALL SAFETY INSTRUCTIONS OVEN SAFETY REQUIREMENTS WARNING - IN CASE OF FIRE Use care when opening the door. Allow hot air or In the event of a fi re, never pick up a fl aming pot steam to escape before removing or replacing food.
-
Page 6: Installation Instructions
INSTALLATION INSTRUCTIONS BEFORE BEGINNING REQUIRED TOOLS Keep these instructions for future reference. 1. Drill with a 1/8” bit 2. Adjustable wrench Installation of this appliance requires basic 3. Pliers mechanical skills and roughly 1 to 3 hours of time. 4. 1/4” nut driver 5. -
Page 7: Electrical Requirements
INSTALLATION INSTRUCTIONS PREPARE THE OPENING ELECTRICAL REQUIREMENTS All rough-in and spacing dimensions must be met This appliance must be supplied with the proper for safe use of the appliance. Electricity to the range voltage and frequency, and connected to an can be disconnected at the outlet without moving the individual properly grounded branch circuit, range by removing the lower drawer if the outlet is... -
Page 8: Anti-Tip Bracket Installation
INSTALLATION INSTRUCTIONS ANTI-TIP BRACKET INSTALLATION Rear wall installation 1. Anti-tip arm on the back of the appliance Use the two screws provided to secure the bracket 2. Anti-tip bracket to the rear wall. The screws must enter a wood sill 3. -
Page 9: Setting The Controls
OPERATING INSTRUCTIONS SURFACE COOKING CONTROLS HEAT SETTING GUIDE The surface heating elements of the appliance are • HI - quick start for cooking; bringing water to a designed for a variety of heat settings. boil At both the HI and LO positions, there are slight •... -
Page 10: Oven Shelves
OPERATING INSTRUCTIONS OVEN COOKING CONTROLS ADJUST THE OVEN THERMOSTAT To use the oven, turn the oven temperature knob to You may fi nd that the new oven cooks differently the desired cooking temperature. The oven knob than the one it replaced. Use the new oven for a is marked in 25 degree increments, from 200°F to few weeks to become familiar with it. -
Page 11: Shelf Positions
OPERATING INSTRUCTIONS OVEN BAKING AND ROASTING OVEN BROILING 1. Position the shelves in the oven. If cooking on Broiling involves cooking food by intense radiant two shelves at the same time, stagger the pans heat from the upper element in the oven. Most fi sh for the best heat circulation. -
Page 12: Care & Maintenance
CARE & MAINTENANCE SURFACE ELEMENTS CLEANING Porcelain enamel cook top To clean the surface heating elements, turn the temperature control knob to the highest setting for one minute; this will burn off any food residue. Note The porcelain enamel fi nish on the cook top is that this could cause smoke, it is advisable to open sturdy but can be damaged if misused. - Page 13 CARE & MAINTENANCE Porcelain oven interior Oven shelves With proper care, the porcelain enamel interior will Clean the shelves with an abrasive cleaner or steel retain its fi nish for many years. wool. After cleaning, rinse the shelves with clean water and dry with a clean cloth.
-
Page 14: Removable Oven Door
CARE & MAINTENANCE Removable oven door OVEN LIGHT REPLACEMENT The oven door is removable but it is heavy. It Important: Before replacing the oven light bulb, is recommended that at least two people work make sure the electrical power is disconnected from together to remove it. - Page 15 TROUBLESHOOTING Danby Consumer Care: 1-800-263-2629 Hours of operation: Monday to Thursday 8:30 am - 6:00 pm Eastern Standard Time Friday 8:30 am - 4:00 pm Eastern Standard Time Information in this manual is subject to change without notice. PROBLEM POSSIBLE CAUSE No power •...
- Page 16 LIMITED “IN HOME” WARRANTY LIMITED IN-HOME APPLIANCE WARRANTY This quality product is warranted to be free from manufacturer’s defects in material and workmanship, provided that the unit is used under the normal operating This quality product is warranted to be free from manufacturer’s defects in material and workmanship, provided that the unit is used conditions intended by the manufacturer.
-
Page 17: Besoin D'assistance
Bienvenue Bienvenue à la famille Danby. Nous sommes fi ers de la qualité de nos produits et nous croyons au service fi able. Nous vous suggérons de lire ce manual d’utilisation avant de brancher votre nouvel appareil, car il contient des informations inportantes sur l’utilisation, la sécurité, le dépannage et la maintenance, afi... -
Page 18: Consignes De Sécurité Importantes
Consignes de sécurité importantes LIRE ET SUIVRE TOUTES LES INSTRUCTIONS DE SÉCURITÉ AVERTISSEMENT - RISQUE DE BASCULEMENT Un enfant ou un adulte peut faire basculer l’appareil et être tué. Vérifi ez que le support anti- renversement a été correctement installé et engagé sur le sol ou le mur. Assurez-vous que le support anti-bascule est réengagé... -
Page 19: Exigences De Sécurité Pour La Table De Cuisson
Consignes de sécurité importantes LIRE ET SUIVRE TOUTES LES INSTRUCTIONS DE SÉCURITÉ EXIGENCES GÉNÉRALES DE SÉCURITÉ EXIGENCES DE SÉCURITÉ POUR LA TABLE DE CUISSON Assurez-vous que l’appareil est correctement installé et mis à la terre par un technicien qualifi é. Utilisez la taille de casserole appropriée. -
Page 20: Exigences De Sécurité Du Four
Consignes de sécurité importantes LIRE ET SUIVRE TOUTES LES INSTRUCTIONS DE SÉCURITÉ EXIGENCES DE SÉCURITÉ DU FOUR AVERTISSEMENT - EN CAS D’INCENDIE Faites attention lorsque vous ouvrez la porte. Laissez En cas d’incendie, ne ramassez jamais une l’air chaud ou la vapeur s’échapper avant de retirer casserole ou une casserole enfl... -
Page 21: Avant De Commencer
INSTRUCTIONS D’INSTALLATION AVANT DE COMMENCER OUTILS REQUIS Conservez ces instructions pour référence ultérieure. 1. Percer avec une mèche de 1/8“ 2. Clé à molette L’installation de cet appareil nécessite des 3. Pinces compétences mécaniques de base et environ 1 à 3 4. -
Page 22: Exigences Électriques
INSTRUCTIONS D'INSTALLATION PREPARER L’OUVERTURE EXIGENCES ÉLECTRIQUES Toutes les dimensions brutes et d’espacement Cet appareil doit être alimenté avec la tension et la doivent être respectées pour une utilisation en toute fréquence appropriées et raccordé à un circuit de sécurité de l’appareil. L’électricité de la cuisinière dérivation individuel correctement mis à... -
Page 23: Installation De Support Antibasculement
INSTRUCTIONS D’INSTALLATION INSTALLATION DE SUPPORT Installation du mur arrière ANTIBASCULEMENT Utilisez les deux vis fournies pour fi xer le support au mur arrière. Les vis doivent entrer dans une plaque 1. Bras anti-bascule à l’arrière de l’appareil de seuil en bois. Si le mur contient des goujons métalliques ou des matériaux similaires, ou si 2. -
Page 24: Reglage Des Commandes
INSTRUCTIONS D’INSTALLATION COMMANDES DE CUISSON DE SURFACE GUIDE DE RÉGLAGE DE LA CHALEUR • HI - Démarrage rapide pour la cuisine; amener Les éléments chauffants de surface de l’appareil de l’eau à ébullition sont conçus pour différents réglages de chaleur. •... -
Page 25: Consignes D'utilisation
CONSIGNES D’UTILISATION COMMANDES DE CUISSON AU FOUR RÉGLER LE THERMOSTAT DU FOUR Vous pouvez constater que le nouveau four cuit Pour utiliser le four, tournez le bouton de différemment de celui qu’il a remplacé. Utilisez le température du four sur la température de cuisson nouveau four pendant quelques semaines pour vous souhaitée. -
Page 26: Four Cuisson Et Rôtissage
INSTRUCTIONS D’INSTALLATION FOUR CUISSON ET RÔTISSAGE CUISSON AU FOUR 1. Placez les étagères dans le four. Si vous cuisinez La cuisson au gril implique la cuisson des aliments sur deux étagères en même temps, échelonnez par la chaleur radiante intense de l’élément les casseroles pour une meilleure circulation de supérieur du four. -
Page 27: Soins Et Entretien
SOINS ET ENTRETIEN ELEMENTS DE SURFACE NETTOYAGE Pour nettoyer les éléments chauffants de surface, tournez Table de cuisson en porcelaine émaillée le bouton de réglage de la température au maximum pendant une minute; Cela va brûler tous les résidus alimentaires. Notez que cela pourrait provoquer de la La fi... - Page 28 SOINS ET ENTRETIEN Intérieur du four en porcelaine Étagères de four Avec un entretien approprié, l’intérieur en émail Nettoyez les étagères avec un nettoyant abrasif ou de porcelaine conservera son fi ni pendant de de la laine d’acier. Après le nettoyage, rincez les nombreuses années.
-
Page 29: Remplacement De La Lumière Du Four
SOINS ET ENTRETIEN La porte du four amovible REMPLACEMENT DE LA LUMIÈRE DU FOUR La porte du four est amovible mais lourde. Il Important: Avant de remplacer l’ampoule du est recommandé qu’au moins deux personnes four, assurez-vous que l’alimentation électrique travaillent ensemble pour le supprimer. -
Page 30: Dépannage
DÉPANNAGE Danby soins du consommateur : 1-800-263-2629 Heures d’ouverture : Du lundi au jeudi, de 8 h 30 à 18 h, heure de l’Est Vendredi, de 8 h 30 à 16 h, heure de l’Est Les informations contenues dans ce manuel sont sujettes à modifi cation sans préavis. PROBLÈME CAUSE POSSIBLE Aucune puissance... - Page 31 GARANTIE LIMITÉE « À DOMICILE » LIMITED IN-HOME APPLIANCE WARRANTY Cet appareil de qualité est garanti exempt de tout vice de matière première et de fabrication, s’il est utilisé dans les conditions This quality product is warranted to be free from manufacturer’s defects in material and workmanship, provided that the unit is used under the normal operating normales recommandées par le fabricant.
- Page 32 MODEL • MODÈLE DER244WC DER244BSSC DER245BSS DER245BSSC DANBY PRODUCTS LIMITED, ONTARIO, CANADA N1H 6Z9 DANBY PRODUCTS INC., FINDLAY, OHIO, USA 45840 Printed in China Imprimé en Chine...