BFT CELLULA 130 Instructions D'utilisation Et D'installation
Liens rapides
8
027908 1 7 1 1 5 3
FOTOCELLULA
PHOTOZELLE
PHOTOCELL
FOTOCÉLULA
PHOTOCELLULE
FOTOCÉLULA
I
1) GENERALITA'
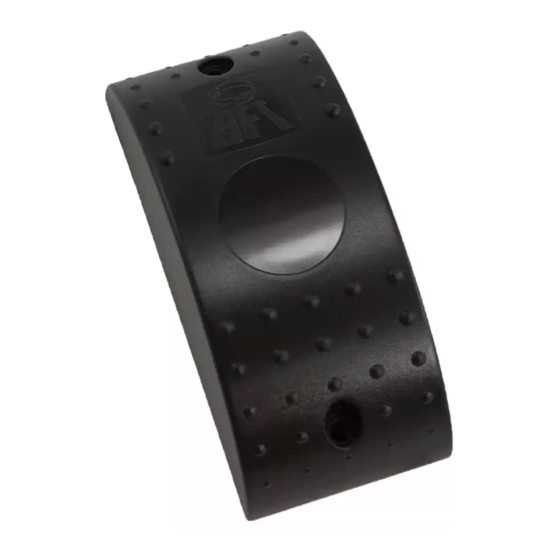
Fotocellula Mod. Cellula 130 ad incasso e per applicazione esterna, costituita
da una coppia trasmittente ricevente con doppio relè normalmente eccitato
come previsto dalle normative.
Questo prodotto risponde alle norme riconosciute della tecnica e delle di-
sposizioni relative alla sicurezza. É conforme alle seguenti direttive europee:
2006/95/CEE, 2004/108/CEE e modifiche successive.
Il dispositivo e di tipo D secondo EN12453 e risulta conforme alla direttiva
2006/42/CE solo se collegato a un quadro di controllo del medesimo
costruttore dotato di circuito di verifica di guasto nei circuiti di sicurezza.
2) DATI TECNICI
Alimentazione.........................................................................................20÷31V~/
Assorbimento coppia...........................................................................................70mA
Portata max.............................................25m (ridotta in caso di nebbia-pioggia)
Contatti relè............................................................................................1A a 24V~/
Temperatura funzion............................................................................. -15°C / +55°C
Grado di protezione.................................................................................................IP54
Dimensioni vedi.........................................................................................................Fig.1
3) FISSAGGIO DELLE FOTOCELLULE
Dovranno essere installate ad una altezza compresa tra i 40-60cm nei
seguenti modi:
•
Installazione a muro (fig.1): verificare che le superfici di fissaggio siano
piane e parallele tra loro. Praticare 2 fori ø4 mm utilizzando la maschera
posteriore come dima di foratura. Inserire quindi i tasselli ad espansione
forniti e procedere al fissaggio e collegamento della fotocellula.
•
Installazione su pilastro in ferro (fig.2): verificare che le superfici di
fissaggio siano piane e parallele tra loro. Fissare la maschera posteriore
praticando 2 fori ø2,5 mm dove avvitare le viti auto-filettanti in dotazione.
•
Se non c'è alcun pilastro o muro dove fissare le fotocellule, richiedere le
apposite colonnine metalliche. Le colonnine si possono fissare direttamente
su una base di calcestruzzo con tre tasselli ad espansione.Il perfetto alline-
amento è garantito dalle asole di registrazione presenti sulla base (fig.3).
•
Nel caso di installazione di due coppie di fotocellule ravvicinate, incro-
ciare le posizioni RX-TX (fig.4).
4) COLLEGAMENTO ALLA MORSETTIERA (Fig.5)
Trasmittente - Ricevente.
1-2 Alimentazione.
3-4 Contatto normalmente chiuso (con fotocellule allineate il contatto si apre).
3-5 Contatto normalmente aperto (con fotocellule allineate il contatto si
chiude).
Attenzione! L'installazione deve essere eseguita da personale qualificato.
5) ALLINEAMENTO DELLE FOTOCELLULE
L'allineamento corretto tra le fotocellule, é ottenuto quando il LED della
ricevente RX (fig.5) si accende e rimane acceso anche dopo aver montato
il coperchio dotato di lente di concentrazione. In presenza di ostacolo fra
ricevente RX e Trasmittente TX, il LED si spegne e apre il contatto.
DEMOLIZIONE
L'eliminazione dei materiali va fatta rispettando le norme vigenti.
Non gettate il vostro apparecchio scartato, le pile o le batterie usate
nei rifiuti domestici. Avete la responsabilità di restituire tutti i vostri
rifiuti da apparecchiature elettriche o elettroniche lasciandoli in un
punto di raccolta dedicato al loro riciclo.
LE DICHIARAZIONI DI CONFORMITÀ SONO CONSULTABILI NEL
SITO WEB: http://www.bft-automation.com/CE
LE ISTRUZIONI DI MONTAGGIO ED USO SONO CONSULTABILI
NELLA SEZIONE DOWNLOAD.
GB
1) GENERAL OUTLINE
Cellula 130 Mod. recessed photocell to be fitted externally, consisting
of a pair of transmitters and receivers having a double relay which
is normally energised, as provided for by the relevant standards.
This product complies with the recognised technical standards and
safety regulations. We declare that this product is in conformity with
the following European Directives: 2006/95/EEC, 2004/108/EEC (and
subsequent amendments).
This is a type D device in accordance with EN 12453 and it will only be
in conformity with directive 2006/42/EEC provided it is connected
to a control panel from the same manufacturer equipped with a
test circuit that looks for faults in the safety circuits.
2) TECHNICAL SPECIFICATIONS
Power supply...........................................................................20÷31 V~/
Absorbed power...................................................................................70 mA
Max range..........................................25m(reduced in case of fog / rain)
Relay contacts......................................................................1A at 24V~/
Working temperature.........................................................-15°C to +55°C
Degree of protection...............................................................................IP54
Dimensions....................................................................................... see Fig. 1
3) PHOTOCELL FITTING
The photocells should be installed between 40 and 60 cm in height,
in the following ways:
•
Installation on a wall (fig. 1): check that the securing surfaces are
level and parallel. Make 2 ø 4 mm holes using the back mask as
a drilling template. Then insert the screw anchors supplied and
proceed to securing and connecting the photocell.
•
Installation on an iron pillar (fig. 2): check that the securing
surfaces are level and parallel. Fix the back mask to make 2 ø 2.5
mm holes where the self-tapping screws are to be fixed.
•
If there is no pillar or wall for the photocells to be secured to,
request the appropriate metal posts. The posts can be directly
secured onto a concrete base by means of three screw anchors.
Perfect alignment is ensured by the adjustment slots provided
in the base (fig.3).
•
In the case where two pairs of photocells are installed close to
each other, cross the RX-TX positions (fig. 4).
4) CONNECTION TO THE TERMINAL BOARD (Fig. 5)
Transmitter - Receiver
1-2 Power supply
3-4 Normally closed contact (When photocells are aligned the
contact opens).
3-5 Normally open contact (When photocells are aligned the
contact closes).
Warning! The installation must be carried out by qualified personnel.
5) PHOTOCELL ALIGNMENT
Correct photocell alignment is achieved when the LED of the RX recei-
ver (fig. 5) lights up and stays on, even after fitting the cover provided
with the concentration lens. When an obstacle is present between the
RX receiver and TX transmitter, the LED goes off and opens the contact.
SCRAPPING
Materials must be disposed of in accordance with the
regulations in force. Do not throw away your discarded
equipment or used batteries with household waste. You
are responsible for taking all your waste electrical and
electronic equipment to a suitable recycling centre.
DECLARATIONS OF CONFORMITY CAN BE FOUND AT http://
www.bft-automation.com/CE
INSTRUCTIONS FOR USE AND ASSEMBLY CAN BE FOUND IN THE
DOWNLOAD SECTION.
F
1) GENERALITES
Cellule photoélectrique Mod. Cellula 130 encastrée et pour appli-
cation extérieure, constituée d'un couple émetteur récepteur avec
double relais normalement excité comme prévu par les normatives.
Ce produit est conforme aux règles reconnues de la technique et aux disposi-
tions de sécurité. Nous certifions sa conformité avec les directives européen-
nes suivantes: 2006/95/CEE, 2004/108/CEE (et modifications successives).
Le dispositif, de type D conformément à EN12453, n'est conforme
à la directive 2006/42/CEE que s'il est branché sur un tableau de
commande du même fabricant, équipé de système de vérification
des pannes des circuits de sécurité.
2) CARACTERISTIQUES TECHNIQUES
Alimentation...........................................................................20÷31 V~/
Puissance absorbée.............................................................................70 mA
Portée maxi...........................25m (réduite en cas de brouillard-pluie)
Contacts relais........................................................................1A à 24V~/
Température de fonct...........................................................-15°C ÷ +55°C
Degré de protection............................................................................... IP54
Dimensions......................................................................................voir Fig. 1
3) FIXATION DES CELLULES PHOTOÉLECTRIQUES
Elles devront être installées à une hauteur comprise entre 40 et
60cm comme suit:
•
Installation murale (fig. 1): vérifier que les surfaces de fixation sont
planes et parallèles entre elles. Effectuer 2 trous ø 4 mm en utilisant
le gabarit postérieur pour le perçage. Insérer les chevilles fournies et
procéder à la fixation et au branchement de la cellule photoélectrique.
•
Installation sur poteau en fer (fig. 2): vérifier que les surfaces
de fixation sont planes et parallèles entre elles. Fixer le gabarit
postérieur en effectuant 2 trous ø 2,5 mm pour visser les vis-
taraud fournies en dotation.
•
Si aucun poteau ou mur n'est présent pour fixer les cellules
photoélectriques, commander les colonnettes métalliques
spécialement prévues. Les colonnettes peuvent être fixées
directement sur une base en béton avec trois chevilles.
L'alignement parfait est assuré par les œillets de réglage situés
sur la base (fig. 3).
•
Si on doit installer deux couples de cellules photoélectriques
rapprochées, croiser les positions RX-TX (fig. 4).
4) CONNEXION AU BORNIER (Fig. 5)
Emetteur - Récepteur.
1-2 Alimentation.
3-4 Contact normalement fermé (avec les cellules photoélectriques
alignées, le contact s'ouvre).
3-5 Contact normalement ouvert (avec les cellules photoélectri-
ques alignées, le contact se ferme).
Attention! L'installation doit être effectuée par un personnel qualifié.
5) ALIGNEMENT DES CELLULES PHOTOÉLECTRIQUES
L'alignement correct entre les cellules photoélectriques s'obtient lorsque
la LED du récepteur RX (fig. 5) s'allume et reste allumée aussi après avoir
monté le couvercle doté de verre de concentration. En cas d'obstacle
entre récepteur RX et émetteur TX, la LED s'éteint et ouvre le contact.
DÉMOLITION
Eliminez les matériaux en respectant les normes en vigueur.
Ne jetez ni les vieux appareils, ni les piles, ni les batteries
usées avec les ordures domestiques. Vous devez confier
tous vos déchets d'appareils électriques ou électroniques à
un centre de collecte différenciée, préposé à leur recyclage.
LES DÉCLARATIONS DE CONFORMITÉ PEUVENT ÊTRE CONSULTÉES
SUR LE SITE INTERNET http://www.bft-automation.com/CE
LES INSTRUCTIONS DE MONTAGE ET D'UTILISATION PEUVENT ÊTRE
CONSULTÉES DANS LA SECTION DOWNLOAD/TÉLÉDÉCHARGEMENT.
D
1) ALLGEMEINES
Fotozelle Mod. Cellula 130 als versenkte Ausführung oder zur exter-
nen Installation, bestehend aus einem Sender-Empfänger-Paar mit
normalerweise angesprochenem Doppelrelais-wie vorgeschrieben.
Dieses Produkt genügt den anerkannten technischen Regeln
und Sicherheitsbestimmungen. Wir bestätigen, daß es mit fol-
genden Europäischen Richtlinien übereinstimmt:2006/95/EWG ,
2004/108/EWG (und ihren nachfolgende Änderungen).
Gemäß EN12453 entspricht diese Vorrichtung dem Typ D und
muss, konform zur Richtlinie 2006/42/EG, an ein Steuerelement
des gleichen Herstellers, ausgestattet mit Sicherheitsfunktionen
durch entsprechende Sicherheitskreise, angeschlossen werden.
2) TECHNISCHE DATEN
Aufnahme.................................................................................20÷31 V~/
Leistungsaufnahme............................................................................70 mA
Max. Reichweite..................................25m (weniger bei Nebel-Regen)
Relaiskontakte....................................................................1A bei 24V~/
Betriebstemperatur.............................................................. -15°C ÷ +55°C
Schutzart.....................................................................................................IP54
Abmessungen........................................................................... siehe Abb. 1
3) FIXIERUNG DER FOTOZELLEN
Sie müssen in einer Höhe zwischen 40 und 60 cm auf folgende
Weise installiert werden:
•
Wandinstallation (Abb. 1): Die Flächen für die Befestigung der
Zellen müssen eben und parallel zueinander sein. Bohren Sie 2
Löcher ø4 mm in die Wand, die hintere Maske dient dabei als
Bohrschablone. Nun die mitgelieferten Spreizdübel einsetzen,
die Fotozelle fixieren und anschließen.
•
Installation auf Eisenpfosten (Abb. 2): Die Flächen für die Befesti-
gung der Zellen müssen eben und parallel zueinander sein. Die
hintere Maske anlegen, 2 Löcher ø 2,5 mm bohren und dort die
beiliegenden selbstschneidenden Schrauben einführen.
•
Stehen weder Pfosten noch Wand zur Anbringung der Fotozellen zur
Verfügung, fordern Sie bitte die Spezialständer aus Metall an. Sie lassen
sich mit drei Spreizdübeln direkt auf einer Betonunterlage befestigen.
Die perfekte Ausrichtung wird ermöglicht durch die Einstell-
Langlöcher in der Basis (Abb. 3).
•
Bei der Installation zweier einander angenäherter Fotozellen-
paare kreuzen Sie die Positionen RX-TX (Abb. 4).
4) ANSCHLUSS AN DIE KLEMMLEISTE (Abb. 5)
Sender - Empfänger.
1-2 Speisung.
3-4 Ruhestromkontakt (Bei ausgerichteten Fotozellen öffnet sich der Kontakt).
3-5 Arbeitskontakt (Bei ausgerichteten Fotozellen schließt sich der Kontakt).
Achtung! Die Installation ist Fachleuten vorbehalten.
5) AUSRICHTUNG DER FOTOZELLEN
Die Fotozellen sind dann korrekt ausgerichtet, wenn die LED des Empfang-
steiles RX (Abb. 5) aufleuchtet und auch dann weiterhin leuchtet, wenn
die Abdeckung mit einer Konzentrationslinse angebracht wurde. Bei
Auftreten eines Hindernisses zwischen Empfänger RX und Sender
TX erlischt die LED und der Kontakt wird geöffnet.
VERSCHROTTUNG
Die Entsorgung der Materialien muss unter Beachtung
der geltenden Normen erfolgen. Bitte werfen Sie Ihr Alt-
gerät oder die leeren Batterien nicht in den Haushaltsa-
bfall. Sie sind verantwortlich für die ordnungsgemäße
Entsorgung Ihrer elektrischen oder elektronischen
Altgeräte durch eine offizielle Sammelstelle.
DIE KONFORMITÄTSERKLÄRUNGEN KÖNNEN AUF DER WEB-
SITE http://www.bft-automation.com/CE konsultiert werden.
DIE ANWEISUNGEN ZUR MONTAGE UND BENUTZUNG KÖNNEN IM
DOWNLOAD-BEREICH KONSULTIERT WERDEN.

Manuels Connexes pour BFT CELLULA 130


Sommaire des Matières pour BFT CELLULA 130
- Page 1 Cellule photoélectrique Mod. Cellula 130 encastrée et pour appli- Fotozelle Mod. Cellula 130 als versenkte Ausführung oder zur exter- Fotocellula Mod. Cellula 130 ad incasso e per applicazione esterna, costituita nen Installation, bestehend aus einem Sender-Empfänger-Paar mit of a pair of transmitters and receivers having a double relay which cation extérieure, constituée d’un couple émetteur récepteur avec...
- Page 2 1) GENERALIDADES Fotocélula Mod. Cellula 130 empotrable y para aplicación de super- Fotocélula Mod. Cellula 130 de encaixe e para aplicação exterior, con- ficie, constituida por una transmisora y una receptora con doble relé stituída por um par transmissor receptor com duplo relé normalmente normalmente excitado, como previsto por las normas.