JVC GZ-MS90U Manuel D'utilisation
Table des Matières
Les langues disponibles
Les langues disponibles
Liens rapides
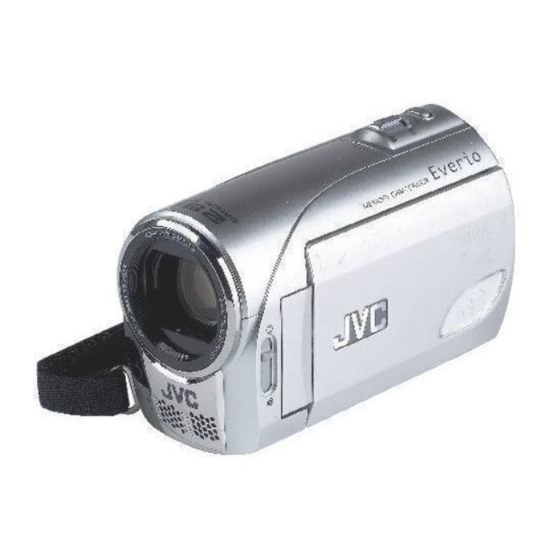
GZ-MS90U
INSTRUCTIONS
MEMORY.CAMCORDER
MANUAL DE INSTRUCCIONES
VIDEOCÁMARA.CON.MEMORIA
MANUEL D'UTILISATION
CAMÉSCOPE.À.MÉMOIRE
For more details on the operations,
refer to the GUIDEBOOK in the
supplied CD-ROM.
LYT2046-001B-M
EN
SP
Dear.Customer
Thank you for purchasing this
camcorder. Before use, please read
the safety information and precautions
contained in pages 2 and 3 to ensure
safe use of this product.
Contents
Accessories......................................5
Getting.Started.................................6
Recording.Files. . ...............................8
Playing.Back.Files..........................10
Watching.Images.on.TV.................11
Installing.Software.to.the.PC. . .......12
PC. . .................................................13
File.Backup.....................................14
File.Upload.to.YouTube™. . .............15
Further.Information.................17.-.20
For.Future.Reference:.
Enter the Model No. (located on the
bottom of the camcorder) and Serial
No. (located on the battery pack
mount of the camcorder) below.
Model.No.
Serial.No.
FR
Chapitres
Table des Matières

Manuels Connexes pour JVC GZ-MS90U


Sommaire des Matières pour JVC GZ-MS90U
-
Page 41: Caméscope À Mémoire
GZ-MS90U INSTRUCTIONS CAMÉSCOPE À MÉMOIRE Cher client, Merci pour avoir acheté ce caméscope. Avant son utilisation, prière de lire les informations de sécurité et les précautions des pages 2 et 3 pour assurer une utilisation sûre de votre appareil. Table des matières Accessoires ........5... -
Page 42: Précautions De Sécurité
Précautions de sécurité Ne dirigez pas l’objectif directement vers le soleil. Vous pourriez vous abîmer la vue et l’appareil pourrait être endommagé. Il y a aussi risque d’incendie ou d’électrocution. PRÉCAUTION! Les remarques suivantes sont destinées à protéger l’utilisateur et le caméscope contre des dommages éventuels. - Page 43 (comprenant les amplificateurs) qui produisent de la chaleur. Des changements ou modifications non 9. N’utiliser que des accessoires spécifiés par le approuvés par JVC peuvent annuler le droit fabricant. de l’utilisateur de faire fonctionner l’appareil. 10. N’utiliser qu’avec le Cet appareil a été...
-
Page 44: À Lire Impérativement
• Vous devez utiliser les bloc-piles JVC BN- Guide de fonctions sur l’écran VF808U/VF815U/VF823U. • Si le caméscope est soumis à une Le guide de fonctions sur l’écran s’affiche au... -
Page 45: Accessoires
Accessoires Adaptateur secteur Batterie Câble audio/vidéo AP-V18U/V14U/V20U BN-VF808U Câble USB CD-ROM Filtre à noyau de ferrite (Z p. 13) (Z p. 12) (pour le câble USB) * Le filtre à noyau de ferrite réduit les parasites. REMARQUE Veiller à utiliser les câbles fournis pour les connexions. Ne pas utiliser d’autres câbles. Fixer le filtre à... -
Page 46: Pour Commencer
Pour commencer REMARQUES Charge de la batterie • Il est possible également utiliser le caméscope avec uniquement l’adaptateur secteur. Fermer l’écran LCD pour éteindre le • Éviter de tirer sur ou de plier la fiche et le caméscope. cordon de l’adaptateur secteur. Cela pourrait endommager l’adaptateur secteur. -
Page 47: Réglage De La Date Et De L'heure
Introduire la carte fermement, le bord Réglage de la date et de l’heure biseauté en premier. Bord Partie inférieure Ouvrir l’écran LCD pour allumer le biseauté du caméscope caméscope. Lorsque [RÉGLER DATE/HEURE!] (SET DATE/TIME!) apparaît, sélectionner [OUI] (YES) pendant 10 secondes. -
Page 48: Enregistrement De Fichiers
Enregistrement de fichiers • Préparation: Insérer une carte SD. • Ouvrer le couvre-objectif. • Ouvrir l’écran LCD pour allumer le caméscope. Déplacer le commutateur de Appuyer sur la touche SELECT mode pour sélectionner le mode PLAY/REC pour sélectionner le (vidéo) ou (photo). -
Page 49: Vérification De L'alimentation
Si “ERREUR DE COMMUNICATION” apparaît, un problème de batterie est possible. Dans ce cas, contacter le Mode d’enregistrement manuel revendeur JVC le plus proche. • La durée d’enregistrement affichée ne Le mode d’enregistrement manuel permet devait être utilisé qu’à titre indicatif. Elle de définir manuellement la mise au point, la... -
Page 50: Lecture De Fichiers
Lecture de fichiers Pour vérifier les informations de fichiers Déplacer le commutateur de mode Appuyer sur la touche INFO lorsque la pour sélectionner le mode lecture est suspendue. (vidéo) ou (photo). Pour ajuster le volume sonore des vidéos Pour Pour réduire augmenter le Appuyer sur la touche SELECT le volume... -
Page 51: Visualisation De Photos Sur Le Téléviseur
Visualisation de photos sur le téléviseur Préparation: Éteindre tous les appareils. Prise AV Prise DC Câble AV À une prise secteur Adaptateur secteur Prise d’entrée AV REMARQUE Ce caméscope est conçu pour être utilisé avec les signaux de télévision couleur de type NTSC. -
Page 52: Installation Du Logiciel Sur L'ordinateur
Installation du logiciel sur l’ordinateur Veuillez lire le fi chier “Contrat de licence du Cliquer sur [Easy Installation]. logiciel JVC” dans le CD-ROM d’instructions avant d’installer le logiciel. Les logiciels suivants sont inclus dans le CD- ROM qui accompagne le caméscope. -
Page 53: Connexion Du Caméscope À L'ordinateur
Connexion du caméscope à l’ordinateur Préparation: Fermer l’écran LCD pour éteindre le caméscope. Prise DC Prise USB Câble USB Adaptateur secteur À une prise secteur Port USB REMARQUES • Ne jamais déconnecter le câble USB lorsque le voyant d’accès/recharge du caméscope est allumé... -
Page 54: Sauvegarde D'un Fichier
Sauvegarde d’un fichier Sauvegarde de fichier (Windows ) en Sauvegarde de fichiers [Windows ® ® utilisant le logiciel Macintosh] sans utiliser les logiciels Préparation : Les fichiers vidéo qui n’ont jamais été Connecter le caméscope à l’ordinateur à sauvegardés sur l’ordinateur connecté l’aide du câble USB. -
Page 55: Fichier Transférer Sur Youtube
Fichier transférer sur YouTube™ Cette méthode utilise le logiciel sur le CD- Sélectionner la catégorie vidéo et ROM fourni pour réaliser le transfert rapide l’option de diffusion. Cliquer sur d’un clip vidéo sur YouTube™ en appuyant sur [Suivant]. une simple touche. Le titre du clip vidéo est créé... -
Page 56: Informations Du Support Client
L’utilisation de ces logiciels est autorisée selon les termes de la licence des logiciels. Préparer les informations suivantes avant de contacter l’agence ou le bureau JVC local le plus proche concernant ces logiciels (se reporter au réseau de service après-vente mondial JVC à... -
Page 57: Dépannage
(Z ci-dessous) • l’empêcher de fonctionner correctement. Si le problème subsiste, consulter le revendeur JVC le plus proche. Les phénomènes suivants ne sont pas Pour réinitialiser le caméscope des dysfonctionnements. 1) Fermer l’écran LCD pour éteindre •... -
Page 58: Adaptateur Secteur
“Siemens Plug”, comme indiqué ci-dessous. cette batterie, veuillez Pour cet adaptateur de prise secteur, consulter composer le 1-800-8- votre revendeur JVC le plus proche. BATTERY. Adaptateur de fiche Support d’enregistrement (Carte SD) • Veiller à suivre les directives ci-dessous pour éviter d’altérer ou d’endommager les... -
Page 59: Nettoyage
Nettoyage Avant de le nettoyer, éteindre le caméscope Appareil principal et retirer la batterie et l’adaptateur secteur. • Pour votre sécurité, NE PAS Pour nettoyer l’extérieur ... ouvrir le boîtier du caméscope. Essuyer délicatement avec un chiffon ... démonter ou modifier l’appareil. doux. - Page 60 Spécifications Vidéo/Audio Caméscope Format SD-VIDEO Général Format d’enregistrement et de lecture Alimentation Video : MPEG-2 11 V CC (en utilisant l’adaptateur secteur) Audio : Dolby numérique (2 voies) 7,2 V CC (en utilisant la batterie) Format du signal Consommation Norme NTSC Environ 2,3 W* Mode d’enregistrement (vidéo) * Quand l’éclairage de l’écran est réglé...