Publicité

Les langues disponibles

Les langues disponibles

Liens rapides

MANUAL DE INSTRUCCIONES DE ASPIRADORES PARA POLVO Y AGUA
MODE D'EMPLOI DES ASPIRATEURS DE POUSSIÈRE ET D'EAU
INSTRUCTION MANUAL FOR WET AND DRY VACUUM CLEANER
Art. No.587300
AY – 1500 – PARED (18 L.)

Publicité

Table des Matières
loading

Sommaire des Matières pour ayerbe 587300

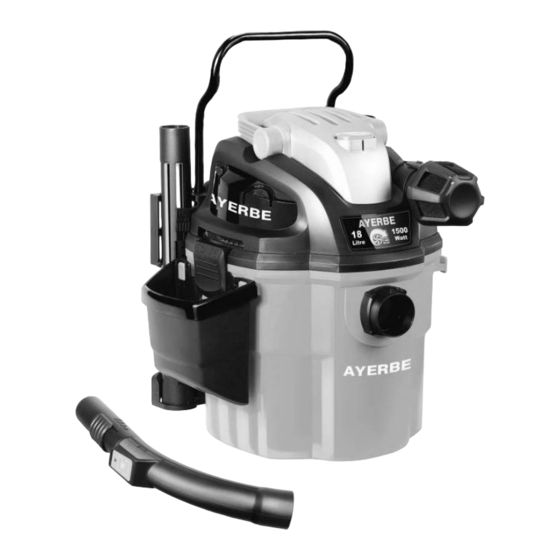
  • Page 1 MANUAL DE INSTRUCCIONES DE ASPIRADORES PARA POLVO Y AGUA MODE D’EMPLOI DES ASPIRATEURS DE POUSSIÈRE ET D’EAU INSTRUCTION MANUAL FOR WET AND DRY VACUUM CLEANER Art. No.587300 AY – 1500 – PARED (18 L.)
  • Page 2 Gracias por comprar este aspirador para polvo y líquidos de Ayerbe. Tenga plena confianza de que con Ayerbe obtendrá un producto de alta calidad fabricado para un resultado óptimo. Este aspirador es capaz de absorber líquidos y materiales secos. POR SU SEGURIDAD: LEA ATENTAMENTE Y COMPRENDA TODAS LAS INSTRUCCIONES GARANTÍA...
  • Page 3 • No utilice ni guarde el aparato cerca de materiales peligrosos. • No utilice el Aspirador para Polvo y Agua con el filtro roto o sin el filtro instalado excepto para aspirar líquidos tal y como se describe en el apartado sobre funcionamiento en este manual. •...
  • Page 4 220 - 240V ~ 50Hz 1.500 W Filtro Cartucho Filtro de Espuma DESEMBALAJE Y COMPROBACIÓN DEL Saque todos los contenidos de la caja de 587300. Compruebe cada elemento con la lista de contenidos. Description………………………... Vac Assembly…………....Hose Holding Rod …………….….. Mounting Rack …………………….
  • Page 5 INSTRUCCIONES GENERALES DE MONTAJE...
  • Page 6 ADVERTENCIA: NO ENCHUFE EL CABLE A LA TOMA DE CORRIENTE, ASEGÚRESE DE QUE EL ENCHUFE ESTÁ DESCONECTADO ANTES DE MONTAR EL ASPIRADOR PARA POLVO Y AGUA DESEMBALAJE DEL ASPIRADOR PARA POLVO Y AGUA Y MONTAJE GENERAL 1. Compruebe que el cable de alimentación está desconectado de la toma. (fig. 1) 2.
  • Page 7 CÓMO INSTALAR EL ARMAZÓN DE MONTAJE DEL ASPIRADOR *Expansion bolt including screw, washer, expansion tube, and nut. *El perno de expansión incluye tornillo, arandela, tubo de prolongación y tuerca. 1. Introduzca los tornillos en los agujeros del armazón. Añada una pequeña arandela y cubra el tornillo con el tubo de prolongación desde otro lado.
  • Page 8: Operación De Aspirado En Seco

    OPERACIÓN DE ASPIRADO EN SECO ASPIRADO EN SECO ADVERTENCIA: ASEGÚRESE DE LEER, COMPRENDER Y APLICAR LA INFORMACIÓN CONTENIDA EN EL APARTADO ‘INSTRUCCIONES Y ADVERTENCIAS DE SEGURIDAD”. NO ASPIRE EN ENTORNOS CON GASES INFLAMABLES, VAPORES O POLVOS EXPLOSIVOS EN EL AIRE. LOS GASES O VAPORES INFLAMABLES INCLUYEN, PERO NO SE LIMITAN A: FLUIDOS LIGEROS, LIMPIADORES DE TIPO DISOLVENTE, PINTURAS A BASE DE ACEITE, GASOLINA, ALCOHOL O AEROSOLES.
  • Page 9 OPERACIÓN DE ASPIRADO DE ASPIRADO DE LÍQUIDOS ADVERTENCIA: ASEGÚRESE DE LEER, COMPRENDER Y APLICAR LA INFORMACIÓN CONTENIDA EN EL APARTADO ‘INSTRUCCIONES Y ADVERTENCIAS DE SEGURIDAD”. NO ASPIRE EN ENTORNOS CON GASES INFLAMABLES, VAPORES O POLVOS EXPLOSIVOS EN EL AIRE. LOS GASES O VAPORES INFLAMABLES INCLUYEN, PERO NO SE LIMITAN A: FLUIDOS LIGEROS, LIMPIADORES DE TIPO DISOLVENTE, PINTURAS A BASE DE ACEITE, GASOLINA, ALCOHOL O AEROSOLES.
  • Page 10 FUNCIONAMIENTO Este Aspirador para polvo y agua tiene función de soplado. Para usar la función de soplado siga las instrucciones indicadas. ADVERTENCIA: LLEVE SIEMPRE GAFAS DE SEGURIDAD QUE CUMPLAN LA NORMATIVA ANSI Z87.1 (O EN CANADÁ, CSAZ94.3) ANTES DE UTILIZAR EL SOPLADOR. ADVERTENCIA: MANTENGA AL PERSONAL AJENO ALEJADO DE LOS RESIDUOS PRODUCIDOS POR EL SOPLADO.
  • Page 11: Instalación Y Limpieza Del Filtro De Cartucho

    aparato sin el filtro de cartucho, el motor se quemará e invalidará la garantía. Tenga siempre filtros de recambio a mano. ¡ATENCIÓN! Los filtros incluidos están fabricados con materiales de alta calidad diseñados para detener las pequeñas partículas de polvo. El filtro de cartucho deberá utilizarse para aspirar el polvo y pequeñas cantidades de líquido.
  • Page 12 3. Deslice el filtro de espuma hacia abajo con cuidado encima del compartimento del filtro asegurándose que tapa todo el compartimento. (fig. 2 & 3) 4. Vuelva a colocar el cabezal en el contenedor. Limpieza del Filtro de Espuma 1. Con el cabezal extraído en posición boca abajo, quite con cuidado el filtro de espuma. (fig. 4) 2.
  • Page 13: Solucion De Problemas

    6 Volver a colocar la cubierta alineando el triangulo hacia el simbolo (fig. 8) 7. Deslizar la cubierta hasta que el triangulo apunte hacia el simbolo (fig. 9&10) 8. Asegurar la cubierta aprentando los tornillos. No apretar en exceso (fig. 11) SOLUCION DE PROBLEMAS ADVERTENCIA: PARA EVITAR EL RIESGO DE DESCARGA ELÉCTRICA –...
  • Page 14: Plano De Despiece Y Lista De Piezas

    587300 PLANO DE DESPIECE Y LISTA DE PIEZAS...
  • Page 15 DECLARACIÓN DE CONFORMIDAD EMPRESA: AYERBE INDUSTRIAL DE MOTORES S.A. DIRECCIÓN: C/ LERMANDABIDE 8 01015 VITORIA (ALAVA) CIF: A-01109206 Afirma que el siguiente producto: ASPIRADOR PARA POLVO Y AGUA MARCA: AYERBE MODELO: 587300 Cumple con las siguientes directivas: - Baja Tensión 2006/95/CE - Compatibilidad Electromagnética 2004/108/CE...
  • Page 16 CAREFULLY READ AND UNDERSTAND ALL INSTRUCTIONS WARRANTY AYERBE takes pride in producing a high quality, durable product. This AYERBE product carries a limited two (2) year warranty against defects in workmanship and materials from date of purchase under normal household use. Warranty does not apply to defects due to direct or...
  • Page 17: Safety Instructions & Warnings

    SAFETY INSTRUCTIONS & WARNINGS IMPORTANT SAFETY INSTRUCTIONS Read and understand all instructions before using this vacuum Read and understand this owner’s manual and all labels on the Wet/Dry Vacuum cleaner before operating. Safety is a combination of common sense, staying alert and knowing how your vacuum works. Use this Wet/Dry Vac only as described in this manual.
  • Page 18: Double Insulation Instructions

    • Do not use Wet/Dry Vac as a sprayer. • Do not direct air at bystanders. • Keep children away when blowing. • Wear safety goggles. DOUBLE INSULATION INSTRUCTIONS This Wet/Dry Vac is double-insulated, eliminating the need for a separate grounding system. Use only identical replacements parts.
  • Page 19 UNPACKING AND CHECKING CARTON CONTENTS Carton contents lists Description………………………... Vac Assembly…………....Hose Holding Rod …………….….. Mounting Rack ……………………. 4m Hose……………………………. 3m Flex Hose……………………… Utility Nozzle……………………….. Crevice Tool ……………………… Round Dusting Brush …………….. Extension Wands ……....Car Nozzle ………………………… Cartridge Filter…………………….. Filter Retainer………………………...
  • Page 20 GENERAL ASSEMBLY INSTRUCTIONS WARNING: DO NOT PLUG IN POWER CORD TO POWER OUTLET, MAKE SURE PLUG IS DISCONNECTED BEFORE ASSEMBLING THE WET/DRY VAC UNPACKING YOUR WET/DRY VACUUM & GENERAL ASSEMBLY 1. Verify that the power cord is disconnected from the outlet. (fig. 1) 2.
  • Page 21 bend of the rod is directed away from the wall. (fig. 6) 7. Select a location on a wall stud that is not more than 5 m away from an electrical outlet. 8. Align the three screw holes so that they are over a stud. Make sure the rack is level and mark the whole locations.
  • Page 22: Dry-Vacuum Operation

    6. For wet vacuum cleaning, install the supplied foam filter. (fig. 14) See page 26 for filter installation. 7. Place the power head back on the container, and secure into place using the 2 side latches. (fig. 15 & 16) 8.
  • Page 23: Remote Control

    4. Place the power head back on the container, aligning the top section with the latches, and snap into place. (fig. 4) OPERATING INSTRUCTIONS: DRY VACUUMING 6. Insert the locking end of the hose into the vacuum port on the power head and lock in place. Push the required attachment onto the free end of the hose or extension.
  • Page 24 6. After wet vacuuming, turn the machine off and remove plug from power supply. To prevent the risk of possible mildew, empty the container, clean and dry the inside and outside of the container, and remove the foam filter and allow to air dry before storage. IMPORTANT! When vacuuming large quantities of liquids, do not immerse the nozzle completely in the liquid;...
  • Page 25: Installing & Cleaning Cartridge Filter

    MAINTENANCE 1. Verify that the power cord is disconnected from the outlet. (fig. 1) 2. Disconnect the hose from the vacuum. (fig. 2) 3. Remove the vacuum from the mounting rack. 4. Undo the latches and remove the power head from the container. (fig. 3) 5.
  • Page 26: Installing & Cleaning Foam Sleeve Filter

    INSTALLING & CLEANING FOAM SLEEVE FILTER Installing Foam Sleeve Filter 1. Verify that the power cord is disconnected from the outlet. (fig. ) 2. Remove power head and place in upside down position. Follow instructions to remove cloth filter. 3. Carefully slide foam sleeve filter down over the filter cage making sure the whole cage is covered. (fig.2 &...
  • Page 27 Changing The Battery – Replace Only With A 23AE 12V Alkaline Battery 1. Take a Phillips screwdriver and remove the screws on the remote control. (fig. 1) 2. Slide back the remote cover so that the white triangle on the remote cover points to the unlock symbol “...
  • Page 28 VWM1518R EXPLODED PARTS LIST...
  • Page 29 DECLARATION OF COMFORMITY COMPANY: AYERBE INDUSTRIAL DE MOTORES S.A. ADDRESS: C/ LERMANDABIDE 8 01015 VITORIA (ALAVA) CIF: A-01109206 STATES THAT THE FOLLOWING PRODUCT: WET AND DRY VACCUM CLEANER BRAND: AYERBE MODEL: 587300 Compiles with the following directives: - Low voltage equipment 2006/95/EC...
  • Page 30: Garantie

    INSTRUCTIONS GARANTIE Ce produit AYERBE est assorti d’une garantie limitée à deux (2) ans.de fabrication à compter de la date d’achat sous les conditions d’utilisation normales. La garantie ne s’applique pas aux dommages dus directement ou indirectement à une utilisation abusive, à la négligence, à une utilisation non conforme, aux accidents, réparations ou modifications ainsi qu’à...
  • Page 31: Sécurité Et Avertissements

    La sécurité est une combinaison de bon sens, rester vigilants et savoir comment l'appareil fonctionne. Utilisez l’aspirateur sec/humide comme décrit dans ce manuel. Pour éviter des dommages à votre aspirateur sec/humide, utilisez seulement accessoires recommandés de Ayerbe. Uniquement pour l‘usage domestique/privé. CONSERVEZ LE MANUEL POUR VOUS RÉFÉRER À L’AVENIR! AVERTISSEMENT: POUR RÉDUIRE LE RISQUE DE FEU, CHOC ÉLECTRIQUE OU DE...
  • Page 32: Pour Votre Sécurité

    • Enfants devraient être surveillés pour s'assurer qu'ils ne jouer pas avec l'appareil. Pour votre sécurité! Vérifiez toujours que votre réseau électrique est toujours protégé avec un disjoncteur différentiel (FI). Utilisation comme souffleuse de feuilles: • Décharge directe à l'espace de travail •...
  • Page 33: Déballer Et Vérifier Le Contenu Du Carton

    SPÉCIFICATIONS Modele Container 18 Litre Voltage 220 - 240V 50Hz Puissance 1.500W Filtre Sec cartouche filtrante en PET (& sac à poussière) Filtre Humide Filtrante en Mousse DÉBALLER ET VÉRIFIER LE CONTENU DU CARTON Liste du contenu du carton Réf. Description…..………….....
  • Page 34 INSTRUCTIONS DE MONTAGE AVERTISSEMENT: AVANT TOUS LES TRAVAUX AU APPAREIL, DÉBRANCHER TOUJOURS LE CORDON D’ALIMENTATION ! DÉBALLEZ L’ASPIRATEUR SEC/HUMIDE AVEC TOUTES CES PARTIES 1. Vérifiez que l’aspirateur n’est pas connecté au réseau de courant. (fig. 1) 2. Ouvrez les verrous. (fig. 2) 3.
  • Page 35 Placez le "barre d’attache" dans les trous prévu qui se trouvent au dessus/arrière du cadre support. Assurez-vous que la courbure de la barre est visée loin du mur. (fig. 6) Choisissez une place qui n'a pas plus de 5 m d'une prise de courant électrique. Assurez-vous que le cadre support mural est à...
  • Page 36: Aspiration À Sec

    Poussez l’aspirateur sec/humide d’en haut dans les deux dispositifs de retenue (A) dans la fixation (B) de le crochet mural. (fig. 10) Montez le récipient d'accessoires à l'endroit prévu. (fig.11) Votre aspirateur sec/humide est prêt pour l’usage. Si le filtre à cartouche n’est pas monté propre, suivez les instructions à...
  • Page 37: Aspiration Humide

    2. Pour préparer votre aspirateur pour le travail à sec, vérifiez que la cartouche filtrante en PET est correctement montée. Veillez à pousser le filtre contre l’unité motrice (fig. 2). 3. Placez le dispositif de retenue du filtre sur le sommet de la cartouche filtrante PET et serrez en tournant la poignée du dispositif de retenue dans le sens des aiguilles d’une montre (fig.
  • Page 38: Fonction De Soufflage

    3. Installez l’accessoire désiré sur le tuyau. (fig. 3) 4. Assurez-vous que le commutateur est sur la position "0", et branchez le câble d'alimentation. (fig. 4) CAUTION: NE FAITES MOUILLER LA TÉLÉCOMMANDE – SINON LA GARANTIE N’EST PLUS VALABLE 5. Durant l'aspiration des grandes quantités des liquides, nous vous recommandons de enlever l’aspirateur de le montage mural et de mettre-le sur le sol.
  • Page 39: Entretien

    ENTRETIEN Vérifiez que le cordon est déconnecté de la prise de courant. (fig.1) 2. Enlevez le tuyau de la cuve en dévissant l’extrémité large dans le contraire à celui d’une montre. (fig. 3. Enlevez l’aspirateur du montage mural. 4. Ouvrez les verrous et enlevez l’unité motrice du récipient. (fig. 3) 5.
  • Page 40: Installer & Nettoyer Le Filtre À Mousse

    3. Nettoyez la cartouche filtrante en la tapotant délicatement ou en la brossant. Ne la nettoyez pas dans des locaux fermés ni dans les espaces de séjour. Un nouveau filtre est recommandé pour une performance optimale. 4. Mettez le filtre nettoyé ou le nouveau filtre en place comme indiqué ci-dessus aux points 2 et 3 du paragraphe «...
  • Page 41: Remplacement De Batterie

    Assurez quand l’aspirateur sec/humide est conservé. * le commutateur (marche arrêt) est en position “0“ (Télécommande est débrayé) le câble est déconnecté de prise de courant Assurez-vous que quand l’aspirateur sec/humide n’est pas en marche. * le commutateur est en position “0“ de la prise de courant est déconnecté...
  • Page 42: Dépannage

    DÉPANNAGE AVERTISSEMENT: AVANT LE DÉPANNAGE; DÉCONNECTÉ LA PRISE DE COURANT. Symptôme Causes possibles Action corrective Pas de dépressurisation 1) pas de courant 1) Vérifiez l’alimentation en courant électrique : cordon, disjoncteur, fusible. 2) câble défectueuse 2) Débranchez le cordon et contrôlez-le.
  • Page 43: Vue Éclatée Et Pièces Détachées

    VUE ÉCLATÉE ET PIÈCES DÉTACHÉES...
  • Page 44: Confirme Que Le Produit Suivante

    DECLARATION DE CONFORMITE ENTREPRISE: AYERBE INDUSTRIAL DE MOTORES S.A. ADRESSE: C/ LERMANDABIDE 8 01015 VITORIA (ALAVA) CIF: A-01109206 CONFIRME QUE LE PRODUIT SUIVANTE: ASPIRATEUR POUSSIERE ET EAU MARQUE: AYERBE MODELE: 587300 Est conforme aux directives suivantes: - Basse Tension 2006/95/CE - Compatibilité...

Table des Matières