Publicité

Les langues disponibles

Les langues disponibles

Liens rapides

VIDEO DE RECUL
ECRAN LCD
7'' MONITOR
REARVIEW SYSTEM
CÁMARA DE MARCHA ATRÁS
MONITOR 7''
REF : RWEC110X-N
MANUEL D'INSTALLATION & D'UTILISATION
USER & INSTALLER MANUAL
INSTALACIÓN Y USO

Publicité

Table des Matières
loading

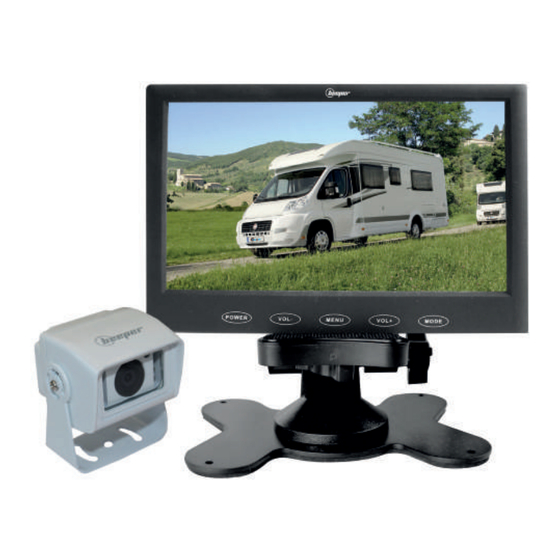
Sommaire des Matières pour Beeper RWEC110X-N

  • Page 1 VIDEO DE RECUL ECRAN LCD 7'' MONITOR REARVIEW SYSTEM CÁMARA DE MARCHA ATRÁS MONITOR 7'' REF : RWEC110X-N MANUEL D'INSTALLATION & D'UTILISATION USER & INSTALLER MANUAL INSTALACIÓN Y USO...
  • Page 2 Introduction Nous vous remercions d'utiliser un produit BEEPER pour la sécurité et le confort de votre véhicule. Les innovations BEEPER sont conçues pour vous assurer de longues années de tranquillité. Notre service technique est à votre disposition pour toute information complémentaire.
  • Page 3: Table Des Matières

    Options caméra : Gabarits ......................................P.9 Fonctions de l'écran ........................................P.10 Utilisation du système........................................P.11 10. Données techniques ........................................P.12 11. Assistance technique ........................................P.12 12. Déclaration de conformité ......................................P.13 13. Garantie ............................................P.13 Continuez la découverte sur www.beeper.fr...
  • Page 4: Avant Lʼinstallation

    1. AVANT L'INSTALLATION Précautions Nous vous remercions de suivre les conseils suivants avant lʼinstallation du système : • Le système fonctionne sous tension 12V continu (12 V DC). Soyez sûr de la polarité de chaque fil. • Vérifiez avant lʼinstallation si tous les éléments du véhicule fonctionnent correctement tels que contact & démarrage moteur, allumage des codes, feux et phares, clignotants, chauffage, climatisation, verrouillage des portes, ...
  • Page 5: Fonctions Principales

    2. FONCTIONS PRINCIPALES • Le BEEPER RWEC110X-N est un kit de vidéo de recul 12V pour véhicules de moyens gabarits (camping-car, véhicules utilitaires, camionnettes, ...) • Au passage en marche arrière, le système de vidéo de recul se met en fonction automatiquement (si le fil vert est connecté sur le +12V marche arrière).
  • Page 6: Connexion Du Système

    4. CONNEXION DU SYSTEME POSITION DE LA CAMERA • Connecter la rallonge de 15 mètres entre l'écran et la caméra Le fil rouge ne doit pas être connecté sur • Brancher le faisceau (6 fils) à l'écran +12V permanent. La consommation en veille du •...
  • Page 7: Installation De L'écran

    5. INSTALLATION DE L'ECRAN POSITION DE L'ECRAN Nous vous conseillons de définir le positionnement idéal de l'écran avec l'utilisateur du véhicule. La position idéale de votre écran est sur le bas de votre pare brise (emplacement classique d'un GPS déporté) Si cette position n'est pas possible, ou ne vous convient pas, vous pouvez positionner l'écran sur le tableau de bord de façon visible lors d'une marche arrière.
  • Page 8: Installation De La Caméra

    6. INSTALLATION DE LA CAMERA POSITION DE LA CAMERA Nous vous conseillons de définir la position de la caméra avec l'utilisateur du véhicule en fonction de la surveillance souhaitée. Idéalement la caméra se positionne à l'arrière du véhicule au centre et le plus haut possible, tout en évitant de dépasser de la hauteur réelle du véhicule. L'orientation de la caméra doit se faire après avoir connecté...
  • Page 9: Options Caméra : Gabarits

    7. OPTIONS CAMÉRA : GABARITS SÉLECTION DES BOUCLES DE LA CAMÉRA Boucle VERTE = GABARITS de visualisation des distances Boucle VERTE Fermée = Gabarits VISIBLES » Sélection dʼorigine Boucle VERTE Ouverte (coupée) = Gabarits NON VISIBLES Pour changer lʼétat de la boucle, veuillez au préalable déconnecter la caméra, puis la reconnecter après l'opération.
  • Page 10: Fonctions De L'écran

    8. FONCTIONS DE L'ÉCRAN Les boutons en façade de l'écran permettent de commander certains réglages de l'écran AV1• AV2 : Sélection de la caméra ou entrées vidéos Si vous avez installé 2 caméras ou si une autre source vidéo (lecteur DVD, ...) est connecté à l'écran, ce bouton permet de commuter sur les autres entrées vidéos.
  • Page 11: Utilisation Du Système

    Vision en VIDEO de RECUL Vision en RETROVISION Il est possible d'ajouter une deuxième caméra au système RWEC110X-N. La référence de la caméra supplémentaire est RWEC110X/CAM et des câbles supplémentaires RX-45/5, RX-45/10, RX-45/15, RX-45/24, en fonction de la longueur demandée.
  • Page 12: Donnees Techniques

    10. DONNEES TECHNIQUES CAMÉRA ÉCRAN LCD 7" • Alimentation : 12V • Alimentation : 12V • Consommation : ≤50 - 150 mA • Consommation : 160 mA - 200 mA • Vision de nuit : 8 LEDs à infrarouge • Format : 16:9 / 4:3 •...
  • Page 13: Déclaration De Conformité

    228 Rue de lʼAncienne Distillerie 69400 GLEIZÉ France Déclarons sous notre propre responsabilité que le produit BEEPER RWEC110X-N (type : Caméra de recul) Auquel cette déclaration sʼapplique, sont conformes aux normes applicables & documents normatifs suivants : Emark ECER10 - N°d'homologation 905215 - 01/01...
  • Page 15 USER MANUAL Introduction Thank you for using a product BEEPER for the safety and comfort of your vehicle. The Beeper innovations are designed to provide you many years of tranquility. Our technical department is at your disposal for any further information.
  • Page 16 Camera installation ........................................P.21 Camera options : Parking lines ....................................P.22 Monitor functions ......................................... P.23 User instructions ........................................... P.24 10. Technical datas ..........................................P.25 11. Technical assistance........................................P.25 12. Declaration of conformity ......................................P.26 13. Guarantee ............................................ P.26 Keep on discovering on www.beeper.fr...
  • Page 17: Before Installation

    1. BEFORE INSTALLATION Warning Thank you to follow these tips before installing the system: • The system operates on 12V DC voltage. Be sure the polarity of each wire. • Before installation, check if all elements of the car are working properly as contact & engine start, ignition codes, fire and headlights, turn signals, heating, air conditioning, power door locks, ...
  • Page 18: Main Functions

    2. MAIN FUNCTIONS • Le BEEPER RWEC110X-N is a 12V rearview monitoring system for medium size vehicules (minivans, vans, motorhomes, ...). • When the car is reversing, the video system switches on automatically (if the green cable is connected on +12V reverse light).
  • Page 19: System Connection

    4. SYSTEM CONNEXION CAMERA POSITION • Connect the 15 m. extension between the screen & the camera The red wire should not be connected on • Connect the beam (6 wires) on the screen +12V permanent. Consumption in standby is of •...
  • Page 20: Monitor Installation

    5. MONITOR INSTALLATION SCREEN POSITION We recommend you to define the perfect position of the screen with the user of the vehicule. The ideal position of the screen is on the bottom of your windshield (standard location of a GPS). If this position is not possible or does not suit you, you can position the screen on the dashboard.
  • Page 21: Camera Installation

    6. CAMERA INSTALLATION POSITION DE LA CAMERA We recommend that you set the position of the camera with the user of the vehicule depending on the desired monitor. Conveniently the camera is positioned at the rear of the vehicle in the center and as high as possible while avoiding to exceed the actual height of the vehicle. The orientation of the camer must be connected after the system to control the optimal viewing angle through the screen.
  • Page 22: Camera Options: Parking Lines

    7. CAMERA OPTIONS: PARKING LINES SELECTION OF THE LOOPS OF THE CAMERA GREEN loop = TEMPLATES viewing distances Closed GREEN loop (UNCUT) = Templates VISIBLE » Original selection GREEN loop opened (CUT) = Templates NOT VISIBLE To change the status of one of the two loops, please first disconnect the camera, and then connect again after the operation.
  • Page 23: Monitor Functions

    8. MONITOR FUNCTIONS The buttons on the front of the screen allow you to control some screen settings. AV1• AV2 : Selecting the camera or video input If you have installed 2 or 3 cameras or other video source (DVD player, ...) is connected to the screen, this button permits you to switch to the other video inputs.
  • Page 24: User Instructions

    9. USER INSTRUCTIONS This system is a video of hindsight, it can be used as an electronic mirror (rear view) or to monitor blind spots of a vehicle. If used and connected as reversing video, it will automatically activate at the passage of the reverse. If used and connected as supervision of another angle, it will be activated as soon as the ignition of the vehicle.
  • Page 25: Technical Datas

    • Storage temperature: -20°C / +60°C • Storage temperature: -20°C / +65°C • Type: PAL • Sensibility: 0,1 Lux • Resolution: CMOS Lens PC L089 11. TECHNICAL ASSISTANCE For technical information please contact our technical hotline by writing an email at: contact@beeper.fr...
  • Page 26: Declaration Of Conformity

    228 Rue de lʼAncienne Distillerie 69400 GLEIZÉ France Déclarons sous notre propre responsabilité que le produit BEEPER RWEC110X-N (type : Caméra de recul) To which this declaration applies, comply with standards & normative documents: Emark ECER10 - Approval number 905215 - 01/01...
  • Page 28 Introducción ¡Gracias por utilizar una solución BEEPER para la seguridad y el confort en su vehículo! Nuestros innovadores productos han sido diseñados para ofrecerle varios años de tranquilidad. Nuestro servicio técnico está a su disposición para brindarle cualquier información adicional.
  • Page 29 Opciones de la cámara : Plantilla ....................................P.35 Funciones del monitor ......................................... P.36 Uso del sistema ..........................................P.37 10. Características técnicas ........................................P.38 11. Asistencia técnica .......................................... P.38 12. Certificaciones ..........................................P.39 13. Garantia............................................P.39 Continuar el descubrimiento en www.beeper.fr...
  • Page 30: Antes De La Instalación

    VEHÍCULOS MULTIPLEXADOS El sistema BEEPER- CC1 es compatible con todos los vehículos multiplexados. Toda la información requerida para la conexión pasa por cables de polaridad normal (+ o -), por los que no se transmite información codificada (multiplexado BUSCAN, VAN u otra codificación). No corte ni toque un cable multiplexado bajo ninguna circunstancia. EN CUALQUIER CASO, ES INÚTIL Y SE DESACONSEJA CORTAR EL CABLE ORIGINAL DEL VEHÍCULO.
  • Page 31: Funciones Principales

    2. FUNCIONES PRINCIPALES • El BEEPER RWEC110X-N es un kit de vídeo de 12 V para marcha atrás destinado a vehículos de medianas dimensiones (autocaravanas, utilitarios, camionetas…). • El sistema de vídeo para marcha atrás se activa automáticamente al poner la marcha atrás (si el cable verde está conectado en + 12V Luz de marcha atrás).
  • Page 32: Conexión Del Sistema

    4. CONEXIÓN DEL SISTEMA POSICIÓN DE LA CÁMARA • Conectar el alargador de 15 metros entre el monitor y la cámara /!\ El cable rojo no debe estar conectado a la • Enchufar el hqz (6 cables) al monitor corriente +12V permanentemente. El consumo del •...
  • Page 33: Instalación Del Monitor

    5. INSTALACIÓN DEL MONITOR POSICIÓN DEL MONITOR Le aconsejamos definir la posición ideal del monitor con el usuario del vehículo. La posicion ideal del monitor está abajo de sus parabrisas (ubicación habitual de un GPS deportado) Si esta posición no es posible, o no le conviene, usted puede posicionar el monitor sobre el salpicadero de manera visible para la marcha atrás.
  • Page 34: Instalación De La Cámara

    6. INSTALACIÓN DE LA CÁMARA POSICIÓN DE LA CÁMARA Le aconsejamos definir la posición ideal del monitor con el usuario del vehículo en función de la vigilancia deseada. Idealmente la cámara se posiciona trasera del vehículo en el centro y lo más alto posible, evitando sobrepasar la altura real del vehículo. La orientación de la cámara debe hacerse después haber conectado el sistema a fin de controlar el ángulo de visión gracias al monitor.
  • Page 35: Opciones De La Cámara : Plantilla

    7. OPCIONES DE LA CÁMARA : PLANTILLA SELECCIÓN DE LOS BUCLES DE LA CÁMARA Bucle VERDE = PLANTILLAS para ver distancias Bucle VERDE cerrado = Plantillas VISIBLES » Configuración de fábrica Bucle VERDE= Abierto (cortado)= Plantillas NO VISIBLES Para cambiar el estado de alguno de estos 2 bucles, desconecte previamente la cámara y vuelva a conectarla después de la modificación.
  • Page 36: Funciones Del Monitor

    8. FUNCIONES DEL MONITOR Los botones del panel frontal del monitor permiten controlar ciertos ajustes del monitor AV1• AV2 : Selección de la cámara o entradas video Si ha instalado 2 cámaras o si otra fuente vídeo (lector DVD, ...) está conectado al monitor, este botón permite cambiar a otras entradas vídeo.
  • Page 37: Uso Del Sistema

    Visión VIDEO de MARCHA ATRÁS Visión en RETROVISIÓN Se puede agregar una segunda cámara al sistema RWEC110X-N. La referencia de la cámara adicional es RWEC110X/CAM y de los cables adicionales RX-45/5, RX-45/10, RX-45/15, RX-45/24, en funcion de la longtitud pedida.
  • Page 38: Características Técnicas

    • Temperatura de almacenaje: de -20 °C a +65 °C • Tipo : PAL • Sensibilidad : 0,1 Lux • Resolución: CMOS Lens PC L089 11. ASISTENCIA TÉCNICA Si necesita más información o asesoramiento, comuníquese con nuestro servicio técnico : contact@beeper.fr...
  • Page 39: Declaración De Conformidad

    Gleizé, le 11 mai 2015 Thierry Billau Directeur général 13. GARANTÍA Los productos Beeper están garantizados por 1 año. El reconocimiento de esta garantía se ejerce según las condiciones indicadas en nuestro sitio web, en la siguiente página: : http://www.beeper.fr/cgv GARANTÍA...
  • Page 40: Plus D'infos, Plus De Produits

    © Copyright IXIT Beeper 2015. The reproduction of data, information, descriptions, photos of this document is subject to prior authorization IXIT Beeper. All information in this manual are indicative and not of a contractual nature and are subject to change without notice. These datas are in reserve of prior check of compatibility with your vehicle to do by yourself.

Table des Matières