KEUCO 12701 Guide De Montage
Liens rapides
en
Mounting
fr
Montage
* WARNING - To reduce risk of burns, fire, electric shock, or injury to Persons. This
Product must be installed in accordance with local codes and the enclosed Instruction
Installation manual by a qualified professional - Wall mont only:
2. Use this appliance only for its intended use as described in these instructions.
Do not use attachments not recommended by the manufacturer.
3. Never operate this appliance if it is not working properly or if has been dropped
or damaged. Return the furnishing to a service center for examination and repair.
This product must be connected to a grounded metal, permanent wiring system,
or an equipment - grounding conductor must be run with the circuit conductors and
connected to the equipment - grounding terminal or lead on the product.
* AVERTISSEMENT - Pour diminuer le risque de brûlures, d`incendie, de chocs électriques ou
de blessures, ce produit devra être installé par une personne qualifiée en accord avec la
réglementation locale et le manuel d`installation joint. - Uniquement pour un montage mural:
1. Avant les travaux de maintenance, l`alimentation en courant doit être interrompue.
2. L`appareil devra être utilisé uniquement dans le but décrit dans ces instructions de montage.
Les accessoires non conseillés par le fabricant ne doivent pas être utilisés.
3. Ne jamais utiliser un appareil qui ne fonctionne pas correctement, qui est tombé ou qui a été
endommagé. Dans un tel cas, l´appareil devra être envoyé à un service aprés-vente
* CONSIGNES CONCERNANT LA MISE À LA TERRE
Ce produit doit être raccordé à un circuit de courant relié à la terre, métallique et continu, ou
alors, il faut qu`un conducteur de mise à la terre de l`appareil fonctionne avec la ligne du circuit
de commutation et qu`elle soit reliée avec le terminal de mise à la terre ou au conducteur sur le produit.
Universe
Model / Modèle 12701
* IMPORTANT SAFETY INSTRUCTIONS
1. Always disconnect power before servicing.
4. Do not use out doors.
5. Do not place anything on top of cabinet.
* GROUNDING INSTRUCTIONS
* IMPORTANTES CONSIGNES DE SECURITE
technique afin d`être contrôler et réparer.
4. Ne jamais utiliser l`appareil en plein air.
5. Evitez de déposer des objets sur l`armoire.
1 - 15
KEUCO GmbH & Co.KG
Oesestr. 36
D-58675 Hemer
Telefon +49 2372 90 4-0
Telefax +49 2372 90 42 36
info@keuco.de
www.keuco.de

Manuels Connexes pour KEUCO 12701


Sommaire des Matières pour KEUCO 12701
- Page 1 Mounting Universe Montage Model / Modèle 12701 KEUCO GmbH & Co.KG Oesestr. 36 D-58675 Hemer Telefon +49 2372 90 4-0 Telefax +49 2372 90 42 36 info@keuco.de www.keuco.de * IMPORTANT SAFETY INSTRUCTIONS * WARNING - To reduce risk of burns, fire, electric shock, or injury to Persons. This...
- Page 2 IMPORTANT - Read this information before carrying out the installation work! Key to symbols STOP! Important note warning about the risk of bodily injury or damage to property. Attention! Important note warning about the risk of bodily injury or damage to property. Attention! Important note warning about the risk of electric shock.
- Page 3 Informations importantes à lire impérativement avant le montage ! Explication des symboles STOP! Remarque importante - mise en garde contre des dommages corporels ou matériels. Attention! Remarque importante - mise en garde contre des dommages corporels ou matériels. Attention! Remarque importante - mise en garde contre un risque d'électrocution. Attention! Remarque importante - mise en garde contre les dégâtes d`eau.
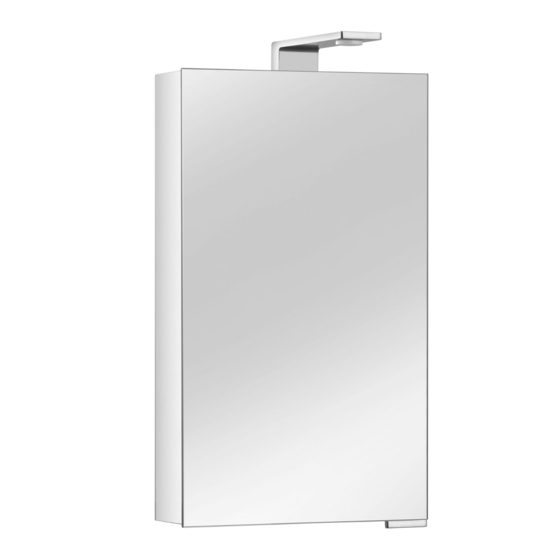
- Page 4 Scope of supply Remarque de détail Dimensions of cabinet with lamps! Dimensions de l`armoire de toilette avec les lampes! 8,6“ 19,7“ 218 mm 500 mm 3,2“ 82 mm 5,6“ 143 mm 18,2“ 462 mm 4 - 15...
- Page 5 Drill 4 holes Ø 6 mm (0.24") at a horizontal distance of 400 mm / 70 mm (15,75" / 2,76”). Insert dowels in the holes. Fix the support bracket with screws. In case wall is uneven or not plane use spacers as required, to ensure cabinet leveled horizontal and vertical! Percez 4 trous de Ø...
- Page 6 Disassembling the cover: 1. Loosen the screws (2x) using a screwdriver 2. 2. Remove the cover. Démontage du cache: 1. Desserrer les vis (2x) à l'aide d'un tournevis 2. 2. Retirer le cache. Install ½" conduit connector and conduit in to cover. Monter un raccord de gaine et la gaine ½"...
- Page 7 Assembling the cover: 1. Attach the cover. 2. Tighten the screws (2x) using a screwdriver 2. Montage du cache: 1. Installer le cache. 2. Serrer les vis (2x) à l'aide d'un tournevis 2. Lamp assembly 1. Connect the lamp plug to the mirror cabinet. 2.
- Page 8 Mirror cabinet assembly 1. Mount the mirror cabinet on the horizontal mounting rails. 2. Mark the two drill holes for the additional fasteners. 3. Remove the mirror cabinet. 4. Drill the two holes Ø 6 mm (0.24“). 5. Insert the rawl plugs. Montage armoire de toilette 1.
- Page 9 Assembling the additional fasteners 1. Mount the mirror cabinet on the mounting rails. 2. Assemble the two additional fasteners. 3. Put on the cover caps. Montage de la fixation complémentaire 1. Accrocher l'armoire de toillette sur les barres de suspension. 2.
- Page 10 Assembling the glass shelves 1. Mount the shelf supports at the desired height. 2. Push in the glass shelves. Montage des tablettes de verre 1. Monter les taquets à la hauteur désirée. 2. Insérer les tablettes de verre. Do not over load shelf`s with heavy items! Each shelf load 6,6 lbs (3kg) max.
- Page 11 SW 4 mm “ Aligning the mirror doors at the top 1. Slightly loosen the top adjusting pin SW 4 mm ( “ 2. Turn the lower adjusting pin SW 4 mm ( ) to lift the door. “ 3. Tighten the top adjusting pin SW 4 mm ( “...
- Page 12 SW 4 mm “ Aligning the mirror doors to the left/right. 1. Slightly loosen the top adjusting pin SW 4 mm ( “ SW 4 mm “ 2. Loosen the top screw. 3. Adjust the mirror door. 4. Tighten the top screw. 5.
- Page 13 Changing the light source. 1. Remove the 2 screws on the lamp. 2. Pull the cable and plug out of the mirror cabinet. 3. Disconnect the plug connection. 4. Loosen the 3 screws on the lamp cover. 5. Replace the light source and dispose of the old bulb. 6.
- Page 14 20.2 Model / Modèle 12701 right Name Dimensions Order-no. Désignation Dimensions No. De commande Hanging rail / Rail de suspension 100 mm 222338 Spacer / Ecarteur 300505 Screws and wall anchors / Vis et chevilles 303826 Base support / Support d`étagère (12x)
- Page 15 20.2 Model / Modèle 12701 left Name Dimensions Order-no. Désignation Dimensions No. De commande Hanging rail / Rail de suspension 100 mm 222338 Spacer / Ecarteur 300505 Screws and wall anchors / Vis et chevilles 303826 Base support / Support d`étagère (12x)