Table des Matières

Manuels Connexes pour Tasco 5TN


Sommaire des Matières pour Tasco 5TN
- Page 1 OWNER’S MANUAL MANUEL DU PROPRIÉTAIRE MANUAL DEL USUARIO MANUALE DELL’UTENTE BENUTZERHANDBUCH HANDLEIDING MANUAL DO UTILIZADOR 54TN 49TN/49TNW 04-14 #5TN / 49TN / 49TNW / 45T / 54TN...
- Page 2 49TN 54TN...
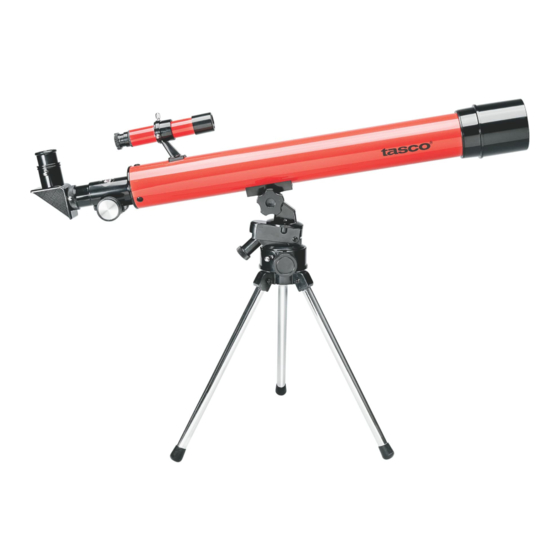
- Page 3 A. Micro Altitude I. Telescope Tube Q. Accessory Tray Adjustment Knob J. Sunshade B. Altitude Knob K. Objective Lens C. Focus Knob L. Scope Mount D. Focus Tube M. Azimuth Adjustment E. Diagonal Mirror Knob F. Eyepiece N. Tripod Legs G.
- Page 4 Fig. 1 Fig. 2 Fig. 3 Fig. 4 Fig. 5 Fig. 7 Fig. 6...
-
Page 5: Technical Specifications
4. Remove the finderscope (Fig. 1a) from the box. Place the finderscope (H) in the finderscope bracket (G) and secure with three finderscope bracket set screws. 5. Model 5TN/49TN/45T: Insert diagonal into the focus tube (Fig. 4m). Secure by tightening small retaining screws. -
Page 6: Specifications Techniques
5. Modèle 5TN/49TN/45T: Introduisez le miroir diagonal dans le tube de focalisation (Fig. 4m). Serrez bien les petites vis. 6. Modèle 5TN/49TN/45T: Utilisez le bouton de réglage pour l’altitude (Fig. 1d) et le bouton de réglage pour l’azimut (Fig. 1e) dans la monture du trépied pour déplacer le télescope selon vos souhaits. - Page 7 3. Quitar el cuerpo principal del telescopio (I) de la caja. Destornillar el perno de montaje (B) de la base del telescopio (5TN/49TN/45T) o quitar de la caja (54TN). Poner el telescopio en la base del trípode (Dib. 1). Insertar el perno por la base del trípode (Dib. 1c) y fijar fuertemente.
-
Page 8: Specifiche Tecniche
4. Estraete dal contenitore il cercatore (Fig. 1a) Posizionate il cercatore (H) nell’apposito sostegno (G) e assicuratelo con tre viti del suo set. 5. Modello 5TN/49TN/45T: Inserite la diagonale nel tubo di messa a fuoco (Fig. 4m). Assicuratela stringendo la piccola vite di sostegno. -
Page 9: Technische Angaben
Wünschen. ANMERKUNG: Der Diagonalspiegel ist nur in Verbindung mit den Okularen zu verwenden. 7. Modell 5TN/49TN/45T: Setzen Sie das Okular (Abb. 4k) in den Diagonalspiegel ein (Abb. 4m). Sichern Sie es durch Anziehen der kleinen Anschlagschraube. ANMERKUNG (5TN/49TN/45T): In allen astronomischen Teleskopen erscheint das Bild auf dem Kopf stehend. -
Page 10: Technische Specificaties
3. Neem het hoofdonderdeel van de telescoop (I) uit de doos. Draai de montagebout (B) los uit het voetstuk van de telescoop (5TN/49TN/45T) of neem uit de doos (54TN). Plaats de telescoop op de driepoot (Fig. 1). Breng de bout aan door de montageplaat van de driepoot (Fig. 1c) en maak stevig vast. -
Page 11: Especificações Técnicas
5. Modelo 5TN/49TN/45T: Introduza o espelho diagonal no tubo de focagem (Fig. 4m) e fixe-o apertando os pequenos parafusos de retenção. 6. Modelo 5TN/49TN/45T: Utilize o micro botão rotativo de ajuste da altitude (Fig. 1d) e o botão rotativo de ajuste do azimute (Fig. 1e) existentes no suporte do tripé para movimentar o telescópio como pretendido. - Page 12 MICROSCOPE COMPONENTS: Ocular Barrel—a protective cover is provided for the ocular barrel. This should be removed before use. Focusing knob—This knob is twisted to adjust the distance between the slide and the lens in order to bring the object being viewed into focus. Connection barrel—This connects the ocular barrel to the multiple objective lens holder.
-
Page 13: Accessories
USING THE MICROSCOPE Select one of the pre-prepared slides and place it under the clips on the slide support table. The specimen should be in the center of the hole in the table. Adjust the observation angle (F) and the reflector so the light is focused on the specimen (G). If there is not enough natural light, the reflector can be turned over so that the specimen is lit by the spotlight. -
Page 14: Pièces Du Microscope
PIÈCES DU MICROSCOPE: Barillet de l’oculaire —un cache de protection est fourni pour le barillet de l’oculaire. Il doit être ôté avant l’utilisation. Molette de mise au point —Cette molette se tourne pour régler la distance entre la lame et la lentille et ainsi mieux observer l’objet d’étude. -
Page 15: Instructions Relatives Au Microscope
INSTRUCTIONS RELATIVES AU MICROSCOPE Prendre l’une des préparations microscopiques et la placer sous les barrettes sur le plateau porte- lame. L’échantillon doit se trouver au centre de l’orifice sur le plateau. Régler l’angle d’observation (Fig. F) et le réflecteur de sorte que la lumière soit dirigée vers l’échantillon. (Fig. G) Si la lumière naturelle est insuffisante, le réflecteur peut être retourné... - Page 16 PARTES DEL MICROSCOPIO: Ocular: se proporciona una tapa protectora para el ocular. Esta tapa debe quitarse antes de utilizar el microscopio. Tornillo de enfoque: este tornillo se gira para ajustar la distancia entre la platina y la lente y poder enfocar la vista del objeto en el foco.
-
Page 17: Consejos De Mantenimiento
INSTRUCCIONES DEL MICROSCOPIO Seleccione una de las platinas preparadas y colóquela bajo las pinzas en el portaobjetos de la platina. La muestra debe estar en el centro del agujero del portaobjetos. Ajuste el ángulo de observación (Fig. F) y el reflector de forma que la luz enfoque la muestra. (Fig. G) Si no hay suficiente luz natural, el reflector se puede girar de forma que la muestra quede iluminada por el iluminador. - Page 18 KOMPONENTEN DES MIKROSKOPS: Okulartubus – Der Okulartubus ist mit einer Schutzkappe versehen. Die Kappe muss vor der Verwendung des Mikroskops abgenommen werden. Triebknopf – durch Drehen des Knopfes wird der Abstand zwischen Objekttisch und Objektiv verändert und dadurch das Objekt fokussiert. Tubus –...
- Page 19 BEDIENUNGSANLEITUNG MIKROSKOP Legen Sie einen Objektträger mit Präparat unter die Objektklemme auf dem Objekttisch. Das Präparat sollte mittig über dem Ausschnitt des Objekttischs liegen. Den Beobachtungswinkel und den Reflektor so einstellen, dass das Licht auf dem Präparat gebündelt wird (Abb. F). (Abb. G) Ist nicht genügend natürliches Licht vorhanden, kann der Reflektor gedreht werden, sodass das Präparat vom Kondensor beleuchtet wird.
- Page 20 PARTI DEL MICROSCOPIO: Oculare: viene venduto con un coperchio protettivo che deve essere rimosso prima dell’uso. Manopola di messa a fuoco: questa manopola viene ruotata per regolare la distanza tra il vetrino e la lente al fine di mettere a fuoco l’oggetto visualizzato. Cilindro di collegamento: collega l’oculare al supporto lenti multiple dell’obiettivo.
- Page 21 ISTRUZIONI DEL MICROSCOPIO Selezionare uno dei vetrini preparati e collocarlo sotto le graffette sul tavolino di supporto dei vetrini. Il campione deve trovarsi al centro del foro nel tavolino. Regolare l’angolo di osservazione (Fig. F) e il riflettore in modo che la luce sia puntata sul campione. (Fig. G) Se la luce naturale non è...
- Page 22 9200 Cody, Overland Park, Kansas 66214 (800) 423-3537 • www.tasco.com © 2014 B.O.P.