Ten Haaft Oyster CONNECT Instructions D'utilisation Et De Montage

Masquer les pouces Voir aussi pour Oyster CONNECT:

Publicité

Les langues disponibles

Les langues disponibles

Liens rapides

CONNECT
BEDIENUNGS- UND MONTAGEANLEITUNG
OPERATING MANUAL AND INSTALLATION INSTRUCTIONS
INSTRUCTIONS D'UTILISATION ET DE MONTAGE
www.ten-haaft.com

Publicité

Table des Matières
loading

Sommaire des Matières pour Ten Haaft Oyster CONNECT

  • Page 1 CONNECT BEDIENUNGS- UND MONTAGEANLEITUNG OPERATING MANUAL AND INSTALLATION INSTRUCTIONS INSTRUCTIONS D’UTILISATION ET DE MONTAGE www.ten-haaft.com...
  • Page 2: Table Des Matières

    INHALTSVERZEICHNIS 1. ALLGEMEINES 1. Allgemeines 1.1 Bestimmungsgemäße Verwendung 1.1 Bestimmungsgemäße Verwendung Die bestimmungsgemäße Verwendung dieses Produktes ist die Festmontage auf Wohnmobilen, Wohnanhängern 1.2 Sicherheitshinweise (Caravans) oder Kraftfahrzeugen ähnlicher Art, mit einer zulässigen Höchstgeschwindigkeit von nicht mehr als 1.3 Lieferumfang 175 km/h. Weiterhin möglich ist die Verwendung auf Wasserfahrzeugen.
  • Page 3: Sicherheitshinweise

    1. ALLGEMEINES 1. ALLGEMEINES 1.3 Lieferumfang 1.2 Sicherheitshinweise Lesen Sie diese Bedienungs- und Montageanleitung aufmerksam durch, bevor Sie mit der Montage und dem Bitte prüfen Sie Ihren Lieferumfang auf Vollständigkeit. Im Lieferumfang enthalten: Betrieb beginnen. 1. Oyster® Connect Outdoor Unit Diese Anleitung beschreibt die Verwendung des Oyster®...
  • Page 4: Montage

    2. MONTAGE 2. MONTAGE 2.2 SIM Karte 2.1 Platzbedarf der Oyster® Connect Zum Einsetzen der SIM Karte muss die Outdoor Unit von der Montageplatte genommen werden. Hierzu müssen die 4 Schrauben (siehe Abbildung) gelöst werden. Nach dem Einsetzen der SIM Karte ist die Outdoor Unit wieder 252,4 auf der Montageplatte mittels den vier Schrauben zu befestigen.
  • Page 5: Spannungsversorgung

    2. MONTAGE 2. MONTAGE 2.3 Spannungsversorgung 2.5 Anschlussplan 1. Sorgen Sie für eine ausreichende Spannungsversorgung des Systems Fahrtrichtung a) Die Anlage benötigt den Anschluss an 12 V oder 24 V Bordspannung. - Die Spannung darf 9 V nicht unterschreiten - Die Spannung darf 32 V keinesfalls überschreiten - Die benötigte Stromstärke ist <1A b) Zum Anschluss an die Bordspannung darf der Kabelquerschnitt 0,75 mm²...
  • Page 6: Bedienelemente

    3. BEDIENELEMENTE 3. BEDIENELEMENTE 3.1 Indoor Unit (Vorderseite) 3.2 Indoor Unit (Rückseite) LED 1 LED 2 LED 3 LED 4 LED 5 Bedientasten Anschlüsse 1. EIN / AUS Taste Einschalten des Gerätes (LED 3 grün) 1. + 2. Spannungsversorgung 1. Hohlstecker 2,1 mm 12V oder 24 V 2.
  • Page 7: Anhang

    2000/53/EG; für Deutschland: AltfahrzeugV) zusammen mit dem Kraftfahrzeug erfolgen. Das Antennen-System enthält keine der gemäß Richtlinie als umweltschädlich eingestuften Stoffe. Wir wünschen Ihnen viel Freude mit Ihrer Oyster® Connect Ihr ten Haaft Team 4.2 Typgenehmigung Dieses Produkt ist als typgeprüftes Zubehör für Kraftfahrzeuge zugelassen.
  • Page 8 CONTENTS 1. GENERAL INFORMATION 1. General Information 1.1 Intended use 1.1 Intended use This product has been designed for permanent installation on mobile homes or camper trailers or motor vehicles 1.2 Safety precautions of a similar type with a permissible maximum speed of 175 km/h. 1.3 Scope of supply Furthermore possible is the usage on watercrafts.
  • Page 9: General Information

    1. GENERAL INFORMATION 1. GENERAL INFORMATION 1.3 Scope of Supply 1.2 Safety precautions Read the operating manual and installation instructions carefully before installing the system. Check that you have received all of the following items. Included: 1. Oyster® Connect Outdoor Unit These instructions describe the functions of the Oyster®...
  • Page 10: Installation

    2. INSTALLATION 2. INSTALLATION 2.2 SIM card 2.1 Installation space required for the Oyster® Connect To insert the SIM card, the Outdoor Unit must be removed from the mounting plate. Therefor you have to loosen the 4 screws (see illustration). After inserting the SIM card, the Outdoor Unit has to be fixed to the mounting 252,4 plate using the four screws.
  • Page 11: Power Supply

    2. INSTALLATION 2. INSTALLATION 2.3 Power Supply 2.5 Connections 1. A sufficient power supply of the system must be ensured Direction of travel a) The system must be connected to the 12/24-V onboard electric system. - The voltage must be at least 9 V - The voltage must never exceed 32 V - The needed amperage is <1A b) The minimum cross-section of the wires connecting the satellite system to the power supply is 0,75 mm².
  • Page 12: Control Elements

    3. CONTROL ELEMENTS 3. CONTROL ELEMENTS 3.1 Indoor Unit (Front) 3.2 Indoor Unit (Back) LED 1 LED 2 LED 3 LED 4 LED 5 Operating keys Inputs/Outputs 1. ON / Off Button This button switches the system on and off. (LED 3 green) 1.
  • Page 13: Appendix

    We hope your Oyster® Connect brings you lots of joyful entertainment hours Your ten Haaft team 4.2 Type Appoval This product has authorised Type Approval as a motorised vehicle accessory.
  • Page 14 TABLE DES MATIÈRES 1. GÉNÉRALITÉS 1. Généralités 1.1 Utilisation conforme à la destination 1.1 Utilisation conforme à la destination Ce produit est conçu pour être monté sur un camping-car, une caravane ou les véhicules automobiles similaires 1.2 Consignes de sécurité dont la vitesse ne doit dépasser 175 km/h.
  • Page 15: Généralités

    1. GÉNÉRALITÉS 1. GÉNÉRALITÉS 1.3 Contenu de la fourniture 1.2 Consignes de sécurité Lisez attentivement les présentes instructions d’utilisation et de montage avant de commencer le montage et Veuillez vérifier que la fourniture est complète. Contenu de la fourniture: l’utilisation. 1.
  • Page 16: Montage

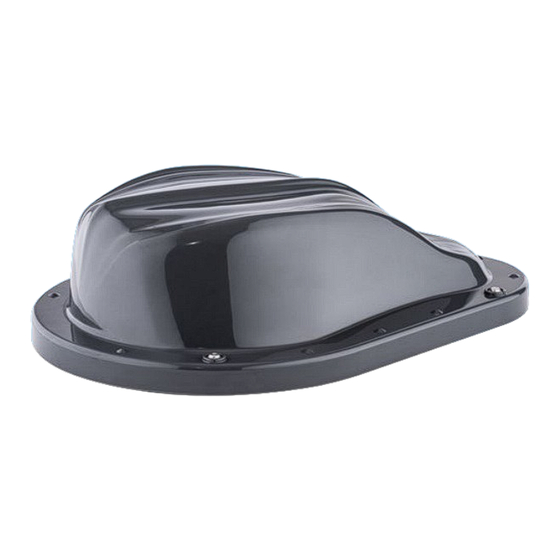
    2. MONTAGE 2. MONTAGE 2.1 Espace nécessaire pour l‘ Oyster® Connect 2.2 Carte SIM Pour insérer la carte SIM, l‘unité extérieure doit être retirée de la plaque de montage. Pour ce faire, les 4 vis (voir illustration) doivent être desserrées. Après avoir inséré la carte SIM, fixer à nouveau l‘unité extérieure à la plaque 252,4 de montage à...
  • Page 17: Alimentation Électrique

    2. MONTAGE 2. MONTAGE 2.3 Alimentation électrique 2.5 Schéma de câblage 1. Assurez-vous que le système est suffisamment alimenté Sens de déplacement a) Le système doit être relié à une tension de bord 12 V / 24 V. - la tension ne doit pas descendre en dessous de 9 V - la tension ne doit jamais dépasser 32 V - l‘ampérage requis est <1A b) Pour le raccordement au réseau de bord, la section du câble utilisé...
  • Page 18: Éléments De Commande

    3. ÉLÉMENTS DE COMMANDE 3. ÉLÉMENTS DE COMMANDE 3.1 Unité Intérieure (Vue de face) 3.2 Unité Intérieure (Vue arrière) LED 1 LED 2 LED 3 LED 4 LED 5 Boutons de commande Raccordements 1. Touche Marche/Arrêt Allumer le système (LED 3 vert) 1.
  • Page 19: Annexe

    2000/53/CE relative aux véhicules hors d’usage. Le système d‘antenne ne contient aucun matériau nocif pour l‘environnement aux termes de la directive. Nous vous souhaitons beaucoup de satisfaction avec votre Oyster® Connect L‘équipe ten Haaft 4.2 Certification Ce produit est homologué comme accessoires pour automobiles.
  • Page 20 NOTES NOTES...
  • Page 21 être les mêmes que les au- tocollants sur l’ unité intérieure de l’ Oyster ® tocollants sur l’ unité intérieure de l’ Oyster ® Connect! Connect! ten Haaft GmbH Öffnungszeiten Neureutstraße 9 Montag – Freitag 08:00 Uhr – 12:00 Uhr 75210 Keltern und von 12:30 Uhr –...

Table des Matières