VEVOR 4530 Mode D'emploi
Technical Support and E-Warranty Certificate www.vevor.com/support
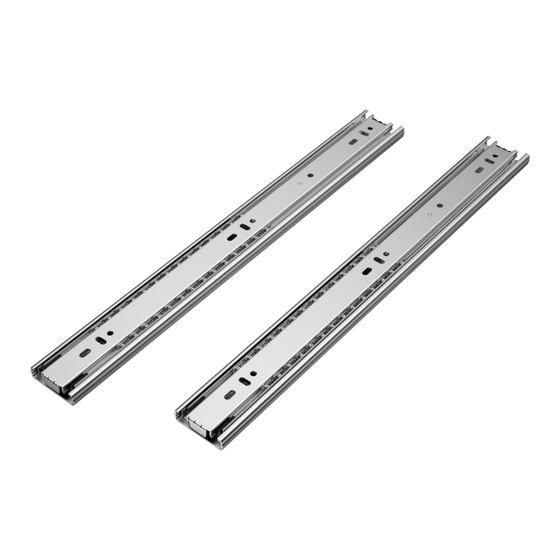
DRAWER SLIDES
MODEL:4530
We continue to be committed to provide you tools with competitive price.
"Save Half", "Half Price" or any other similar expressions used by us only
represents an estimate of savings you might benefit from buying certain tools
with us compared to the major top brands and does not necessarily mean to cover
all categories of tools offered by us. You are kindly reminded to verify carefully
when you are placing an order with us if you are actually Saving
Half in comparison with the top major brands.
Table des Matières

Manuels Connexes pour VEVOR 4530


Sommaire des Matières pour VEVOR 4530
- Page 1 Technical Support and E-Warranty Certificate www.vevor.com/support DRAWER SLIDES MODEL:4530 We continue to be committed to provide you tools with competitive price. "Save Half", "Half Price" or any other similar expressions used by us only represents an estimate of savings you might benefit from buying certain tools with us compared to the major top brands and does not necessarily mean to cover all categories of tools offered by us.
-
Page 2: Drawer Slides
This is the original instruction, please read all manual instructions carefully before operating. VEVOR reserves a clear interpretation of our user manual. The appearance of the product shall be subject to the product you received. Please forgive us that we won't inform you again if there are any technology or software updates on our product. -
Page 3: Product Introduction
7.If using power tools, please be careful to slow down and stop when needed. 8.Two people are required for assembly. 9.Follow the intended uses only. Save the instructions. Product Introduction Part List (pcs) Item Slide Model Screws 4530.450-10 4530.500-10 4530.550-10 4530.600-10 Applicable Drawer Sliding Length Max. Load Model Length (inch) (mm) (lbs / kg) 4530.450-10... -
Page 4: Installation Procedure
Installation Dimensions (mm) Size (mm) Hole Pattern (mm) Travel Model (mm) 4530.450 128 224 352 4530.500 128 224 352 416 192 4530.550 128 224 352 416 224 4530.600 128 224 352 180 256 Installation Procedure ◆Note the following two points during installation: 1.Pay attention to the installation space on both sides.(Units:mm) - Page 5 2.2mm away from the front end of the cabinet.(Units:mm) STEP1:Cabinet Installation For Ball Bearing 1.Install the steel ball rail to the inside of the cabinet according to the large drawing of the screw. 2.The bead frame should be pushed flat with the file glue to facilitate the installation of the drawer.
- Page 6 STEP3:Drawer Installation On both sides of the inner rail to the upper middle rail file glue through the slot to install the drawer on. STEP4:Disassembel Drawer When removing the drawer, pull the drawer out by using the fork in the enlarged image to pull it out completely.
- Page 7 Manufacturer: Shanghaimuxinmuyeyouxiangongsi Address: Shuangchenglu 803nong11hao1602A-1609shi, baoshanqu, shanghai 200000 CN. Imported to AUS: SIHAO PTY LTD. 1 ROKEVA STREETEASTWOOD NSW 2122 Australia Imported to USA: Sanven Technology Ltd. Suite 250, 9166 Anaheim Place, Rancho Cucamonga, CA 91730 YH CONSULTING LIMITED. C/O YH Consulting Limited Office 147, Centurion House, London Road, Staines-upon-Thames, Surrey, TW18 4AX E-CrossStu GmbH...
- Page 8 Technical Support and E-Warranty Certificate www.vevor.com/support...
- Page 9 Machine Translated by Google Assistance t echnique e t c ertificat d e g arantie é lectronique w ww.vevor.com/support GLISSIÈRES D E T IROIRS MODÈLE:4530 Nous c ontinuons à n ous e ngager à v ous f ournir d es o utils à d es p rix c ompétitifs.
- Page 10 à n ous c ontacter : A ssistance t echnique e t c ertificat d e g arantie électronique w ww.vevor.com/support Il s 'agit d e l a n otice d 'utilisation d 'origine. V euillez l ire a ttentivement t outes l es ...
- Page 11 9. R especter u niquement l es u sages p révus. C onserver l es i nstructions. Présentation d u p roduit Liste d es p ièces ( pcs) Article Glisser Modèle 4530.45010 4530.50010 4530.55010 4530.60010 Charge m ax. Tiroir a pplicable Longueur ...
- Page 12 4530.450 4 50 4 46 4 50 1 28 2 24 3 52 / 1 60 3 52 4530.500 5 00 4 96 5 00 1 28 2 24 3 52 4 16 1 92 4 16 4530.550 5 50 5 46 5 50 1 28 2 24 3 52 4 16 2 24 4 48 4530.600 ...
- Page 13 Machine Translated by Google À 2 ,2 m m d e l 'extrémité a vant d e l 'armoire. ( Unités : m m) ÉTAPE 1 : I nstallation d e l 'armoire p our r oulement à b illes 1 . I nstallez le ...
- Page 14 Machine Translated by Google ÉTAPE 3 : I nstallation d u t iroir. D es d eux côtés d u r ail i ntérieur j usqu'au r ail c entral s upérieur, c ollez l a l ime à t ravers l a f ente p our i nstaller l e t iroir. ÉTAPE ...
- Page 15 Machine Translated by Google Fabricant : S hanghaimuxinmuyeyouxiangongsi A dresse : Shuangchenglu 8 03nong11hao1602A1609shi, b aoshanqu, s hanghai 2 00000 C N. Importé e n A US : S IHAO P TY L TD. 1 R OKEVA S TREETEASTWOOD N SW 2 122 Australie ...
- Page 16 Machine Translated by Google Assistance t echnique e t c ertificat d e g arantie électronique w ww.vevor.com/support...
- Page 17 Machine Translated by Google Technischer Support und E-Garantie-Zertifikat www.vevor.com/support SCHUBLADENFÜHRUNGEN MODELL:4530 Wir sind weiterhin bestrebt, Ihnen Werkzeuge zu wettbewerbsfähigen Preisen anzubieten. „Sparen Sie die Hälfte“, „Halber Preis“ oder andere ähnliche Ausdrücke, die wir verwenden, stellen nur eine Schätzung der Ersparnis dar, die Sie beim Kauf bestimmter Werkzeuge bei uns im Vergleich zu den großen Topmarken erzielen können, und decken nicht unbedingt alle von uns...
- Page 18 Dies ist die Originalanleitung. Bitte lesen Sie alle Anweisungen sorgfältig durch, bevor Sie das Gerät in Betrieb nehmen. VEVOR behält sich eine klare Auslegung unserer Bedienungsanleitung vor. Das Erscheinungsbild des Produkts richtet sich nach dem Produkt, das Sie erhalten haben. Bitte verzeihen Sie uns, dass wir Sie nicht erneut informieren, wenn es Technologie- oder Software-Updates für unser Produkt gibt.
- Page 19 8.Für die Montage werden zwei Personen benötigt. 9. Befolgen Sie nur die vorgesehenen Verwendungszwecke. Bewahren Sie die Anweisungen auf. Produkteinführung Stückliste (Stk.) Artikel Gleiten Modell Schrauben 4530.450-10 4530.500-10 4530.550-10 4530.600-10 Max. Belastung Anwendbare Schublade Gleitlänge Modell Länge (Zoll) (mm) (Pfund / kg) 4530.450-10...
- Page 20 L1 L2 ABCDE (mm) 4530.450 450 446 450 128 224 352 / 160 352 4530.500 500 496 500 128 224 352 416 192 416 4530.550 550 546 550 128 224 352 416 224 448 4530.600 600 596 600 128 224 352 180 256 512 Installationsverfahren •Beachten Sie während der Installation die folgenden...
- Page 21 Machine Translated by Google 2,2 mm vom vorderen Ende des Gehäuses entfernt. (Einheiten: mm) SCHRITT 1: Schrankinstallation für Kugellager 1. Installieren Sie die Stahlkugelschiene gemäß der großen Zeichnung der Schraube an der Innenseite des Schranks. 2.Um den Einbau der Schublade zu erleichtern, sollte der Profilrahmen mit dem Feilenkleber flach gedrückt werden.
- Page 22 Machine Translated by Google SCHRITT 3: Schubladeninstallation. Kleben Sie auf beiden Seiten der Innenschiene durch den Schlitz der oberen Mittelschiene Kleber auf, um die Schublade zu installieren. SCHRITT 4: Schublade zerlegen. Ziehen Sie beim Entfernen der Schublade diese mithilfe der Gabel in der vergrößerten Abbildung vollständig heraus.
- Page 23 Machine Translated by Google Hersteller: Shanghaimuxinmuyeyouxiangongsi Adresse: Shuangchenglu 803nong11hao1602A-1609shi, baoshanqu, Shanghai 200000 CN. Importiert nach AUS: SIHAO PTY LTD. 1 ROKEVA STREETEASTWOOD NSW 2122 Australien Importiert nach USA: Sanven Technology Ltd. Suite 250, 9166 Anaheim Place, Rancho Cucamonga, CA 91730 YH CONSULTING LIMITED.
- Page 24 Machine Translated by Google Technischer Support und E-Garantie-Zertifikat www.vevor.com/support...
- Page 25 Machine Translated by Google Supporto tecnico e certificato di garanzia elettronica www.vevor.com/support GUIDE PER CASSETTI MODELLO:4530 Continuiamo a impegnarci per fornirvi strumenti a prezzi competitivi. "Risparmia la metà", "Metà prezzo" o qualsiasi altra espressione simile da noi utilizzata rappresenta solo una stima del risparmio che potresti ottenere acquistando determinati utensili con noi rispetto ai principali marchi principali e non significa necessariamente coprire tutte le categorie di utensili da noi offerti.
- Page 26 Questa è l'istruzione originale, si prega di leggere attentamente tutte le istruzioni del manuale prima di utilizzare. VEVOR si riserva una chiara interpretazione del nostro manuale utente. L'aspetto del prodotto sarà soggetto al prodotto ricevuto. Vi preghiamo di perdonarci se non vi informeremo di nuovo se ci sono aggiornamenti tecnologici o software sul nostro prodotto.
-
Page 27: Introduzione Al Prodotto
8. Per il montaggio sono necessarie due persone. 9. Seguire solo gli usi previsti. Conservare le istruzioni. Introduzione al prodotto Elenco dei pezzi (pz) Articolo Diapositiva Modello Viti 4530.450-10 4530.500-10 4530.550-10 4530.600-10 Carico massimo Cassetto applicabile Lunghezza scorrevole Modello (mm) - Page 28 L1 L2 ABCDE Corsa (mm) 4530.450 450 446 450 128 224 352 / 160 352 4530.500 500 496 500 128 224 352 416 192 416 4530.550 550 546 550 128 224 352 416 224 448 4530.600 600 596 600 128 224 352 180 256 512 Procedura di installazione •Notare i due punti seguenti durante l'installazione:...
- Page 29 Machine Translated by Google A 2,2 mm di distanza dall'estremità anteriore del mobile. (Unità: mm) FASE 1: Installazione del cuscinetto a sfere nel mobile 1. Installare la guida a sfere in acciaio all'interno del mobile seguendo il disegno grande della vite.
- Page 30 Machine Translated by Google FASE 3: Installazione del cassetto Su entrambi i lati della guida interna, fino alla guida centrale superiore, applicare la colla attraverso la fessura per installare il cassetto. FASE 4: Smontare il cassetto Quando si rimuove il cassetto, estrarlo completamente utilizzando la forcella nell'immagine ingrandita. - 5 -...
- Page 31 Machine Translated by Google Produttore: Shanghaimuxinmuyeyouxiangongsi Indirizzo: Shuangchenglu 803nong11hao1602A-1609shi, baoshanqu, shanghai 200000 CN. Importato in AUS: SIHAO PTY LTD. 1 ROKEVA STREETEASTWOOD NSW 2122 Australia Importato in USA: Sanven Technology Ltd. Suite 250, 9166 Anaheim Place, Rancho Cucamonga, CA 91730 YH CONSULTING LIMITED. C/O YH Consulting Limited Office 147, Centurion House, London Road, Staines-upon-Thames, Surrey, TW18 4AX RAPPRESENTANZA DEL REGNO UNITO...
- Page 32 Machine Translated by Google Supporto tecnico e certificato di garanzia elettronica www.vevor.com/support...
- Page 33 Machine Translated by Google Soporte t écnico y c ertificado d e g arantía e lectrónica w ww.vevor.com/support GUÍAS P ARA C AJONES MODELO:4530 Seguimos c omprometidos a b rindarle h erramientas a p recios c ompetitivos.
- Page 34 Machine Translated by Google GUÍAS P ARA C AJONES MODELO:4530 ¿NECESITA A YUDA? ¡ CONTÁCTENOS! ¿Tiene p reguntas s obre e l p roducto? ¿ Necesita a sistencia t écnica? N o d ude e n p onerse e n ...
- Page 35 9. S iga ú nicamente l os u sos p revistos. G uarde l as i nstrucciones. Introducción d el p roducto Lista d e p iezas ( uds.) Artículo Deslizar Modelo Tornillos 4530.45010 4530.50010 4530.55010 4530.60010 Carga m áx. Cajón a plicable Longitud d eslizante...
- Page 36 4530.450 4 50 4 46 4 50 1 28 2 24 3 52 / 1 60 3 52 4530.500 5 00 4 96 5 00 1 28 2 24 3 52 4 16 1 92 4 16 4530.550 5 50 5 46 5 50 1 28 2 24 3 52 4 16 2 24 4 48 4530.600 ...
- Page 37 Machine Translated by Google A 2 ,2 m m d el e xtremo f rontal d el g abinete. ( Unidades: m m) PASO 1 : I nstalación d el g abinete p ara c ojinetes d e b olas 1 . Instale ...
- Page 38 Machine Translated by Google PASO 3 : I nstalación d el c ajón E n ambos l ados d el r iel i nterior h asta e l r iel c entral s uperior, a plique p egamento a t ravés d e l a ranura ...
- Page 39 Machine Translated by Google Fabricante: S hanghaimuxinmuyeyouxiangongsi D irección: Shuangchenglu 8 03nong11hao1602A1609shi, b aoshanqu, s hanghai 2 00000 C N. Importado a A US: S IHAO P TY L TD. 1 R OKEVA S TREETEASTWOOD N SW 2 122 Australia ...
- Page 40 Machine Translated by Google Soporte t écnico y c ertificado d e g arantía electrónica w ww.vevor.com/support...
- Page 41 Machine Translated by Google Wsparcie techniczne i certyfikat gwarancji elektronicznej www.vevor.com/support PROWADNICE SZUFLAD MODEL:4530 Nadal staramy się oferować Państwu narzędzia w konkurencyjnych cenach. „Oszczędzaj połowę”, „Połowa ceny” lub inne podobne wyrażenia używane przez nas stanowią jedynie szacunkowe oszczędności, jakie możesz uzyskać, kupując u nas określone narzędzia w porównaniu z głównymi markami i niekoniecznie oznaczają...
- Page 42 E-Gwarancji www.vevor.com/support To jest oryginalna instrukcja, przed użyciem należy uważnie przeczytać wszystkie instrukcje. VEVOR zastrzega sobie jasną interpretację naszej instrukcji obsługi. Wygląd produktu będzie zależał od produktu, który otrzymałeś. Prosimy o wybaczenie, że nie poinformujemy Cię ponownie, jeśli w naszym produkcie pojawią się jakiekolwiek aktualizacje technologiczne lub oprogramowania.
-
Page 43: Wprowadzenie Do Produktu
8. Do montażu potrzebne są dwie osoby. 9. Postępuj wyłącznie zgodnie z przeznaczeniem. Zachowaj instrukcje. Wprowadzenie do produktu Lista części (szt.) Przedmiot Slajd Model Śruby 4530.450-10 4530.500-10 4530.550-10 4530.600-10 Odpowiednia szuflada Długość przesuwania Maksymalne obciążenie Model Długość (cale) (mm) (funty / kg) 4530.450-10... - Page 44 (mm) L1 L2 ABCDE 4530.450 450 446 450 128 224 352 / 160 352 4530,500 500 496 500 128 224 352 416 192 416 4530.550 550 546 550 128 224 352 416 224 448 4530.600 600 596 600 128 224 352 180 256 512 Procedura instalacji •Podczas...
- Page 45 Machine Translated by Google 2,2 mm od przedniej krawędzi szafki. (Jednostki: mm) KROK 1: Montaż szafy z łożyskiem kulkowym 1. Zamontuj stalową szynę kulkową wewnątrz szafy zgodnie z dużym rysunkiem śruby. 2. Ramkę należy docisnąć płasko za pomocą kleju do pilników, aby ułatwić montaż szuflady. KROK 2: Montaż...
- Page 46 Machine Translated by Google KROK 3: Montaż szuflady Po obu stronach wewnętrznej szyny, przyklej klej do górnej środkowej szyny przez szczelinę, aby zamontować szufladę. KROK 4: Rozmontowanie szuflady. Wyjmując szufladę, wyciągnij ją całkowicie, używając widelca widocznego na powiększonym obrazku. - 5 -...
- Page 47 Machine Translated by Google Producent: Shanghaimuxinmuyeyouxiangongsi Adres: Shuangchenglu 803nong11hao1602A-1609shi, baoshanqu, szanghaj 200000 CN. Importowane do AUS: SIHAO PTY LTD. 1 ROKEVA STREETEASTWOOD NSW 2122 Australia Importowane do USA: Sanven Technology Ltd. Suite 250, 9166 Anaheim Place, Rancho Cucamonga, CA 91730 YH CONSULTING LIMITED.
- Page 48 Machine Translated by Google Wsparcie techniczne i certyfikat gwarancji elektronicznej www.vevor.com/support...
- Page 49 Machine Translated by Google Technische ondersteuning en e-garantiecertificaat www.vevor.com/support LADESCHUIF MODEL:4530 Wij streven er voortdurend naar om u gereedschappen tegen concurrerende prijzen te leveren. "Save Half", "Half Price" of andere soortgelijke uitdrukkingen die wij gebruiken, geven alleen een schatting weer van de besparingen die u kunt behalen door bepaalde gereedschappen bij ons te kopen in vergelijking met de grote topmerken en betekent niet noodzakelijkerwijs dat alle categorieën...
- Page 50 Dit is de originele instructie, lees alle handleidingen zorgvuldig door voordat u het product gebruikt. VEVOR behoudt zich een duidelijke interpretatie van onze gebruikershandleiding voor. Het uiterlijk van het product is afhankelijk van het product dat u hebt ontvangen.
- Page 51 7. Als u elektrisch gereedschap gebruikt, wees dan voorzichtig en vertraag en stop wanneer u nodig. 8. Voor de montage zijn twee personen nodig. 9. Volg alleen het beoogde gebruik. Bewaar de instructies. Productintroductie Onderdelenlijst (stuks) Item Schuif Model Schroeven 4530.450-10 4530.500-10 4530.550-10 4530.600-10 Toepasselijke lade Schuiflengte Maximale belasting Model Lengte (inch) (mm) (lbs/kg) 4530.450-10...
- Page 52 L1L2 ABCDE Slag (mm) 4530.450 450 446 450 128 224 352 / 160 352 4530.500 500 496 500 128 224 352 416 192 416 4530.550 550 546 550 128 224 352 416 224 448 4530.600 600 596 600 128 224 352 180 256 512 Installatieprocedure •Let op...
- Page 53 Machine Translated by Google 2,2 mm vanaf de voorkant van de kast. (Eenheid: mm) STAP 1: Installatie van de kast voor kogellagers 1. Installeer de stalen kogelrail aan de binnenkant van de kast volgens de grote tekening van de schroef. 2.
- Page 54 Machine Translated by Google STAP 3: Installatie van de lades Lijm de lades aan beide zijden van de binnenrail door de sleuf aan de bovenste middenrail om de lade te installeren. STAP 4: Demonteer de lade . Wanneer u de lade verwijdert, trekt u de lade eruit met behulp van de vork op de vergrote afbeelding om deze er volledig uit te trekken.
- Page 55 Machine Translated by Google Fabrikant: Shanghaimuxinmuyeyouxiangongsi Adres: Shuangchenglu 803nong11hao1602A-1609shi, baoshanqu, shanghai 200000 CN. Geïmporteerd naar AUS: SIHAO PTY LTD. 1 ROKEVA STREETEASTWOOD NSW 2122 Australië Geïmporteerd naar de VS: Sanven Technology Ltd. Suite 250, 9166 Anaheim Place, Rancho Cucamonga, CA 91730 YH CONSULTING LIMITED.
- Page 56 Machine Translated by Google Technische ondersteuning en e- garantiecertificaat www.vevor.com/support...
- Page 57 Machine Translated by Google Teknisk support och e-garanticertifikat www.vevor.com/support LÅDA GLÄDDER MODELL: 4530 Vi fortsätter att vara engagerade i att ge dig verktyg till konkurrenskraftiga priser. "Spara hälften", "halva priset" eller andra liknande uttryck som används av oss representerar bara en uppskattning av besparingar du kan dra nytta av att köpa vissa verktyg hos oss jämfört med de stora toppmärkena och betyder inte nödvändigtvis att täcka...
- Page 58 Detta är den ursprungliga instruktionen, läs alla instruktioner noggrant innan du använder den. VEVOR reserverar sig för en tydlig tolkning av vår användarmanual. Utseendet på produkten är beroende av den produkt du fått. Ursäkta oss att vi inte kommer att informera dig igen om det finns någon teknik eller mjukvaruuppdateringar på...
- Page 59 7.Om du använder elverktyg, var noga med att sakta ner och stoppa när behövs. 8.Två personer krävs för montering. 9. Följ endast avsedd användning. Spara instruktionerna. Produktintroduktion Dellista (st) Punkt Glida Modell Skruvar 4530.450-10 4530.500-10 4530.550-10 4530.600-10 Max. Ladda Tillämplig låda Glidlängd Modell Längd (tum) (mm) (lbs/kg) 4530.450-10...
- Page 60 (mm) L1 L2 ABCDE 4530.450 450 446 450 128 224 352 / 160 352 4530.500 500 496 500 128 224 352 416 192 416 4530.550 550 546 550 128 224 352 416 224 448 4530,600 600 596 600 128 224 352 180 256 512 Installationsprocedur •...
- Page 61 Machine Translated by Google 2,2 mm bort från skåpets främre ände.(Enheter:mm) STEG 1: Skåpsinstallation för kullager 1. Installera stålkulskenan på insidan av skåpet enligt skruvens stora ritning. 2. Pärlramen ska skjutas platt med fillimmet för att underlätta monteringen av lådan. STEG 2: Installation av lådslid Skruva fast kulskenan på...
- Page 62 Machine Translated by Google STEG 3:Lådinstallation På båda sidor av den inre skenan till den övre mittskenan limma genom skåran för att installera lådan på. STEG 4: Ta isär lådan När du tar bort lådan, dra ut lådan genom att använda gaffeln i den förstorade bilden för att dra ut den helt. - 5 -...
- Page 63 Machine Translated by Google Tillverkare: Shanghaimuxinmuyeyouxiangongsi Adress: Shuangchenglu 803nong11hao1602A-1609shi, baoshanqu, shanghai 200000 CN. Importerad till AUS: SIHAO PTY LTD. 1 ROKEVA STREETEASTWOOD NSW 2122 Australien Importerad till USA: Sanven Technology Ltd. Suite 250, 9166 Anaheim Place, Rancho Cucamonga, CA 91730 YH CONSULTING LIMITED. C/O YH Consulting Limited Office 147, Centurion House, London UK REP Road, Staines-upon-Thames, Surrey, TW18 4AX...
- Page 64 Machine Translated by Google Teknisk support och e-garanticertifikat www.vevor.com/support...