D-Link DCS-7110 Guide D'installation
Table des Matières
Les langues disponibles
Les langues disponibles
Quick Installation Guide
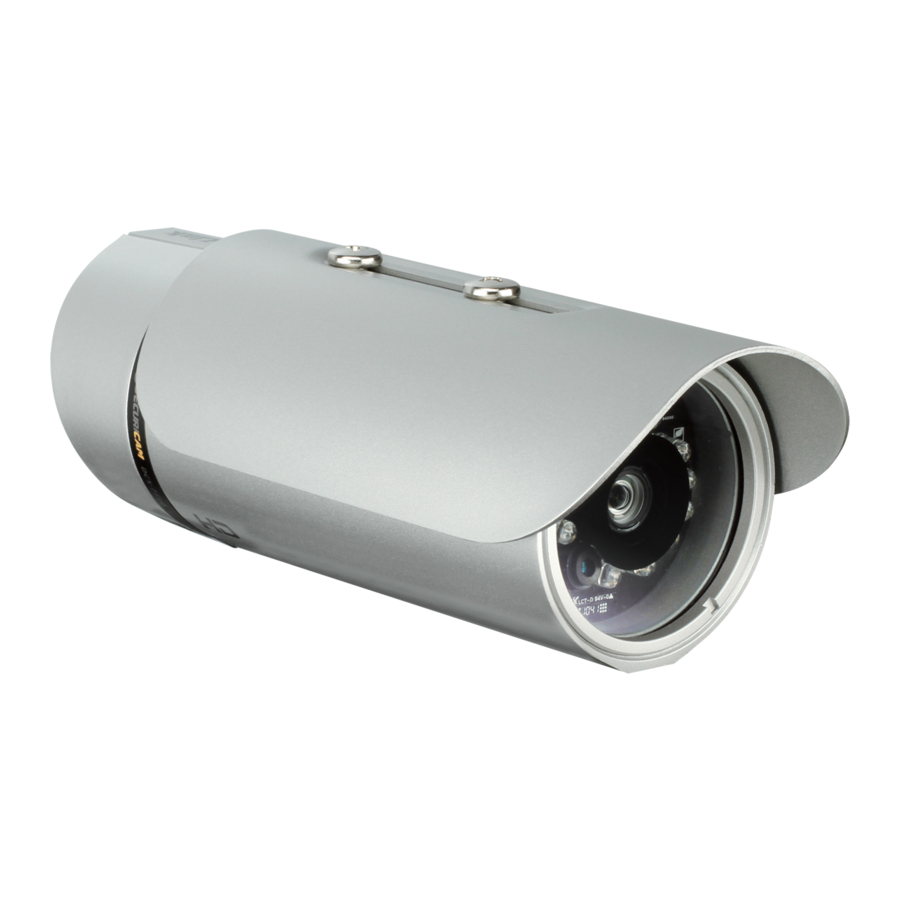
HD IR Outdoor Network Camera
This document will guide you through the basic installation
process for your new D-Link Network Camera.
DCS-7110
Quick Installation Guide
Installationsanleitung
Guide d'installation
Guía de instalación
Guida di Installazione
Documentation also available on
CD and via the D-Link Website
Table des Matières

Manuels Connexes pour D-Link DCS-7110


Sommaire des Matières pour D-Link DCS-7110
-
Page 16: Procédure D'installation
DCS-7110 sur votre réseau. Pour obtenir des informations complémentaires sur l'utilisation de la caméra, consultez le Manuel d'utilisation, disponible sur le CD joint à ce coffret, ou sur le site Web d'assistance D-Link. Procédure d'installation 1. Vérifiez le contenu de la boîte par rapport à la liste ci-dessous. -
Page 17: Description Du Matériel
Raccordement à une alimentation CA de 24V Connecteur RS485 Connecteurs RS485 pour périphériques externes Connecteurs DI/DO : Les connecteurs DI/DO offrent une interface physique permettant d’envoyer et de recevoir des signaux numérique vers et depuis plusieurs périphériques externes. D-Link DCS-7110 Quick Install Guide... -
Page 18: Installation Du Matériel
Alignez la caméra au champ de vision correct et verrouillez la vis en la serrant. 7. Les câbles de la caméra peuvent être installés via un grand trou différent percé dans le mur, ou à l'aide d'un conduit de câble externe. D-Link DCS-7110 Quick Install Guide... -
Page 19: Connexion Des Câbles
La fonction PoE servira à transmettre l'alimentation et les données par un seul câble. Remarque : Une fois l'alimentation établie, le voyant devient rouge. Lorsque le périphérique a obtenu une adresse IP et qu'il est accessible, ce voyant devient vert. D-Link DCS-7110 Quick Install Guide... -
Page 20: Configuration À L'aide De L'assistant
4. Configuration à l'aide de l'assistant Insérez le CD de la DCS-7110 dans le lecteur de CD-ROM de l'ordinateur pour lancer l'installation. Si la fonction d'exécution automatique de votre ordinateur est désactivée ou si le dispositif de lancement D-Link ne parvient pas à démarrer automatiquement, cliquez sur Démarrer >... - Page 21 Cliquez sur l'icône D-Link Setup Wizard SE (Assistant de configuration D-Link SE) créée dans le menu Démarrer. Démarrer > D-Link > Setup Wizard SE (Assistant de configuration SE) L'Assistant de configuration s'ouvre et affiche les adresses MAC et IP de votre ou vos caméras. Si un serveur DHCP se trouve sur votre réseau, une...
-
Page 22: Affichage De La Caméra Dans Un Navigateur Web
Cliquez sur l'icône D-Link Setup Wizard SE (Assistant de configuration D-Link SE) créée dans le menu Démarrer. Démarrer > D-Link > Setup Wizard SE (Assistant de configuration SE) Sélectionnez la caméra, puis cliquez sur le bouton « Link » (Connexion) pour accéder à la configuration Web. - Page 37 NOTES...
- Page 38 NOTES...
- Page 39 NOTES...
- Page 40 Ver.1.00(EU) 2010/11/26 625013510G...