Electrohome CR35 Manuel De L'utilisateur
Masquer les pouces
Voir aussi pour CR35:
- Guide de démarrage rapide (2 pages) ,
- Manuel de l'utilisateur (22 pages)
Table des Matières
Publicité
Les langues disponibles
Les langues disponibles
Liens rapides
USER MANUAL
MANUEL DE L'UTILISATEUR
v1.01
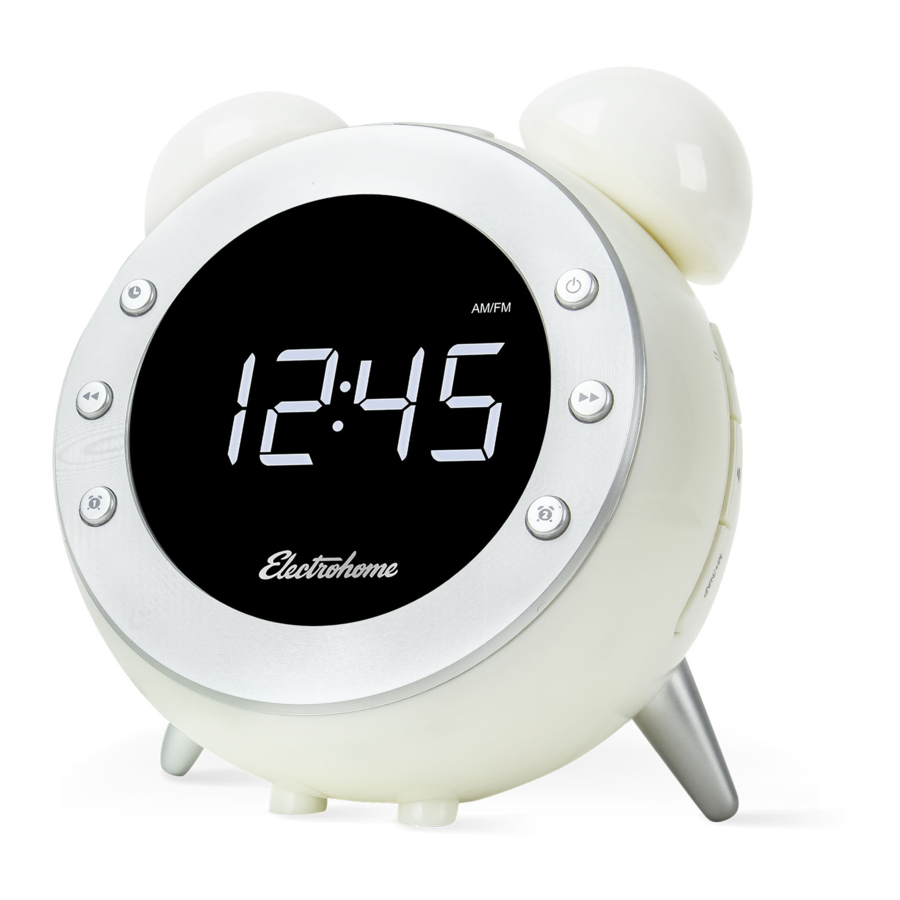
Retro Alarm Clock Radio
Radio-Réveil Rétro
CR35/CR35W
FM
AM
Thank you for your purchase of this Electrohome product. Please read this instruction manual carefully
before using product to ensure proper use. Keep this manual in a safe place for future reference.
Merci d'avoir fait l'achat de cet appareil Electrohome®. Veuillez lire ce manuel attentivement avant de
faire fonctionner l'appareil pour vous assurer de l'utiliser correctement. Conservez ce manuel dans un
endroit sûr afin de pouvoir vous y référer au besoin.
electrohome.com
Publicité
Table des Matières
Dépannage

Manuels Connexes pour Electrohome CR35

Sommaire des Matières pour Electrohome CR35
- Page 1 Radio-Réveil Rétro CR35/CR35W Thank you for your purchase of this Electrohome product. Please read this instruction manual carefully before using product to ensure proper use. Keep this manual in a safe place for future reference. Merci d’avoir fait l’achat de cet appareil Electrohome®. Veuillez lire ce manuel attentivement avant de faire fonctionner l’appareil pour vous assurer de l’utiliser correctement.
- Page 2 NEED HELP? DO NOT RETURN THIS PRODUCT TO THE STORE Please contact an ELECTROHOME® customer support representative first regarding any additional information on product features, specifications or assistance with setup. Please contact us via one of the methods below: Support: www.electrohome.com/support...
-
Page 3: Electrohome Warranty
ELECTROHOME® WARRANTY Thank you for choosing Electrohome. We guarantee your investment in our products is a solid one! Extensive thought, research, planning and design goes into every product we make. High quality components combined with precision manufacturing allows us to maintain the highest possible production standards. All items are guaranteed against defects in materials and craftsmanship. -
Page 4: Warning
WARNINGS WARNING To reduce the risk of fire or electric shock, do not expose this appliance to rain or moisture. CAUTION Use of controls or adjustments or performance of procedures other than those specified may result in hazardous radiation exposure. RISK OF ELECTRIC SHOCK DO NOT OPEN CAUTION - TO REDUCE THE RISK OF ELECTRIC SHOCK, DO NOT REMOVE COVER (OR BACK). -
Page 5: Important Safety Information
IMPORTANT SAFETY INFORMATION WARNING: Please refer to the information on exterior bottom enclosure for electrical and safety information before installing or operating the apparatus. Clean only with a dry cloth. Do not block any ventilation openings. Install in accordance with the manufacturer’ s instructions. Do not install near any heat sources such as radiators, heat registers, stoves, or other apparatus (including amplifiers) that produce heat. -
Page 6: Replacement Parts
IMPORTANT SAFETY INFORMATION Unwind and straighten the power cord before use. 27. Damage Requiring Service Unplug the power cord and refer servicing to qualified service professional under the following conditions: A. If liquid has been spilled on or into the product. B. - Page 7 IMPORTANT SAFETY INFORMATION NOTE: This equipment has been tested and found to comply with the limits for a Class B digital device, pursuant to part 15 of the FCC Rules. These limits are designed to provide reasonable protection against harmful interference in a residential installation. This equipment generates, uses and can radiate radio frequency energy and, if not installed and used in accordance with the instructions, may cause harmful interference to radio communications.
-
Page 8: Table Des Matières
TABLE OF CONTENTS NEED HELP?........................2 ELECTROHOME WARRANTY ....................3 WARNING ........................4 WHAT’S INCLUDED ....................... 10 PRODUCT INFORMATION ....................10 TOP ............................10 FRONT ............................11 BACK/BOTTOM ..........................12 OPERATING INSTRUCTIONS ..................13 CONNECTING POWER ........................13 BATTERY BACKUP ........................13 INSTALLING THE BATTERY ......................14 DAYLIGHT SAVING TIME (DST) / SUMMER TIME ...............15 SETTING THE DATE &... - Page 9 TABLE OF CONTENTS BESOIN D’AIDE? ......................24 GARANTIE ELECTROHOME® ..................25 AVERTISSEMENT ......................26 CE QUI EST INCLUS ....................... 31 INFORMATIONS DU PRODUIT ..................31 DESSUS .............................31 DEVANT .............................32 ARRIÈRE / DESSOUS ........................33 UTILISATION........................ 34 CONNEXION D’ALIMENTATION ....................34 CIRCUIT SECOURS À PILES ......................34 INSTALLATION DE LA PILE ......................35...
-
Page 10: What's Included
WHAT’S INCLUDED • Retro Wake-up light Clock Radio • 1 x 3V, CR2032 Flat Lithium battery • Quick Start Guide • 1 Year Warranty • Instructional Manual • Lifetime Customer Support PRODUCT INFORMATION SIDE 1. Wake-up light/ Wake-up light 2. Motion Activation Sensor / Snooze / Wake-up light ON-OFF 3. -
Page 11: Front
PRODUCT INFORMATION GET TO KNOW YOUR CLOCK RADIO / APPRENDRE À CONNAÎTRE VOTRE RADIO RÉVEIL FRONT Front / Devant Top / Dessus Left / Gauche LED Screen / Écran DEL Set Y-M-D / 24h-12h Clock / Time Indicates time is set to PM View Y-M-D-Temperature (press &... -
Page 12: Back/Bottom
PRODUCT INFORMATION BACK/BOTTOM Speaker FM Antenna Air vents Indoor Temperature Sensor Battery compartment for 1 x 3V, AC Power Supply CR2032 Flat Lithium battery - 12 -... -
Page 13: Operating Instructions
OPERATING INSTRUCTIONS CONNECTING POWER The Retro Alarm Clock Radio is equipped with an "AUTO TIME SET" feature. When power is connected, the clock display will flash '2' which is TIME ZONE 2 (Eastern time) and the default TIME ZONE setting. To select TIME ZONE 2 (Eastern time) as your default time zone: •... -
Page 14: Installing The Battery
OPERATING INSTRUCTIONS INSTALLING THE BATTERY Using a small Phillips Head screwdriver, remove the screw from the battery panel on the bottom of the unit. Remove the battery compartment panel. Remove/properly dispose of depleted battery and replace with new, 3V, CR2032 Flat Lithium battery. -
Page 15: Daylight Saving Time (Dst) / Summer Time
OPERATING INSTRUCTIONS DAYLIGHT SAVING TIME (DST) / SUMMER TIME Daylight Saving Time/Summer Time is automatically preset. • Daylight saving time begins at: 2:00 AM on the second Sunday of March. • Standard time begins at: 2:00 AM on the first Sunday of November. Note: DST is set to ON by default. -
Page 16: Setting Alarm 1 & Alarm 2
OPERATING INSTRUCTIONS Press the button to DECREASE numbers or to toggle through settings. Press the button to INCREASE numbers or to toggle through the different settings. Press the button after each setting to confirm your selection and move on to the next setting. PM appears on the LED screen when time is set to PM;... - Page 17 OPERATING INSTRUCTIONS ALARM MODES allows you to set more than one alarm in a week i.e. ALARM 1 set to wake you Monday- Friday and ALARM 2 set to wake you on weekends. The ALARM MODE settings are as follows: 1-5 : Monday to Friday 6-7 : Saturday &...
- Page 18 OPERATING INSTRUCTIONS When AM or FM radio is selected AL 2 Hour > AL 2 Min > AL 2 Alarm Modes >AL 2 Radio Station > AL 2 Radio Volume > L10 (Wake-up light brightness) Press the buttons to decrease/increase the HOUR; press the button to confirm HOUR.
-
Page 19: Alarm Wake-Up Light
OPERATING INSTRUCTIONS ALARM WAKE-UP LIGHT The Alarm Wake-up light will gradually come on 30 minutes before the set alarm time. The light will start out at a low level and increase gradually to your preset max level (See "SETTING ALARM 1 & ALARM 2"). •... -
Page 20: Nap Timer
OPERATING INSTRUCTIONS NAP TIMER The nap timer allows you to set a buzzer alarm to go off after a preset amount of time ranging from 90 minutes to 10 minutes. With radio off, press the button to turn on NAP timer. Press the button to toggle through the preset times;... -
Page 21: View Year-Month/Day-Temperature (Change °C To °F)
OPERATING INSTRUCTIONS 6. Press and hold the buttons for one second to scan back/forward through the stations; the unit will automatically scan to the next broadcasting station. Please ensure that the FM antenna is completely unrolled and extended for best FM reception. The AM band uses an internal directional aerial. -
Page 22: Troubleshooting
TROUBLESHOOTING Please consult the Troubleshooting chart below before communicating with ELECTROHOME Customer Support. SYMPTOM POSSIBLE CAUSE POSSIBLE SOLUTION GENERAL Power does not come on AC cord not plugged in Insert plug firmly into AC outlet RADIO No Sound Power is not on... -
Page 23: Specifications
SPECIFICATIONS Display Size 0.8" (2.03cm) Automatic Time Set Battery Back-up for Time PLL Digital Radio Tuner Time/Date Restore Radio Station Pre-sets Yes 10 AM / 10 FM Dual Alarm Yes, with optional weekend skip Alarm Options Buzzer & Radio with gradual Alarm Wake-up light Calendar Display Indoor Temperature Reading Adjustable Display Brightness... -
Page 24: Besoin D'aide
NE RETOURNEZ PAS CE PRODUIT AU MAGASIN! Veuillez contacter d’abord un représentant du soutien à la clientèle ELECTROHOME® pour toute information supplémentaire sur les caractéristiques du produit, les spécifications ou pour de l’aide avec l’installation. Veuillez nous contacter par l’une des méthodes ci-dessous: Soutien: www.electrohome.com/support... -
Page 25: Garantie Electrohome
Si votre produit acheté démontre un défaut du fabricant pendant la période de garantie et qu’il ne fonctionne pas correctement, Electrohome réparera votre produit et paiera toutes les pièces, les frais de main-d’ o euvre et les frais de retour à la réception du produit Electrohome et sa preuve d’achat. -
Page 26: Avertissement
AVERTISSEMENT AVERTISSEMENT Pour réduire le risque d’incendie ou de choc électrique, n’ e xposez pas cet apareil à la pluie ni à l’humidité. MISE EN GARDE: Le réglage ou l’utilisation de commandes ou d’ajustements qui ne sont pas spécifiés dans ceguide peuvent vous exposer à... -
Page 27: Consignes De Sécurité Importantes
CONSIGNES DE SÉCURITÉ IMPORTANTES ATTENTION: Veuillez consulter le dessous du boîtier extérieur pour les consignes électriques et de sécurité avant d’installer ou d’utiliser l’appareil. N’utilisez qu’un linge doux et sec pour le nettoyage. Ne bloquez aucun des orifices de ventilation. Installez l’appareil conformément aux directives du fabricant. -
Page 28: Dommage Nécessitant Une Réparation
CONSIGNES DE SÉCURITÉ IMPORTANTES Ne placez aucune source de flamme, comme une bougie allumée, sur l’appareil. Veuillez utiliser l’appareil dans des climats modérés. Utilisez uniquement le chariot, le pied, le trépied, le support ou la table recommandé par le fabricant ou fourni avec l’appareil. - Page 29 CONSIGNES DE SÉCURITÉ IMPORTANTES DÉCLARATION IC CANICES-3 (B)/NMB-3(B) Son fonctionnement est soumis aux deux conditions suivantes: Cet équipement ne doit pas causer d’interférences, et Cet équipement doit accepter toute interférence, y compris les interférences capables de causer un mauvais fonctionnement de l’appareil Cette marque indique que ce produit ne doit pas être jeté...
- Page 30 CONSIGNES DE SÉCURITÉ IMPORTANTES Déclaration de la FCC sur la réglementation Cet appareil est conforme à la partie 15 des règlements de la FCC. Son fonctionnement est soumis aux deux conditions suivantes: cet équipement ne doit pas causer d’interférences nuisibles et cet équipement doit accepter toute interférence reçue, y compris les interférences capables de causer un mauvais fonctionnement Tout changement ou modification apportées à...
-
Page 31: Ce Qui Est Inclus
CE QUI EST INCLUS • Radio-réveil rétro avec veilleuse • 1 x Pile à plat au lithium 3V, CR2032 • Guide de démarrage rapide • Garantie d’un an • Manuel de l’utilisateur • Soutien à la clientèle à vie INFORMATIONS DU PRODUIT DESSUS CÔTÉ... -
Page 32: Devant
INFORMATIONS DU PRODUIT GET TO KNOW YOUR CLOCK RADIO / APPRENDRE À CONNAÎTRE VOTRE RADIO RÉVEIL DEVANT Front / Devant Top / Dessus Left / Gauche LED Screen / Écran DEL... -
Page 33: Arrière / Dessous
INFORMATIONS DU PRODUIT ARRIÈRE / DESSOUS Haut-parleur Antenne FM Grille d’aération Capteur de température intérieur Compartiment à pile pour 1 x pile à Adaptateur CA plat au lithium 3V, CR2032 - 33 -... -
Page 34: Utilisation
UTILISATION CONNEXION D’ALIMENTATION Le radio-réveil rétro est équippé avec la fonction « SYNCHRONISATION AUTOMATIQUE DE L’HEURE ». Lorsque l’appareil est alimenté, l’affichage de l’horloge clignote « 2 » qui représente le FUSEAU HORAIRE 2 (heure de l’ e st). Pour choisir FUSEAU HORAIRE 2 (heure de l’ e st) comme votre fuseau horaire par défaut: •... -
Page 35: Installation De La Pile
UTILISATION INSTALLATION DE LA PILE À l’aide d’un petit tournevis à tête cruciforme, retirez la vis dans le panneau du compartiment à pile sous l’appareil. Retirez le panneau du compartiment à pile. Retirez/jetez la pile déchargée en respectant les consignes de sécurité et remplacez-la par une pile à... -
Page 36: Heure Avancée (Ha) / Heure D'été
UTILISATION HEURE AVANCÉE (HA) / HEURE D’ÉTÉ Appuyez le bouton sur la touche pendant 3 secondes pour activer la fonction de l heure d’ é té (DST) ou désactiver. L’heure d’ é té est maintenant activée. L’heure avancée (HA) / l’heure d’ é té est préréglée automatiquement. •... -
Page 37: Appuyer Le Bouton
UTILISATION 1. Appuyez le bouton pour DIMINUER les numéros ou pour faire défiler les paramètres. 2. Appuyez le bouton pour AUGMENTER les numéros ou pour faire défiler les paramètres. 3. Appuyez le bouton après chaque réglage pour confirmer votre sélection et passer au prochain réglage. PM apparaît à... - Page 38 UTILISATION Les MODES ALARMES vous permettent de régler plus qu’une alerte par semaine, c.-à-d. ALARME 1 est réglée du lundi au vendredi et ALARME 2 est réglée pour les fins de semaine. Les réglages pour MODE ALARME sont les suivants: 1-5 : lundi au vendredi 6-7 : samedi et dimanche 1-7 : sur semaine...
-
Page 39: Lampe-Réveil Durant L'alarme
UTILISATION Lorsque la radio AM ou FM est sélectionné AL 2 Heure >AL 2 Minute > AL 2 Modes alarme >AL 2 Station Radio > AL 2 Volume Radio > L10 (Luminosité de la veilleuse) Appuyez le bouton pour diminuer/augmenter l’HEURE; appuyez le bouton pour confirmer l’HEURE. -
Page 40: Durée De L' Alarme
UTILISATION • Ou appuyez sur le bouton sur le côté de l’appareil. DURÉE DE L’ ALARME La SONNERIE ou la RADIO sonnera pour 30 minutes, si aucune touche n’ e st actionnée, l’appareil arrêtera automatiquement et reprendra à la même heure de réveil d’après l’horaire préréglé. -
Page 41: Cycle D'affichage
UTILISATION CYCLE D’AFFICHAGE La fonction CYCLE D’AFFICHAGE affiche à l’ é cran DEL l’HEURE, le MOIS / JOUR et la TEMPÉRATURE COURANTE en séquence. Avec la radio éteinte (bouton RADIO MARCHE/ARRÊT ), appuyer et maintenir appuyé le bouton CYCLE D’AFFICHAGE jusqu’à... -
Page 42: Affichage De L'année-Mois/Jour-Température (Changement °C À °F)
UTILISATION RÉGLER / RAPPEL DE STATIONS RADIO Appuyez le bouton RADIO MARCHE/ARRÊT pour alimenter la radio. Appuyez le bouton pour faire défiler les bandes AM et FM. Appuyez les boutons pour sélectionner la station de radio désirée. Appuyez et maintenir appuyé le bouton ;... -
Page 43: Dépannage
DÉPANNAGE Veuillez consulter le tableau de dépannage ci-dessous avant de communiquer avec le soutien ELECTROHOME. SYMPTÔME CAUSE POSSIBLE SOLUTION POSSIBLE GÉNÉRAL L’appareil ne s’allume pas Cordon d’alimentation n’est pas Insérez fermement la fiche dans branché la prise de courant RADIO... -
Page 44: Spécifications
SPÉCIFICATIONS Largeur de l’affichage 0,8po (2.03cm) Synchronisation automatique de l’heure Circuit secours à pile pour l’heure Syntonisateur numérique PLL Restaurer la date/l’heure Stations radio préréglées Oui 10 AM/ 10 FM Alarme double Oui, avec option de sauter la fin de semaine Options d’alarmes Sonnerie et radio avec lampe-réveil progressive Affichage calendrier...