Publicité
Les langues disponibles
Les langues disponibles
Liens rapides
https://tehnoteka.rs
Uputstvo za upotrebu (EN)
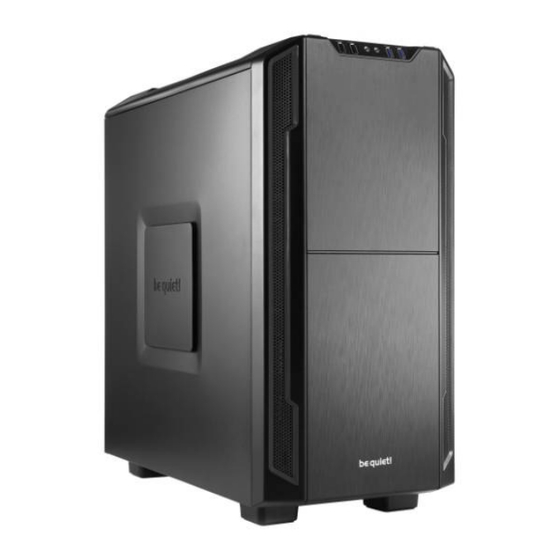
Be Quiet kućište Silent Base 600 BG006
Tehnoteka je online destinacija za upoređivanje cena i karakteristika bele tehnike,
potrošačke elektronike i IT uređaja kod trgovinskih lanaca i internet prodavnica u Srbiji.
Naša stranica vam omogućava da istražite najnovije informacije, detaljne karakteristike
i konkurentne cene proizvoda.
Posetite nas i uživajte u ekskluzivnom iskustvu pametne kupovine klikom na link:
https://tehnoteka.rs/p/be-quiet-kuciste-silent-base-600-bg006-akcija-cena/
Publicité

Manuels Connexes pour BE QUIET! Silent Base 600 BG006


Sommaire des Matières pour BE QUIET! Silent Base 600 BG006
- Page 1 Uputstvo za upotrebu (EN) Be Quiet kućište Silent Base 600 BG006 Tehnoteka je online destinacija za upoređivanje cena i karakteristika bele tehnike, potrošačke elektronike i IT uređaja kod trgovinskih lanaca i internet prodavnica u Srbiji. Naša stranica vam omogućava da istražite najnovije informacije, detaljne karakteristike i konkurentne cene proizvoda.
- Page 3 INDEX Glinde, October 2016 ENGLISH » Introduction ����������������������������������������������������������������������������������������������������������������������������������������������������������4 Scope of delivery ��������������������������������������������������������������������������������������������������������������������������������������������������4 Warranty ���������������������������������������������������������������������������������������������������������������������������������������������������������������4 Manufacturer’s details �����������������������������������������������������������������������������������������������������������������������������������������4 Copyright ��������������������������������������������������������������������������������������������������������������������������������������������������������������4 Specifications �������������������������������������������������������������������������������������������������������������������������������������������������������4 Installation process ����������������������������������������������������������������������������������������������������������������������������������������������5 Remove the side panels �����������������������������������������������������������������������������������������������������������������������������������29 Changing the door opening direction ���������������������������������������������������������������������������������������������������������������29 Optional fans/radiator installation������������������������������������������������������������������������������������������������������������������� 31 Installation of the motherboard �����������������������������������������������������������������������������������������������������������������������33 Installation of Power Supply unit �������������������������������������������������������������������������������������������������������������������34 Installation of a 5�25”...
- Page 4 Comment installer les périphériques 5�25’’ ? ��������������������������������������������������������������������������������������������������34 Comment installer les périphériques 3�5”/HDD ? �������������������������������������������������������������������������������������������35 Comment installer le rack disque dur 3 baies dans la baie 5,25’’ ? �����������������������������������������������������������������36 Comment installer des périphériques 2�5”/SSD ? �������������������������������������������������������������������������������������������38 Comment nettoyer les filtres ? �������������������������������������������������������������������������������������������������������������������������40 POLSKI »...
- Page 5 INTRODUCTION We are delighted you have chosen to buy our Silent Base 600 PC case� Please read the information here and carefully follow all the instructions prior to installation� Should you have further questions, please contact our customer service� See contact information in the manufacturer’s details section� SCOPE OF DELIVERY ∙...
- Page 6 Model Silent Base 600 Orange / Black / Sliver / Red / Green Article number BG005 (Orange), BG006 (Black), BG007 (Silver), BG008 (Red), BG009 (Green) Material 0�7mm SECC, ABS, nylon Case size (L x W x H), (mm) 495 x 230 x 493 Net weight (kg) 7�8 Main board size...
- Page 7 M3 x8 Flat head screws Secure 2�5” HDD/SSD #6-32 x 5 Flat head screws Secure 2.5" HDD cage tray M3 x 5 Round head screws Secure 5�25” device/ODD #6-32 x30 flat head screws Secure front intake fan #6-32 Hex head screws Rubber rail Mounting HDD to HDD cage Standoff...
- Page 8 7.2 Description of the model Upper front panel Front I/O ports Front air filter Optional fan mountings Intake fans Rear exhaust fan 5�25” bays/bezels 5.25” device lock Left side panel with fan mounting and filter 3-bay HDD cage Side panel bezel 3-step fan controller Right side panel with filter.
- Page 9 7.3 Front I/O ports USB 2�0 Headphone jack Microphone jack USB 3�0 Power button/Power LED HDD LED/reset button 3-step fan controller 7.4 The function panel has several wire connections that need to be installed. HD audio (headphone jack/microphone jack) Find the “Front panel audio headers/pin connectors” on the motherboard�...
- Page 10 EINLEITUNG Wir freuen uns, dass Sie sich für das be quiet! Gehäuse Silent Base 600 entschieden haben� Bitte lesen Sie vor Inbetriebnahme die nachstehenden Informationen aufmerksam durch und beachten Sie die einzelnen Installationshinweise. Bei weiteren Fragen wenden Sie sich gern an unseren Kundenservice. Die Kontaktdaten finden Sie im Abschnitt „Herstellerangaben“.
- Page 11 Modell Silent Base 600 Orange / Black / Silver / Red / Green Artikelnummer BG005 (Orange), BG006 (Schwarz), BG007 (Silber), BG008 (Rot), BG009 (Grün) Material 0,7mm Stahl, ABS, Nylon Abmessungen (L x W x H), (mm) 495 x 230 x 493 Gewicht (kg) Formfaktor Mini-ITX, Micro-ATX, ATX...
- Page 12 M3 x8 Flachkopfschraube Befestigung 2.5” Laufwerk (HDD/SSD) #6-32 x5 Flachkopfschraube Befestigung 2.5" HDD Käfig Platte M3 x5 Rundkopfschraube Befestigung 5.25” Laufwerk(ODD) #6-32 x30 Flachkopfschraube Befestigung vorderer Lüfter #6-32 Sechskantschraube Netzteil-Befestigung Silikonschiene Montage HDD am HDD-Käfig Abstandshalter Mainboard-Fixierung Kabelbinder lang Kabelmanagement Kabelbinder kurz Kabelmanagement Kabelbinder Halterung...
- Page 13 7.2 Gehäusebeschreibung Obere Frontabdeckung Front I/O-Anschlüsse Front-Luftfilter Montage Zusatzlüfter (optional) Ansauglüfter Abluft-Lüfter 5�25” Schächte/Blenden Verriegelung 5.25” Laufwerk Linke Seitenabdeckung, Luftfilter, Lüfteröffnung HDD-Käfig (3 Schächte) Belüftungsklappe 3-Stufen Lüftersteuerung Rechte Seitenpanel, Luftfilter PCI-Halterung HINWEIS: rechts keine Montage von Zusatzlüftern möglich! Gehäusedeckel...
- Page 14 7.3 Front I/O ports USB 2�0 Kopfhörerbuchse Mikrofonbuchse USB 3�0 Power Knopf/Power LED HDD LED/Reset Knopf 3-Stufen Lüftersteuerung 7.4 Die vorhandenen Front I/O-Anschlüsse müssen mit Ihrem Mainboard verbunden werden. HD Audio (Kopfhörer- und Mikrofon-Buchse) Ermitteln Sie die HD Audio Pin-Anschlüsse an Ihrem Mainboard und stecken Sie die HD Audio-Kabel in die dort vorgesehenen Steckplätze.
- Page 15 INTRODUCTION Nous vous remercions d’avoir choisi d’acquérir notre Silent Base 600� Nous vous invitons à lire attentivement le manuel et à suivre les instructions avec beaucoup d’attention� Si toutefois, vous aviez des questions, veuillez contacter notre service client, dont vous trouverez les coordonnées dans le paragraphe appelé ‘Informations constructeur »�...
- Page 16 Modèle Silent Base 600 Orange / Black / Silver / Red / Green Référence BG005 (Orange), BG006 (Noir), BG007 (Argent), BG008 (Rouge), BG009 (Vert) Matériaux 0,7mm acier, ABS, nylon Dimensions (l, h, p), (mm) 495 x 230 x 493 Poids net (kg) 7�8 Taille de la carte mère Mini-ITX, Micro-ATX, ATX...
- Page 17 M3 x8 Vis à tête fraisée Sécuriser les HDD/SSD 2�5” #6-32 x 5 Vis à tête fraisée Sécuriser le rack disque dur 2.5’’. M3 x 5 Vis profilée Sécuriser les périphériques 5�25” #6-32 x30 Vis à tête plate Sécuriser le ventilateur avant #6-32 Vis à...
- Page 18 7.2 Description Façade avant supérieure Panneau connectique avant (marche arrêt) Filtre à air avant Emplacement ventilateur optionnel Ventilateur avant (aspiration) Ventilateur arrière (extraction) Baies 5�25” Verrouillage des périphériques 5�25” Panneau latéral gauche avec emplacement Rack disque dur 3 baies ventilateur optionnel et filtre Trappe latérale Régulateur 3 vitesses Panneau latéral droit avec filtre...
- Page 19 7.3 Connectique panneau supérieur USB 2�0 Prise casque Prise micro USB 3�0 Bouton marche/arrêt Voyant lumineux LED Voyant lumineux disque dur/ bouton reset Régulateur 3 vitesses 7.4 Le panneau supérieur dispose de plusieurs connectiques qui doivent être installées. HD audio (prise téléphone/prise micro) Identifiez les broches du panel audio sur votre carte mère.
- Page 20 WPROWADZENIE Dziękujemy za zakup obudowy komputerowej Silent Base 600. Przed przystąpieniem do instalacji prosimy zapoznać się ze szczegółowymi informacjami zawartymi w niniejszej instrukcji. W razie dodatkowych pytań, prosimy o kontakt z naszym działem obsługi klienta. Informacje kontaktowe znajdziesz w sekcji Dane producenta�...
- Page 21 Model Silent Base 600 Orange / Black / Silver / Red / Green Kod produktu BG005 (Orange), BG006 (Black), BG007 (Silver), BG008 (Czerwony), BG009 (Zielony) Materiał Stal 0,7mm, ABS, nylon Wymiary obudowy (S x W x G) 495 x 230 x 493 Waga netto (kg) 7�8 Rozmiar płyty głównej...
- Page 22 M3 x8 śrubki płaskie Mocowanie 2�5” HDD/SSD #6-32 x 5 śrubki płaskie Zabezpiecz zasobnik HDD 2.5” M3 x 5 śrubki okrągłe Mocowanie urządzeń 5.25”/ODD #6-32 x30 śrubki płaskie Mocowanie wentylatora z przodu #6-32 śrubki heksagonalne Zasilacz Gumowe prowadnice Mocowanie HDD do koszyka HDD Podkładka dystansowa Do płyty głównej Opaski zaciskowe długie...
- Page 23 7.2 Budowa produktu Górny panel przedni Przednie porty I/O Przedni filtr przeciwkurzowy Opcjonalny montaż wentylatora Wentylatory wlotowe Tylny wentylator wylotowy Zatoki 5.25”/zaślepki Zatrzaski 5.25” Lewy panel boczny z filtrem przeciwkurzowym Koszyk HDD z 3 zatokami i możliwością montażu wentylatora Maskownica otworu panelu bocznego trzystopniowy kontroler wentylatorów Prawy panel boczny z filtrem przeciwkurzowym.
- Page 24 7.3 Front I/O ports USB 2�0 Gniazdo słuchawkowe Gniazdo mikrofonowe USB 3�0 Przycisk zasilania/Power HDD LED/przycisk reset trzystopniowy kontroler wentylatorów 7.4 Panel funkcyjny wyposażony jest w kilka wiązek przewodów które muszą zostać podłączone. HD audio (Gniazdo słuchawkowe/gniazdo mikrofonowe) Znajdź podłączenie “Front panel audio” na płycie głównej. Podłącz wiązkę...
- Page 25 INTRODUCCIÓN Gracias por elegir nuestro Silent Base 600. Le rogamos que lea la información de este manual y siga atentamente las instrucciones antes de la instalación. Si tiene cualquier pregunta póngase en contacto con nuestro servicio de atención al cliente. La información de contacto se indica en la sección «Información del fabricante». VOLUMEN DE SUMINISTRO ∙...
- Page 26 Modelo Silent Base 600 Orange / Black / Silver / Red / Green Número de artículo BG005 (naranja), BG006 (negro), BG007 (plateado), BG008 (rojo), BG009 (verde) Material 0,7mm acero, ABS, nailon Dimensiones de la carcasa 495 x 230 x 493 (anch�...
- Page 27 Tornillos de cabeza plana M3 x 8 Sujeción de disco duro magnético o de estado sólido (SSD) de 2,5" Tornillos de cabeza plana #6-32 Fije la bandeja para la carcasa del disco duro de 2,5" Tornillos de cabeza redonda M3 Sujeción de dispositivo o unidad de disco óptico de 5,25"...
- Page 28 7.2 Descripción del modelo Panel frontal superior Puertos de E/S frontales Filtro de aire frontal Soportes para ventilador opcional Ventiladores de entrada Ventilador de salida trasero Bahías o marcos de 5,25" Bloqueo del dispositivo de 5,25" Panel lateral izquierdo con soporte para Caja de discos duros de tres bahías ventilador y filtro Marco del panel lateral...
- Page 29 7.3 Puertos de E/S frontales USB 2�0 Salida para auriculares Entrada para micrófono USB 3�0 Botón de encendido y LED de encendido LED de disco duro y botón de restablecimiento (reset) Controlador del ventilador de 3 pasos 7.4 El panel de funciones cuenta con varias conexiones por cable que es necesario instalar. Audio HD (salida de auriculares/entrada de micrófono) Localice los cabezales de audio y las clavijas de conexión del panel frontal en la placa base�...
- Page 30 STEP-BY-STEP INSTALLATION | SCHRITT-FÜR-SCHRITT ANLEITUNG INSTALLATION - PAS À PAS | INSTALACJA KROK PO KROKU INSTALACIÓN PASO A PASO It is important you follow all the instructions in the sequence they are given� Führen Sie alle beschriebenen Installationsschritte genau in der angegebenen Reihenfolge aus� Il est important de suivre les différentes étapes dans l’ordre suivant.
- Page 31 8.2.2 Remove the side panel. 8.2.2 Entfernen Sie die Seitenabdeckungen. 8.2.2 Enlevez le panneau latéral. 8.2.2 Usuń panel boczny. 8.2.2 Retire el panel lateral. 8.2.3 Remove the front panel. 8.2.3 Entfernen Sie die Frontabdeckung. 8.2.3 Enlevez la façade avant. 8.2.3 Usuń panel przedni. 8.2.3 Retire el panel frontal.
- Page 32 8.2.6 Re-insert the hinge at the other end, reverse the steps from 8.2.1. 8.2.6 Versetzen Sie die Scharnierhalterung auf die andere Seite und führen Sie die vorherigen Schritte in umgekehrter Reihenfolge zurück zu Punkt 8.2.1 aus. 8.2.6 Repositionnez la charnière de l’autre côté et inversez les étapes à...
- Page 33 8.3.2 Remove the upper cover and install an additional fan/radiator. 8.3.2 Entfernen Sie den Gehäusedeckel, um zusätzliche Lüfter bzw. einen Radiator im oberen Gehäusebereich zu installieren. 8.3.2 Enlevez le panneau supérieur et installez les ventilateurs ou le radiateur additionnel 8.3.2 Usuń górny panel i zainstaluj dodatkowy wentylator/radiator. 8.3.2 Retire la cubierta superior e instale el ventilador/radiador adicional.
- Page 34 8.3.5 To mount a radiator or an additional fan at the front, the HDD cage has to be removed. 8.3.5 Für den Einbau eines Radiators oder eines zusätzlichen Lüfters im vorderen Bereich muss der HDD-Käfig entfernt werden. 8.3.5 Pour monter un radiateur ou un ventilateur additionnel à l'avant, il faut tout d'abord retirer la cage HDD.
- Page 35 INSTALLATION OF POWER SUPPLY UNIT Insert the power supply unit at the bottom of the case, secure the PSU with screws� EINBAU DES NETZTEILS Setzen Sie das Netzteil in den Boden des Gehäuses ein. Sichern Sie das Netzteil anschließend mit den beigelegten #6-32 Sechskantschrauben.
- Page 36 8.6.2 Slide the 5.25” device/ODD into the drive bay. Push the lock backwards to secure it. An extra screw ensures it remains locked. 8.6.2 Schieben Sie das 5.25” Laufwerk/ODD in den Schacht. Drücken Sie das Laufwerk nach hinten, damit die Verriegelung einrastet. Zur Sicherheit befestigen Sie das Laufwerk mit den beigelegten Schrauben.
- Page 37 8.7.2 Open the gate on the HDD cage. 8.7.2 Öffnen Sie die Verriegelung der HDD- Sicherungsschiene. 8.7.2 Déverrouillez le système de blocage du rack (vis à main en haut=rack ouvert). 8.7.2 Otwórz koszyk na dyski HDD. 8.7.2 Abra la puerta de la caja para discos duros. 8.7.3 Insert the HDD into the HDD cage.
- Page 38 8.8.1 Remove the upper HDD holder by releasing the four screws below the 5.25 bay. 8.8.1 Entfernen Sie die obere HDD-Halterung, indem Sie die vier Schrauben unterhalb des 5.25" Rahmens lösen. 8.8.1 Retirez le support supérieur qui maintient la cage de disque dur, en enlevant les 4 vis situées en dessous de la baie 5,25''.
- Page 39 8.8.3 There are two different positions for the HDD holder: Placed flush with the front or more inwards the case ending behind the 5.25” bezels. 8.8.3 Die HDD-Halterung können Sie so anbringen, dass der HDD Käfig entweder bündig mit der Front abschließt oder hinter den 5.25” Blenden endet.
- Page 40 INSTALACIÓN DE UN DISPOSITIVO O DISCO DURO SSD DE 2,5" Para montar el dispositivo o disco duro SSD de 2,5" en una de las cajas para discos duros, retire primero la caja para discos duros 8.9.1 Mount the 2.5” device/SSD upside down under the top panel of the HDD cage with M3 flat head screws.
- Page 41 8.10 CLEANING THE AIR FILTERS 8.10 REINIGUNG DER LUFTFILTER 8.10 COMMENT NETTOYER LES FILTRES ? 8.10 CZYSZCZENIE FILTRÓW PRZECIWKURZOWYCH 8.10 LIMPIEZA DE LOS FILTROS DE AIRE 8.10.1 Open the front panel and pull the air filter upwards. 8.10.1 Öffnen Sie die Frontklappe und ziehen Sie den Filter nach oben heraus.
- Page 42 Limited Warranty Per the terms and conditions of this limited warranty as given below, be quiet! warrants its new products to be free of defects resulting from faulty materials and faulty manufacturing for the length of the warranty period� I. APPLICABILITY This non-transferable warranty is applicable to newly purchased, previously unopened be quiet! products and is enforceable by only the original consumer purchaser�...
- Page 43 Notes...
- Page 46 https://tehnoteka.rs Ovaj dokument je originalno proizveden i objavljen od strane proizvođača, brenda Be quiet!, i preuzet je sa njihove zvanične stranice. S obzirom na ovu činjenicu, Tehnoteka ističe da ne preuzima odgovornost za tačnost, celovitost ili pouzdanost informacija, podataka, mišljenja, saveta ili izjava sadržanih u ovom dokumentu.