Publicité

Les langues disponibles
  • FR

Les langues disponibles

  • FRANÇAIS, page 10

Liens rapides

TempCo Comfort
User Guide
Analogic thermostat 24V
Guide d'utilisation
Thermostat analogique 24V
Bedienungsanleitung
Analog Raumthermostat 24V
Gebruiksaanwijzing
Analoge thermostaat 24V
Instrukcja Użytkowania
Termostat Analogowy 24V
Manualul utilizatorului
Termostat analogic UFH – 24VAC
Инструкция по эксплуатации
TempCo Comfort – 24VAC
24V
1
GB
3-9
F
10 -17
D
18 -24
Nl
25-32
P
33 -39
RO
40-47
RU
48-55

Publicité

Table des Matières
loading

Sommaire des Matières pour Tempco Comfort 24V

  • Page 1 Guide d’utilisation Thermostat analogique 24V 10 -17 Bedienungsanleitung Analog Raumthermostat 24V 18 -24 Gebruiksaanwijzing Analoge thermostaat 24V 25-32 Instrukcja Użytkowania Termostat Analogowy 24V 33 -39 Manualul utilizatorului Termostat analogic UFH – 24VAC 40-47 Инструкция по эксплуатации TempCo Comfort – 24VAC 48-55...
  • Page 3 Installation and Operation Manual IMPORTANT! Before starting work the installer should carefully read this Installation & Operation Manual, and make sure all instructions contained therein are understood and observed. - The thermostat should be mounted, operated and maintained by specially trained personnel only. Personnel in the course of training are only allowed to handle the product under the supervision of an experienced fitter.
  • Page 4: Technical Characteristics

    User Guide UFH – 24VAC Analogue thermostat with NSB and H&C function Wired Analogue thermostat (24VAC) specially designed to control your Under Floor Heating and cooling managed by actuator (NC). Flush Mounting version, standard fixing with 60mm axes. Pilot wire for NSB function (-2°C) 3 working modes: Anti freeze, Reduced, Comfort Thermostat with silent output.
  • Page 5 Configuration switch 1 2 3 4 Default setting and Other N° Description possibility OFF: Hysteresis of 0,5°C (ON/OFF regulation). Type of regulation ON: Proportional Band of 2.0°C with 10Min cycle (PWM regulation). Cooling function OFF: Cooling function is Example of use: deactivated.
  • Page 6 How to use your thermostat Anti Freeze mode: (Manual mode) Simple installation without main zone programmer: The antifreeze temperature (7°C) will be maintained in the room all the time. Installation with main zone programmer: (with or without Heating and Cooling function) In heating mode: (Winter) The antifreeze temperature (7°C) will be maintained in the room all the time.
  • Page 7 How to caliber and limit the setting range. If your thermostat needs to calibrated, make these operations: Put a thermometer in the middle of the room at 1.5 Meter distance of the floor. Wait 1 hour to be sure that your thermostat shows the correct temperature.
  • Page 8 If your thermostat needs to be limited, make these operations: Set the setting button on the middle of the new setting range. Remove the setting button by pressing gently outwards with a narrow screwdriver between the button and the cover. Remove the dial pins and put in the desired holes to limit the setting range of the thermostat.
  • Page 9 Notes _____________________________________________________ _____________________________________________________ _____________________________________________________ _____________________________________________________ _____________________________________________________ _____________________________________________________ _____________________________________________________ _____________________________________________________ _____________________________________________________ _____________________________________________________ _____________________________________________________ _____________________________________________________ _____________________________________________________ _____________________________________________________ _____________________________________________________ _____________________________________________________ _____________________________________________________ _____________________________________________________ _____________________________________________________ _____________________________________________________ _____________________________________________________ _____________________________________________________ _____________________________________________________ _____________________________________________________...
  • Page 10 Manuel d’utilisation et d’installation IMPORTANT! - Avant de commencer les travaux, le monteur doit lire, comprendre et observer les présentes instructions de montage et de service. - Seul un spécialiste en la matière est autorisé à effectuer le montage, le réglage et la maintenance d’une régulation plancher type UFH.
  • Page 11: Instruction De Securite

    INSTRUCTION DE SECURITE Veillez toujours à déconnecter l’alimentation avant le montage ou la manipulation! Toute installation ou raccordement électrique sur le module doit être réalisé dans des conditions de sécurité. Le module devra être raccordé et manipulé par du personnel qualifié. Veuillez respecter les législations de sécurité...
  • Page 12: Caractéristiques Techniques

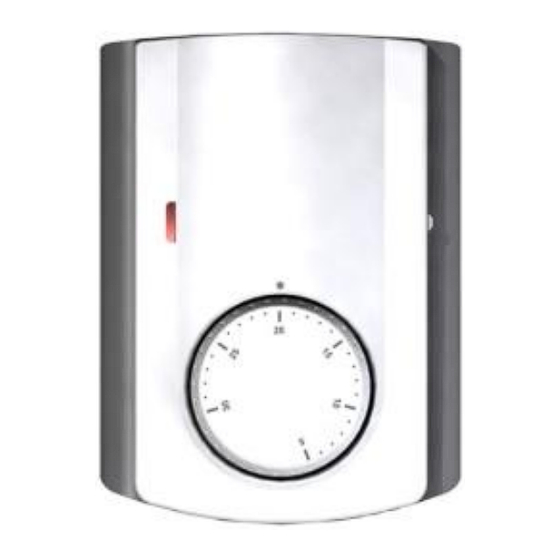
    Guide d’utilisation UFH – 24VAC Thermostat analogique Thermostat filaire 24Vac spécialement conçu pour la régulation de plancher chauffant et rafraichissant hydraulique géré par électrovanne thermique normalement fermée (NC). Version encastrable (se fixe sur la plupart des boîtes avec entraxe de fixation 60mm) Fil pilote pour abaissement en mode ECO (-2°C) 3 modes de fonctionnement Hors Gel, ECO, Automatique Thermostat à...
  • Page 13: Interrupteur De Configuration

    Interrupteur de configuration 1 2 3 4 Réglage usine et autres N° Description possibilités OFF: Hystérésis de 0,5°C (Régulation dite ON/OFF). Choix de la régulation ON: Bande proportionnelle de 2°C avec cycle de 10minutes. (Régulation dite PWM) Fonction Rafraichissement OFF: Fonction rafraichissement Exemple d’utilisation: désactivée.
  • Page 14: Comment Utiliser Votre Thermostat

    Comment utiliser votre thermostat Mode Hors Gel: (Mode manuel) Installation simple sans centrale de programmation: La température de hors gel (7°C) sera maintenue indéfiniment. Installation avec centrale de programmation: (avec ou sans fonction Chaud / Froid) En mode Chauffage : (Hiver) La température de hors gel (7°C) sera maintenue indéfiniment.
  • Page 15 Comment calibrer et limiter la plage de réglage. Procédez de la manière suivante pour calibrer le thermostat Tout d’abord, placez un thermomètre au milieu de la pièce à une hauteur d’environ 1,5 mètre du sol. Attendre environ 1 heure pour que la valeur affichée sur le thermomètre soit correcte.
  • Page 16 Procéder de la manière suivante pour borner la plage de réglage de votre thermostat Positionnez le bouton de réglage au milieu de la plage désirée Exemple : vous désirez réduire la plage de réglage entre 15 et 25°C => Positionnez votre bouton sur 20°C. Tirez le bouton de réglage vers vous en faisant délicatement levier avec un tournevis étroit entre la face avant et le bouton.
  • Page 17 Notes _____________________________________________________ _____________________________________________________ _____________________________________________________ _____________________________________________________ _____________________________________________________ _____________________________________________________ _____________________________________________________ _____________________________________________________ _____________________________________________________ _____________________________________________________ _____________________________________________________ _____________________________________________________ _____________________________________________________ _____________________________________________________ _____________________________________________________ _____________________________________________________ _____________________________________________________ _____________________________________________________ _____________________________________________________ _____________________________________________________ _____________________________________________________ _____________________________________________________ _____________________________________________________ _____________________________________________________...
  • Page 18 Installations- und Bedienungsanleitung Wichtig!! Bevor Sie mit der Installation beginnen, sollten sie sich die Installations- und Bedienungsanleitung sorgfältig durchlesen und unbedingt die nachfolgenden Punkte beachten: Der Raumthermostat darf nur von Fachpersonal oder unter deren Aufsicht installiert, angeschlossen und konfiguriert werden. Für Schäden die durch unsachgemäße Installation oder Montage entstehen kann keine Gewährleistung oder Haftung übernommen werden.
  • Page 19 Bedienungsanleitung Analog Raumthermostat 24 VAC mit Nachabsenkung Analoger Raumthermostat 24 VAC Nachabsenkungsfunktion 2K Kühlfunktion (Zentralregler erforderlich) Unterputz Version Betriebsartenwahlschalter: Frostschutz, Absenkbetrieb,utomatik Betrieb Geräuschlos durch TRIAC Ausgang Technische Daten Messgenauigkeit 0.1°C Betriebstemperatur 0°C - 50°C Temperatureinstellbereich 5°C - 30°C 2-Punkt (xp=0,5K) oder Regelungsart Puls-Weiten-Modulation Schutzart und -...
  • Page 20 Funktionswahl Wahlschalter (DIP Schalter, Geräterückseite) 1 2 3 4 Einstellung Beschreibung (Werkseinstellung) OFF: 2 Punkt (xp=0,5 K) ON: Puls-Weiten- Regelungsart Modulation (PWM), Proportional Band 2.0K bei 10 min. Interval Kühlfunktion OFF: Kühlfunktion Beispiel: ausgeschaltet Kühlfunktion sollte in Bereichen mit hohem ON: Kühlfunktion Feuchteanfall ausge- eingeschaltet...
  • Page 21 Betriebsartenwahl Frostschutz: Installation ohne Zentralregler: Regler ist ausgeschaltet. Unabhängig von der Sollwertvorgabe öffnet der Regler bei Raumtemperaturen unter 7°C Installation mit Zentralregler: Im Heizbetrieb: (Winter) Regler ist ausgeschaltet. Unabhängig von der Sollwertvorgabe öffnet der Regler bei Raumtemperaturen unter 7°C Im Kühlbetrieb: (Sommer) Regler ist ausgeschaltet Permanenter Absenkbetrieb : Installation ohne Zentralregler:...
  • Page 22 Kalibrierung und Begrenzung des Einstellbereiches Sollte eine Kallibrierung des Raumthermostaten erforderlich sein, gehen Sie wie folgt vor Messen Sie die Raumtemperatur in der gewünschten Aufenthaltszone ca. 1,5 m über dem Boden Um sicher zu gehen das der Raumthermostat seinen Beharrungszustand erreicht hat, darf der Sollwert ca. 1 Stunde nicht verändert werden.
  • Page 23 Wenn Sie den Einstellwert des Raumthermostaten begrenzen wollen, gehen Sie wie folgt vor Drehen Sie den Stellknopf in die Mitte des gewünschten Einstellbereiches Entfernen Sie vorsichtig den Stellknopf Entfernen sie die Begrenzungsstifte und stecken sie in die dafür vorgesehenen Löcher des gewünschten Einstellbereiches (Fig.4) Stecken sie den Stellknopf wieder auf das Reglergehäuse...
  • Page 24 Notizen _____________________________________________________ _____________________________________________________ _____________________________________________________ _____________________________________________________ _____________________________________________________ _____________________________________________________ _____________________________________________________ _____________________________________________________ _____________________________________________________ _____________________________________________________ _____________________________________________________ _____________________________________________________ _____________________________________________________ _____________________________________________________ _____________________________________________________ _____________________________________________________ _____________________________________________________ _____________________________________________________ _____________________________________________________ _____________________________________________________ _____________________________________________________ _____________________________________________________ _____________________________________________________ _____________________________________________________...
  • Page 25 Installatie en bedieningshandleiding BELANGRIJK! Alvorens de installatie uit te voeren moet de handleiding gelezen en begrepen worden door de installateur. - De Main zone digitale programmator moet geplaatst en onderhouden worden door een gecertificeerde installateur. Personeel die de installatie cursus niet hebben voltooid mogen deze slechts plaatsen onder supervisie van een gecertificeerd persoon.
  • Page 26 Veiligheidsmaatregelingen Sluit de spanning af alvorens de regelapparatuur aan te sluiten. - De installatie en bedrading moet spanningsloos worden uitgevoerd. De regelcomponenten mogen slechts aangesloten worden door bevoegd personeel. Volg de locale veiligheidsmaatregelingen. - De master en slave units zijn niet spatwaterdicht, gelieve ze in een droge omgeving te plaatsen.
  • Page 27: Technische Kenmerken

    Gebruiksaanwijzing UFH – 24VAC Analoge thermostaat Bedrade analoge thermostaat (24 VAC) speciaal ontworpen voor vloerverwarming en radiatoren. Sturing door actie op (NC) thermische motoren Inbouwversie met standaard 60 mm as aansluiting Nachtverlaging van (-2°C) d.m.v. externe stuurdraad 3 verschillende werkingsmodi: Antivries, ECO, Automatisch Thermostaat zonder schakelgeluid, stille uitvoering.
  • Page 28 Configuratie Dipswitch Configuratie dipswitch 1 2 3 4 Fabrieksinstelling en N° Beschrijving andere mogelijkheden OFF: Hysteresis 0,5°C (ON/OFF). Type regeling ON: Proportionele band (PWM) van 2°C met een cyclus van 10 minuten. Koeling modi OFF: Koelingmodus Voorbeeld: niet actief De koeling mag niet worden geactiveerd in Koelingmodus vochtige ruimtes zoals...
  • Page 29 Gebruik van de Thermostaat Antivries modus: (Manuele modus) Eenvoudige installatie zonder centrale programmator: De antivries instelling van (7°C) zal permanent worden bewaakt. Installatie met centrale programmator: (met of zonder verwarming/koeling functie) In verwarmingsmodus: (Winter) De antivries instelling van (7°C) zal permanent worden bewaakt. In koelingmodus: (Zomer) De thermostaat is buiten werking.
  • Page 30 Kalibratie en Begrenzing van de Thermostaat. Indien uw thermostaat moet gekalibreerd worden, volg dan deze instructies : Plaats een thermometer op 1.5 m van de vloer in het midden van het lokaal. Wacht 1 uur tot dat u zeker bent van de juiste afgelezen temperatuur Trek de instelknop naar u toe, gebruik daarbij zachtjes een schroevendraaier als hefboom (besteed de nodig aandacht...
  • Page 31 Beperking van de instelwaarde Plaats de instelknop in het midden van het instelbereik. Trek de instelknop naar u toe, gebruik daarbij zachtjes een schroevendraaier als hefboom (besteed de nodig aandacht om een roterende beweging van de instelknop te voorkomen). Verplaats de limiet pennen naar de juiste plaats zoals weergegeven (figuur 3 en 4).
  • Page 32 Nota’s _____________________________________________________ _____________________________________________________ _____________________________________________________ _____________________________________________________ _____________________________________________________ _____________________________________________________ _____________________________________________________ _____________________________________________________ _____________________________________________________ _____________________________________________________ _____________________________________________________ _____________________________________________________ _____________________________________________________ _____________________________________________________ _____________________________________________________ _____________________________________________________ _____________________________________________________ _____________________________________________________ _____________________________________________________ _____________________________________________________ _____________________________________________________ _____________________________________________________ _____________________________________________________ _____________________________________________________...
  • Page 33 Instrukcja Instalacji i Użytkowania (uruchomienia) Uwaga! Przed rozpoczęciem pracy instalator powinien dokładnie przeczytać „Instrukcję Instalacji i Użytkowania” i upewnić się, że wszystkie zawarte w niej informacje są dla niego zrozumiałe. - Termostat glowny powinien byc zamontowany, uruchomiony i serwisowany wylacznie przez wyspecjalizowany personel Osoba bez odpowiednich uprawnień...
  • Page 34: Instrukcja Użytkowania

    Instrukcja Użytkowania TempCo Comfort – 24VAC Termostat Analogowy z funkcją Grzania i Chłodzenia oraz Nocnego Obniżenia (Redukcja) Analogowy termostat przewodowy (24VAC) przeznaczony do regulacji temperatury ogrzewania podłogowego lub chłodzenia za pomocą głowic termoelektrycznych / siłowników (NC). Montowany w puszce podtynkowej o średnicy 60mm.
  • Page 35 Konfiguracja przełączników Konfiguracja przełączników 1 2 3 Ustawienia domyślne i N° Opis dodatkowe możliwości OFF: Histereza 0,5°C (ON/OFF). Rodzaj regulacji ON: proporcjonalna 2.0°C z 10Min cyklem (PWM). Funkcja Chłodzenia Przykład: Funkcja chłodzenia OFF: Funkcja Chłodzenia powinna być nieaktywna nieaktywna w ON: Funkcja Chłodzenia aktywna pomieszczeniach o podwyższonej...
  • Page 36: Sposób Działania

    Sposób działania Anty zamrożenie: (Tryb ręczny) Prosta instalacja bez programatora strefy głównej: Bezpieczna temperatura (7°C) będzie utrzymywana w pomieszczeniu przez cały czas. Instalacja z programatorem strefy głównej: (z funkcją lub bez funkcji grzania i chłodzenia) Tryb grzania: (Zima) Bezpieczna temperatura (7°C) będzie utrzymywana w pomieszczeniu przez cały czas.
  • Page 37 Jak kalibrować i ustawić ograniczenia temperatury. Jeśli termostat wymaga kalibracji postępuj według instrukcji: Umieść termostat mniej więcej po środku pomieszczenia na wysokości ok. 1,5m Poczekaj ok.1 godziny, tak aby ustaliła się mierzona przez termostat temperatura. Zdejmij delikatnie pokrywę pokrętła z termostatu podważając ją...
  • Page 38 Jeśli potrzebujesz wprowadzić ograniczenia nastawy temperatury: Ustaw pokrętło w połowie skali, a następnie zdejmij delikatnie pokrywę pokrętła z termostatu podważając ją przy pomocy płaskiego śrubokrętu. Wyjmij wewnętrzny pierścień z pokrywy. Wetknij kołeczki w otwory odpowiadające wymaganym ograniczeniom temperatury na pierścieniu. (Rysunki 3 i 4) Następnie nałóż...
  • Page 39 NOTKA _____________________________________________________ _____________________________________________________ _____________________________________________________ _____________________________________________________ _____________________________________________________ _____________________________________________________ _____________________________________________________ _____________________________________________________ _____________________________________________________ _____________________________________________________ _____________________________________________________ _____________________________________________________ _____________________________________________________ _____________________________________________________ _____________________________________________________ _____________________________________________________ _____________________________________________________ _____________________________________________________ _____________________________________________________ _____________________________________________________ _____________________________________________________ _____________________________________________________ _____________________________________________________ _____________________________________________________...
  • Page 40 Manual pentru Instalare şi Utilizare IMPORTANT! Înaintea începerii montării, instalatorul trebuie să citească cu atenţie acest Manual pentru Instalare şi Utilizare şi să se asigure că toate instrucţiunile conţinute în acesta sunt înţelese şi respectate. - Termostatul trebuie montat, utilizat şi întreţinut numai de către personal calificat.
  • Page 41: Instrucţiuni Pentru Siguranţă

    INSTRUCŢIUNI PENTRU SIGURANŢĂ Înaintea începerii montării, întrerupeţi alimentarea cu curent! - Toate lucrările de instalare şi conectare aferente regulatorului trebuie efectuate doar când nu trece curentul prin el. - Cutiile de conexiuni nu sunt nici protejate contra stropirii nici protejate contra picăturilor de apă. De aceea, ele trebuie montate într-un loc uscat.
  • Page 42: Caracteristici Tehnice

    Manualul utilizatorului thermostaat Termostat analogic UFH – 24VAC cu NSB şi funcţie H&C Termostat analogic conectat (24VAC) proiectat special pentru reglarea încălzirii sub pardoseală dirijată de dispozitivul de acţionare (NC). Versiune încorporabilă, se fixează cu distanţa dintre axe de 60 Fir pilot pentru funcţia NSB (-2°C) 3 moduri de funcţionare: (Anti îngheţ, Economic, Confortabil)
  • Page 43 Comutatorul pentru configurare Comutatorul pentru configurare 1 2 3 4 Valoare prestabilită şi alte N° Descriere posibilităţi OFF: Histerezis 0,5°C (ON/OFF). ON: Bandă proporţională Tip de reglare 2.0°C cu ciclu de 10 Min (PWM). Funcţia de răcire OFF: Funcţia de răcire este Exemplu: Funcţia de răcire ar dezactivată...
  • Page 44 Utilizarea Termostatului Modul anti-îngheţ: (modul manual) Instalare simplă fără programatorul zonal principal: Temperatura anti-îngheţ (7°C) va fi păstrată permanent în încăpere. Instalare cu programatorul zonal principal: (cu sau fără funcţia de Încălzire şi Răcire): În modul de încălzire: (iarna) Temperatura anti-îngheţ (7°C) va fi păstrată permanent în încăpere.
  • Page 45 Indien uw thermostaat moet gekalibreerd worden, volg dan deze instructies: Dacă termostatul necesită calibrare, procedaţi după cum urmează: Plaats een thermometer op 1.5 m van de vloer in het midden van het lokaal. Wacht 1 uur tot dat u zeker bent van de juiste afgelezen temperatuur Trek de instelknop naar u toe, gebruik daarbij zachtjes een schroevendraaier als hefboom (besteed de nodig...
  • Page 46 Dacă trebuie să limitaţi intervalul de reglare al termostatului: Poziţionaţi butonul de reglaj pe mijlocul intervalului dorit. Scoateţi butonul de reglaj prin apăsarea uşoară spre exterior cu o şurubelniţă, între buton şi partea de sus. Scoateţi picioruşele pentru reglaj şi aşezaţi-le pe noul interval de reglaj.
  • Page 47 Nota’s _____________________________________________________ _____________________________________________________ _____________________________________________________ _____________________________________________________ _____________________________________________________ _____________________________________________________ _____________________________________________________ _____________________________________________________ _____________________________________________________ _____________________________________________________ _____________________________________________________ _____________________________________________________ _____________________________________________________ _____________________________________________________ _____________________________________________________ _____________________________________________________ _____________________________________________________ _____________________________________________________ _____________________________________________________ _____________________________________________________ _____________________________________________________ _____________________________________________________ _____________________________________________________ _____________________________________________________...
  • Page 48 Инструкция по установке и использованию (активации) Внимание! Перед тем, как начать работу, установщик должен внимательно прочесть «Инструкцию по установке и использованию» и убедиться в том, что вся содержащаяся в ней информация ему понятна. Главный термостат - Устанавливать, активировать и осуществлять сервисное обслуживание...
  • Page 49 Техника безопасности Перед тем, как подключить термостат необходимо отключить электропитание! - Все монтажные работы, связанные с термостатом, необходимо производить при отключѐнном электропитании. Подключать и активировать устройство могут только лица, имеющие к этому допуск. Убедитесь в том, что установка произведена в соответствии с правилами...
  • Page 50: Технические Данные

    Инструкция по эксплуатации UFH0051001 TempCo Comfort – 24VAC Термостат аналоговый с функцией нагрева и охлаждения, а также ночного понижения температуры (Редукция) Термостат аналоговый проводной (24 В перем. т.) предназначен для регулировки температуры напольного отопления или охлаждения при помощи термоэлектрических головок / серводвигателей (NC).
  • Page 51 Конфигурация переключателей Конфигурация переключателей 1 2 3 4 № Установки по умолчанию и п/ Описание дополнительные возможности п OFF: Гистерезис 0,5°C (ON/OFF). Вид регулировки ON: Пропорциональная 2.0°C с 10-мин. циклом (PWM). Функция охлаждения Пример: Функция охлаждения OFF: Функция охлаждения должна быть неактивна...
  • Page 52: Принцип Действия

    Принцип действия Антизамораживание: (ручной режим) Простая установка без программатора главной зоны: Безопасная температура (7°C) будет поддерживаться в помещении всѐ время. Установка с программатором главной зоны: (с функцией или без функции нагревания и охлаждения) Режим нагревания: (Зима) Безопасная температура (7°C) будет поддерживаться в помещении...
  • Page 53 Как производить калибровку и устанавливать ограничения температуры Как производить калибровку и устанавливать ограничения температуры Поместить термостат примерно посередине помещения на высоте ок. 1,5 м Подождать примерно 1 час, чтобы установилась измеряемая термостатом температура Осторожно снять крышку с ручки термостата, поддев еѐ...
  • Page 54 Если нужно ввести ограничения установки температуры: Установить ручку на середину шкалы, а затем осторожно снять крышку с ручки термостата, поддев еѐ при помощи плоской отвѐртки Вынуть из крышки внутреннее кольцо Вставить штыри в отверстия, соответствующие требуемым ограничениям температуры на кольце (рис.
  • Page 55 Notatki _____________________________________________________ _____________________________________________________ _____________________________________________________ _____________________________________________________ _____________________________________________________ _____________________________________________________ _____________________________________________________ _____________________________________________________ _____________________________________________________ _____________________________________________________ _____________________________________________________ _____________________________________________________ _____________________________________________________ _____________________________________________________ _____________________________________________________ _____________________________________________________ _____________________________________________________ _____________________________________________________ _____________________________________________________ _____________________________________________________ _____________________________________________________ _____________________________________________________ _____________________________________________________ _____________________________________________________...
  • Page 56 Rettig Belgium NV Vogelsancklaan 250 B-3520 Zonhoven Belgium Tel: +49 5324 808-0 Fax: +49 5324 808-999 info@radson.be www.radson.com Purmo DiaNorm Wärme AG Lierestraße 68 38690 Vienenburg Germany Tel: +49 5324 808-0 Fax: +49 5324 808-999 info@purmo.de www.purmo.de Rettig Heating Sp. z o.o. ul.

Table des Matières