Télécharger Imprimer la page

Publicité

Les langues disponibles
  • FR

Les langues disponibles

  • FRANÇAIS, page 1

Liens rapides

Appareil photo numérique
Digital Camera
MODE D'EMPLOI - INSTRUCTION MANUAL
DJ014series
DJ014seriesIM1112_15Mar_V02.indb 1
15/03/2012 3:15 PM

Publicité

loading

Sommaire des Matières pour LEXIBOOK DJ014 Serie

  • Page 1 Appareil photo numérique Digital Camera MODE D’EMPLOI - INSTRUCTION MANUAL DJ014series DJ014seriesIM1112_15Mar_V02.indb 1 15/03/2012 3:15 PM...
  • Page 2 DJ014seriesIM1112_15Mar_V02.indb 2 15/03/2012 3:15 PM...
  • Page 3 DJ014seriesIM1112_15Mar_V02.indb 3 15/03/2012 3:15 PM...
  • Page 4 
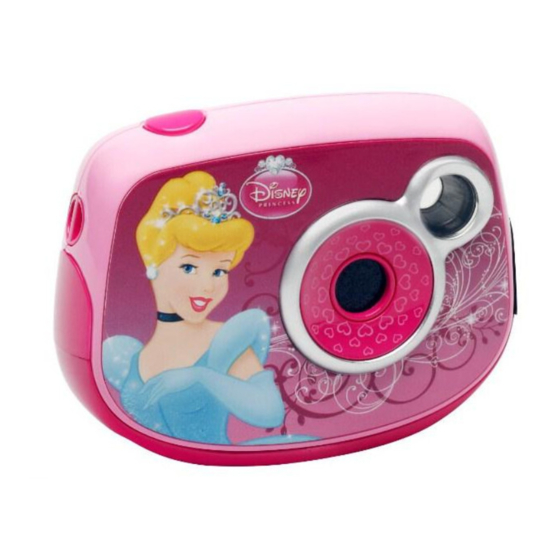
4. Pour lan PRÉSENTATION DE VOTRE APPAREIL PHOTO Configurat 1. Déclencheur/bouton de confirmation 6. Bouton MODE 400 Mo d’e 2. Viseur optique 7. Bouton mise en marche/arrêt 3. Objectif 8. Compartiment des piles (sous l’appareil photo) graphique s 4. Connecteur USB 9.
  • Page 5 4. Pour lancer « Magix Video easy SE », double-cliquez sur son raccourci. Configurations requises : Intel® Pentium 4 ou AMD® Athlon® 1 GHz ou supérieur, 512 Mo de RAM, 400 Mo d’espace libre sur le disque dur et un lecteur DVD pour l’installation du programme, carte eil photo) graphique supportant au minimum une résolution d’écran de 1024x768, carte son.
  • Page 6 Prise en continu 1. Pour activer le mode « Prise en continu », lorsque vous êtes en mode « Prise unique », appuyez sur le bouton Mode jusqu’à ce que l’icône « Prise en continu » apparaisse sur l’écran LCD. En mode «...
  • Page 7 appuyez SÉLECTION DE LA QUALITE D’IMAGE LCD. En mode « Prise unique », appuyez de manière répétée sur le bouton MODE jusqu’à ce que l’une continu. des icônes « qualité d’image» hd ou ld apparaisse à l’écran. Appuyez sur le déclencheur pour ip »...
  • Page 8 LEXIBOOK S.A, Référence : DJ014series 2, avenue de Scandinavie, Conçu et développé en Europe – Fabriqué en Chine 91953 Courtaboeuf Cedex © 2012 Lexibook® France © Disney / Pixar Service consommateurs : © Disney 0892 23 27 26 (0,34 € TTC/Min) www.lexibook.com...
  • Page 9 GETTING TO KNOW YOUR CAMERA 6. MODE button 1. Shutter/Set button 7. Power on/off button 2. Optical viewfinder 8. Battery compartment 3. Camera lens 9. Tripod hole (tripod not included) 4. USB connector port 10. Strap hole 5. LCD display CONTENTS OF THE PACKAGING 1xDJ014 digital camera/1xUSB cable/1xhand strap/1xCD-ROM/1x instruction manual WARNING: All packaging materials, such as tape, plastic sheets, wire ties and tags are not part of...
  • Page 10 INSTALLING THE VIDEO SOFTWARE (Magix Video easy SE) Single sho 1. Insert the CD Software (included) into your CD-ROM drive. You are alr 2. In the main menu, click “Install MAGIX Video easy SE” and wait during the extraction. to take a ph 3.
  • Page 11 TAKING PHOTOS Single shooting You are already in “Single shooting” mode when you switch on the camera. Press the shutter button to take a photo. The camera will beep to confirm that a picture is taken. The number of pictures that you can take in memory is shown on the LCD screen.
  • Page 12 SELECTING THE IMAGE QUALITY In “Single shooting” mode, press repeatedly the MODE button until one of the image quality icons hd Connected or ld is displayed on the screen. Then press the shutter button to change the image quality. Webcam m There are 2 levels of quality: 1.
  • Page 13 Reference: DJ014series 0808 100 3015 Designed and developed in Europe – Made in China me page. http://www.lexibook.com © 2012 Lexibook® © Disney / Pixar © Disney This product is not a toy. Environmental Protection Unwanted electrical appliances can be recycled and should not be discarded along with regular household waste! Please actively support the conservation of resources and help protect the environment by returning this appliance to a collection centre (if available).
  • Page 14 4. Para abr FAMILIARÍCESE CON SU CÁMARA Requisitos 1. Botón del Obturador/Confirmación 6. Botón de selección de Modo de memoria 2. Visor óptico 7. Botón encendido/apagado los program 3. Lente de la cámara 8. Compartimento de las pilas Dispositiv 4. Puerto de conexión USB 9.
  • Page 15 4. Para abrir el programa “Magix Video easy SE” haga doble clic en el icono de acceso directo. Requisitos del sistema: Procesador Intel® Pentium 4/AMD® Athlon® de 1 GHz o superior, 512 MB de memoria RAM, 400 MB de espacio libre en el disco duro y una unidad de DVD para poder instalar los programas, tarjeta gráfica compatible con una resolución mínima de 1024 x 768, tarjeta de sonido.
  • Page 16 Disparo continuo 1. Mientras está en el modo de “Disparo único”, pulse reiteradamente el botón de selección del modo Desde el m (MODE) hasta que el icono de modo de “Disparo continuo” se muestre en la esquina superior hasta que u derecho de la pantalla.
  • Page 17 SELECCIÓN DE LA CALIDAD DE IMAGEN n del modo Desde el modo de “Disparo único”, pulse reiteradamente el botón de selección de modo (MODE) superior hasta que uno de los iconos de calidad de imagen hd o ld (alta definición o baja definición) se er 3 fotos muestre en la pantalla.
  • Page 18 NOTA: guardar el manual de instrucciones porque contiene información importante. Referencia: DJ014series España Servicio atención al cliente: 902367933 Diseñado y desarrollado en Europa – Fabricado en China © 2012 Lexibook® http://www.lexibook.com © Disney / Pixar © Disney Este producto no es un juguete.
  • Page 19 CONHECER A SUA CÂMARA 1. Obturador/Botão “Set” (Definições) 6. Botão MODE (modo) 2. Visor óptico 7. Botão ligar/desligar 3. Lente da câmara 8. Compartimento das pilhas 4. Porta de ligação USB 9. Orifício para o tripé (tripé não incluído) 5. Ecrã LCD 10.
  • Page 20 INSTALAR O SOFTWARE PARA EDITAR CLIPES DE VIDEO (MAGIX Video easy SE) Disparo co 1. Quando 1. Insira o CD do Software (incluído) na sua unidade de CD-ROM. apareça o í 2. No menu principal, clique em “Install MAGIX Video easy SE” e espere durante a extracção. obturador n 3.
  • Page 21 asy SE) Disparo contínuo 1. Quando estiver no modo de “Disparo contínuo”, prima o botão MODE repetidamente até que apareça o ícone do modo de “Disparo contínuo” no canto superior direito do ecrã. Prima o ão. obturador no espaço de 5 segundos para tirar 3 fotografias continuamente. Nota: Quando a memória incorporada da câmara estiver cheia, a unidade toca duas vezes quando premir o obturador, para indicar que não pode tirar mais fotografias.
  • Page 22 SELECCIONAR A QUALIDADE DE IMAGEM No modo de “Disparo único”, prima repetidamente o botão MODE até que um dos ícones da qualidade de imagem hd ou ld seja apresentado no ecrã. De seguida, prima o obturador para alterar a qualidade de imagem. Existem 2 níveis de qualidade: hd: Alta qualidade (modo predefinido) / ld: Baixa qualidade.
  • Page 23 © Disney Este produto não é um brinquedo. Portugal AJ Aguiar – Comércio Geral, Lda. Avenida Principal, 4300 | 4535-013 Lourosa - Portugal T. +(351) 220 824 521 | lexibook@ajaguiar.com http://www.lexibook.com es em Indicações para a protecção do meio ambiente seja Aparelhos eléctricos antigos são materiais que não pertencem ao lixo doméstico! Por isso...
  • Page 24 LIBRETTO DI ISTRUZIONI PER LA FOTOCAMERA DIGITALE 1. Inserire i 1. Tasto Otturatore/Set 6. Tasto MODE (MODALITÀ) 2. Nel men 2. Mirino ottico 7. Tasto ACCENSIONE (on/off) 3. Seguire 3. Obiettivo macchina fotografica 8. Vano batterie 4. Per lanc 4. Porta connettore USB 9.
  • Page 25 INSTALLAZIONE DEL SOFTWARE PER L’EDITING DI VIDEO CLIPS 1. Inserire il CD col software (incluso) nel drive del CD-ROM del computer. 2. Nel menù principale, cliccare “Installa MAGIX Video easy SE” e aspettare l’estrazione. 3. Seguire le istruzioni sullo schermo e premere “Installa” per avviare l’installazione. 4.
  • Page 26 Ripresa continua 1. Quando si è in modalità “Scatto singolo”, premere ripetutamente il tasto MODE fino a quando In modalità l’icona della modalità “scatto continuo” viene visualizzata nell’angolo superiore destro schermo un dello schermo. Premere il pulsante otturatore entro i successivi 5 secondi per prendere 3 foto in entro 5 sec continuazione.
  • Page 27 SELEZIONE DELLA QUALITÀ DELL’IMMAGINE ando In modalità “Scatto singolo”, premere ripetutamente il tasto MODE fino a quando compare sullo schermo una delle icone della qualità dell’immagine hd o ld. Quindi premere il pulsante otturatore oto in entro 5 secondi per cambiare la qualità dell’immagine. Ci sono 2 livelli di qualità: beep”...
  • Page 28 NOTA: conservare il manuale di istruzioni in quanto contiene informazioni importanti. Riferimento: DJ014series Progettato e sviluppato in Europa – Fabbricato in Cina © 2012 Lexibook® © Disney / Pixar © Disney http://www.lexibook.com Questo prodotto non è un giocattolo.
  • Page 29 ÜBERSICHT ÜBER DIE KAMERAELEMENTE 1. Auslöser/ Einstellungstaste 6. MODE-Taste (Modus) 2. Optischer Sucher 7. Power -Taste (Ein/ Aus) 3. Kameralinse 8. Batteriefach 4. USB-Anschluss 9. Stativanschluss (Stativ nicht im Lieferumfang enthalten) 5. LC-Display 10. Haltebandöse VERPACKUNGSINHALT 1 x DJ014 Digitalkamera/1 x USB-Kabel/1 x Halteband/1 x CD-ROM/1 x Bedienungsanleitung WARNUNG: Alle Verpackungsmaterialien, wie Klebeband, Plastikfolie, Kabelbinder und Aufkleber gehören nicht zu dem Digitalkamera und müssen weggeworfen werden.
  • Page 30 4. Um „Magix Video easy SE“ zu starten, klicken Sie doppelt auf den Shortcut. „Welcome MAGIX Selbstausl Video easy“ wird angezeigt. 1. Drücke i sauf dem L Systemanforderungen: Intel® Pentium 4 oder AMD® Athlon® 1 GHz und höher, 512 MB RAM, Selbstauslö...
  • Page 31 MAGIX Selbstauslöser 1. Drücke im „Einzelbildmodus” mehrmals die MODE-Taste, bis das „Selbstauslöser”-Symbol sauf dem LC-Display erscheint. Drücke dann den Auslöser innerhalb von 5 Sekunden, um die RAM, Selbstauslöserfunktion zu aktivieren. mms, 2. Die Digitalkamera nimmt 10 Sekunden später ein Bild auf. Hinweis: Die Selbstauslöserfunktion wird automatisch deaktiviert, nachdem das Bild aufgenommen wurde.
  • Page 32 AUSWAHL DER FREQUENZ DER LICHTQUELLE Mit Ihrem P Drücke im „Einzelbildmodus” mehrmals die MODE-Taste, bis eines der Webcamm Frequenzsymbole 50 (50HZ) oder 60 (60HZ) auf dem Display angezeigt wird. Drücke dann innerhalb 1. Verbinde den Auslöser, um die Frequenz zu ändern. 2.
  • Page 33 ANMERKUNG: Bitte bewahren Sie diese Bedienungsanleitung gut auf, sie enthält wichtige Information. Deutschland & Österreich Referenznummer: DJ014series n auf „ Design und Entwicklung in Europa - Hergestellt in China Service-Hotline: 01805 010931 © 2012 Lexibook® (0.14€ TTC/Minute) das/die © Disney / Pixar E-Mail: savcomfr@lexibook.com © Disney www.lexibook.com und „High...
  • Page 34 UW CAMERA LEREN KENNEN 1. Sluiter/Instelknop 6. MODE knop ‘MAGIX Vid 2. Optische beeldzoeker 7. Power (aan/uit) knop 1. Plaats de 3. Cameralens 8. Batterijvak 2. Klik op ‘M 4. USB-aansluitpoort 9. Statiefgat (statief niet meegeleverd) 3. Volg de a 5.
  • Page 35 DE SOFTWARE INSTALLEREN ‘MAGIX Video easy SE’: het bewerken van videobestanden 1. Plaats de software-cd (meegeleverd) in uw CD-ROM drive. 2. Klik op ‘MAGIX Video Easy SE installeren’ in het hoofdmenu en wacht tijdens het uitpakken. 3. Volg de aanwijzingen op het scherm en druk op ‘Installeren’ om te beginnen met de installatie. 4.
  • Page 36 Continu foto’s maken 1. Wanneer u zich in de “Eén foto maken” modus bevindt, druk herhaaldelijk op de MODE knop totdat het “Continu foto’s maken” modus symbool in de rechterbovenhoek van het scherm verschijnt. Druk binnen de 5 seconden op de sluiterknop om continu 3 foto’s te nemen. Opmerking: Als het ingebouwd geheugen van de camera vol is, zult u een dubbel piepgeluid horen wanneer u op de sluiterknop drukt, dit om aan te geven dat het niet mogelijk is om nieuwe foto’s te nemen.
  • Page 37 DE FOTOKWALITEIT SELECTEREN knop totdat In de “Eén foto maken” modus, druk herhaaldelijk op de MODE knop totdat één van de beeldkwaliteit- erschijnt. symbolen hd of ld op het scherm wordt weergegeven. Druk dan binnen op de sluiterknop om de beeldkwaliteit te wijzigen.
  • Page 38 Ter verbetering van onze service kunnen productkleuren en -details zoals getoond op de verpakking, gewijzigd worden. OPMERKING: Bewaar deze gebruiksaanwijzing, deze bevat belangrijke informatie. Referentie: DJ014series Ontworpen en ontwikkeld in Europa - Gemaakt in China © 2012 Lexibook® © Disney / Pixar © Disney Dit product is geen speelgoed. http://www.lexibook.com...
  • Page 39 DJ014seriesIM1112_15Mar_V02.indb 39 15/03/2012 3:15 PM...
  • Page 40 DJ014seriesIM1112_15Mar_V02.indb 40 15/03/2012 3:15 PM...