Publicité
Liens rapides
Livret technique à conserver
3
Technical manual to keep
5
Technische information zum Aufbewahren
8
Folleto técnico a conservar
3
Conservar este folheto técnico
9
Technische gegevens bewaren
Scheda tecnica da conservare
4
Opis techniczny do zachowania
F -
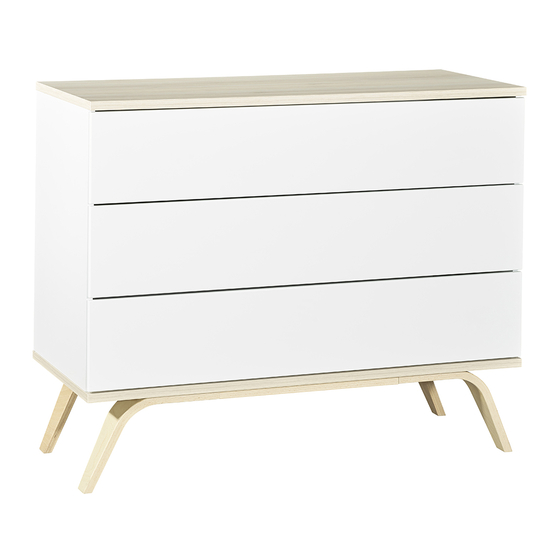
Commode 3 Tiroirs
F -
Livré démonté : 4 colis
À monter soi-même
GB -
Chest 3 Drawers
GB -
Knocked down : 4 parcels
Self assembly
D -
Kommode 3 Schubladen
D -
Zerlegt geliefert : 4 kollis
Selbst zu montieren
SP -
Comoda 3 Cajones
SP -
Entregado desmontado : 4 bultos
Para montar su mismo
P -
P -
Comoda 3 Gavetas
Entregue desmontado : 4 embrulhos
Para montar você mesmo
NL -
Kommode 3 Laden
NL -
Ongemonteerd geleverd : 4 pakketten
Zelf te monteren
I -
I -
Como a 3 Cassetti
Consegnato non montato : 4 colli
Assemblaggio fai da te
-
-
PL
Komoda z 3 Szufladami
PL
Dostarczane zdemontowane :
Do samodzielnego montażu
MAX
20
KG
4 paczki
SERENA UT161A
À
LIRE
ENTIÈREMENT
AVANT LE MONTAGE
51cm
115cm
édition 07.19
Publicité

Manuels Connexes pour SAUTHON easy SERENA UT161A


Sommaire des Matières pour SAUTHON easy SERENA UT161A
- Page 1 Technische information zum Aufbewahren Folleto técnico a conservar Conservar este folheto técnico Technische gegevens bewaren Scheda tecnica da conservare Opis techniczny do zachowania SERENA UT161A Commode 3 Tiroirs Livré démonté : 4 colis À monter soi-même GB - Chest 3 Drawers GB - À...
- Page 2 FICHE TECHNIQUE - SAV à conserver / TECHNICAL SHET - AFTER SALES SERVICE to keep / TECHNISCHE INFORMATION - KUNDENDIENST zum aufbehalten / FOLLETO Técnico - SERVICIO POSTVENTA a conservar DEMANDE DE SAV / AFTER SALES SERVICE REQUEST / KUNDENDIENST ANFORDERUNG / SOLICITUD DE SERVICIO POSTVENTA : Toute demande de SAV doit être transmise directement au revendeur.
- Page 3 FICHE TECHNIQUE - SAV à conserver / TECHNICAL SHET - AFTER SALES SERVICE to keep / TECHNISCHE INFORMATION - KUNDENDIENST zum aufbehalten / FOLLETO Técnico - SERVICIO POSTVENTA a conservar Avertissement N o u s f o u r n i s s o n s u n n o m b r e d e quincaillerie supérieur à...
- Page 4 WICHTIG – ANLEITUNG ZU SPÄTERE IMPORTANT - A CONSERVER POUR IMPORTANT – KEEP THIS LEAFLET IMPORTANTE - CONSERVAR ESTE ANWENDUNG AUFBEWAHREN DE FUTURS BESOINS DE REFERENCE. FOR A NEW CONSULT OF THE ITEMS’ FOLLETO PARA UNA PROXIMA Halten Sie bitte die folgenden Respecter les instructions de montage et REFERENCE CONSULTA DE LA REFERENCIA...
-
Page 5: Outillage Nécessaire
CONSEIL Il est recommandé de mettre une protection au sol pour manipuler les pièces. ADVICE Put a protection on the floor to handle parts. RATSCHLÄGE Um die Teile vom Kratzer zu schützen, legen Sie einen Schutz auf den Boden. CONSEJO Poner una proteccion en el suelo para manipular las piezas. - Page 6 Ø3,5x35...
- Page 8 Important : La fixation des coins plastiques permet le bon maintien du meuble ! Important : Fastening the plastic corners allows for the proper holding of the furniture ! Wichtig : die Befestigung der Plastik Ecken erlaubt die richtige Haltung des Möbels ! Importante : la fijación de las cuñas de plástico permite el buen ajuste del mueble ! •...
- Page 9 • Attention au sens de la coulisse : respectez le sens de la flèche. (voir détail ci-dessous) • Take care of the slideway’s direction : respect the direction ofvthe arrow. (see the instructions below) • Beachten Sie die Richtung der Schiene laut die folgende Skizze. •...
- Page 10 Verrouillez impérativement les excentriques «LU» comme indiqué. Block all the excenters LU. Drehen sie alle Exzenters LU fest. Es imprescindible bloquear las excéntricas «LU» cómo indicado. 90 ° 90° 90° 90° Avant de passer à l’étape suivante, vérifiez que le tiroir comporte bien 4 angles droits. Before the next stage, check that the drawer has 4 right angles.
- Page 11 ...
- Page 12 RÉGLAGE DES TIROIRS DRAWER ADJUSTMENT REGELUNG SCHUBLADEN AJUSTE DE LOS CAJONES • Pour un bon fonctionnement de la commode, il est indispensable DERNIERS de caler correctement celle-ci. Utilisez une ou plusieurs cales adaptées (épaisseur) de façon à aligner verticalement les faces de REGLAGES tiroir.
- Page 13 DISPOSITIF ANTI - BASCULE La vis fournie avec le dispositif anti-bascule est destinée à fixer le dispositif dans le meuble. Pour la fixation au mur, compléter par une vis adaptée au support mural. En cas de doute, contacter un magasin de bricolage. FALLOVER-PROOF DEVICE Screw supplied with the fallover-proof device must be used to fix the device in to the piece of furniture.