Publicité

Les langues disponibles

Les langues disponibles

Liens rapides

Owner's Manual
Manual del Propietario
Manuel d'utilisation
Benutzerhandbuch
KICKER PowerBar
KPB1 | KPB2
Amplified Weatherproof Bar-Mount Speaker System with Bluetooth
Sistema de alto-falantes Amplificado à prova de intempéries com Bluetooth
Système d'enceintes Amplifiées étanches à Montage sur Barre avec Bluetooth
Verstärktes Wetterfestes Bar-Mount-Lautsprechersystem mit Bluetooth
select language
seleccione el idioma
choisir la langue
sprache auswählen

Publicité

Table des Matières
loading

Sommaire des Matières pour Kicker KPB1

  • Page 1 Manual del Propietario Manuel d’utilisation Benutzerhandbuch KICKER PowerBar KPB1 | KPB2 Amplified Weatherproof Bar-Mount Speaker System with Bluetooth Sistema de alto-falantes Amplificado à prova de intempéries com Bluetooth Système d’enceintes Amplifiées étanches à Montage sur Barre avec Bluetooth Verstärktes Wetterfestes Bar-Mount-Lautsprechersystem mit Bluetooth...
  • Page 2: Table Des Matières

    Contents Overview ......2 Specifications ......3 Installation ...... 4 Wiring ........4 Relay Install & Battery Management ..... 5 Mounting ....... 6 Operation ....... 8 Status LED ......8 Control Panel ......9 Setting Input Source .... 10 Line Output & AUX IN ..10 Broadcast Mode ....
  • Page 3: Overview

    KPB’s via Bluetooth, while AUX Input and Line Output connections allow for any combination of use with other devices. Use the KPB1 or the larger KPB2 on the beach, the links, the patio, off-road, or anywhere you’re missing the music.
  • Page 4: Specifications

    Specifications Model: KPB1 KPB2 Power Output 150W 300W @ 14.4V, <10% THD+N Total Speakers Height [in, mm] 4-9/16, 115 4-9/16, 115 Width [in, mm] 21, 530 34-1/2, 880 7.39 Weight [lbs, kg] 16.3 Woofer [in, mm] 3, 76 Tweeter [in, mm]...
  • Page 5: Installation

    Connect the KPB’s red power wire to the positive battery terminal. The wire harness includes an inline 15A ATC fuse (KPB1) or 30A ATC fuse (KPB2), and 5/16” ring terminals. The ring terminals can be cut off if they’re not needed, but the fuse should always be kept within 18”...
  • Page 6: Relay Install & Battery Management

    KPB. Relays and BMS are optional and not included. Required current rating: 30A SPDT Bosch Relay KPB or other device ground fuse KPB1 - 15A ATC KPB2 - 30A ATC battery Relay Pinouts 30 - Power Input 85 - Relay Ground...
  • Page 7: Mounting

    Mounting The KPB-series mounts out-of-the-box to round bars with the included 1.5”, 1.75”, and 2” diameter Bar Clamps. Use the KPB Square Clamps - sold separately - to mount your KPB to square bars. Choose a structurally sound location to mount the KPB.
  • Page 8 Clamp Rings around your bar, securing them to the Mounting Bases using the Clamp Screws. 5mm Allen Wrench required The KPB2 may be mounted with the bases and clamps in an inward, or outward configuration. KICKER does not recommend a combined inward/outward configuration. English...
  • Page 9: Operation

    Operation Status LED The LED color displays audio source, pairing status, and warnings: Bluetooth (Blue) Power is off Solid Bluetooth Mode Rapid Blinking Bluetooth Pairing Mode Alternate Red/Blue Waiting for Broadcast Mode to connect Long Blue + Short Red Broadcast Mode Bluetooth Transmitter Active AUX IN (Red) Power is off...
  • Page 10: Control Panel

    POWER Button Long Press - Power On/Off Short Press - Change Input Source Long Press - Enter Bluetooth Pairing Mode Change EQ Presets - KICKER, LOUD, SOUND QUALITY, & VOICE Increase Volume Decrease Volume Short Press - Previous Track...
  • Page 11: Setting Input Source

    SOURCE button. To finish pairing, from your audio device select either ‘KPB1 KICKER’ or ‘KPB2 KICKER’. When successfully connected, the STATUS LED will be solid blue. When the PowerBar powers on in, or enters, Bluetooth mode, it will automatically begin to search for and connect with the last connected device.
  • Page 12: Broadcast Mode

    Broadcast Mode Broadcast Mode allows you to play your audio through multiple KPBs. One KPB, the Broadcaster, will broadcast the audio to the Receiver(s). Broadcast Mode is compatible with both AUX and Bluetooth input sources. You may enter Broadcast Mode with the following button sequence.
  • Page 13: Remote Control Install

    Remote Control Install The remote control must be charged via USB micro 5V power input. Fully charge the remote for at least 3 hours before first use to maximize battery life. The LED will be red while charging, and off when complete.
  • Page 14 Install the included remote control to your steering wheel as follows: 1. Slightly pull out the mount tab on the back of the KPB remote and slide the remote onto the strap as shown below, firmly pushing until you feel a click. The Remote may be removed from the mounting clip and strap using a slight twisting motion.
  • Page 15: Remote Control Operation

    Remote Control Operation Sync to KPB after charging and mounting Short Press - Previous Track Long Press - Rewind Double-Press - Sync to KPB Short Press - Change Input Source Long Press - Enter Bluetooth Pairing Mode Short Press - Next Track Long Press - Fast Forward Decrease Volume Short Press - Play/Pause or Mute...
  • Page 16: Troubleshooting

    Bluetooth device will not connect? On your mobile device: Œ Turn Bluetooth off, then on again.  Remove ‘KPB1/2 KICKER’ from the Bluetooth menu. Then pair again (see page 10). Ž Move your mobile device closer to the speaker. Avoid obstacles that may block the wireless signal.
  • Page 17: Warranty

    Should service be necessary under this warranty for any reason due to manufacturing defect or malfunction during the warranty period, KICKER will repair or replace (at its discretion) the defective merchandise with equivalent merchandise. Warranty replacements may have cosmetic scratches and blemishes.
  • Page 18 Service performed by anyone other than KICKER HOW LONG WILL IT TAKE? KICKER strives to maintain a goal of one week turnaround for all electronics (amplifiers, crossovers, equalizers, etc.) returns. Delays may be incurred if lack of replacement inventory or parts is encountered.
  • Page 19 Descripción general ..19 Especificaciones ....20 Instalación ....21 Cableado ......21 Gestión de la batería e instalación del relé .... 22 Montaje ....... 23 Funcionamiento .... 25 LED de estado ....25 Panel de control ....26 Configuración de la fuente de entrada ....
  • Page 20: Descripción General

    Use el KPB1 o el KPB2 más grande en la playa, la cancha, el patio, en el campo o en cualquier lugar donde desee escuchar música.
  • Page 21: Especificaciones

    Especificaciones Modelo: KPB1 KPB2 Potencia de salida 150 W 300 W @ 14.4V, <10% THD+N Cantidad total de altavoces Altura [pulg., mm] 4-9/16,115 4-9/16,115 Ancho [pulg., mm] 21,530 34-1/2,880 7.39 Peso [lb, kg] 16.3 Altavoz de baja frecuencia 3, 76 [pulg., mm]...
  • Page 22: Instalación

    Conecte el cable de potencia rojo del KPB a la terminal positiva de la batería. El cable de alimentación incluye un fusible de línea ATC de 15A (KPB1) o un fusible ATC de 30A (KPB2), y terminales de anillo de 5/16". Las terminales de anillo pueden aislarse si no son necesarias, pero el fusible siempre debe mantenerse a 18"...
  • Page 23: Gestión De La Batería E Instalación Del Relé

    Corriente nominal requerida: 30 A Relé Bosch SPDT KPB u otro dispositivo conexión a tierra fusible KPB1 - 15A ATC KPB2 - 30A ATC batería Terminales del relé 30 - Entrada de alimentación 85 - Tierra del relé...
  • Page 24: Montaje

    Montaje La serie KPB se instala fácilmente a las barras redondas con las abrazaderas de barra incluidas de 1.5", 1.75" y 2" de diámetro. Use las abrazaderas cuadradas para el KPB (se venden por separado) para instalar su KPB en barras cuadradas. Elija una ubicación sólida en términos estructurales para la instalación del KPB.
  • Page 25 Llave Allen de 5 mm requerida El KPB2 puede ser instalado con las bases y sujetadores en configuración interna o externa. KICKER no recomienda una combinación de configuración interna y externa. Español...
  • Page 26: Funcionamiento

    Funcionamiento LED de estado El color del LED muestra la fuente de audio, el estado de sincronización y las advertencias: Bluetooth (azul) Apagado La energía está apagada Sólido Modo Bluetooth Parpadeo rápido Modo de sincronización de Bluetooth Rojo/azul alternado Esperando al que el Modo de transmisión se conecte Azul largo + rojo corto Modo de transmisión...
  • Page 27: Panel De Control

    Pulsación breve: cambiar fuente de entrada Pulsación larga: ingresar al modo de sincronización Bluetooth EQ (ECUALIZADOR) Cambio de opciones predefinidas del ecualizador - KICKER, ALTO, CALIDAD DE SONIDO, Y VOZ Subir volumen Bajar volumen Pulsación breve: pista anterior Pulsación larga: retroceder Pulsación breve: reproducción/pausa o ingresar...
  • Page 28: Configuración De La Fuente De Entrada

    SOURCE (FUENTE). Para terminar la sincronización, en su dispositivo de audio elige entre "KPB1 KICKER" o "KPB2 KICKER". Cuando se conecte exitosamente, el STATUS LED (LED DE ESTADO) se mostrará en azul continuo. Cuando el PowerBar se conecte o ingrese al modo Bluetooth, automáticamente comenzará...
  • Page 29: Modo De Transmisión

    Modo de transmisión El modo de transmisión le permite reproducir su audio a través de múltiples KPB. Un KPB, el Transmisor, transmitirá el audio al o los receptores. El modo de transmisión es compatible tanto con las fuentes de entrada AUX como Bluetooth.
  • Page 30: Instalación De Control Remoto

    Instalación de control remoto El control remoto debe cargarse a través de la entrada de alimentación micro USB de 5V. Cargue por completo el control remoto por al menos tres horas antes de usarlo por primera vez para maximizar la vida de la batería. El LED estará...
  • Page 31 Instale el control remoto incluido en su volante de la siguiente manera: 1. Extraiga ligeramente la pestaña de montaje en la parte trasera del control remoto del KPB y deslice el control remoto en la correa como se muestra a continuación, presionando firmemente hasta que escuche un chasquido.
  • Page 32: Operación Del Control Remoto

    Operación del control remoto Sincronizar con el KPB después de la carga y la instalación Pulsación breve: pista anterior Pulsación larga: retroceder Doble pulsación: sincronizar con KPB Pulsación breve: cambiar fuente de entrada Pulsación larga: ingresar al modo de sincronización Bluetooth Pulsación breve: pista siguiente Pulsación larga: avanzar Bajar volumen...
  • Page 33: Resolución De Problemas

    ¿El dispositivo Bluetooth no se conecta? En su dispositivo móvil: Œ Desactive la función Bluetooth y luego actívela otra vez.  Elimine ‘KPB1/2 KICKER’ del menú de Bluetooth. Luego sincronícelo otra vez (ver página 10). Ž Acerque más su dispositivo móvil al altavoz.
  • Page 34 Présentation ....34 Caractéristiques techniques . 35 Installation ....36 Câblage ......36 Gestion de batterie et installation de relais ..37 Montage ......38 Utilisation ..... 40 Voyant d'état ....... 40 Panneau de commande ..41 Réglage de la source d'entrée ....
  • Page 35: Présentation

    à l'entrée AUX et la sortie ligne permettent toute combinaison d'utilisation avec d'autres appareils. Utilisez le KPB1 ou le KPB2, plus grand, sur la plage, dans les plaines, sur le patio, hors des sentiers battus ou dans tout endroit où vous souhaiteriez pouvoir écouter votre musique.
  • Page 36: Caractéristiques Techniques

    Caractéristiques techniques Modèle : KPB1 KPB2 Puissance de sortie 150 W 300 W @ 14,4 V, <10 % THD+N Total des haut-parleurs Hauteur [po, mm] 4-9/16, 115 4-9/16, 115 Largeur [po, mm] 21, 530 34-1/2, 880 7,39 Poids [lbs, kg] 16,3 Graves [po ; mm] 3, 76 Aigus [po, mm] 1 ;...
  • Page 37: Installation

    Connectez le câble d'alimentation rouge du KPB à la borne de batterie positive. Le faisceau de câblage inclut un fusible en ligne 15A ATC (KPB1) ou un fusible 30A ATC (KPB2), et des bornes à anneaux de 5/16”. Les bornes à anneaux peuvent être coupées si elles ne sont pas nécessaires, mais le fusible doit toujours être...
  • Page 38: Gestion De Batterie Et Installation De Relais

    Courant nominal requis : 30 A Relais Bosch SPDT KPB ou autre appareil COMMUTATEUR masse fusible KPB1 - 15 A ATC KPB2 - 30 A ATC batterie Brochages de relais 30 - Entrée d'alimentation 85 - Masse du relais 86 - Entrée du déclencheur de relais 87 - Puissance de sortie - Contact ouvert (ON) 87a - Déconnecté...
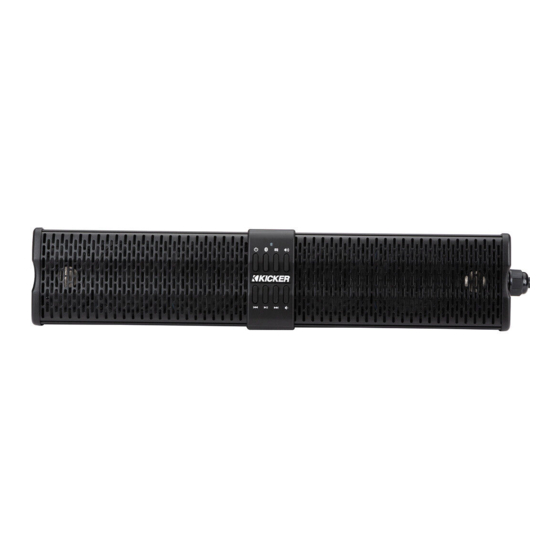
  • Page 39: Montage

    Montage Les modèles de la gamme KPB se montent dès leur déballage sur des barres rondes à l'aide des serre- barres inclus aux diamètres de 1,5”, 1,75” et 2”. Utilisez les dispositifs de serrage carrés du KPB - vendus séparément - pour monter votre KPB sur des barres carrées.
  • Page 40 Clé Allen de 5 mm requise Le KPB2 peut être monté avec les bases et dispositifs de serrage selon une configuration intérieure ou extérieure. KICKER ne recommande pas une configuration combinée intérieure/extérieure. Français...
  • Page 41: Utilisation

    Utilisation Voyant d'état La couleur du voyant affiche la source audio, l'état d'appairage et des avertissements : Bluetooth (Bleu) Éteint L'alimentation est coupée Fixe Mode Bluetooth Clignotement rapide Mode appairage Bluetooth Alternance Rouge/Bleu Attente de connexion du Mode Diffusion Bleu long + Rouge court Mode Diffusion Émetteur Bluetooth actif Entrée AUX (Rouge)
  • Page 42: Panneau De Commande

    POWER (ALIMENTATION) Pression prolongée : marche/arrêt Pression brève : changement de la source d'entrée Pression prolongée : mise en mode appairage Bluetooth Modifier préréglages de l'égaliseur - KICKER, LOUD (PUISSANCE), SOUND QUALITY (QUALITÉ SONORE) ET VOICE (VOIX) Hausse du volume Baisse du volume Pression brève : piste précédente...
  • Page 43: Réglage De La Source D'entrée

    SOURCE. Pour terminer l'appairage, depuis votre appareil audio, sélectionnez « KPB1 KICKER » ou « KPB2 KICKER ». Une fois la connexion réussie, le voyant d'état sera bleu fixe. Quand le PowerBar se met sous tension en mode Bluetooth, ou passe en mode Bluetooth, il commence automatiquement à...
  • Page 44: Mode Diffusion

    Mode Diffusion Le Mode Diffusion vous permet de diffuser votre musique via plusieurs KPB. Un KPB, le diffuseur, diffusera l'audio sur le(s) récepteur(s). Le Mode Diffusion est compatible avec les sources d'entrée AUX et Bluetooth. Vous pouvez entrer en Mode Diffusion avec la séquence de boutons suivante.
  • Page 45: Installation De La Télécommande

    Installation de la télécommande La télécommande doit être rechargée via l'entrée d'alimentation USB micro 5 V. Rechargez entièrement la télécommande pendant au moins 3 heures avant la première utilisation pour maximiser la durée de vie de la batterie. Le voyant sera rouge pendant le rechargement, et s'éteindra une fois le rechargement terminé.
  • Page 46 Installez la télécommande incluse sur votre volant comme suit : 1. Sortez légèrement l'attache de montage à l'arrière de la télécommande du KPB et faites glisser la télécommande sur la sangle comme illustré ci-dessous, en appuyant fermement jusqu'à sentir un clic. La télécommande peut être retirée de la sangle et du clip de montage par un léger mouvement de torsion.
  • Page 47: Utilisation De La Télécommande

    Utilisation de la télécommande Synchroniser avec le KPB après rechargement et montage Pression brève : piste précédente Pression prolongée : rembobinage Double pression : synchroniser avec le KPB Pression brève : changement de la source d'entrée Pression prolongée : mise en mode appairage Bluetooth Pression brève : piste suivante Pression prolongée : avance rapide Baisse du volume Pression brève : lecture/pause ou mise en sourdine...
  • Page 48: Dépannage

    La connexion avec le périphérique Bluetooth échoue ? Sur votre appareil mobile : Œ désactivez la fonction Bluetooth, puis réactivez-la.  Supprimez « KPB1/2 KICKER » du menu Bluetooth. Puis appairez de nouveau (voir page 10). Ž Rapprochez votre appareil mobile du haut-parleur. Évitez les obstacles qui pourraient bloquer le signal sans fil.
  • Page 49 Übersicht ..... 49 Spezifikationen ....50 Installation ....51 Verkabelung ......51 Relaisinstallation und Batteriemanagement .... 52 Montage ......53 Betrieb ......55 Status-LED......55 Bedienfeld ......56 Einstellung der Eingangsquelle ....57 Leitungsausgang und AUX-Eingang ....... 57 Broadcast-Modus ....58 Installation der Fernbedienung ....
  • Page 50: Übersicht

    Synchronisierung von zwei oder mehr KPBs über Bluetooth und mit AUX-Eingangs- und Line-Ausgangsanschlüssen ist eine beliebige Kombination mit anderen Geräten möglich. Verwenden Sie den KPB1 oder den größeren KPB2 am Strand, auf dem Golfplatz, auf der Terrasse, im Gelände oder überall dort, wo Sie Musik vermissen.
  • Page 51: Spezifikationen

    Spezifikationen Modell: KPB1 KPB2 Ausgangsleistung 150 W 300 W bei 14,4 V, <10 % THD+N Anzahl der Lautsprecher Höhe [Zoll, mm] 4-9/16, 115 4-9/16, 115 Breite [Zoll, mm] 21, 530 34-1/2, 880 7,39 Gewicht [lbs, kg] 16,3 Tieftöner [Zoll, mm] 3, 76 Hochtöner [Zoll, mm] 1, 25 Kabelbaumlänge [ft, m]...
  • Page 52: Installation

    Minuspol der Batterie an. Schließen Sie das rote Stromkabel der KPB an den positiven Batteriepol an. Der Kabelbaum enthält eine Inline 15 A ATC- Sicherung (KPB1) oder 30 A ATC-Sicherung (KPB2) sowie 5/16"-Ringklemmen. Die Ringklemmen können abgetrennt werden, wenn sie nicht benötigt werden, aber die Sicherung sollte immer innerhalb eines Abstands von 45 cm von der Batterie gehalten werden.
  • Page 53: Relaisinstallation Und Batteriemanagement

    Ihre KPB zu verwenden. Relais und BMS sind separat erhältlich und nicht im Lieferumfang enthalten. Erforderlicher Bemessungsstrom: 30 A SPDT Bosch Relais KPB oder anderes Gerät Erdung Sicherung KPB1 – 15 A ATC KPB2 – 30 A ATC Batterie Relais-Pinbelegungen 30 – Leistungsaufnahme 85 – Relais-Masse 86 – Relais-Trigger-Eingang 87 –...
  • Page 54: Montage

    Montage Die KPB-Serie lässt sich mit den mitgelieferten Halteklammern mit 1,5", 1,75" und 2" Durchmesser sofort an Rundstangen montieren. Verwenden Sie die separat erhältlichen rechtwinkligen KPB-Klemmen, um Ihre KPB an Vierkantstäben zu befestigen. Wählen Sie eine strukturell stabile Stelle aus, um die KPB zu montieren. Die KPB kann unter oder über Stangen montiert werden, und der Montagesockel kann um ±30°...
  • Page 55 Sie sie mit den Montageschrauben an den Montagesockeln. 5 mm Inbusschlüssel erforderlich Die KPB2 kann mit den Sockeln und Klemmen nach innen oder nach außen gerichtet montiert werden. KICKER empfiehlt keine kombinierte nach innen und nach außen gerichtete Anordnung. Deutsch...
  • Page 56: Betrieb

    Betrieb Status-LED Die LED-Farbe zeigt Audioquelle, Pairing-Status und Warnungen an: Bluetooth (Blau) Strom ist ausgeschaltet Leuchtet durchgehend Bluetooth-Modus Schnelles Blinken Bluetooth-Pairing-Modus Abwechselnd Rot/Blau Warten auf die Verbindung zum Broadcast-Modus Blau lang + Rot kurz Broadcast-Modus Bluetooth-Sender aktiv AUX-EINGANG (Rot) Strom ist ausgeschaltet Leuchtet durchgehend AUX-Modus Abwechselnd Rot/Blau...
  • Page 57: Bedienfeld

    Sie die POWER-Taste lange gedrückt halten Lange gedrückt halten – Ein-/Ausschalten Kurz drücken – Eingangsquelle ändern Lange gedrückt halten – Bluetooth-Pairing-Modus aufrufen EQ-Voreinstellungen ändern – KICKER, LOUD, SOUND QUALITY und VOICE Lautstärke erhöhen Lautstärke verringern Kurz drücken – vorheriger Titel Lange gedrückt halten –...
  • Page 58: Einstellung Der Eingangsquelle

    Pairing-Modus in diesem Stadium durch kurzes Drücken der SOURCE-Taste verlassen. Um die Kopplung (Pairing) abzuschließen, wählen Sie auf Ihrem Audiogerät entweder „KPB1 KICKER“ oder „KPB2 KICKER“. Wenn die Verbindung erfolgreich hergestellt wurde, leuchtet die STATUS-LED dauerhaft blau. Wenn die PowerBar...
  • Page 59: Broadcast-Modus

    Broadcast-Modus Im Broadcast-Modus können Sie Ihr Audio über mehrere KPBs wiedergeben. Eine KPB, der Broadcaster, sendet den Ton an den/die Receiver. Der Broadcast-Modus ist sowohl mit AUX- als auch mit Bluetooth-Eingangsquellen kompatibel. Sie können den Broadcast-Modus mit der folgenden Tastenfolge aufrufen.
  • Page 60: Installation Der Fernbedienung

    Installation der Fernbedienung Die Fernbedienung muss über einen USB-Micro- 5-V-Stromeingang geladen werden. Laden Sie die Fernbedienung vor der ersten Verwendung mindestens 3 Stunden lang vollständig auf, um die Lebensdauer der Batterie zu maximieren. Die LED leuchtet während des Ladevorgangs rot und erlischt, wenn der Ladevorgang abgeschlossen ist.
  • Page 61 Montieren Sie die mitgelieferte Fernbedienung wie folgt an Ihrem Lenkrad: 1. Ziehen Sie die Befestigungslasche auf der Rückseite der KPB-Fernbedienung leicht heraus und schieben Sie die Fernbedienung wie unten gezeigt auf den Träger, indem Sie sie fest drücken, bis Sie ein Klicken vernehmen.
  • Page 62: Betrieb Mit Der Fernbedienung

    Betrieb mit der Fernbedienung Nach dem Laden und Montieren Synchronisierung mit KPB Kurz drücken – vorheriger Titel Lange gedrückt halten – zurückspulen Zweimaliges Drücken - Synchronisierung mit KPB Kurz drücken – Eingangsquelle ändern Lange gedrückt halten – Bluetooth-Pairing- Modus aufrufen Kurz drücken –...
  • Page 63: Fehlerbehebung

    KPB-Ausgangslautstärke werden erhöht. Bluetooth-Gerät wird nicht verbunden. Auf Ihrem Mobilgerät: Œ Schalten Sie Bluetooth aus und dann wieder ein.  Entfernen Sie „KPB1/2 KICKER“ aus dem Bluetooth-Menü. Koppeln Sie dann erneut (siehe Seite 10). Ž Bewegen Sie Ihr mobiles Gerät näher an den Lautsprecher heran. Achten Sie auf Objekte, die das Funksignal blockieren können.
  • Page 64: Garantía | Garantie

    (“a todo volumen”) en todo sentido. La línea de altavoces y amplificadores KICKER es la mejor del mercado de audio de automóviles y por lo tanto representa el “combustible” para vivir a todo volumen en el área de “estéreos de automóvil” de la vida de nuestros clientes.

Ce manuel est également adapté pour:

Kpb2

Table des Matières