Exit Kickback L Mode D'emploi
Table des Matières
Les langues disponibles
Les langues disponibles
Liens rapides
Table des Matières

Manuels Connexes pour Exit Kickback L

Sommaire des Matières pour Exit Kickback L
- Page 3 English Deutsch Nederlands Français...
- Page 16 Nous testons égalemant en continu nos cycles de production et faisons régulièrement réaliser des tests indépendants à titre de contrôle supplémentaire. Seuls les produits qui se montrent à la hauteur de la norme EXIT Toys la plus rigoureuse sont porteurs de l’étiquette EXIT Toys.
-
Page 17: Consignes De Sécurité
2.0 Consignes de sécurité: Pour simplifier l’assemblage, veuillez lire les instructions suivantes avant de com- mencer, une personne additionnelle serait utile pour faciliter l’assemblage. Conservez ce manuel pour un réassemblage futur. • Lorsque le rebounder est utilisée par des enfants, la surveillance permanente d’un adulte est requise. -
Page 18: Instructions D'assemblage Et D'installation
Instructions d’Assemblage et d’installation • Une hauteur libre suffisante est essentielle. Veillez à un dégagement suffisant pour les fils, branches d’arbre, et autres risques possibles. • Un dégagement latéral est essentiel. Placez le rebounder loin des murs, struc- tures, barrières, et autres terrains de jeux. Maintenez un espace libre de tous les côtés du rebounder. -
Page 19: Conditions De Garantie Et Service Après- Vente
5.0 Conditions de garantie et service après- vente Le propriétaire du produit de EXIT Toys bénéficie des garanties suivantes sur ce produit: • 2 ans après date d’achat sur le cadre (avec un emploi normal). • 3 mois sur toutes les autres pieces (avec un emploi normal). - Page 21 Assembly steps / Montageschritte / Montage / Assemblée EN: Lay the Pad (1) upside down. Then insert the upper U-pipe (2) into the Lower U-pipe (3) to assemble the frame. Note: The Pad (1) needs to be lifted when assembling the upper U-pipe (2) and the Lower U-pipe (3). DE: Legen Sie den Rebounder mit der Abdeckung (1) nach unten auf den Boden.
- Page 22 EN: Turn around the Pad (1). Use two elastics with ball (5) through the first mesh of the net (4) at each 4 corners of the frame as shown and put the elastics around the frame. Note: First attach an elastic at the horizontal direction, then attach another elastic at the vertical direction.
- Page 23 EN: Attach all remaining elastics (5) to the frame as indicated by the arrows. Then attach all the straps of the pad (1) to the Net (4). DE: Befestigen Sie nun die restlichen Gummis (5) am Rahmen (siehe die Pfeile in der Abbildung).
- Page 24 EN: Insert the first hole of the ø38mm pipe (9) into the second hole of the ø42mm pipe(8). Then insert the L-plug (10) from the top down. There are multi adjustment positions, according to the desired position. DE: Stecken Sie das erste Loch der ø38 mm-Stange (9) in das zweite Loch der ø42 mm-Stange (8).
- Page 25 EN: This Rebounder L has three adjustment angels when using the button snap adjustments and ten angles when using the L-plug. DE: Dieser Rebounder L lässt sich mithilfe der Schnappverschlüsse in drei Positionen und mithilfe der L-Verbinder in zehn Positionen verstellen.
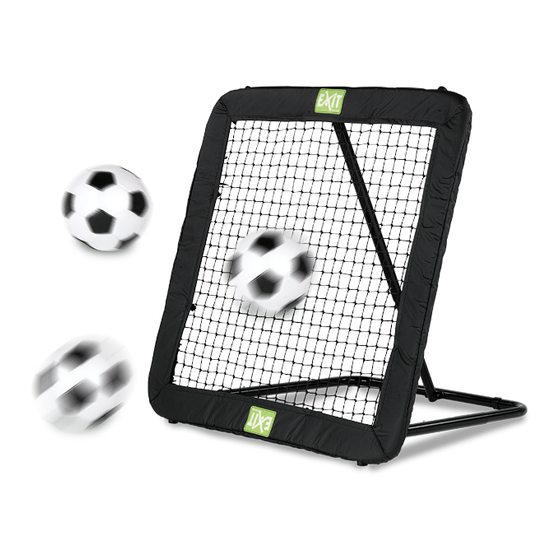
- Page 26 EN: Congratulations! The EXIT Kickback Rebounder is ready to use! DE: Herzlichen Glückwunsch! Ihr EXIT Kickback Rebounder ist nun einsatzbereit! NL: Gefeliciteerd! Uw EXIT Kickback Rebounder is nu gereed voor gebruik! FR: Félicitations! Le EXIT Kickback Rebounder est prêt à être utilisé !