
Manuels Connexes pour Nicols BIRDY 250 LED


Sommaire des Matières pour Nicols BIRDY 250 LED
- Page 1 BIRDY 250 LED Manuel d’utilisation Nouvelle technologie LED Nous vous recommandons de lire attentivement le manuel avant toute utilisation.
- Page 2 TABLES DES MATIERES Instructions de sécurité Caractéristiques techniques Réglages de l’appareil 3.1 Panneau de contrôle 3.2 Fonctions principales 3.3 Réglage position de départ Fonctionnement de l’appareil 4.1 Master/Slave 4.2 Télécommandes 4.3 Contrôleur DMX Configuration DMX 512 Branchement DMX 512 Dépannage de l’appareil Entretien de l’appareil...
- Page 3 1. INTRUCTIONS DE SECURITE Lire attentivement les consignes ci-après. Elles contiennent des informations importantes sur la sécurité de l'installation ainsi que sur l'utilisation et la maintenance de l'équipement. Conservez le présent manuel avec l'équipement pour référence ultérieure. En cas de vente de l'équipement à...
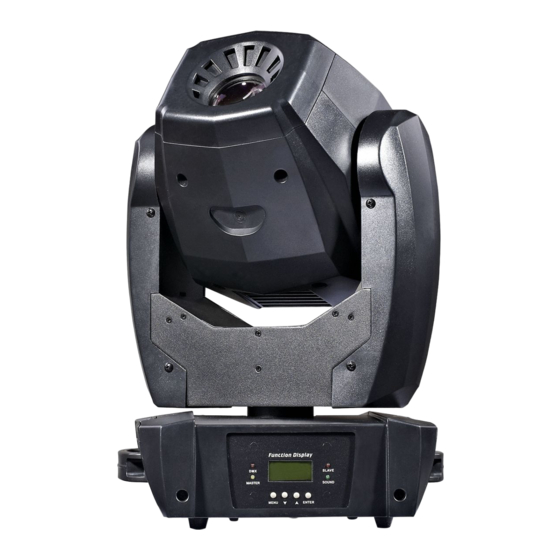
- Page 4 2. CARACTERISTIQUES TECHNIQUES La nouvelle lyre BIRDY 250 LED est la combinaison de la dernière génération de la technologie LED avec un optique de très grande qualité et des caractéristiques techniques incroyables.
- Page 5 Auto focus Angle :17° Affichage LED pour navigation et réglage adresse DMX facilité Alimentation : 230V 50hz Consommation : 130W Source lumineuse : LED 50W Dimensions : 299 x 247 x 437 mm Gobo rotatif : 22 mm Gobo fixe : 24 mm Poids : 10.2 kg Système photométrique...
- Page 6 3. FONCTIONNEMENT DE L’APPAREIL 3.1 PANNEAU DE CONTROLE Affichage ECRAN : Affiche les menus et les fonctions sélectionnées Signal Entrée DMX MASTER Mode Master SLAVE Mode Slave SOUND Clignote Mode musical Boutons MENU Pour sélectionner les fonctions DOWN Pour retourner dans les fonctions Pour avancer dans les fonctions ENTER Pour confirmer les fonctions sélectionnées...
- Page 7 Veuillez vous référer aux fonctions mentionnées ci-dessous.
- Page 8 DMX ADRESS – Le réglage de l’adresse DMX 512 Sélectionnez DMX Address. Appuyez sur le bouton ENTER pour valider. L’adresse s’affiche et clignote. Utilisez les boutons UP et DOWN pour régler l’adresse de 1 à 512. Une fois l'adresse sélectionnée, appuyez sur le bouton ENTER pour la valider. Pour retourner aux fonctions sans avoir fait de changement, appuyez sur le bouton MENU de nouveau.
- Page 9 BLACKOUT MODE – Le mode Blackout Sélectionnez Slave Mode. Appuyez sur le bouton ENTER pour valider. Le mode s’affiche et clignote. Utilisez les boutons DOWN et UP pour sélectionner Yes (blackout activé) ou No (blackout désactivé). Une fois le mode choisi, appuyez sur le bouton ENTER pour la valider. Pour retourner aux fonctions sans avoir fait de changement, appuyez sur le bouton MENU de nouveau.
- Page 10 1 minute pour sortir du mode MENU. BACK LIGHT Sélectionnez Back light. Appuyez sur le bouton ENTER pour valider. Le mode s’affiche et clignote. Utilisez les boutons DOWN et UP pour sélectionner On (Led on) ou Off (Led off). Une fois le mode choisi, appuyez sur le bouton ENTER pour la valider. Pour retourner aux fonctions sans avoir fait de changement, appuyez sur le bouton MENU de nouveau.
- Page 11 effectué, appuyez sur le bouton ENTER pour valider. Pour retourner aux fonctions sans avoir fait de changement, appuyez sur le bouton MENU de nouveau. Appuyez et maintenez le bouton MENU enfoncé pendant 1 seconde ou attendez 1 minute pour sortir du mode MENU.
- Page 12 PRO Defaults (PRO Def) : Pour utilisateurs professionnels 16 Chan Channel Mode Yes Split Color Mode Slave 1 Slave Mode Yes Black Out Off Sound State 90 Sound Sense ...
- Page 13 attendez 1 minute pour sortir du mode MENU. 3.3 REGLAGE DE LA POSITION DE DEPART Dans le menu des fonctions principales, maintenez enfoncé le bouton ENTER pendant au moins 3 secondes pour entrer dans le menu secondaire. Utilisez les boutons DOWN et UP pour choisir Pan Offset, Tilt Offset , Color Offset, Gobo1 Offset, R-Gobo Offset, Gobo2 Offset, Prism Offset, R-Prism Offset ou Focus Offset.
- Page 14 4.1 MASTER/SLAVE En configuration MASTER/SLAVE, en reliant toutes les unités, le premier appareil de la chaîne va contrôler les autres appareils en déclenchant un effet de lumière au son de la musique. Cette fonction est intéressante dès lors où vous voulez réaliser une démonstration instantanée.
- Page 15 4.3 CONTROLEUR DMX Si vous utilisez un contrôleur DMX universel pour contrôler les unités, vous devez régler l'adresse DMX de 1 à 512 pour que les unités puissent recevoir le signal DMX. Appuyez sur le bouton MENU jusqu'à ce que DMX ADRESS s'affiche. Appuyez sur le bouton ENTER. L'affichage clignote.
- Page 16 5. CONFIGURATION DMX 512 Modes 15 canaux...
- Page 18 Modes 16 canaux...
- Page 19 6. BRANCHEMENT DMX 512...
- Page 20 1. Sur le dernier appareil, le câble DMX doit avoir un bouchon de terminaison afin de réduire les défauts du signal. Il faut alors souder une résistance de 120 Ohm 1/4W entre la borne 2 (DMX-) et la borne 3 (DMX+) dans une prise XLR 3 points. Raccordez-la à la sortie DMX du dernier appareil 2.
- Page 21 l'appareil précédent. Essayer d'utiliser un autre contrôleur DMX. Vérifiez l'absence d'interférences entre les câbles électriques. C. Les appareils ne répondent pas à la télécommande CA-8 1. Vous pouvez avoir une coupure dans le câblage DMX. Vérifiez les LED pour savoir si elles fonctionnent correctement en mode MASTER/SLAVE.