Publicité
Les langues disponibles
Les langues disponibles
Liens rapides
Quick Installation Guide
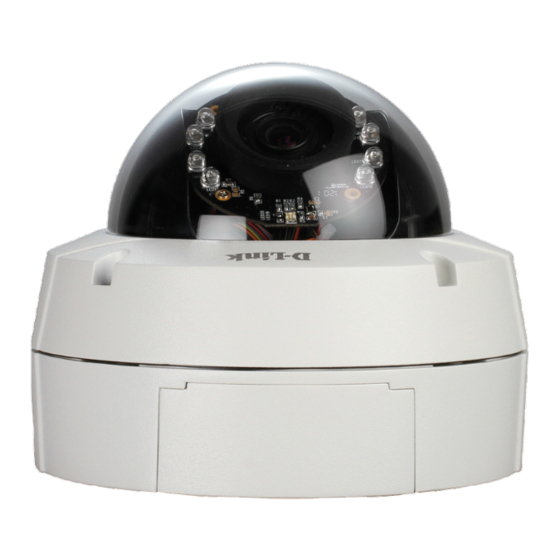
HD Day & Night Vandal-Proof Fixed Dome Network Camera
This document will guide you through the
basic installation process for your new D-Link
Network Camera.
DCS-6511
Quick Installation Guide
Installationsanleitung
Guide d'installation
Guía de instalación
Guida di Installazione
DCS-6511_A1_QIG_v1.00(EU).indd 1
Documentation also available on
CD and via the D-Link Website
2010/10/13 上午 11:19:53
Publicité

Manuels Connexes pour D-Link DCS-6511


Sommaire des Matières pour D-Link DCS-6511
- Page 1 Quick Installation Guide HD Day & Night Vandal-Proof Fixed Dome Network Camera This document will guide you through the basic installation process for your new D-Link Network Camera. DCS-6511 Quick Installation Guide Installationsanleitung Guide d’installation Guía de instalación Guida di Installazione...
- Page 2 DCS-6511_A1_QIG_v1.00(EU).indd 2 2010/10/13 上午 11:19:54...
- Page 3 DCS-6511 Quick Install Guide This installation guide provides basic instructions for installing the DCS-6511 Network Camera on your network. For additional information about how to use the camera, please see the User’s Manual which is available on the CD included in this package or from the D-Link support website.
- Page 4 Push the SD card into the camera with the gold contacts oriented towards the base of the camera. To eject the SD card, push the SD card into the slot. D-Link DCS-6511 Quick Install Guide DCS-6511_A1_QIG_v1.00(EU).indd 2 2010/10/13 上午 11:19:55...
- Page 5 Style 1 - Concealed Cable Installation ƒ Height: 23 mm (0.9 inches) ƒ Diameter: 183 mm (7.2 inches) ƒ Weight: 400 g (0.9 lbs) Figure 2.1 Figure 2.2 D-Link DCS-6511 Quick Install Guide DCS-6511_A1_QIG_v1.00(EU).indd 3 2010/10/13 上午 11:19:56...
- Page 6 Style 2 - Exposed Cable Installation ƒ Height: 23 mm (0.9 inches) ƒ Diameter: 183 mm (7.2 inches) ƒ Weight: 400 g (0.9 lbs) Figure 2.3 Figure 2.4 Figure 2.5 Figure 2.6 D-Link DCS-6511 Quick Install Guide DCS-6511_A1_QIG_v1.00(EU).indd 4 2010/10/13 上午 11:19:56...
- Page 7 ƒ Height: 201 mm (7.9 inches) ƒ Diameter: 150 mm (5.9 inches) ƒ Weight: 665 g (1.45 lbs) Rubber Seal Bracket Pendant Bracket Mounting Plate Figure 3.1 Bracket Figure 3.2 Figure 3.4 Figure 3.3 D-Link DCS-6511 Quick Install Guide DCS-6511_A1_QIG_v1.00(EU).indd 5 2010/10/13 上午 11:19:56...
- Page 8 ƒ Diameter: 150 mm (5.9 inches) ƒ Weight: 770 g (1.7 lbs) Bracket Bent Bracket Mounting Plate Figure 4.1 Bracket Cap Figure 4.2 Bent Bracket Dome Camera Figure 4.3 Figure 4.4 D-Link DCS-6511 Quick Install Guide DCS-6511_A1_QIG_v1.00(EU).indd 6 2010/10/13 上午 11:19:56...
- Page 9 If you are using a PoE hub, connect the IP camera to the hub via an Ethernet cable, which will provide transmission of both power and data over a single cable. D-Link DCS-6511 Quick Install Guide DCS-6511_A1_QIG_v1.00(EU).indd 7 2010/10/13 上午 11:19:58...
- Page 10 Insert the DCS-6511 CD into your computer's CD-ROM drive to begin the installation. If the Autorun function on your computer is disabled, or if the D-Link Launcher fails to start automatically, click Start > Run. Type D:\autorun.exe, where D: represents the drive letter of your CD-ROM drive.
- Page 11 Click on the D-Link Setup Wizard SE icon that was created in your Windows Start menu. Start > D-Link > Setup Wizard SE The Setup Wizard will appear and display the MAC address and IP address of your camera(s). If you have a DHCP server on your network, a valid IP Address will be displayed.
- Page 12 Viewing Camera via Web Browser Click on the D-Link Setup Wizard SE icon that was created in your Windows Start menu. Start > D-Link > Setup Wizard SE Select the camera and click the button labeled "Link" to access the web configuration.
- Page 13 Managed, Smart, & Wireless Switches, or Firewalls 0871 873 0909 (09.00am- 05.30pm) (BT 10ppm, other carriers may vary.) Ireland (Mon-Fri) All Products 1890 886 899 (09.00am-06.00pm, Sat 10.00am-02.00pm) Phone rates: €0.05ppm peak, €0.045ppm off peak times D-Link DCS-6511 Quick Install Guide DCS-6511_A1_QIG_v1.00(EU).indd 11 2010/10/13 上午 11:20:01...
- Page 14 NOTES DCS-6511_A1_QIG_v1.00(EU).indd 12 2010/10/13 上午 11:20:01...
- Page 15 DCS-6511 Netzwerkkamera in Ihrem Netzwerk. Zusätzliche Informationen zur Verwendung der Kamera finden Sie im Benutzerhandbuch, das Ihnen auf der CD, die diesem Paket beiliegt, oder über die D-Link Support-Website zur Verfügung steht. Installationsschritte 1. Prüfen Sie den Packungsinhalt, ob er mit den auf der Liste unten aufgeführten Artikeln übereinstimmt.
- Page 16 Installation der SD-Karte Stecken Sie die SD-Karte in die Kamera. Achten Sie darauf, dass die goldfarbenen Kontakte auf den Kamerafuß zeigen. Um die SD-Karte auszuwerfen, drücken Sie sie leicht in den Steckplatz. D-Link DCS-6511 Quick Install Guide DCS-6511_A1_QIG_v1.00(EU).indd 14 2010/10/13 上午 11:20:02...
- Page 17 Genaue Anleitungen zur Installation und Montage der Kamera mithilfe eines Befestigungsbügels finden Sie im Benutzerhandbuch. Methode 1 – Verdeckte Kabelinstallation ƒ Höhe: 23 mm ƒ Durchmesser: 183 mm ƒ Gewicht: 400 g Abbildung 2.1 Abbildung 2.2 D-Link DCS-6511 Quick Install Guide DCS-6511_A1_QIG_v1.00(EU).indd 15 2010/10/13 上午 11:20:02...
- Page 18 Methode 2 – Exponierte Kabelinstallation ƒ Höhe: 23 mm ƒ Durchmesser: 183 mm ƒ Gewicht: 400 g Abbildung 2.3 Abbildung 2.4 Abbildung 2.5 Abbildung 2.6 D-Link DCS-6511 Quick Install Guide DCS-6511_A1_QIG_v1.00(EU).indd 16 2010/10/13 上午 11:20:03...
- Page 19 Montage für hängende Kamera (DCS-34-2) ƒ Höhe: 201 mm ƒ Durchmesser: 150 mm Gummidichtungsring ƒ Gewicht: 665 g Bügelkappe Deckenhalterung Montageplatte Abbildung 3.1 Bügelkappe Abbildung 3.2 Abbildung 3.4 Abbildung 3.3 D-Link DCS-6511 Quick Install Guide DCS-6511_A1_QIG_v1.00(EU).indd 17 2010/10/13 上午 11:20:03...
- Page 20 Montage für gebogene Kamerabügelhalterung (DCS-34-3) ƒ Höhe: 253 mm ƒ Durchmesser: 150 mm ƒ Gewicht: 770 g Bügelkappe Gebogene Bügelhalterung Montageplatte Abbildung 4.1 Bügelkappe Abbildung 4.2 Gebogene Bügelhalterung Dome-Kamera Abbildung 4.3 Abbildung 4.4 D-Link DCS-6511 Quick Install Guide DCS-6511_A1_QIG_v1.00(EU).indd 18 2010/10/13 上午 11:20:03...
- Page 21 Anschluss an einen PoE-Hub Wenn Sie einen PoE-Hub verwenden, schließen Sie die IP-Kamera mit dem Ethernetkabel an den Hub an, so dass Strom und Daten über ein einziges Kabel übertragen werden. D-Link DCS-6511 Quick Install Guide DCS-6511_A1_QIG_v1.00(EU).indd 19 2010/10/13 上午 11:20:05...
- Page 22 5. Konfiguration mithilfe des Assistenten Legen Sie die DCS-6511 CD in das CD-ROM-Laufwerk Ihres Computers, um die Installation zu beginnen. Sollte die CD auf Ihrem Computer nicht automatisch ausgeführt werden oder der D-Link Launcher startet nicht automatisch, klicken Sie auf Start > Ausführen. Geben Sie D:\autorun.exe ein, wobei D: für den Laufwerkbuchstaben Ihres CD-ROM-Laufwerks steht.
- Page 23 Klicken Sie auf das Symbol für den D-Link SE Setup- Assistenten, der in Ihrem Windows-Startmenü erstellt wurde. Start > D-Link > Setup Wizard SE Der Setup-Assistent wird aufgerufen und zeigt die MAC- und IP-Adresse Ihrer Kamera(s) an. Wenn in Ihrem Netzwerk ein DHCP-Server vorhanden ist, wird eine gültige IP-Adresse angezeigt.
- Page 24 Anzeige der Kamera über einen Webbrowser Klicken Sie auf das Symbol für den D-Link SE Setup- Assistenten, der in Ihrem Windows-Startmenü erstellt wurde. Start > D-Link > Setup Wizard SE Wählen Sie die Kamera aus und klicken Sie auf die Schaltfläche Link, um auf die Web-Konfiguration...
- Page 25 0,116 € pro Minute Zeiten: Mo. –Fr. 09:00 – 17:30 Uhr Schweiz: Web: http://www.dlink.ch Telefon: +41(0)848 331100 0,08 CHF pro Minute Zeiten: Mo. –Fr. 09:00 – 17:30 Uhr * Gebühren aus Mobilnetzen und von anderen Providern können abweichen. D-Link DCS-6511 Quick Install Guide DCS-6511_A1_QIG_v1.00(EU).indd 23 2010/10/13 上午 11:20:07...
- Page 26 NOTES DCS-6511_A1_QIG_v1.00(EU).indd 24 2010/10/13 上午 11:20:08...
- Page 27 DCS-6511 sur votre réseau. Pour obtenir des informations complémentaires sur l'utilisation de la caméra, consultez le Manuel d'utilisation, disponible sur le CD joint à ce coffret, ou sur le site de support en ligne D-Link. Procédure d'installation 1.
- Page 28 Installer la carte SD Insérez la carte SD dans la caméra avec les contacts dorés orientés vers la base de la caméra. Pour éjecter la carte SD, appuyez dessus dans le port. D-Link DCS-6511 Quick Install Guide DCS-6511_A1_QIG_v1.00(EU).indd 26 2010/10/13 上午 11:20:08...
- Page 29 Style 1 : Installation dissimulée des câbles ƒ Hauteur : 23 mm ƒ Diamètre : 183 mm ƒ Poids : 400 g Illustration 2.1 Illustration 2.2 D-Link DCS-6511 Quick Install Guide DCS-6511_A1_QIG_v1.00(EU).indd 27 2010/10/13 上午 11:20:08...
- Page 30 Style 2 : Installation exposée des câbles ƒ Hauteur : 23 mm ƒ Diamètre : 183 mm ƒ Poids : 400 g Illustration 2.3 Illustration 2.4 Illustration 2.5 Illustration 2.6 D-Link DCS-6511 Quick Install Guide DCS-6511_A1_QIG_v1.00(EU).indd 28 2010/10/13 上午 11:20:09...
- Page 31 ƒ Diamètre : 150 mm Joint en caoutchouc ƒ Poids : 665 g Cache de support Support suspendu Plaque de montage Illustration 3.1 Cache de support Illustration 3.2 Illustration 3.4 Illustration 3.3 D-Link DCS-6511 Quick Install Guide DCS-6511_A1_QIG_v1.00(EU).indd 29 2010/10/13 上午 11:20:09...
- Page 32 ƒ Diamètre : 150 mm ƒ Poids : 770 g Cache de support Support coudé Plaque de montage Illustration 4.1 Cache de support Illustration 4.2 Support coudé Caméra à dôme Illustration 4.3 Illustration 4.4 D-Link DCS-6511 Quick Install Guide DCS-6511_A1_QIG_v1.00(EU).indd 30 2010/10/13 上午 11:20:09...
- Page 33 Si vous utilisez un concentrateur Ethernet PoE pour alimenter la caméra, connectez celle-ci au concentrateur à l'aide du câble Ethernet fourni, qui sert à la fois de câble pour l'alimentation et les données. D-Link DCS-6511 Quick Install Guide DCS-6511_A1_QIG_v1.00(EU).indd 31 2010/10/13 上午 11:20:11...
- Page 34 5. Configuration à l'aide de l'assistant Insérez le CD de la DCS-6511 dans le lecteur de CD-ROM de l'ordinateur pour lancer l'installation. Si la fonction d'exécution automatique de votre ordinateur est désactivée ou si le dispositif de lancement D-Link ne parvient pas à démarrer automatiquement, cliquez sur Démarrer >...
- Page 35 Cliquez sur l'icône D-Link Setup Wizard SE (Assistant de configuration D-Link SE) créée dans le menu Démarrer. Démarrer > D-Link > Setup Wizard SE (Assistant de configuration SE) L'Assistant de configuration s'ouvre et affiche les adresses MAC et IP de votre ou vos caméras. Si un serveur DHCP se trouve sur votre réseau, une...
- Page 36 Cliquez sur l'icône D-Link Setup Wizard SE (Assistant de configuration D-Link SE) créée dans le menu Démarrer. Démarrer > D-Link > Setup Wizard SE (Assistant de configuration SE) Sélectionnez la caméra, puis cliquez sur le bouton « Link » (Connexion) pour accéder à la configuration Web.
- Page 37 ASSISTANCE TECHNIQUE Assistance technique D-Link sur internet :http://www.dlink.fr Assistance technique D-Link par téléphone : 0820 0803 03 0.12 € TTC/min depuis un poste fixe Du lundi au vendredi de 9h à 19h (hors jours fériés) D-Link DCS-6511 Quick Install Guide DCS-6511_A1_QIG_v1.00(EU).indd 35...
- Page 38 NOTES DCS-6511_A1_QIG_v1.00(EU).indd 36 2010/10/13 上午 11:20:13...
- Page 39 Esta guía de instalación proporciona instrucciones básicas para la instalación de la cámara de red DCS-6511 en su red. Para obtener información adicional acerca de cómo utilizar la cámara, consulte el Manual del usuario disponible en el CD incluido en el paquete o en el sitio web de asistencia de D-Link.
- Page 40 Empuje la tarjeta SD en la cámara, con los contactos dorados orientados hacia la base de la cámara. Para expulsar la tarjeta SD, empuje la tarjeta SD en la ranura. D-Link DCS-6511 Quick Install Guide DCS-6511_A1_QIG_v1.00(EU).indd 38 2010/10/13 上午 11:20:14...
- Page 41 Estilo 1 – Instalación de cables oculta ƒ Altura: 23 mm (0,9 pulgadas) ƒ Diámetro: 183 mm (7,2 pulgadas) ƒ Peso: 400 g (0,9 libras) Figura 2.1: Figura 2.2: D-Link DCS-6511 Quick Install Guide DCS-6511_A1_QIG_v1.00(EU).indd 39 2010/10/13 上午 11:20:14...
- Page 42 Estilo 2 – Instalación de cables visible ƒ Altura: 23 mm (0,9 pulgadas) ƒ Diámetro: 183 mm (7,2 pulgadas) ƒ Peso: 400 g (0,9 libras) Figura 2.3: Figura 2.4: Figura 2.5: Figura 2.6: D-Link DCS-6511 Quick Install Guide DCS-6511_A1_QIG_v1.00(EU).indd 40 2010/10/13 上午 11:20:15...
- Page 43 ƒ Diámetro: 150 mm (5,9 pulgadas) Junta de goma ƒ Peso: 665 g (1,45 libras) Tapa del soporte Soporte suspendido Placa de montaje Figura 3.1 Tapa del soporte Figura 3.2 Figura 3.4 Figura 3.3 D-Link DCS-6511 Quick Install Guide DCS-6511_A1_QIG_v1.00(EU).indd 41 2010/10/13 上午 11:20:15...
- Page 44 ƒ Diámetro: 150 mm (5,9 pulgadas) ƒ Peso: 770 g (1,7 libras) Tapa del soporte Soporte curvado Placa de montaje Figura 4.1 Tapa del soporte Figura 4.2 Soporte curvado Cámara domo Figura 4.3 Figura 4.4 D-Link DCS-6511 Quick Install Guide DCS-6511_A1_QIG_v1.00(EU).indd 42 2010/10/13 上午 11:20:15...
- Page 45 Si está utilizando un terminal PoE, conecte la cámara IP al terminal mediante un cable Ethernet, el cuál proporcionará transmisión eléctrica y de datos a través de un solo cable. D-Link DCS-6511 Quick Install Guide DCS-6511_A1_QIG_v1.00(EU).indd 43 2010/10/13 上午 11:20:17...
- Page 46 5. Configuración con el asistente Inserte el CD de la DCS-6511 en la unidad de CD-ROM del ordenador para comenzar la instalación. Si la función de ejecución automática del ordenador está desactivada o si el iniciador de D-Link no se inicia automáticamente, haga clic en Inicio > Ejecutar. Escriba D:\ autorun.exe, donde D: representa la letra de unidad de su unidad de CD-ROM.
- Page 47 Haga clic en el icono Asistente de configuración SE D-Link que se creó en el menú de inicio de Windows. Inicio > D-Link > Asistente de configuración SE Aparecerá el asistente de configuración y mostrará la dirección MAC y la dirección IP de la cámara. Si tiene un servidor DHCP en la red, se mostrará...
- Page 48 Haga clic en el icono Asistente de configuración SE D-Link que se creó en el menú de inicio de Windows. Inicio > D-Link > Asistente de configuración SE Seleccione la cámara y haga clic en el botón con la etiqueta "Vínculo"...
- Page 49 ASISTENCIA TÉCNICA http://www.dlink.es Asistencia Técnica Telefónica de D-Link: +34 902 30 45 45 0,067 €/min De Lunes a Viernes de 9:00 a 19:00 D-Link DCS-6511 Quick Install Guide DCS-6511_A1_QIG_v1.00(EU).indd 47...
- Page 50 NOTES DCS-6511_A1_QIG_v1.00(EU).indd 48 2010/10/13 上午 11:20:20...
- Page 51 DCS-6511 In questa guida di installazione sono riportate le istruzioni di base per installare la videocamera DCS-6511 Network Camera in rete. Per ulteriori informazioni sull'utilizzo della videocamera, consultare il manuale utente disponibile sul CD incluso nella confezione o scaricabile dal sito Web di supporto di D-Link.
- Page 52 Installare la scheda SD Inserire la scheda SD nella videocamera con i contatti dorati rivolti verso la base della videocamera. Per espellere la scheda, spingerla nell'alloggiamento. D-Link DCS-6511 Quick Install Guide DCS-6511_A1_QIG_v1.00(EU).indd 50 2010/10/13 上午 11:20:21...
- Page 53 Manuale utente. Stile 1 – Installazione con cavi nascosti ƒ Altezza: 23 mm ƒ Diametro: 183 mm ƒ Peso: 400 g Figura 2.1 Figura 2.2 D-Link DCS-6511 Quick Install Guide DCS-6511_A1_QIG_v1.00(EU).indd 51 2010/10/13 上午 11:20:21...
- Page 54 Stile 2 – Installazione con cavi a vista ƒ Altezza: 23 mm ƒ Diametro: 183 mm ƒ Peso: 400 g Figura 2.3 Figura 2.4 Figura 2.5 Figura 2.6 D-Link DCS-6511 Quick Install Guide DCS-6511_A1_QIG_v1.00(EU).indd 52 2010/10/13 上午 11:20:22...
- Page 55 ƒ Diametro: 150 mm Guarnizione in gomma ƒ Peso: 665 g Copertura staffa Staffa per montaggio sospeso Piastra di montaggio Figura 3.1 Tappo per staffa Figura 3.2 Figura 3.4 Figura 3.3 D-Link DCS-6511 Quick Install Guide DCS-6511_A1_QIG_v1.00(EU).indd 53 2010/10/13 上午 11:20:22...
- Page 56 ƒ Peso: 770 g Copertura staffa Staffa per montaggio piegato Piastra di montaggio Figura 4.1 Tappo per staffa Figura 4.2 Staffa per montaggio piegato Videocamera a cupola Figura 4.3 Figura 4.4 D-Link DCS-6511 Quick Install Guide DCS-6511_A1_QIG_v1.00(EU).indd 54 2010/10/13 上午 11:20:22...
- Page 57 Collegamento con hub PoE Se si utilizza un hub PoE, collegare la videocamera IP all'hub tramite un cavo Ethernet, che verrà utilizzato sia per l'alimentazione che per la trasmissione dei dati. D-Link DCS-6511 Quick Install Guide DCS-6511_A1_QIG_v1.00(EU).indd 55 2010/10/13 上午 11:20:23...
- Page 58 5. Procedura guidata di configurazione Inserire il CD di DCS-6511 nell'unità CD-ROM del computer per avviare l'installazione. Se la funzione di esecuzione automatica è disabilitata nel computer in uso o se l'utilità di avvio di D-Link non viene avviata automaticamente, fare clic su Start > Run (Start > Esegui). Digitare D:\autorun.exe, dove D: rappresenta la lettera dell'unità...
- Page 59 Fare clic sull'icona D-Link Setup Wizard SE creata nel menu di Start di Windows. Start > D-Link > Setup Wizard SE Nella pagina dell'Installazione guidata verranno visualizzati l'indirizzo MAC e l'indirizzo IP della telecamera. Se la rete dispone di un server DHCP, viene visualizzato un indirizzo IP valido.
- Page 60 Visualizzazione della telecamera tramite il browser Web Fare clic sull'icona D-Link Setup Wizard SE creata nel menu di Start di Windows. Start > D-Link > Setup Wizard SE Selezionare la telecamera e fare clic sul pulsante "Link" (Collegamento) per accedere alla configurazione Web.
- Page 61 Al termine serrare la vite di regolazione immagine. SUPPORTO TECNICO http://www.dlink.it/support Supporto Tecnico dal lunedì al venerdì dalle ore 9.00 alle ore 19.00 con orario continuato Telefono: 199400057 D-Link DCS-6511 Quick Install Guide DCS-6511_A1_QIG_v1.00(EU).indd 59 2010/10/13 上午 11:20:26...
- Page 62 NOTES DCS-6511_A1_QIG_v1.00(EU).indd 60 2010/10/13 上午 11:20:26...
- Page 63 NOTES DCS-6511_A1_QIG_v1.00(EU).indd 61 2010/10/13 上午 11:20:26...
- Page 64 Ver.1.00(EU) 2010/10/11 RMN0100500 DCS-6511_A1_QIG_v1.00(EU).indd 62 2010/10/13 上午 11:20:26...