Télécharger Imprimer la page
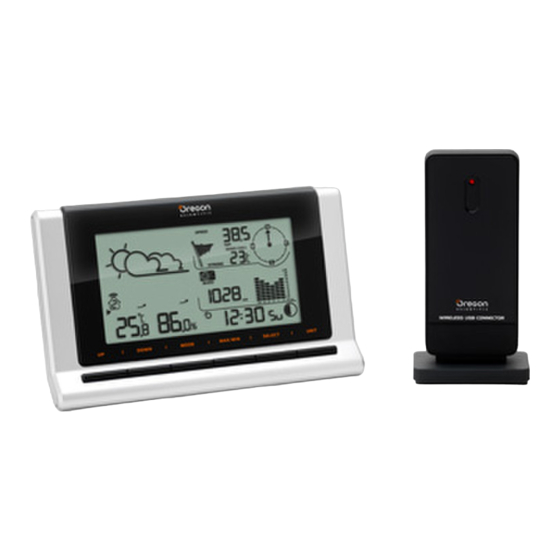
Oregon Scientific WMR180 Manuel De L'utilisateur

Oregon Scientific WMR180 Manuel De L'utilisateur

Masquer les pouces Voir aussi pour WMR180:

Publicité

Les langues disponibles
  • FR

Les langues disponibles

  • FRANÇAIS, page 37

Liens rapides

All manuals and user guides at all-guides.com
Wireless PC-connected Professional
Weather Station
Model: WMR180 / WMR180A
USER MANUAL
1

Publicité

loading

Sommaire des Matières pour Oregon Scientific WMR180

  • Page 1 All manuals and user guides at all-guides.com Wireless PC-connected Professional Weather Station Model: WMR180 / WMR180A USER MANUAL...
  • Page 2 Wir danken Ihnen, dass Sie sich für die Schnurlose, mit dem PC verbundene professionelle Wetterstation von Wetterstation Oregon Scientific™ (WMR180 / WMR180A) entschieden Modell: WMR180 / WMR180A haben. D i e B a s i s s t a t i o n i s t k o m p a t i b e l m i t a n d e r e n BEDIENUNGSANLEITUNG Sendeeinheiten.
  • Page 3 All manuals and user guides at all-guides.com LIGHT...
  • Page 4 All manuals and user guides at all-guides.com 7. Bereich für Luftfeuchtigkeit / Taupunkt ist WINDMESSER ausgewählt 8. Stufe des Taupunkts – Temperatur wird angezeigt 9. MAX. / MIN. Luftfeuchtigkeit / Stufe des Taupunkts wird angezeigt 10. Luftfeuchtigkeitstrend 11. Messwert für Luftfeuchtigkeit B Bereich für Windgeschwindigkeit / Windrichtung / Windkühle 1.
  • Page 5 All manuals and user guides at all-guides.com 1. Gehäuse für Temperatur- / Luftfeuchtigkeitssensor DEN EXTERNEN TEMPERATUR- / 2. Anschluss für Solarpanel LUFTFEUCHTIGKEITSSENSOR EINRICHTEN 3. RESET-Taste 4. Batteriefach USB-KOMMUNIKATIONSHUB VORDERANSICHT RÜCKANSICHT SEAR CH 1. Halten Sie das Gehäuse fest, drehen Sie an der Sendeeinheit und öffnen Sie sie nach links, bis Sie ein Klicken hören.
  • Page 6 All manuals and user guides at all-guides.com BASISSTATION EINRICHTEN VERBINDUNG ÜBERPRÜFEN HINWEIS Installieren Sie die Batterien zuerst in Bevor Sie mit der Installation der externen Sendeeinheiten den Funksendeeinheiten und anschließend in der fortfahren, überprüfen Sie die Verbindung zur Basisstation, und achten Sie auf die Übereinstimmung Basisstation.
  • Page 7 All manuals and user guides at all-guides.com 1. Befestigen Sie den Plastikfuß mit Hilfe der Rundbügel, USB-HUB den Unterlegscheiben und Schraubenmuttern an der Um sicherzustellen, dass Sie die neueste und passendste Stange. Software für Ihr Gerät ausführen, installieren Sie bitte 2.
  • Page 8 • USA :Signal WWVB-60: innerhalb von 3200 km (2000 Meilen) von Fort Collins, Colorado. Nur bei WMR180 – schieben Sie den EU- / UK-Schalter auf die Ihrem Standort entsprechende Stellung. Drücken Sie jedes Mal auf RESET, wenn Sie die gewählte Einstellung ändern.
  • Page 9 All manuals and user guides at all-guides.com Nördliche Hemisphäre (wie auf dem Hauptgerät wenn Sie den Empfang des Funkzeitsignals deaktiviert angezeigt) haben.) 1. Drücken Sie auf SELECT, um zum Uhr-Bereich zu Neumond Vollmond navigieren. wird neben dem Bereich angezeigt. 2. Halten Sie MODE gedrückt, um die Uhreinstellung Zunehmender Abnehmender zu ändern.
  • Page 10 All manuals and user guides at all-guides.com TEMPERATUR- UND LUFTFEUCHTIGKEITSTREND TEMPERATUR UND LUFTFEUCHTIGKEIT Die Trendanzeigen werden neben den Messwerten für Die Wetterstation zeigt folgende Messwerte für Innen Temperatur und Luftfeuchtigkeit angezeigt. Der Trend und Außen an: wird wie folgt dargestellt: 1.
  • Page 11 All manuals and user guides at all-guides.com Windgeschwindigkeit / Windrichtung / Windkühle zu UV - INDEX navigieren. wird neben dem Bereich angezeigt. Die Werte des UV-Index lauten wie folgt: 2. Drücken Sie wiederholt auf MAX / MIN, bis der UV-INDEX GEFAHRENSTUFE SYMBOL Messwert der minimalen Windkühle oder der...
  • Page 12 All manuals and user guides at all-guides.com FUNKGESTEUERTE / ATOMUHR RESET Drücken Sie auf RESET, um das Gerät auf die Synchronisierung Autom. oder deaktiviert Standardeinstellungen zurückzusetzen. Uhranzeige HH:MM:SS Stundenformat 12 Std. AM/PM oder 24 Std. TECHNISCHE DATEN Kalender TT/MM oder MM/TT BASISSTATION Wochentag in 6 (E, D, F, I, S, R)
  • Page 13 Hiermit erklärt Oregon Scientific, dass die Schnurlose, Speicherrücksetzung mit dem PC verbundene professionelle Wetterstation Batterie 2 x UM-3 (AA) 1,5V (Modell: WMR180 / WMR180A) mit den grundlegenden Anforderungen und anderen relevanten Vorschriften der Richtlinie 1999/5/EG übereinstimmt. Eine Kopie VORSICHTSMASSNAHMEN der unterschriebenen und mit Datum versehenen •...
  • Page 14 Wireless PC-connected Professional INTRODUCTION Weather Station Thank you for selecting the Oregon Scientific™ Wireless PC-connected Professional Weather Station (WMR180 Model: WMR180 / WMR180A / WMR180A). The base station is compatible with other sensors. To purchase additional sensors, please contact your local USER MANUAL retailer.
  • Page 15 All manuals and user guides at all-guides.com LIGHT...
  • Page 16 All manuals and user guides at all-guides.com B Wind Speed / Wind Direction / Wind Chill Area RAIN GAUGE Base and funnel: 1. Wind speed reading (m/s, kph, mph or knots) 2. Outdoor wind sensor battery is low 1. Rain gauge 3.
  • Page 17 All manuals and user guides at all-guides.com Front view: 1. LED indicator: blinks rapidly during search or slowly to indicate unsuccessful search; continuous light indicates a successful connection Back view: 1. SEARCH: initiate search for base station 2. RESET: reset USB Communications Hub to default settings 4.
  • Page 18 All manuals and user guides at all-guides.com • Wind direction indicator. Move the direction of the To completely disconnect from power, unplug adaptor wind indication and verify the icon moves in the same from the mains. direction To insert batteries: TEMPERATURE / HUMIDITY SENSOR 1.
  • Page 19 All manuals and user guides at all-guides.com • Make sure the USB communications hub is not obstructed and is easily accessible to the computer. • To completely disconnect from power, the USB should be disconnected from the PC. • This product should be supplied by an identical USB port complying with the requirements of Limited Power Source.
  • Page 20 WWVB-60 signal: within 3200km (2000 miles) of Fort • Clock with seconds Collins Colorado. • Clock with weekday WMR180 only - slide the EU / UK switch to the appropriate • Calendar setting based on your location. Press RESET whenever you change the selected setting.
  • Page 21 All manuals and user guides at all-guides.com The timestamp records the date and time when storing Southern hemisphere the temperature and humidity readings in memory. Full Moon Moon To select the temperature measurement unit: Waxing Waning Press UNIT to select °C / °F. Crescent Gibbous First...
  • Page 22 All manuals and user guides at all-guides.com 2. Press MODE to toggle between UVI / Barometer / The wind level is shown by a series of icons: Rainfall readings. The corresponding icon will appear: ICON LEVEL DESCRIPTION BAROMETER RAINFALL <2 miles/h (<4km/h) Light 2-8 miles/h (3-13 km/h) To select the measurement unit for the barometer or...
  • Page 23 All manuals and user guides at all-guides.com RAINFALL RADIO-CONTROLLED / ATOMIC CLOCK To view the recorded rainfall of the current hour or Synchronization Auto or disabled last 24 hours: Clock display HH:MM:SS 1. Press SELECT to navigate to the UVI / Barometer / Hour format 12hr AM/PM or 24hr Rainfall Area.
  • Page 24 Hereby, Oregon Scientific, declares that this Wireless Product Name: Wireless PC-connected PC-connected Professional Weather Station (Model: Professional Weather Station WMR180 / WMR180A) is in compliance with the Manufacturer: IDT Technology Limited essential requirements and other relevant provisions Address: Block C, 9/F, Kaiser Estate, of Directive 1999/5/EC.
  • Page 25 Conexión Inalámbrica al PC Gracias por elegir Estación Meteorológica de Oregon Scientific (WMR180 / WMR180A). Modelo: WMR180 / WMR180A La unidad base es compatible con otros sensores. Para MANUAL DE USUARIO comprar un sensor adicional, sírvase ponerse en contacto con su proveedor local.
  • Page 26 All manuals and user guides at all-guides.com LIGHT...
  • Page 27 All manuals and user guides at all-guides.com SENSOR DE VIENTO 3. Se muestran la humedad y temperatura interior y exterior 4. Área de temperatura seleccionada 5. La pila del sensor exterior está casi gastada 6. Lectura de temperatura (°C / °F) 7.
  • Page 28 All manuals and user guides at all-guides.com 1. Carcasa del sensor de temperatura y humedad CONFIGURACIÓN DEL SENSOR REMOTO 2. Toma de alimentación solar DE TEMPERATURA Y HUMEDAD 3. Botón de REINICIO 4. Compartimento para las pilas HUB DE COMUNICACIONES USB VISTA FRONTAL VISTA TRASERA SEAR CH...
  • Page 29 All manuals and user guides at all-guides.com MONTAJE DE LA UNIDAD PRINCIPAL COMPROBAR CONEXIÓN NOTA Coloque las pilas de los sensores remotos antes Antes de empezar a instalar los sensores exteriores, que las de la unidad principal, asegurándose de que la compruebe que la comunicación con la unidad principal polaridad coincida (+ y -).
  • Page 30 All manuals and user guides at all-guides.com 2. Introduzca el soporte de fijación horizontal en la USB HUB base. Para asegurarse de que está utilizando el software más 3. Fíjelo firmemente con un tornillo. actualizado y con mejor compatibilidad con su unidad, instale el software Virtual Weather Station del CD incluido en este paquete.
  • Page 31 • EEUU: Señal WWVB-60: a 3200 Km (2000 millas) de Fort Collins, Colorado. Sólo WMR180– deslice el conmutador entre EU / UK para que encaje con su localización. Pulse RESET para modificar la configuración seleccionada. El icono de recepción parpadeará mientras busque una MEDIDOR DE LLUVIA señal.
  • Page 32 All manuals and user guides at all-guides.com Hemisferio norte (como se muestra en la unidad 2. Pulse MODE y manténgalo pulsado para modificar principal) la configuración del reloj. El ajuste parpadeará. 3. Pulse el botón UP / DOWN para incrementar / reducir el valor de ajuste.
  • Page 33 All manuals and user guides at all-guides.com TEMPERATURA Y HUMEDAD SENSACIÓN DE VIENTO / DIRECCIÓN / VELOCIDAD DEL VIENTO La estación meteorológica muestra lecturas interiores y exteriores de: La unidad principal 1. Temperatura / humedad relativa (actual / máxima / proporciona información mínima) sobre la velocidad y la...
  • Page 34 All manuals and user guides at all-guides.com Para ver las lecturas de nivel máximo de rayos UV / BARÓMETRO / PRECIPITACIÓN UVA: La estación meteorológica funciona con un sensor UV y 1. Pulse SELECT para acceder al área de UVA / un pluviómetro.
  • Page 35 All manuals and user guides at all-guides.com HUB DE COMUNICACIONES USB Precisão da 2 m/s ~ 10 m/s (+/- 3 m/s) velocidade 10 m/s ~ 56 m/s (+/- 10%) Dimensões 68 x 46 x 136 mm Precisão da direção 16 pontos cardinais (C x L x A) (2,7 x 1,8 x 5,4 pol) Transmissão do...
  • Page 36 Estación Meteorológica Profesional con Conexión • No limpie la unidad con materiales abrasivos o Inalámbrica al PC (modelo: WMR180 / WMR180A) corrosivos. cumple con los requisitos esenciales y cualesquiera • No manipule los componentes internos. De hacerlo otras disposiciones aplicables o exigibles de la Directiva se invalidaría la garantía.
  • Page 37 Nous vous remercions d’avoir choisi cette Station météorologique professionnelle sans fil pour PC Modèle: WMR180 / WMR180A (WMR180 / WMR180A) de Oregon Scientific Cette station est compatible avec d'autres capteurs. Si MANUEL DE L’UTILISATEUR vous désirez acheter des capteurs supplémentaires, veuillez contacter votre revendeur local.
  • Page 38 All manuals and user guides at all-guides.com LIGHT...
  • Page 39 All manuals and user guides at all-guides.com 3. La température et l’humidité des canaux intérieurs ANÉMOMÈTRE-GIROUETTE / extérieurs sont affichées 4. Zone de température sélectionnée 5. La pile de la sonde extérieure est faible 6. Relevés de la température (°C / °F) 7.
  • Page 40 All manuals and user guides at all-guides.com Le capteur est alimenté par des piles. Il transmet des THERMO HYGROMETRE données à la station de base à une distance de 100 mètres (328 pieds). Installation des piles : 1. Dévisser l’anémomètre du capteur de vent soigneusement.
  • Page 41 All manuals and user guides at all-guides.com Installation du pluviomètre : 2. Insérez les piles, en respectant les polarités (+/-). 3. Appuyer sur RESET après chaque changement de piles. 4. Fermez le couvercle du compartiment des piles. REMARQUE Nous vous recommandons d’utiliser des piles alcalines pour une meilleure performance.
  • Page 42 All manuals and user guides at all-guides.com REMARQUE SONDE DE TEMPÉRATURE & D’HUMIDITÉ EXTÉRIEURE Pour un chargement continu des données en temps • réel, veillez à ce que le Hub de communication USB soit connecté à l’ordinateur via le câble USB fourni et que l’ordinateur soit allumé.
  • Page 43 • États-Unis: Signal WWVB-60: dans un rayon de 3200km (2000 miles) de Fort Collins Colorado. Modèle WMR180 uniquement – placez le bouton EU / UK selon votre zone géographique. Appuyez sur RESET (REINITIALISER) dès lors que vous changez le réglage sélectionné.
  • Page 44 All manuals and user guides at all-guides.com Dans l’hémisphère Nord, la lune croit par la droite (portion Pour activer (et forcer une recherche de signal si la de lune visible augmentant après la Nouvelle Lune). recherche précédente est infructueuse) / désactiver La partie éclairée de la lune croit de droite à...
  • Page 45 All manuals and user guides at all-guides.com Zone de Prévisions Météorologiques Effacer les mémoires et l’horodatage afférents aux relevés de température, humidité et point de rosée. ICONE DESCRIPTION Pour effacer les relevés, dans la Zone Température ou Ensoleillé Humidité, appuyez et maintenez la touche MAX / MIN. REMARQUE Le point de rosée vous indique à...
  • Page 46 All manuals and user guides at all-guides.com REMARQUE Le graphique n’ayant pour objectif que de L’horodatage s’affiche donc dans la Zone Horloge une vous fournir une comparaison rapide entre les relevés des fois la vitesse maximum du vent enregistrée. dernières 24 heures, l’axe vertical ne peut convertir les Effacer les relevés minimum du refroidissement pouces en millimètres.
  • Page 47 All manuals and user guides at all-guides.com RÉINITIALISATION UNITE DE CAPTEUR DE VENT Appuyez sur RESET pour que l’appareil revienne aux Dimensions 178 x 76 x 214 mm réglages par défaut. (L x l x H) (7 x 3 x 8,4 pouces) Poids 100 g (3,5 onces) sans piles SPÉCIFICATIONS...
  • Page 48 Ne pas soumettre le produit à une force excessive, Par la présente Oregon Scientific déclare que l’appareil au choc, à la poussière, aux changements de (modèle: WMR180/ WMR180A) est conforme aux température ou à l’humidité. exigences essentielles et aux autres dispositions •...
  • Page 49 Grazie per aver scelto la Stazione meteorologica professionale con USB HUB wireless per la connessione per la connessione al PC al PC (WMR180 / WMR180A) di Oregon Scientific Modello: WMR180 / WMR180A L’unità principale è compatibile con sensori addizionali opzionali. Per l’acquisto dei sensori opzionali, contattare MANUALE PER L’UTENTE...
  • Page 50 All manuals and user guides at all-guides.com LIGHT...
  • Page 51 All manuals and user guides at all-guides.com 6. Rilevazione della temperatura (°C / °F) ANEMOMETRO 7. Area umidità / punto di rugiada selezionata 8. Indica che sono visualizzati il livello del punto di rugiada e la temperatura 9. Indica che sono visualizzati l’umidità MAX / MIN e il livello del punto di rugiada 10.
  • Page 52 All manuals and user guides at all-guides.com Il sensore funziona a batterie. Esso è in grado di SENSORE DI TEMPERATURA E UMIDITÀ ESTERNE trasmettere dati all’unità principale senza l’utilizzo di fili, entro un campo d’azione di circa 100 metri. Inserimento delle batterie: 1.
  • Page 53 All manuals and user guides at all-guides.com Installazione del pluviometro: NOTA Non utilizzare batterie ricaricabili. Con questo prodotto si consiglia di utilizzare batterie alcaline per prestazioni prolungate. NOTA Non esporre le batterie ad eccessive fonti di calore, quali sole o fuoco. L’icona dell’indicatore della batteria può...
  • Page 54 All manuals and user guides at all-guides.com SENSORE TERMOIGROMETRO Display / luce LED USB Significato Sincronizzazione in corso sul display LCD dell’hub USB e della stazione LED che lampeggia base velocemente Perdita del collegamento LED che lampeggia Impossibile realizzare il lentamente collegamento LED fisso...
  • Page 55 Questo prodotto è progettato per sincronizzare di fissaggio che contribuiscono a tenere fermi i cavi. automaticamente il proprio orologio-calendario quando si trova nel raggio di un segnale di radiocontrollo: WMR180: INSTALLAZIONE ALTERNATIVA: MONTAGGIO SEPARATO • EU: segnale DCF-77: entro 1500km da Francoforte, DEL SENSORE DI TEMPERATURA E UMIDITÀ...
  • Page 56 CE per l’ora Centrale (Central) Collins, Colorado. EA per l’ora della Costa Orientale Solo per il modello WMR180 – spostare la levetta EU / UK NOTA Il giorno della settimana è disponibile in inglese sull’impostazione corretta in base alla propria posizione.
  • Page 57 All manuals and user guides at all-guides.com 2. Tenere premuto MODE per attivare la ricerca Visualizzazione delle rilevazioni dell’umidità (umidità, punto di rugiada): automatica. I dati interni ed esterni si alterneranno automaticamente sul display. 1. Premere SELECT per passare all’Area umidità. 3.
  • Page 58 All manuals and user guides at all-guides.com 2. Premere MODE per alternare le rilevazioni dell’indice UV, del barometro e delle precipitazioni. Apparirà Forte 42-87 km/h (26-54 mph) l’icona corrispondente: BAROMETRO PRECIPITAZIONI Tempesta >88 km/h (>55 mph) Visualizzazione della velocità massima del vento e dell’indice di raffreddamento minimo: Per selezionare l’unità...
  • Page 59 All manuals and user guides at all-guides.com 4. Premere UP / DOWN per aumentare / diminuire il Temperatura attuale, minima e valore dell’impostazione. massima Memoria 5. Premere MODE per confermare l’impostazione. Punto di rugiada con min e PRECIPITAZIONI Visualizzazione delle rilevazioni registrate delle UMIDITÀ...
  • Page 60 Campo di trasmissione aperto Per avere maggiori informazioni sui nuovi prodotti Trasmissione Ogni 100 secondi circa Oregon Scientific visita il nostro sito internet www. oregonscientific.it dove potrai trovare tutte le informazioni Num. canali di cui hai bisogno. Alimentazione 2 batterie UM-4 (AAA) da 1,5V DICHIARAZIONE DI CONFORMITÁ...
  • Page 61 INTRODUCTIE draadloze pc-verbinding Dank u dat u gekozen hebt voor de Oregon Scientific™ Weerstation (WMR180/ WMR180A). Model: WMR180 / WMR180A Het apparaat ondersteunt ook andere sensoren. Om extra HANDLEIDING sensoren aan te schaffen, kunt u contact opnemen met uw plaatselijke dealer.
  • Page 62 All manuals and user guides at all-guides.com LIGHT...
  • Page 63 All manuals and user guides at all-guides.com B Schermvak Windsnelheid / Windrichting / REGENMETER Windkoelte Basis en trechter: 1. Windsnelheidsgegevens (m/s, kph, mph of knopen) 2. Batterij windmeter raakt leeg 3. Indicator Windsnelheidsniveaus 1. Regenmeter 4. Beschrijving Windsnelheidsniveaus 2. Batterijvak 5.
  • Page 64 All manuals and user guides at all-guides.com Voorkant: 1. Indicator-LED: knippert snel tijdens het zoeken en langzaam om aan te geven dat het zoeken mislukt is; het brandt continu als het verbinding met succes gelegd is Achterkant: 1. SEARCH: zoeken naar buitensensoren starten 2.
  • Page 65 All manuals and user guides at all-guides.com • Windsnelheid: Draai de windvaan voorzichtig en NB Stel het apparaat en de adapter niet bloot aan controleer of er iets verschijnt op het scherm van het vochtige omstandigheden. Plaats nooit voorwerpen met basisstation, bijv.
  • Page 66 All manuals and user guides at all-guides.com 7. Schuif de aansluiting voor het zonnepaneel op zijn Scherm / USB LED-licht Betekenis plaats aan de andere kant van de steun. Bevestig het USB-hub en basisstation op het LCD-scherm zonnepaneel op zijn plaats. worden gesynchroniseerd.
  • Page 67 • Klok met Seconden van Fort Collins, Colorado (VS). • Klok met Weekdag Alleen WMR180 – schuif de EU / UK schakelaar naar • Kalender de gewenste stand, afhankelijk van uw locatie. Druk op RESET wanneer u deze instelling verandert.
  • Page 68 All manuals and user guides at all-guides.com rechts. De richting hangt af van de breedtegraad waarop de observeerder zich bevindt. Bewolkt De maandstand van dit apparaat is uitsluitend geschikt voor het noordelijk halfrond. Voor gebruikers op het zuidelijk halfrond zal het maanstanddiagram incorrect Regenachtig (in spiegelbeeld) lijken.
  • Page 69 All manuals and user guides at all-guides.com De gevoelstemperatuurfactor is gebaseerd HITTE-INDEX- EN VOCHTIGHEIDSTREND op de gecombineerde effecten van temperatuur en De trendlijnen worden weergegeven naast de windsnelheid. De weergegeven gevoelstemperatuur is temperatuur- en vochtigheidsgegevens. De trend wordt alleen van sensoren op kanaal 1. als volgt weergegeven: STIJGEND STABIEL...
  • Page 70 All manuals and user guides at all-guides.com Om de maximale UV-metingen te bekijken: BINNENBAROMETER 1. Druk SELECT om naar het UVI- / Barometer- / Barometereenheid mb, inHg en mmHg Neerslagvak te gaan. verschijnt naast het vak. 2. Druk herhaaldelijk op MODE om het UV-vak te Meetbereik 700 –...
  • Page 71 Mm en in Weerstation met draadloze pc-verbinding (model: Bereik 0 mm – 9999 mm WMR180 / WMR180A) voldoet aan de essentiële eisen < 15 mm: +/- 1 mm en aan de overige relevante bepalingen van Richtlijn Nauwkeurigheid 15 mm tot 9999 mm: +/- 7% 1999/5/EC.
  • Page 72 Agradecemos por escolher a Estação Meteorológica da Sem Fio Conectável ao PC Oregon Scientific (WMR180 / WMR180A). Modelo: WMR180 / WMR180A A estação base é compatível com outros sensores. Para adquirir sensores adicionais, entre em contato com o MANUAL DO USUÁRIO revendedor local.
  • Page 73 All manuals and user guides at all-guides.com LIGHT...
  • Page 74 All manuals and user guides at all-guides.com 1. Direção do vento 10. Tendência da umidade 2. Caixa do leme 11. Leitura da umidade 3. Anemômetro B Área da Velocidade do Vento / Direção do Vento 4. Conexão para energia solar / Sensação Térmica MEDIDOR DE CHUVA Base e funil:...
  • Page 75 All manuals and user guides at all-guides.com CONCENTRADOR DE COMUNICAÇÕES USB AJUSTE DO SENSOR REMOTO DE UMIDADE / TEMPERATURA VISTA FRONTAL VISTA TRASEIRA SEAR CH 1. Segurando o sensor, gire-o à esquerda. Vista frontal: 2. Retire o sensor da caixa. 1.
  • Page 76 All manuals and user guides at all-guides.com MONTAGEM DA ESTAÇÃO BASE VERIFICANDO A CONEXÃO NOTA Instale primeiramente as pilhas nos sensores Antes de efetuar a instalação dos sensores externos, remotos e, a seguir, na estação base observando as verifique a comunicação com a estação base. polaridades (+ e -).
  • Page 77 All manuals and user guides at all-guides.com acompanha o pacote. Siga as instruções de instalação do software. NOTA O software deve ser primeiramente instalado 16 4 antes da transferência de dados. 1. Conecte uma extremidade do cabo USB no concentrador USB e a outra extremidade na porta USB do PC.
  • Page 78 • Sinal WWVB-60: dentro de 3.200 km (2000 milhas) de Fort Collins, Colorado. Apenas WMR180 – deslize a chave EU / UK para o ajuste apropriado, com base em sua localização. Pressione RESET sempre que alterar o ajuste selecionado. O ícone de recepção piscará durante a busca de um sinal.
  • Page 79 All manuals and user guides at all-guides.com 3. Pressione UP / DOWN para aumentar / diminuir o Hemisfério Sul valor do ajuste. 4. Pressione MODE para confirmar. Lua Nova Lua Cheia 5. Repita as etapas 3 a 4 para ajustar a diferença horária (+ / -23 horas), formato 12 / 24 horas, hora, minuto, ano, formato data / mês, mês, data e idioma do dia Lua Crescente...
  • Page 80 All manuals and user guides at all-guides.com • Metros por segundo O ícone indica o sensor remoto cujos dados são (m/s) exibidos. O ícone aparece quando dados internos • Kilômetros por hora são exibidos. (kph) A marca horária registra a data e hora ao armazenar as •...
  • Page 81 All manuals and user guides at all-guides.com NOTA O número que aparece no eixo horizontal (Hr) BARÔMETRO indica há quanto tempo cada medida foi registrada (por Para definir as leituras de compensação do nível de exemplo, 3 horas atrás, 6 horas atrás, etc.). A barra altitude do barômetro: representa a medida registrada para aquele período 1.
  • Page 82 All manuals and user guides at all-guides.com TEMPERATURA INTERNA -20°C a 0°C: +/- 2.0°C (+/- 4.0°F) Unidade de 0°C a 40°C: ºC / ºF temperatura Precisão de +/- 1.0°C (+/- 2.0°F) Alcance exibido 0°C a 50°C (32°F a 122°F) temperatura 40°C a 50°C: +/- 2.0°C (+/- 4.0°F) Faixa operacional...
  • Page 83 CE – DECLARAÇÃO DE CONFORMIDADE Oregon Scientific declara que este(a) Estação Meteorológica Profissional Sem Fio Conectável ao PC (modelo: WMR180 / WMR180A) está conforme com os requisitos essenciais e outras provisões da Diretriz 1999/5/CE. Uma cópia assinada e datada da Declaração de Conformidade está...
  • Page 84 Trådlös PC-ansluten Professionell INTRODUKTION Väderstation Tack för ditt val av en Oregon Scientific Väderstation (WMR180 / WMR180A). Modell: WMR180 / WMR180A Basstationen är kompatibel med andra sensorer. För att köpa ytterligare sensorer, kontakta din närmaste BRUKSANVISNING återförsäljare. Sensorer med denna logo är kompatibla med...
  • Page 85 All manuals and user guides at all-guides.com LIGHT...
  • Page 86 All manuals and user guides at all-guides.com 1. Vindriktning B Vindhastighet / Vindriktnings / Kyla i vind 2. Hus för vindflöjel område 3. Vindmätare 4. Anslutningskontakt för solcell REGNUPPSAMLARE Uppsamlare: 1. Vindhastighet (m/s, kph, mph eller knop) 2. Batteriet i vindgivaren är svagt 3.
  • Page 87 All manuals and user guides at all-guides.com 1. Håll i givaren, vrid till det klickar åt vänster. USB HUB 2. Lyft givaren från huset. VY FRAMSIDA VY BAKSIDA 3. Se till att batterierna sätts in med rätt polaritet (+ / -). Tryck RESET efter varje batteribyte.
  • Page 88 All manuals and user guides at all-guides.com • Vindhastighet: Vrid långsamt vindflöjeln och observera NOTERA Huvudenheten och adapter får inte utsättas ett numeriskt värde på basstationen, t.ex. för väta. Inga objekt fyllda med vätska, såsom vaser, får • Vindriktningsindikator. Ändra riktningen på placeras på...
  • Page 89 All manuals and user guides at all-guides.com NOTERA Solcellsriktning: om du bor på: För kontinuerlig uppladdning av data i realtid, se till att • Nord Södra halvklotet USB-huben är ansluten till datorn med medföljande Norra halvklotet USB-kabel och förvissa dig om att datorn är igång. Kolla så...
  • Page 90 Fort Collins Colorado. • Klocka med sekunder • Klocka med veckodag Endast WMR180 - Skjut EU / UK omkopplaren till den • Datum position som motsvarar den plats du befinner dig på. Tryck RESET så snart du har ändrat inställning.
  • Page 91 All manuals and user guides at all-guides.com Södra halvklotet Att välja temperaturmätenhet: Tryck UNIT för att välja °C / °F. Nymåne Fullmåne NOTERING Mätenheten för alla temperaturer ändras Avtagande samtidigt. Växande måne fullmåne För att avläsa temperatur (aktuell / max / min): 1.
  • Page 92 All manuals and user guides at all-guides.com Vindstyrkan visas genom ett antal ikoner: Att välja mätenhet för lufttryck eller regn: I UV / Barometer / Regnområdet, tryck UNIT för att IKON NIVÅ BESKRIVNING växla mellan: • barometer: millimeter kvicksilver (mmHg), tum Ej mätbart <4km/h (2 mph) kvicksilver (inHg), millibar per hectopascal (mb).
  • Page 93 All manuals and user guides at all-guides.com BAKGRUNDSBELYSNING 12 timmars AM / PM eller Timformat 24 tim Tryck LIGHT för att tända bakgrundsbelysningen i 5 sekunder. Datum DD/MM eller MM/DD Veckodag på 6 språk (E, D, F, I, S, R) RESET (ÅTERSTÄLLNING) VINDGIVARE Tryck RESET för att återställa produkten till...
  • Page 94 Utsätt inte apparaten för kraftigt våld, stötar, damm, Härmed intygar Oregon Scientific att denna Trådlös PC- extrema temperaturer eller fukt. ansluten Professionell Väderstation (modell: WMR180 / • Täck inte för ventilationshålen. Försäkra dig om att WMR180A) står i överensstämmelse med de väsentliga närliggande föremål såsom tidningar, dukar, gardiner...
  • Page 95 All manuals and user guides at all-guides.com © 2011 Oregon Scientific. All rights reserved. P/N:300102856-00001-10...

Ce manuel est également adapté pour:

Wmr180a