
Sommaire des Matières pour FIBARO Smoke Sensor
- Page 1 All manuals and user guides at all-guides.com I n st all at io n and O p era t io n Gu i de SMOKE SENSOR...
- Page 2 03. ADDING TO THE ACTIVE SMARTHOME PLATFORM 04. SENSOR INSTALLATION 4.1. Walk Test 4.2. Installation Notes 05. SMOKE DETECTION 06. RESETTING THE SMOKE SENSOR S mo k e S e n s o r P a g e | 2...
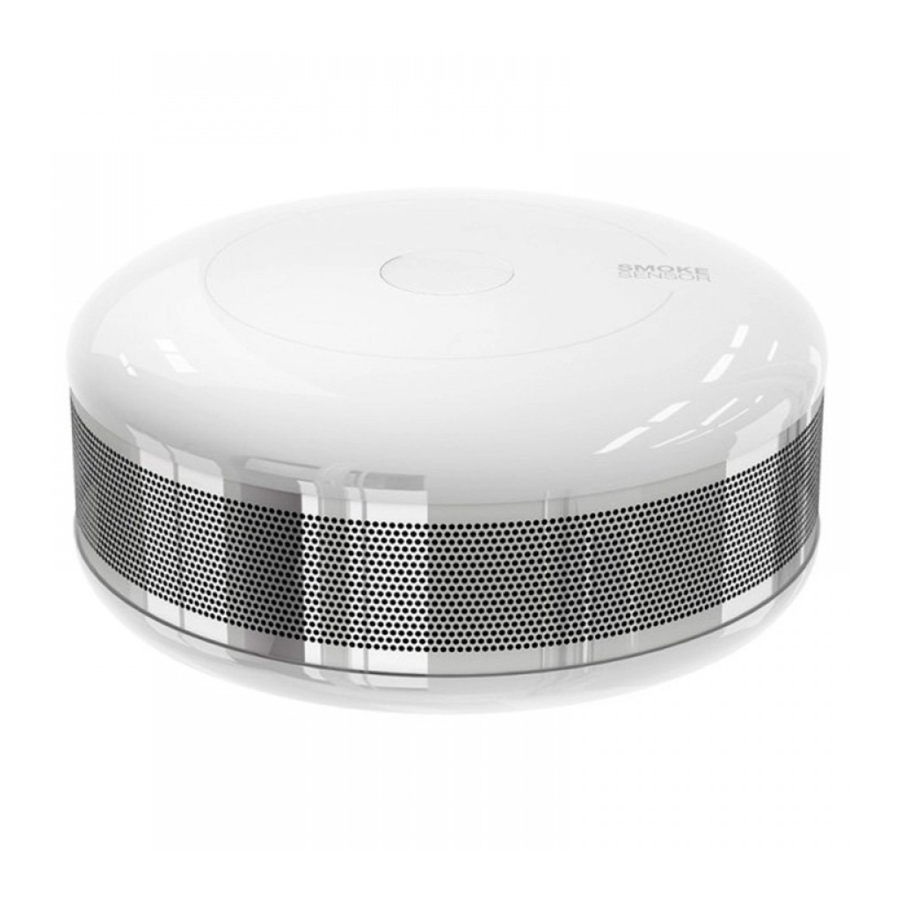
- Page 3 The alarm is signaled by sound and a LED, it can be battery-operated or VDC powered. The smoke sensor carries out an automatic efficiency test every 5 seconds. The Smoke Sensor is designed to be placed on a wall or ceiling. S mo k e S e n s o r...
- Page 4 (free from dust or condensed water vapor). The Smoke Sensor is a universal, optical Z-Wave smoke detector. The device can be hard-wired (12 or 24 VDC) or battery operated. Smoke detection is signaled through a sound alarm and a flashing LED.
- Page 5 I n st all at io n and O p era t io n Gu i de 02. POWERING MODES There are two powering modes for the Smoke Sensor. By default it is powered by a factory-included battery. Alternatively it can operate with a constant current, after connecting a 12/24 VDC power source to the +12/24 and GND terminals (see figure 01).
- Page 6 LED and an intermittent sound alarm. The Smoke Sensor can signal a low battery level for approximately 30 days. It is not possible to power the device from a battery and a VDC power source at the same time.
- Page 7 All manuals and user guides at all-guides.com I n st all at io n an d O p er at io n Gu i d e SMOKE NC – potential-free, smoke sensor connecting terminals (for wired systems only). TAMP NC – potential-free, tamper connecting terminals (for wired systems...
- Page 8 I n st all at io n and O p era t io n Gu i de 03. ADDING TO THE ACTIVE SMARTHOME PLATFORM The Smoke Sensor can be added to the Active SmartHome Portal by using the B-button (fig. 03). F ig u r e 0 3...
- Page 9 I n st all at io n and O p era t io n Gu i de There you can access “ Security ” and go to the “ Settings ” page. Now press the “ Add Sensor ” button and choose the “ Smoke Sensor ” option (Fig. 04).
- Page 10 I n s e r t i n g t h e n a me f o r S mo k e Now take the Smoke Sensor. Twist the lid and make sure that the battery is inserted and that there is no insulation strip between the contacts. If there is no battery, insert a new CR17345 3 V battery, ensuring that the polarity is correct.
- Page 11 P r e p a r in g S m o k e Se n s o r f o r o p e r a t io n On the Smoke Sensor, press the B-button three times and ensure that the LED turns white and that the Active SmartHome Gateway beeps once.
- Page 12 All manuals and user guides at all-guides.com I n st all at io n an d O p er at io n Gu i d e You can find all the steps for adding the Smoke Sensor to the Active SmartHome Platform at our website.
- Page 13 I n st all at io n and O p era t io n Gu i de 04. SENSOR INSTALLATION Installing the Smoke Sensor: As before, ensure that the Smoke Sensor is near to the Active SmartHome Gateway, as the process can ONLY be carried out within the direct range of the Active SmartHome Gateway.
- Page 14 Before adding the Smoke Sensor to its final destination ensure that the sensor is operating and that the Walk Test (see section 4.1.) has been successfully completed.
- Page 15 Particular attention should be paid to any adjacent objects or devices that can impede the smoke’s access to the sensor. It is recommended that you install the Smoke Sensor in all rooms where a fire may occur, as well as in hallways and corridors between these rooms.
- Page 16 All manuals and user guides at all-guides.com I n st all at io n an d O p er at io n Gu i d e It is recommended that you install the sensor at least 1.5 m from air- conditioning units.
- Page 17 When smoke is detected, the sensor checks 3 more times at a 1 second interval to see whether the smoke is actually present. Once the presence of smoke is confirmed, the Smoke Sensor triggers an alarm and also emits a constant sound signal along with the LED flashing red.
- Page 18 SMOKE SENSOR You can use the reset function of the Smoke Sensor in the case of the sensor not being detected or to delete its memory. This includes all the information on the Z-Wave network and the Active SmartHome Gateway, . However, the device reset will not remove it from the Active SmartHome Gateway’s memory.
- Page 19 S mo k e S e n s o r p r e f e r e n c e s p a g e To reset the Smoke Sensor follow these instructions: Make sure the device is connected to the power supply.
- Page 20 All manuals and user guides at all-guides.com I n st all at io n an d O p er at io n Gu i d e 07. TECHNICAL DATA AND INFORMATION Power supply 12 - 24 VDC Battery Type CR123A Power Consumption (at VDC operations) 0.4 W Maximum voltage at output terminals...
- Page 21 It is highly recommended that all safety precautions are taken to ensure safety and the protection of property. Depending on the Smoke Sensor’s internal conditions (e.g. operational mode, battery discharge, etc.) and on the installation conditions, this device may not be 100% accurate.
- Page 22 04. INSTALLATION DU CAPTEUR 4.1. Test de marche 4.2. Observations quant au montage 05. DÉTECTION DE FUMÉE 06. RÉINITIALISATION DU SMOKE SENSOR 07. DONNÉES TECHNIQUES ET INFORMATIONS Assistance technique info@activesmarthome.com S mo k e S e n s o r...
- Page 23 I n st all at io n and O p era t io n Gu i de 01. INTRODUCTION Le Smoke Sensor est un détecteur de fumée au design élégant et minimaliste. Il est fabriqué à partir de matériaux de haute qualité et est résistant aux températures élevées.
- Page 24 I n st all at io n an d O p er at io n Gu i d e Le Smoke Sensor est un détecteur de fumée optique universel compatible avec le standard Z-Wave. Le dispositif fonctionne avec une pile ou peut être branché sur le réseau d'alimentation (12 ou 24 V).
- Page 25 I n st all at io n and O p era t io n Gu i de 02. MODES D'ALIMENTATION Il y a deux modes d'alimentation pour le Smoke Sensor. L'alimentation par défaut est celle avec une pile fournie avec le dispositif. Il peut également être branché à...
- Page 26 I n st all at io n an d O p er at io n Gu i d e Le Smoke Sensor peut fonctionner avec une pile. La durée de vie de la pile est de 3 ans environ en mode optimal. L'avertissement de pile faible s'affiche dans l'interface «...
- Page 27 All manuals and user guides at all-guides.com I n st all at io n an d O p er at io n Gu i d e SMOKE NC - connecteurs sans potentiel du détecteur de fumée (pour les systèmes sans fil). TAMP NC - connecteurs sans potentiel du capteur anti-sabotage (pour les systèmes sans fil) Figure 02...
- Page 28 I n st all at io n and O p era t io n Gu i de 03. AJOUT À LA PLATEFORME ACTIVE SMARTHOME Le Smoke Sensor peut être ajouté à la plateforme Active SmartHome à l'aide du bouton B (Fig. 03). Figure 03...
- Page 29 Appuyez sur le bouton « Add Sensor » (ajouter un capteur) puis choisissez l'option « Smoke Sensor » (Fig. 04). Figure 04 Le Smoke Sensor dans la page « HomeSecurity - Settings » (Paramètres) S mo k e S e n s o r Pa g e | 2 9...
- Page 30 I n st all at io n an d O p er at io n Gu i d e Personnalisez le Smoke Sensor à l'aide d'un nom de votre choix, afin de pouvoir l'identifier plus facilement. Appuyez ensuite sur Continue (Continuer) (Fig.
- Page 31 Figure 06 Préparation du Smoke Sensor pour la mise en marche Sur le Smoke Sensor, appuyez trois fois sur le bouton B et assurez-vous que la LED passe au blanc et que le portail Active SmartHome bippe une fois. Une fois détectée, la plateforme affichera l'identification du détecteur. Pour finaliser le processus d'installation, cliquez sur le bouton «...
- Page 32 All manuals and user guides at all-guides.com I n st all at io n an d O p er at io n Gu i d e Vous pouvez retrouver toutes les étapes d'ajout du Smoke Sensor à la plateforme Active SmartHome sur notre site Internet.
- Page 33 Testez la portée du réseau Z-Wave pour veiller à ce que le dispositif reste à portée (voir section 4.1.). Le Smoke Sensor doit d'abord avoir été ajouté à la plateforme Active SmartHome (voir section 3). Si le détecteur doit être branché à l'alimentation continue, percez trois trous dans le boîtier du détecteur (Fig.
- Page 34 Installation des bornes du système central d'alame au courant continu Avant d'ajouter le Smoke Sensor à son emplacement final, veillez à ce que le détecteur soit en état de marche et que le test de portée ait été réalisé avec succès (voir section 4.1.).
- Page 35 « Walk Test » (Test de portée). Commencez le test en appuyant sur le bouton B. Appuyez une fois sur le bouton B sur le Smoke Sensor et vérifiez qu'il a été reconnu par le module de contrôle à distance Active SmartHome et que la plateforme l'affiche.
- Page 36 Faites particulièrement attention à tout objet ou dispositif voisin pouvant rendre l'accès de la fumée au détecteur plus difficile. Il est recommandé d'installer le Smoke Sensor dans toutes les chambres, où un incendie peut survenir, ainsi que dans les couloirs et corridors entre ces chambres.
- Page 37 I n st all at io n an d O p er at io n Gu i d e 05. DÉTECTION DE FUMÉE Le Smoke Sensor réagit à la présence physique de fumée. Le Smoke Sensor exécute un test automatique toutes les 5 secondes et vérifie la présence de fumée.
- Page 38 « Remove » (Retirer). Cliquez dessus (voir figure 10). Une fenêtre contextuelle s'affichera, où vous devez sélectionner « Confirm » (Confirmer) pour retirer le Smoke Sensor. De cette façon, le dispositif sera retiré de la page de sécurité.
- Page 39 I n st all at io n an d O p er at io n Gu i d e Figure 10 Page des préférences du Smoke Sensor Pour réinitialiser le Smoke Sensor, suivez ces instructions : Assurez-vous que le dispositif est relié à l'alimentation. Appuyez sur le bouton B et maintenez-le enfoncé pendant 3 secondes. La LED passera au blanc.
- Page 40 All manuals and user guides at all-guides.com I n st all at io n an d O p er at io n Gu i d e 07. DONNÉES TECHNIQUES ET INFORMATIONS Alimentation électrique 12 - 24 V Type de pile CR123A Puissance (alimentation fixe) 0,4 W...
- Page 41 Selon les conditions internes du Smoke Sensor (comme le mode de fonctionnement, l'état de la pile, etc.) et les conditions d'installation, ce dispositif peut ne pas être fiable à 100 %.