Falcon FALHDS110SC Manuel D'instructions
Masquer les pouces
Voir aussi pour FALHDS110SC:
- Manuel d'instructions (12 pages) ,
- Manuel d'instructions (11 pages) ,
- Manuel d'instructions (11 pages)
Publicité
Les langues disponibles
Les langues disponibles
Liens rapides
FALHDS110SC/
FALHDS110BC/
All manuals and user guides at all-guides.com
Libretto di Istruzioni
Instructions Manual
Manuel d'Instructions
Bedienungsanleitung
Gebruiksaanwijzing
Manual de instrucciones
Manual de Instruções
Käyttöohje
Publicité

Manuels Connexes pour Falcon FALHDS110SC


Sommaire des Matières pour Falcon FALHDS110SC
- Page 1 All manuals and user guides at all-guides.com FALHDS110SC/ FALHDS110BC/ Libretto di Istruzioni Instructions Manual Manuel d’Instructions Bedienungsanleitung Gebruiksaanwijzing Manual de instrucciones Manual de Instruções Käyttöohje...
- Page 2 All manuals and user guides at all-guides.com INDICE CONSIGLI E SUGGERIMENTI.............................. 4 CARATTERISTICHE................................5 INSTALLAZIONE ................................... 6 USO......................................9 MANUTENZIONE ................................10 INDEX RECOMMENDATIONS AND SUGGESTIONS ........................11 CHARACTERISTICS ................................12 INSTALLATION..................................13 USE ...................................... 16 MAINTENANCE ................................... 17 SOMMAIRE CONSEILS ET SUGGESTIONS............................
- Page 3 All manuals and user guides at all-guides.com ÍNDICE CONSELHOS E SUGESTÕES............................46 CARACTERÍSTICAS ................................47 INSTALAÇÃO..................................48 UTILIZAÇÃO ..................................51 MANUTENÇÃO..................................52 SISÄLTÖ OHJEET JA SUOSITUKSET ............................... 53 MITAT JA OSAT .................................. 54 ASENNUS .................................... 55 KÄYTTÖ ....................................58 HUOLTO ....................................59...
- Page 4 All manuals and user guides at all-guides.com CONSIGLI E SUGGERIMENTI Questo libretto di istruzioni per l'uso è previsto per più versioni dell' apparecchio. É possibile che siano descritti singoli particolari della dotazione, che non riguar- dano il Vostro apparecchio. INSTALLAZIONE •...
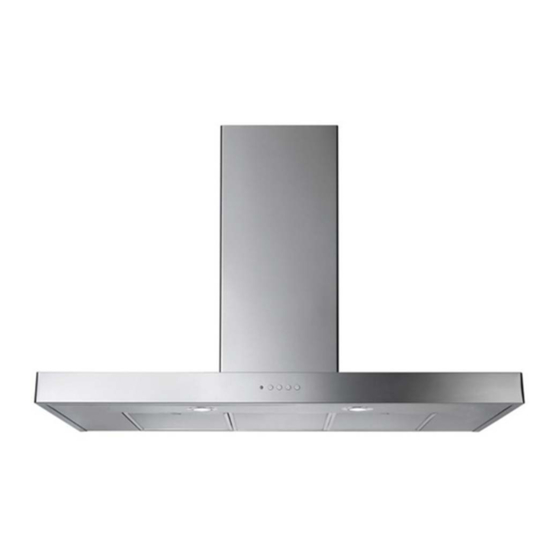
- Page 5 All manuals and user guides at all-guides.com CARATTERISTICHE Ingombro 1098 Min. Min. 650mm 650mm Componenti 14.1 Rif. Q.tà Componenti di Prodotto Corpo Cappa completo di: Comandi, Luce, Gruppo 12a 7.2.1 Ventilatore, Filtri Camino Telescopico formato da: Camino Superiore Camino Inferiore Griglia Direzionata DX Uscita Aria Griglia Direzionata SX Uscita Aria Flangia di Riduzione ø...
- Page 6 All manuals and user guides at all-guides.com INSTALLAZIONE Foratura Parete e Fissaggio Staffe 7.2.1 Tracciare sulla Parete: • una linea Verticale fino al soffitto o al limite superiore, al centro della zona prevista per il montaggio della Cappa; • una linea Orizzontale a: 650 mm min. sopra il Piano di Cottura. •...
- Page 7 All manuals and user guides at all-guides.com Montaggio Corpo Cappa • Prima di agganciare il Corpo Cappa, serrare le 2 Viti Vr situate sui punti di aggancio del Corpo Cappa. • Agganciare il Corpo Cappa alle Viti 12a. • Serrare definitivamente le Viti 12a di supporto. •...
- Page 8 All manuals and user guides at all-guides.com USCITA ARIA VERSIONE FILTRANTE 14.1 • Assemblare i Semigusci della Prolunga Corpo Cappa 14. • Inserire a pressione la Prolunga Corpo Cappa 14 così ottenuta, sull’Uscita Aria. • Inserire a pressione il Raccordo 15 sulla Prolunga Corpo Cap- pa 14.
- Page 9 All manuals and user guides at all-guides.com Quadro comandi TASTO FUNZIONI T1 Velocità Acceso Accende il Motore alla Prima velocità. Spegne il Motore. T2 Velocità Acceso Accende il Motore alla Seconda velocità. T3 Velocità Fisso Premuto brevemente Accende il Motore alla Terza velocità. Lampeggiante Premuto per 2 Secondi .
- Page 10 All manuals and user guides at all-guides.com MANUTENZIONE Filtri antigrasso PULIZIA FILTRI ANTIGRASSO METALLICI AUTOPORTANTI • Sono lavabili anche in lavastoviglie, e necessitano di essere lavati ogni 2 mesi circa di utilizzo o più frequentemente, per un uso particolarmente intenso. •...
- Page 11 All manuals and user guides at all-guides.com RECOMMENDATIONS AND SUGGESTIONS The Instructions for Use apply to several versions of this appliance. Accord- ingly, you may find descriptions of individual features that do not apply to your specific appliance. INSTALLATION • The manufacturer will not be held liable for any damages resulting from in- correct or improper installation.
- Page 12 All manuals and user guides at all-guides.com CHARACTERISTICS Dimensions 1098 Min. Min. 650mm 650mm Components 14.1 Ref. Q.ty Product Components Hood Body, complete with: Controls, Light, Blower, 12a 7.2.1 Filters Telescopic Chimney comprising: Upper Section Lower Section Right Air Outlet Grill Left Air Outlet Grill Reducer Flange ø...
- Page 13 All manuals and user guides at all-guides.com INSTALLATION Wall drilling and bracket fixing 7.2.1 Wall marking: • Draw a vertical line on the supporting wall up to the ceiling, or as high as practical, at the centre of the area in which the hood will be installed. •...
- Page 14 All manuals and user guides at all-guides.com Mounting the hood body • Before attaching the hood body, tighten the two screws Vr lo- cated on the hood body mounting points. • Hook the hood body onto the screws 12a. • Fully tighten the support screws 12a. •...
- Page 15 All manuals and user guides at all-guides.com RECIRCULATION VERSION AIR OUTLET 14.1 • Assemble the two halves of the hood body extension piece 14. • Push fit the assembled hood body extension piece 14 onto the air outlet. • Push fit connection 15 onto the hood body extension piece 14. •...
- Page 16 All manuals and user guides at all-guides.com Control panel BUTTON FUNCTIONS T1 Speed Turns the Motor on at Speed one. Turns the Motor off. T2 Speed Turns the Motor on at Speed two. T3 Speed Fixed When pressed briefly, turns the Motor on at Speed three. Flashing Pressed for 2 Seconds.
- Page 17 All manuals and user guides at all-guides.com MAINTENANCE Grease filters CLEANING METAL SELF- SUPPORTING GREASE FILTERS • The filters must be cleaned every 2 months of operation, or more frequently for particularly heavy usage, and can be washed in a dishwasher. •...
- Page 18 All manuals and user guides at all-guides.com CONSEILS ET SUGGESTIONS La présente notice d'emploi vaut pour plusieurs versions de l'appareil. Elle peut conte- nir des descriptions d'accessoires ne figurant pas dans votre appareil. INSTALLATION • Le fabricant décline toute responsabilité en cas de dommage dû à une installation non correcte ou non conforme aux règles de l’art.
- Page 19 All manuals and user guides at all-guides.com CARACTERISTIQUES Encombrement 1098 Min. Min. 650mm 650mm Composants 14.1 Réf. Q.té Composants de Produit Corps Hotte équipé de:Comandes, 12a 7.2.1 Lumière,Groupe Ventilateur,Filtres Cheminée Télescopique formée de : Cheminée Supérieure Cheminée Inférieure Grille en Direction Droite Sortie Air Grille en Direction Gauche Sortie Air Flasque de Réduction ø...
- Page 20 All manuals and user guides at all-guides.com INSTALLATION Perçage Paroi et Fixation Brides 7.2.1 Tracer sur la paroi: • une ligne verticale allant jusqu’au plafond ou à la limite supérieure, au centre de la zone prévue pour le montage de la hotte; •...
- Page 21 All manuals and user guides at all-guides.com Montage Corps Hotte • Avant d’accrocher le corps hotte, serrer les deux vis Vr situées sur les points d’accrochage du corps hotte. • Accrocher le corps hotte aux vis 12a prévues à cet effet. •...
- Page 22 All manuals and user guides at all-guides.com SORTIE AIR VERSION FILTRANTE 14.1 • Assembler les semi-coques de la rallonge corps hotte 14. • Insérer sous pression la rallonge corps hotte 14 ainsi obtenue, à la sortie air. • Insérer sous pression le raccord 15 sur la rallonge corps hotte •...
- Page 23 All manuals and user guides at all-guides.com UTILISATION Tableau des commandes TOUCHE VOYANT FONCTIONS T1 Vitesse Allumé Démarre le moteur en première vitesse. Coupe le moteur. T2 Vitesse Allumé Démarre le moteur en deuxième vitesse. T3 Vitesse Fixe Appuyée brièvement, démarre le moteur en troisième vitesse. Clignotant Appuyée pendant 2 secondes.
- Page 24 All manuals and user guides at all-guides.com ENTRETIEN Filtres anti-graisse NETTOYAGE FILTRES ANTI-GRAISSE METALLIQUES AUTOPORTEURS • Lavables au lave-vaisselle, ils doivent être lavés environ tous les 2 mois d’emploi ou plus fréquemment en cas d’emploi par- ticulièrement intense. • Retirer les filtres l’un aprés l’autre, en les poussant vers la par- tie arrière du groupe et en tirant simultanément vers le bas.
- Page 25 All manuals and user guides at all-guides.com EMPFEHLUNGEN UND HINWEISE Diese Gebrauchsanleitung gilt für mehrere Geräte-Ausführungen. Es ist möglich, dass einzelne Ausstattungsmerkmale beschrieben sind, die nicht auf Ihr Gerät zutreffen. MONTAGE • Der Hersteller haftet nicht für Schäden, die auf eine fehlerhafte und unsachgemäße Montage zurückzuführen sind.
- Page 26 All manuals and user guides at all-guides.com CHARAKTERISTIKEN Platzbedarf 1098 Min. Min. 650mm 650mm Komponenten 14.1 Pos. Produktkomponenten Haubenkörper mit Schaltern,Beleuchtung, 12a 7.2.1 Gebläsegruppe,Filter Teleskopkamin bestehend aus: oberer Kaminteil unterer Kaminteil Luftleitgitter Luftaustritt rechts Luftleitgitter Luftaustritt links Reduzierflansch ø 150-120 mm Verlängerungsstück f.Luftaustritt Hauben- körper,bestehend aus 2 Rohrhälften 14.1...
- Page 27 All manuals and user guides at all-guides.com MONTAGE Bohren der Befestigungslöcher und Fixieren der Befestigungsbügel 7.2.1 Nachstehende Linien an die Wand zeichnen: • eine vertikale Linie bis zur Decke oder oberen Begrenzung, und zwar in der Mitte des Be- reiches, in dem die Haube montiert werden soll; •...
- Page 28 All manuals and user guides at all-guides.com Montage des Haubenkörpers • Bevor der Haubenkörper eingehakt wird, die 2 Schrauben Vr bei den Haubenkörper-Anhakpunkten festziehen. • Den Haubenkörper bei den Schrauben 12a einhängen. • Die Halteschrauben 12a definitiv festziehen. • Den Haubenkörper mit Hilfe der Schrauben Vr ausrichten. Anschlüss in abluftversion Bei Abluftbetrieb kann die Haube vom Installateur wahlweise mittels Rohr oder Schlauch (ø...
- Page 29 All manuals and user guides at all-guides.com ANSCHLUSS IN UMLUFTVERSION 14.1 • Die beiden Rohrhälften des Verlängerungsstücks 14 zusam- menbauen. • Das auf diese Weise erzielte Verlängerungsstück 14 beim Luftaustritt eindrücken. • Den Anschluss 15 beim Verlängerungsstück 14 eindrücken. • Die Verlängerungen 14.1 beim Anschluss 15 seitlich einfügen. •...
- Page 30 All manuals and user guides at all-guides.com BEDIENUNG Schalttafel TASTE FUNKTIONEN T1 Betriebsgeschwindigkeit Eingeschaltet Schaltet Motor ersten Betriebsgeschwindigkeit ein. Stellt den Motor ab. T2 Betriebsgeschwindigkeit Eingeschaltet Schaltet Motor zweiten Betriebsgeschwindigkeit ein. T3 Betriebsgeschwindigkeit Bleibend Schaltet Motor dritten Betriebsgeschwindigkeit ein. Blinkend Bei 2 Sekunden langem Drücken: Aktiviert die auf 10 Minuten geregelte vierte Betriebsgeschwindigkeit, nach deren Ablauf...
- Page 31 All manuals and user guides at all-guides.com WARTUNG Fettfilter SELBSTTRAGENDER METALLFETTFILTER REINIGUNG • Sie müssen nach 2-monatigem Betrieb bzw. bei starkem Ein- satz auch häufiger gereinigt werden, was im Geschirrspüler möglich ist. • Die Filter nacheinander aushaken, indem sie auf die Rückseite der Gruppe geschoben und gleichzeitig nach unten gezogen werden.
- Page 32 All manuals and user guides at all-guides.com ADVIEZEN EN SUGGESTIES Deze gebruiksaanwijzing geldt voor verschillende uitvoeringen van het apparaat. Het is mogelijk dat er een aantal kenmerken worden beschreven die niet van toe- passing zijn op uw apparaat. INSTALLATIE • De fabrikant aanvaardt geen enkele aansprakelijkheid voor schade die voortkomt uit onjuiste of niet overeenkomstig de regels der kunst uitgevoerde installaties.
- Page 33 All manuals and user guides at all-guides.com EIGENSCHAPPEN Buitenafmetingen 1098 Min. Min. 650mm 650mm Onderdelen 14.1 Ref. Productonderdelen Wasemkap compleet met:Bedieningen, 12a 7.2.1 Licht,Ventilatorgroep,Filters Telescopische Schouw Bestaande uit: Bovenstuk Onderstuk Richtingsrooster Rechts Luchtuitlaat Richtingsrooster Links Luchtuitlaat Reductieflens ø 150-120 mm Verlengstuk Luchtuitlaat Wasemkap bestaande uit twee helften 14.1...
- Page 34 All manuals and user guides at all-guides.com INSTALLATIE Boren van gaten in de wand en bevestiging van de draagbeugels 7.2.1 Trek de volgende lijnen op de wand: • een verticale lijn tot aan het plafond of tot aan de bovenlimiet, in het midden van de zone waar u de wasemkap wilt installeren;...
- Page 35 All manuals and user guides at all-guides.com Montage van de Wasemkap • Alvorens de wasemkap vast te haken, de 2 schroeven Vr, die zich op de bevestigingspunten van de wasemkap bevinden, aanhalen. • Haak de wasemkap vast aan de schroeven 12a. •...
- Page 36 All manuals and user guides at all-guides.com LUCHTUITLAAT FILTERVERSIE • Assembleer de helften van het verlengstuk van de wasemkap 14. 14.1 • Druk het zo verkregen verlengstuk van de wasemkap 14 met kracht op de luchtuitlaat. • Druk het verbindingsstuk 15 met kracht op het verlengstuk van de wasemkap 14.
- Page 37 All manuals and user guides at all-guides.com GEBRUIK Bedieningspaneel TOETS FUNCTIES T1 Snelheid Aan Schakelt de motor op de eerste snelheid in. Zet de motor uit. T2 Snelheid Aan Schakelt de motor op de tweede snelheid in. T3 Snelheid Vast Schakelt de motor bij een korte druk op de toets op de derde snelheid in.
- Page 38 All manuals and user guides at all-guides.com ONDERHOUD Vetfilters REINIGING VAN DE ZELFDRAGENDE METALEN VETFILTERS • De filters moeten eens in de 2 maanden of, bij bijzonder inten- sief gebruik, vaker gereinigd worden, en kunnen ook in de vaatwasmachine worden gewassen. •...
- Page 39 All manuals and user guides at all-guides.com CONSEJOS Y SUGERENCIAS Las presentes instrucciones de servicio son válidas para diferentes modelos de aparato; por ello puede ser posible que se describan detalles y características de equipamiento que no concuerden íntegramente con las de su aparato concreto. INSTALACIÓN •...
- Page 40 All manuals and user guides at all-guides.com CARACTERÍSTICAS Dimensiones 1098 Min. Min. 650mm 650mm Componentes 14.1 Ref. Cant. Componentes de Producto Cuerpo Campana dotado de: Mandos, Luz, Grupo 12a 7.2.1 Ventilador, Filtros Chimenea Telescópica formada por: Chimenea Superior Chimenea Inferior Rejilla Direccionada DER.
- Page 41 All manuals and user guides at all-guides.com INSTALACIÓN Taladrado pared y fijación de las bridas 7.2.1 Trazar en la pared: • una línea vertical hasta el cielorraso o límite superior, al centro de la zona prevista para el montaje de la campana; •...
- Page 42 All manuals and user guides at all-guides.com Montaje del cuerpo de la campana • Antes de enganchar el cuerpo de la campana,apretar los 2 tornillos Vr situados en los puntos de enganche del cuerpo de la campana . • Enganchar el cuerpo de la campana en los tornillos 12a predis- puestos.
- Page 43 All manuals and user guides at all-guides.com SALIDA DEL AIRE VERSIÓN FILTRANTE • Ensamblar los semicascos de la extensión del cuerpo de la 14.1 campana 14. • Introducir a presión la extensión del cuerpo de la campana 14 obtenida de esta manera, en la salida del aire. •...
- Page 44 All manuals and user guides at all-guides.com Tablero de mandos TECLA FUNCIONES T1 Velocidad Encendido Enciende el motor a la primera velocidad. Apaga el motor T2 Velocidad Encendido Enciende el motor a la segunda velocidad T3 Velocidad Fijo Presionada brevemente enciende el motor a la tercera velocidad.
- Page 45 All manuals and user guides at all-guides.com MANTENIMIENTO Filtros antigrasa LIMPIEZA DE LOS FILTROS ANTIGRASA METÁLICOS • Se pueden lavar en el lavavajillas y requieren un lavado cada 2 meses aproximadamente o más a menudo si su uso es muy in- tenso.
- Page 46 All manuals and user guides at all-guides.com CONSELHOS E SUGESTÕES Estas instruções de serviço aplicam-se a vários modelos de aparelhos. É por isso, possível que se encontrem descritas várias características de equi- pamento que não dizem respeito ao seu aparelho. INSTALAÇÃO •...
- Page 47 All manuals and user guides at all-guides.com CARACTERÍSTICAS Dimensões 1098 Min. Min. 650mm 650mm Componentes 14.1 Ref. Qtd Componentes do produto Corpo do exaustor equipado com: Comandos, ilumina- 12a 7.2.1 ção, grupo do ventilador e filtros Chaminé telescópica formada por: Chaminé...
- Page 48 All manuals and user guides at all-guides.com INSTALAÇÃO Perfuração da parede e fixação dos suportes 7.2.1 Marque na parede: • uma linha vertical que vá até ao tecto ou ao limite superior, ao centro da zona destinada à montagem do exaustor; •...
- Page 49 All manuals and user guides at all-guides.com Montagem do corpo do extractor • Antes de fixar o corpo do extractor, aperte os dois parafusos Vr situados nos pontos de montagem do corpo do extractor. • Pendure o corpo do extractor nos dois parafusos 12a. •...
- Page 50 All manuals and user guides at all-guides.com SAÍDA DO AR PARA A VERSÃO FILTRANTE • Reuna os dois meios tubos da extensão do corpo do exaustor 14.1 • Encaixe, à pressão, a extensão do corpo do exaustor 14 assim obtida, na saída de ar. •...
- Page 51 All manuals and user guides at all-guides.com UTILIZAÇÃO Quadro de comandos TECLA FUNÇÕES T1 Velocidade Aceso Liga o motor com velocidade I. Desliga o motor. T2 Velocidade Aceso Liga o motor com velocidade II. T3 Velocidade Fixo Premida breves instantes, liga o motor com velocidade III.
- Page 52 All manuals and user guides at all-guides.com MANUTENÇÃO Filtros contra gordura LIMPAR OS FILTROS METÁLICOS CONTRA GORDURA • Os filtros deverão ser limpos de 2 em 2 meses de funcionamento, ou mais frequentemente em situações de utilização extrema e podem ser lavados na máquina de lavar louça. •...
- Page 53 All manuals and user guides at all-guides.com OHJEET JA SUOSITUKSET Nämä käyttöohjeet koskevat useita tuuletintyyppejä. On mahdollista, että teksti käsittelee yksityiskohtia, jotka eivät kuulu valitsemaanne tuulettimeen. ASENNUS • Valmistaja ei vastaa virheellisestä tai huolimattomasta asennuksesta aiheutu- vista vahingoista • Pienin sallittu turvaetäisyys liesitason ja liesikuvun välillä on 650 mm (jotkut mallit voidaan asentaa alemmas, katso mittoja ja asennusta koskevia kappalei- ta).
- Page 54 All manuals and user guides at all-guides.com MITAT JA OSAT Mitat 1098 Min. Min. 650mm 650mm Osat 14.1 Viite Lkm Tuotteen osat Liesituulettimen runko, johon kuuluu: Kytkimet, valo, 12a 7.2.1 tuuletusyksikkö, suodattimet Teleskooppihormi, jossa on: Ylähormi Alahormi Ilman ulostuloritilä oikealle Ilman ulostuloritilä...
- Page 55 All manuals and user guides at all-guides.com ASENNUS Seinän poraaminen ja tukien kiinnitys 7.2.1 Piirrä seinään: • pystysuora viiva kattoon tai seinän yläreunaan saakka liesituulettimen asennusalueen keskel- • vaakasuora viiva lieden yläpuolelle vähintään 650 mm:n korkeudelle. • Aseta tuki 7.2.1 1-2 mm:n päähän katosta tai seinän yläreunasta siten, että sen keskikohta (lovet) on pystysuoran viiteviivan kohdalla.
- Page 56 All manuals and user guides at all-guides.com Liesituulettimen rungon kokoaminen • Ennen rungon kiinnittämistä on kiristettävä rungon kiinnitys- kohtien kaksi ruuvia Vr. • Kiinnitä runko ruuveihin 12a. • Kiristä tukiruuvit 12a. • Tasapainota liesituulettimen runko ruuveilla Vr. Ilmanpoistoputket HORMILIITÄNTÄINEN MALLI Tämä...
- Page 57 All manuals and user guides at all-guides.com SUODATINVERSION ILMAN ULOSTULO 14.1 • Kokoa liesituulettimen rungon jatko-osat 14. • Työnnä sitten liesituulettimen rungon jatke 14 ilman ulostu- loon. • Työnnä liitos 15 jatkeeseen 14. • Laita liitoksen 15 sivuille liitoksen jatkeet 14.1. •...
- Page 58 All manuals and user guides at all-guides.com KÄYTTÖ Käyttöpaneeli PAINIKE MERKKIVALO TOIMINNOT T1 Nopeus Palaa Käynnistää moottorin ensimmäisellä nopeudella. Sammuttaa moottorin. T2 Nopeus Palaa Käynnistää moottorin toisella nopeudella. T3 Nopeus Kiinteä Lyhyt painallus käynnistää moottorin kolmannella nopeudella. Vilkkuva Kun painiketta painetaan 2 sekunnin ajan. Aktivoi neljännen nopeuden, joka toimii 10 minuuttia.
- Page 59 All manuals and user guides at all-guides.com HUOLTO Rasvasuodattimet ITSEKANNATTAVIEN METALLISTEN RASVASUODATTIMIEN PUHDISTUS • Voidaan pestä myös astianpesukoneessa. Pesu on tarpeen noin 2 kuukauden käytön jälkeen tai useammin, jos laitetta käyte- tään paljon. • Irrota suodattimet yksi kerrallaan työntämällä niitä taaksepäin ja vetämällä...
- Page 60 All manuals and user guides at all-guides.com AGA RANGEMASTER GROUP PLC Falcon is a business name of AGA RANGEMASTER GROUP PLC 436004987_ver3...