Télécharger Imprimer la page

Publicité

Les langues disponibles

Les langues disponibles

Liens rapides

All manuals and user guides at all-guides.com
Downloaded from www.vandenborre.be

Publicité

loading

Sommaire des Matières pour Electrolux EAT955

  • Page 1 All manuals and user guides at all-guides.com Downloaded from www.vandenborre.be...
  • Page 2 All manuals and user guides at all-guides.com INSTRUCTIONS ELECTRICAL CONNECTION (UK ONLY) For your safety please read the following information Warning: This appliance must be earthed. The appliance must be connected to a 220-240 volts 50 cycle AC supply by means of a three pin socket, suitably earthed and should be protected by a 5 amp fuse in the plug or a 5 amp fuse in the consumer unit.
  • Page 3 All manuals and user guides at all-guides.com The brown wire must be connected to the terminal marked L or coloured red. IMPORTANT SAFEGUARDS: This appliance must be used on the electric voltage shown on the rating plate on the base of this appliance, failure to use the correct voltage will render the guarantee VOID.
  • Page 4 All manuals and user guides at all-guides.com This appliance must be EARTHED. This appliance must be disconnected from the mains when not in use. Do not allow appliance to be exposed to rain or moisture. Do not place foil wrapped articles in the toaster. Remove all protective wrapping prior to using the toaster.
  • Page 5 All manuals and user guides at all-guides.com 7. Power cord: Takes up excess cord and keeps countertop tidy. 8. Carriage knob: Starts the toasting process. 9. Bun warmer: Supports the bread bun for warming. TOASTER OPERATION Making toast: Plug the power cord into the wall outlet. Set the Browning control knob to your desired colour.
  • Page 6 All manuals and user guides at all-guides.com Unplug the toaster from the wall socket after use. Note: During toasting, the pilot light will illuminate showing the toaster is in operation. CLEANING AND MAINTENANCE 1. Always unplug the toaster from electrical outlet and allow to cool before cleaning.
  • Page 7 All manuals and user guides at all-guides.com Unit dead Fuse blown Replace Fuse Lights not coming on Not plugged into wall Plug into wall socket and socket switch on Plug into wall socket and Not heating bread Not plugged into wall switch on socket Consult the retail store...
  • Page 8 All manuals and user guides at all-guides.com INSTRUCTIONS DE SÉCURITÉ : Branchez l'appareil sur une prise secteur de même tension électrique que celle indiquée sur l'étiquette de spécifications. Le branchement sur une prise de tout autre voltage ANNULE la garantie. Cet appareil est réservé...
  • Page 9 All manuals and user guides at all-guides.com Ne placez pas l'appareil au-dessus ou à proximité d'un réchaud à gaz ou électrique chaud, ou dans un four chauffé. Faites très attention si vous devez déplacer l'appareil alors qu'il fonctionne. Vérifiez que le cordon d'alimentation est branché sur l'appareil et uniquement ensuite branchez le cordon sur une prise secteur.
  • Page 10 
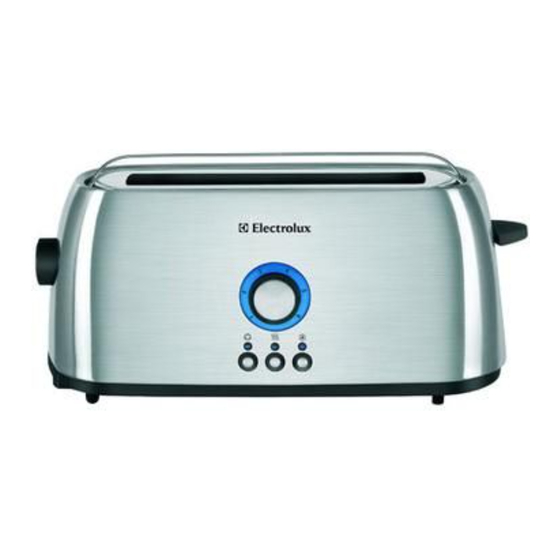
All manuals and user guides at all-guides.com COMPOSANTS DU GRILLE-PAIN 1. Sélecteur rotatif : monte ou descend la grille de chauffe pour de petits pains. 2. Tiroir de récupération des miettes : dégagez-le pour retirer les miettes tombées au fond de l'appareil. 3.
  • Page 11 All manuals and user guides at all-guides.com Réglez la température sur la couleur de grillage désirée. La position "3" est la plus fréquemment utilisée. Posez les tranches de pain sur le porte-pain. Appuyez sur la patte du porte-pain (sur la droite du grille-pain) jusqu'à bloquer celui-ci en bout de course.
  • Page 12 All manuals and user guides at all-guides.com Débranchez le grille-pain de la prise secteur lorsque vous ne voulez plus l'utiliser. Remarque : La lampe témoin reste allumée tout le temps que le pain est grillé, indiquant que l'appareil est en cours de chauffe. ENTRETIEN ET NETTOYAGE 1.
  • Page 13 All manuals and user guides at all-guides.com DÉPANNAGE L'appareil ne Le fusible a sauté. Remplacez le fusible. fonctionne pas Vous n'avez pas Branchez le cordon Les indicateurs branché le cordon d'alimentation sur une prise lumineux ne d'alimentation. secteur et allumez l'appareil. s'allument pas Branchez le cordon Vous n'avez pas...
  • Page 14 All manuals and user guides at all-guides.com BELANGRIJKE VEILIGHEIDSMAATREGELEN: Dit toestel dient gebruikt worden met de elektrische spanning vermeld op het typeplaatje aan de onderzijde van dit toestel. Indien de juiste voltage niet wordt gebruikt zal dit de garantie ONGELDIG verklaren. Dit toestel is enkel bestemd voor huishoudelijk gebruik binnenshuis.
  • Page 15 All manuals and user guides at all-guides.com Wees extra voorzichtig wanneer U het toestel verplaatst. Bevestig altijd een stekker aan het toestel en sluit vervolgens de stekker aan op het stopcontact. Om te ontkoppelen zet U de schakelaar op UIT en trekt U vervolgens de stekker uit het stopcontact.
  • Page 16 All manuals and user guides at all-guides.com 1. Draaiknop om de broodverwarmer te verhogen of te verlagen. 2. Kruimelschaal: Trek uit aan de onderkant om kruimels te verwijderen. 3. Bruineringknop: Selecteer de bruineringinstelling. 4. Annulatiefunctie: Onderbreekt het toasten wanneer ingedrukt; 5.
  • Page 17 All manuals and user guides at all-guides.com Broodopwarmfunctie Trek de broodverwarmer boven de roostergleuven (draaiknop 1). Leg de gebakte dikke sneden brood, croissant, fruitbroodjes, loempias of chips bovenin de broodverwarmer. Draai de bruineringknop naar de gewenste stand. Druk de hendel van de broodmand naar beneden tot deze op zijn plaats vastklinkt.
  • Page 18 All manuals and user guides at all-guides.com Draai het snoer nooit rond de buitenkant van de broodrooster. Gebruik de snoerklamp. WAARSCHUWING: Dit toestel wordt warm wanneer in gebruik. Zorg ervoor dat U de warme oppervlakken van het toestel niet aanraakt om brandwonden te vermijden. De temperatuur van de bereikbare onderdelen kunnen hoog oplopen wanneer het toestel in gebruik is.
  • Page 19 All manuals and user guides at all-guides.com Elektronische afvalstoffen dienen niet weggegooid te worden met het huisafval. Breng dit materiaal terug naar uw electro- speciaalzaak voor een veilige verwerking, of indien dit niet mogelijk is, naar het inname punt in uw gemeente. Verpakkingsmateriaal dient gerecycleerd te worden bij uw plaatselijke faciliteiten.