Publicité

Les langues disponibles
  • FR

Les langues disponibles

  • FRANÇAIS, page 16

Liens rapides

HANDLEIDING
MODE D'EMPLOI
GEBRAUCHSANLEITUNG
INSTRUCTION BOOKLET
MANUAL DE INSTRUCCIONES
NávOD K POUžITí
MICAVERWARMING
ChAuffAGE MICA
MICA-hEIzElEMENt
MICA hEAtING
RADIADOR DE MICA
MICA tOpENí
DO7317M
PRODUCT OF

Publicité

Table des Matières
loading

Sommaire des Matières pour Linea 2000 DOMO MICA DO7317M

  • Page 1 HANDLEIDING MODE D’EMPLOI GEBRAUCHSANLEITUNG INSTRUCTION BOOKLET MANUAL DE INSTRUCCIONES NávOD K POUžITí MICAVERWARMING ChAuffAGE MICA MICA-hEIzElEMENt MICA hEAtING RADIADOR DE MICA MICA tOpENí DO7317M PRODUCT OF...
  • Page 2: Garantievoorwaarden

    LINEA 2000 - Dompel 9 - 2200 Herentals Belgium - Tel 014/21.71.91 - Fax : 014/21.54.63...
  • Page 3: Condiciones De Garantía

    Domo-elektro s.r.o. Hluboká 147, 34506 Kdyně viz www.domo-elektro.cz tel. 379 789 684 nebo na servis@domo-elektro.cz , tel. 379 422 550 LINEA 2000 - Dompel 9 - 2200 Herentals Belgium - Tel 014/21.71.91 - Fax : 014/21.54.63...
  • Page 4 DO7317M type nr. apparaat DO7317M N° de modèle de l’appareil type nr des Gerätes type nr. of appliance N° de modelo del aparato Model Naam Nom ..........................Name Nombre Jméno Adres Adresse ..........................Address Dirección Adresa Aankoopdatum Date d’achat ........................Kaufdatum Date of purchase fecha de compra...
  • Page 5 DO7317M Reklamace : (vyplní zákazník nebo obchod) Popis vady 1. reklamace/Datum uplatnění reklamace: Popis vady 2. reklamace/Datum uplatnění reklamace: Popis vady 3. reklamace/Datum uplatnění reklamace: Záznamy servisu : 1.reklamace (datum přijetí/odeslání/ číslo reklamačního dokladu) 2.reklamace (datum přijetí/odeslání/ číslo reklamačního dokladu) 3.reklamace (datum přijetí/odeslání/ číslo reklamačního dokladu) * Jméno kupujícího, adresu a tel.spojení...
  • Page 6: Recyclage-Informatie

    DO7317M RECYCLAGE-INFORMATIE Dit symbool op het product of op de verpakking wijst erop dat dit product niet als huishoudafval mag worden behandeld. het moet naar een plaats worden gebracht waar elektrische en elektronische apparatuur wordt gerecycleerd. Als u ervoor zorgt dat dit product op de correcte manier wordt verwijderd, voorkomt u mogelijk voor mens en milieu negatieve gevolgen die zich zouden kunnen voordoen in geval van verkeerde afvalbehandeling.
  • Page 7: Recycling Information

    DO7317M RECYCLING INFORMATION this symbol on the product or on its packaging indicates that this product may not be treated as household waste. Instead it must be brought to the applicable collection point for recycling of electrical and electronic equipment. By ensuring this product is disposed of correctly, you will help prevent potential negative consequences for the environment and human health, which could otherwise be caused by inappropriate waste handling of...
  • Page 8 DO7317M Als het elektrisch snoer beschadigd is, moet het vervangen worden door de fabrikant, zijn dienst naverkoop of een gelijkaardig gekwalificeerd persoon, om ongelukken te voorkomen. Si le cordon électrique est endommagé, il doit être remplacé par le fabricant, son service après-vente ou toute autre personne qualifiée, pour éviter tout accident.
  • Page 9: Veiligheidsinstructies

    DO7317M VEILIGHEIDSINSTRUCTIES Dit toestel mag gebruikt worden door kinderen vanaf 8 jaar en ouder, en door personen met een fysieke of sensoriële beperking of mensen met een beperkte mentale capaciteit of gebrek aan ervaring of kennis, op voorwaarde dat deze personen toezicht krijgen of instructies hebben gekregen over het gebruik van het toestel op een veilige manier en dat ze ook de gevaren kennen bij het gebruik van het toestel.
  • Page 10 DO7317M het toestel wordt warm tijdens het gebruik. hou het elektrisch snoer weg van hete onderdelen en dek het toestel niet af. ees aL deze instructies aLvorens het toesteL te gebruiken • Voer geen veranderingen uit aan het toestel. • Gebruik de verwarming niet buitenshuis. •...
  • Page 11 DO7317M meter verwijderd van de voorkant van de verwarming en hou ze weg van de zijkant en de achterkant. • hou vreemde voorwerpen weg van de openingen in de verwarming, aangezien dit elektrische schok, brand of beschadiging kan veroorzaken. • trek altijd de stekker uit het stopcontact wanneer de verwarming niet in gebruik is.
  • Page 12 DO7317M diensten. • plastic zakken zijn geen speelgoed. hou ze uit de buurt van baby’s en kinderen, aangezien ze een risico op verstikking en andere gevaren inhouden. • Als je een aantal uren niet aanwezig bent, denk er dan aan om de temperatuurinstelling te verlagen. • Houd het toestel op minimum 0,60 m (volume 3) van douche of bad, zoals aangegeven op de tekening. Het mag niet mogelijk zijn voor...
  • Page 13: Installatie

    DO7317M Controlepaneel 1. thermostaatknop 2. “Max” 3. Antivries 4. functieknop 5. Indicatielampjes 6. Aan/uit-knop Installatiekit 1. pootjes 2. Muurbevestiging 3. Schroef voor muurbevestiging 4. pluggen voor muurbevestiging 5. Onderste muurbevestiging 6. Schroef M3 x 5 7. Schroef M3 x 8 8.
  • Page 14 DO7317M Installatie van de pootjes 1. Schroef de steun (9) vast op de pootjes. 2. Schroef de twee pootjes vast op de verwarming. Installatie aan de muur 1. Boor 2 gaatjes in de muur, 7cm van de kant van het verwarmingstoestel en 100cm van de vloer.
  • Page 15 DO7317M op de muur. Verwijder het verwarmingstoestel en boor de twee gaatjes voor de onderste muurbevestiging op de plaats die je net gemarkeerd hebt. 4. plaats de bijgeleverde pluggen (4) in de gaatjes voor de onderste muurbevestiging, met behulp van een hamer. 5.
  • Page 16: Précautions

    DO7317M PRéCAUTIONS Cet appareil peut être utilisé par des enfants âgés d’au moins 8 ans et par des personnes ayant des capacités physiques, sensorielles ou mentales réduites ou dénuées d’expérience ou de connaissance, s’ils (si elles) sont correctement surveillé(e)s ou si des instructions relatives à...
  • Page 17 DO7317M l’appareil peut chauffer pendant l’utilisation. tenez le cordon électrique à distance de parties chaudes et ne couvrez pas l’appareil. • N’apportez aucune modification à l’appareil. • N’utilisez pas l’appareil de chauffage à l’extérieur. • Cet appareil de chauffage est destiné à une utilisation dans des salles de bain, des salles d’eau ou d’autres lieux similaires à...
  • Page 18 DO7317M à au moins 1 mètre de distance de la face avant de l’appareil de chauffage et tenez-les à l’écart des faces latérales et de la face arrière. • tenez les corps étrangers à l’écart des ouvertures ménagées dans l’appareil de chauffage. Ceux-ci peuvent causer un choc électrique, un incendie ou d’autres dommages.
  • Page 19 DO7317M provoquer un incendie, un choc électrique ou de graves blessures. • les réparations et l’entretien de l’appareil ne doivent être réalisés que par des services et des techniciens qualifiés. • les sacs en plastique ne sont pas des jouets. tenez-les hors de portée des bébés et des enfants car ils peuvent présenter pour ceux-ci un risque d’étouffement et d’autres dangers.
  • Page 20: Description Des Elements

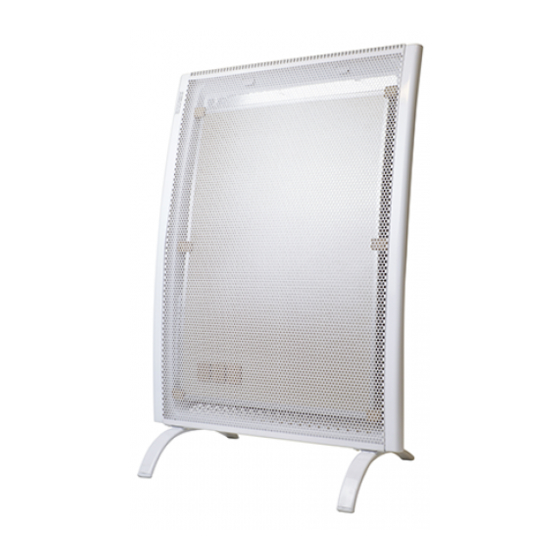
    DO7317M DESCRIPTION DES ELEMENTS Appareil 1. face avant 2. face latérale 3. poignée 4. panneau de commande Panneau de commande 1. Bouton de thermostat 2. “Max” 3. Antigel 4. Sélecteur de fonction 5. témoin marche/arrêt 6. Bouton marche/arrêt...
  • Page 21 DO7317M Kit d’installation 1. pieds Vis M3 x 8 2. fixation murale Rondelle pour vis M3 (6. + 7.) 3. Vis pour fixation murale Support pour les pieds 4. Chevilles pour fixation murale 10. Vis avec rondelle M3 x 8 5.
  • Page 22 DO7317M Installation des pieds 1. fixez le support (9) sur les pieds avec les vis. 2. fixez les 2 pieds sur le chauffage. Installation au mur 1. percez 2 trous dans le mur, à 7 cm du bord de l’appareil de chauffage et à...
  • Page 23: Entretien

    DO7317M les deux trous destinés à la fixation murale inférieure à l’emplacement que vous venez de repérer. 4. Enfoncez avec un marteau les chevilles fournies (4) dans les trous destinés à la fixation murale inférieure. 5. Placez l’appareil de chauffage sur la fixation murale supérieure. Utilisez les vis fournies (3) pour accrocher la fixation murale inférieure contre le mur.
  • Page 24 DO7317M RANGEMENT Rangez toujours l’appareil dans un endroit frais et sec. pour éviter que l’appareil se couvre de poussière, vous pouvez utiliser son emballage d’origine pour le protéger.
  • Page 25 DO7317M SICHERHEITSANWEISUNGEN Dieses Gerät darf von Kindern ab 8 Jahren oder älter gebraucht werden. Ebenso dürfen personen mit körperlicher bzw. leichter geistiger Behinderung sowie personen mit eingeschränkter Erfahrung das Gerät betätigen. Dies unter der Voraussetzung, dass diese personen ausreichende Anweisungen sowohl zum Gebrauch des Gerätes, als auch zu den hiermit verbundenen Gefahren erhalten haben.
  • Page 26 DO7317M Das Gerät kann während des Gebrauchs warm werden. Das elektrische Kabel von heißen teilen entfernt halten und das Gerät nicht abdecken. • führen Sie keine Veränderungen am Gerät durch. • Verwenden Sie das heizgerät nicht im freien. • Dieser heizkörper ist für die Verwendung in Badezimmern, Waschräumen oder an ähnlichen Stellen innerhalb des hauses gedacht.
  • Page 27 DO7317M mindestens 1m Platz zur Belüftung ist. • Achten Sie darauf, dass keine fremdgegenstände die Öffnungen des Gerätes blockieren können, da dies Stromschlag, Brand oder Beschädigungen verursachen kann. • ziehen Sie stets den Stecker aus der Steckdose, wenn das Gerät nicht benutzt wird. •...
  • Page 28 DO7317M • Reparaturen und Wartungen dürfen nur von qualifizierten Personen ausgeführt werden. • Die plastikverpackungen, in denen sich das Gerät bei Lieferung befindet, sind kein Spielzeug. Achten Sie darauf, dass die plastiksäcke nicht in der Nähe von Kindern liegen, da das Risiko besteht, dass Kinder sich die Säcke über den Kopf ziehen und somit ersticken könnten.
  • Page 29 DO7317M BESTANDTEILE Gerät 1. Vorderseite 2. Seitenansicht 3. Griff 4. Schaltfläche Schaltfläche 1. thermostatschalter 2. «Max» 3. Antifrost 4. funktionsschalter 5. Kontrollleuchte Ein/Aus 6. Ein/Aus Schalter...
  • Page 30 DO7317M Montagezubehör 1. Standfüße Schraube M3 x 8 2. Wandbefestigung Schließring für Schraube M3 (6. + 7.) 3. Schraube für Wandbefestigung Stützung für Standfüße 4. Dübel für Wandbefestigung 10. Schraube mit Schließring M3 x 8 5. untere Wandbefestigung 11. Schraube mit Schließring M4 x 8 6.
  • Page 31 DO7317M Anbringung der Standfüße 1. Schrauben Sie die Stützung (9) auf die Standfüße. 2. Schrauben Sie die zwei Standfüße auf die heizung. Wandbefestigung 1. Bohren Sie 2 Löcher in die Wand, 7 cm unter dem oberen Rand des heizgeräts und 100 cm vom Boden.
  • Page 32 DO7317M heizgerät wieder von der Wand und bohren Sie die zwei löcher für die untere Wandhalterung an der soeben markierten Stelle. 4. Verbringen Sie die mitgelieferten Dübel (4) in die Bohrlöcher für die untere Wandbefestigung, am besten mithilfe eines hammers. 5.
  • Page 33 DO7317M AUFBEWAHRUNG Bewahren Sie das Gerät immer in einem kühlen und trockenen Raum auf. Um zu verhindern, dass das heizgerät verstaubt, verwenden Sie zur Aufbewahrung am besten die Originalverpackung.
  • Page 34: Safety Instructions

    DO7317M SAFETY INSTRUCTIONS this appliance may be used by children from the age of 8 and up, and also by persons with a physical or sensorly limitation, as well as mentally limited persons or persons with a lack of experience and knowledge. But only on the condition that these persons have received the necessary instructions on how to use this appliance in a safe way and know the dangers that can occur by using this...
  • Page 35 DO7317M the appliance can become hot during use. Keep the power cord away from hot parts and don’t cover the appliance. ead aLL these instructions before using this appLiance • Do not carry out any changes to the appliance. • Do not use the heater outdoors. •...
  • Page 36 DO7317M the heater as this may cause electric shock, fire or damaging. • Always unplug the heater when it is not in use. • Only use well grounded sockets to plug in the appliance. • Never use a damaged cord or plug. If the cord is damaged, it should be replaced by the manufacturer, the dealer or a qualified person to avoid a hazard.
  • Page 37 DO7317M indicated in the drawing. Volume3 Volume2 A person who is in the Volume1 bathtub or shower should 60cm not be able to touch the appliance, the power cord or the control knobs. PARTS Appliance 1. front 2. Side 3. handle 4. Control panel Control panel 1. thermostat knob 2. “Max” 3. Anti-frost 4. function button 5. light indicators 6. On/off switch...
  • Page 38 DO7317M Installation kit 1. feet Screw M3 x 8 2. Wall mounting bracket Washer for screw M3 (6. + 7.) 3. Screw for wall mount Support for feet 4. Anchors for wall mount 10. Screw with washer M3 x 8 5.
  • Page 39 DO7317M Installation of the feet 1. Screw the support (9) onto the feet. 2. Screw the two feet onto the heater. Wall mount 1. Drill 2 holes in the wall, 7cm next to the side of the appliance and 100cm above the floor. place 2 plugs (4) into the holes, using a hammer.
  • Page 40 DO7317M you just marked. 4. put the plugs (4) into the holes for the lower wall mount, using a hammer. 5. place the appliance on top of the upper wall mounting bracket. use the screws (3) to secure the lower wall mounting bracket to the wall. READ ALL INSTRUCTIONS CAREFULLy BEFORE USING THE APPLIANCE.
  • Page 41: Precauciones Importantes

    DO7317M PRECAUCIONES IMPORTANTES Este aparato está diseñado para ser utilizado por niños a partir de 8 años de edad y por personas con discapacidades físicas, sensoriales o mentales, o por personas que no dispongan de suficiente experiencia y conocimientos, a no ser que sean supervisados o instruidos inicialmente en la utilización segura del aparato y los posibles peligros.
  • Page 42 DO7317M El aparato puede calentarse durante el uso. Mantenga el cable eléctrico lejos de las piezas calientes y no cubra el aparato. • No haga modificaciones en el aparato. • No utilice el radiador en el exterior de la casa. •...
  • Page 43 DO7317M del radiador, ya que pueden provocar descargas eléctricas, fuego o lesiones. • Quite siempre el enchufe de la toma de corriente cuando el aparato no se esté usando. • use el aparato sólo si está bien conectado a tierra. •...
  • Page 44 DO7317M 3) de la ducha o de la Volume3 Volume2 bañera, como se muestra Volume1 en el dibujo. una persona 60cm que esté en la bañera o en la ducha no debe poder tocar el aparato, el cable ni los botones de control. PIEZAS Radiador 1.
  • Page 45 DO7317M Kit de instalación 1. patas tornillo M3 x 8 2. fijación a la pared Arandela para tornillo M3 (6. + 7.) 3. Tornillo para fijación a la pared Soporte para las patas 4. Tacos para fijación a la pared 10.
  • Page 46 DO7317M Montaje de las patas 1. Atornille el soporte (9) en las patas. 2. Atornille las patas en el radiador. Montaje en la pared 1. haga dos agujeros en la pared, a 7 cm del lateral del radiador y a 100 cm del suelo. Coloque 2 tacos (4) en los agujeros con un martillo.
  • Page 47: Almacenamiento

    DO7317M 4. Utilizando un martillo inserte los tacos suministrados (4) en los orificios de montaje de la fijación inferior de la pared. 5. Coloque el radiador en el soporte superior. use los tornillos suministrados (3) para fijar el soporte inferior a la pared. lEA tODAS lAS INStRuCCIONES ANtES DE utIlIzAR El RADIADOR Asegúrese de que el botón del termostato esté...
  • Page 48 DO7317M DŮLEŽITé Přečtěte si pečlivě tento návod k použití a uschovejte si jej pro pozdější nahlédnutí a radu. Tento přístroj byl vyroben pouze pro využití v domácnosti a smí být používán výhradně podle pokynů uvedených níže. Tento přístroj nesmí být samostatně obsluhován osobami s mentální...
  • Page 49 DO7317M PŘED POUŽITÍM PŘÍSTROJE SI POZORNĚ PŘEČTĚTE VŠECHNy INSTRUKCE • Neprovádějte na spotřebiči žádné vlastní úpravy. • Nepoužívejte topení ve venkovních prostorách. • Toto topení je určeno pro použití v koupelnách, prádelnách, nebo podobných místnostech uvnitř budov. Nikdy ale neumisťujte topení na takové místo, odkud by mohlo spadnout do vany, nebo jiné...
  • Page 50 DO7317M materiálů za přístroj, nebo po jeho stranách. • Dejte pozor, aby se do otvorů v přístroji nedostali nějaké objekty, mohlo by dojít k elektrickému zkratu, vznícení, nebo jinému poškození přístroje, či nehodě. • Vždy když topení nepoužíváte jej odpojte od elektrické...
  • Page 51 DO7317M • Pokud odcházíte z domu na delší dobu, zvažte nastavení nižší teploty, nebo vypnutí přístroje. • Umístěte přístroj v minimální vzdálenosti 0,60 m (volume 3) od vany nebo sprchového koutu, jak je vidět na obrázku. Osoba, která je ve vaně Volume3 Volume2 Volume1...
  • Page 52 DO7317M Ovládací panel 1. Ovladač termostatu 2. Maximální teplota 3. protizámrazová teplota 4. Tlačítko funkcí 5. Kontrolky 6. Vypínač Obsah balení 1. Nožičky 2. Konzole pro uchycení na zeď 3. Šroub pro montáž na zeď 4. Hmoždinky pro montáž na zeď 5.
  • Page 53 DO7317M Montáž nožiček Montáž na zeď 1. Vyvrtejte 2 díry (o průměru vhodném pro přiložené hmoždinky) do zdi, viz. obrázek dále, ve výšce 100cm a od sebe 7cm. pomocí kladívka zaklepejte do připravených děr přiložené hmoždinky a přišroubujte ke zdi horní závěs. 2.
  • Page 54: Čištění A Údržba

    DO7317M Znovu zavěste topení na horní závěs a přišroubujte ke zdi i jeho spodní část. POUŽITÍ TOPENÍ PŘED POUŽITÍM PŘÍSTROJE SI POZORNĚ PŘEČTĚTE NÁVOD K POUŽITÍ Ujistěte se, že je termostat natavený na pozici „max“. Ujistěte se, že je vypínač v pozici vypnuto (0).
  • Page 55 DO7317M...
  • Page 56 LINEA 2000 - Dompel 9 - 2200 Herentals Belgium - Tel 014/21.71.91 - Fax : 014/21.54.63...

Table des Matières