Table des Matières
Publicité
Les langues disponibles
Les langues disponibles
Liens rapides
INSTALLATION INSTRUCTIONS
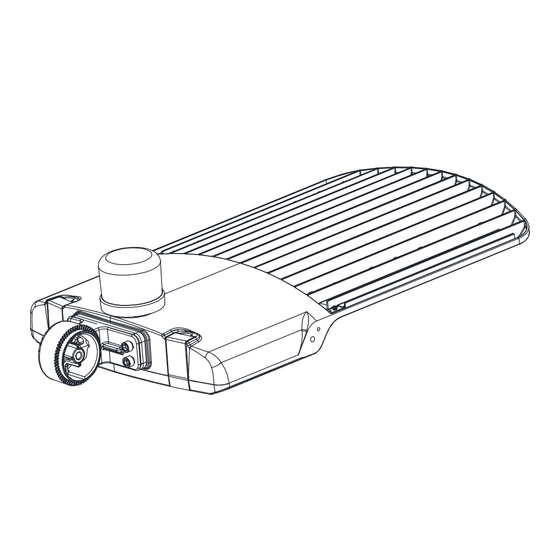
C-AR-A-AL Series
CAUTIONS
IMPORTANT SAFEGUARDS
When using electrical equipment, basic safety
precautions should always be followed including the
READ AND FOLLOW ALL
SAFETY INSTRUCTIONS
1.
DANGER- Risk of shock- Disconnect power before
installation.
DANGER – Risque de choc – Couper l'alimentation
avant l'installation.
2.
This luminaire must be installed in accordance with the
NEC or your local electrical code. If you are not familiar
with these codes and requirements, consult a qualified
electrician.
Ce produit doit être installé conformément à NEC ou votre
code électrique local. Si vous n'êtes pas familier avec ces
codes et ces exigences, veuillez contacter un électricien
qualifié.
3.
Suitable for Wet Locations.
Adspte pour les Endroits Mouiles.
4.
Min. 75C supply conductors.
Les fils d'alimentation 75C min.
5.
Class 1 wiring only.
Cablage de classe 1 uniquement.
6.
SUITABLE FOR OPERATION IN AMBIENT NOT
EXCEEDING =50°C.
PEUT ETRE UTILISE A UNE TEMPERATURE
AMBIANTE N'EXCEDANT PAS 50°C.
SAVE THESE INSTRUCTIONS
FOR FUTURE REFERENCE
NEMA
PHOTOCONTROL RECEPTACLE
®
NOTE: Fixture will not operate without the supplied shorting cap or a
3-pin or 7-pin NEMA
photocontrol installed in NEMA
®
receptacle.
NOTE: Never install fixture without a shorting cap or NEMA
photocontrol installed into photocontrol receptacle.
following:
photocontrol
®
®
http://lighting.cree.com/warranty
Document
LPN00851X0001A0_C
Created By:
TMT
NOTE: Dimming capabilities are accessible through the NEMA
7-pin receptacle when used with a NEMA
dimming capabilities. If dimming is accomplished using 7-pin NEMA
photocontrol, make sure dimming cord leads are capped off.
1.
Insert the pins on the supplied shorting cap or customer supplied
photocontrol into the slots on the photocontrol receptacle on top of
the fixture,
NOTE: One pin is wider than the other two pins and must be
inserted into the widest slot. Do NOT force pins into receptacle if
pins are not properly oriented with slots.
2.
Once pins are inserted into receptacle, rotate photocontrol or
shorting cap approximately 1/8 turn clockwise to lock it in place.
SLIP FITTER MOUNTING
(Requires use of C-AR-A-ALSF Accessory)
NOTE: Maximum tilt angle for the fixture is 45°. Fixture is not to be
used as an uplight.
1.
Pass (2) fixture cords through top hole in lower fitter and out
through open end of lower fitter. See Figure 1.
2.
While gently pulling on the ends of the (2) cords, bring the two
halves of fitter together and partially tighten supplied 10 mm bolt
with lockwasher and flat washer on bolt to hold the two halves of
fitter together. Make sure the lockwasher is positioned closest to
the head of the bolt. Do not fully tighten bolt at this time.
3.
Route supply leads up through 2-3/8" (60 mm) O.D. heavy wall
pipe or tenon that the fixture will be mounted on.
4.
Splice supply leads to fixture leads per the Electrical Connections
section.
NOTE: Strain relief is required for electrical connections at
mounting heights of 25' (7.6 m) and above. Knot the supply wires
from the pole with the fixture cord inside the pole to provide strain
relief.
5.
Route cord and splices into open end of tenon while slipping lower
fitter over 2-3/8" (60 mm) O.D. heavy wall pipe or tenon, making
sure not to pinch any leads.
6.
Aim the fixture in the proper direction and hand tighten all four
Allen head set screws against the outer wall of the tenon. Once
all four screws are hand tightened, secure them by gradually
tightening in an "x" pattern to 140 in-lbs (16 N•m).
7.
Tilt the fixture to the desired angle and tighten the 10mm
adjustment bolt between the two halves of the fitter to
32.5 ft-lbs. (44 N•m) to lock the slip fitter in place.
FIGURE 1
Fixture
|
866.924.3645
Date:
06-22-2022
®
7-pin photocontrol with
®
45° MAX
Adjusting Bolt
(4) Set Screws
Lower Fitter
Wire
Tenon
®
Publicité
Table des Matières

Manuels Connexes pour C-LITE C-AR-A-AL Serie

Sommaire des Matières pour C-LITE C-AR-A-AL Serie
- Page 1 Document LPN00851X0001A0_C Date: 06-22-2022 INSTALLATION INSTRUCTIONS Created By: C-AR-A-AL Series NOTE: Dimming capabilities are accessible through the NEMA ® 7-pin receptacle when used with a NEMA 7-pin photocontrol with ® dimming capabilities. If dimming is accomplished using 7-pin NEMA ® photocontrol, make sure dimming cord leads are capped off.
- Page 2 Document LPN00851X0001A0_C Date: 06-22-2022 INSTALLATION INSTRUCTIONS Created By: C-AR-A-AL Series While gently pulling cords through slot in trunnion, move the trunnion towards the fixture, eventually aligning the lower knuckle area with the upper knuckle area. See Figure 5 on the next page. Partially tighten supplied 10 mm bolt with lockwasher and flat DIRECT MOUNT ARM MOUNTING washer on bolt to hold the two halves of fitter together.
-
Page 3: Electrical Connections
Document LPN00851X0001A0_C Date: 06-22-2022 INSTALLATION INSTRUCTIONS Created By: C-AR-A-AL Series FIGURE 5 ELECTRICAL CONNECTIONS Fixture is equipped with universal volt driver 120-277V (ie. 120V, 208V, 240V or 277V) PHASE TO NEUTRAL WIRING 120/277V 1. Connect supply ground to fixture ground (green) lead. 2. - Page 4 Document LPN00851X0001A0_C Date: 06-22-2022 INSTALLATION INSTRUCTIONS Created By: C-AR-A-AL Series FIGURE 9 ø0.344" (9 mm) hole 2 Required 2.000" (51 mm) 1.125" (28.6 mm) 5.5" (140 mm) ø0.688" (18 mm) hole NOT TO SCALE http://lighting.cree.com/warranty 866.924.3645...
- Page 5 Documento LPN00851X0001A0_C Fecha: 06-22-2022 INSTRUCCIONES DE INSTALACIÓN Creado por: Serie C-AR-A-AL NOTA: Se puede acceder a las capacidades de atenuación a través del receptáculo NEMA de 7 clavijas cuando se usa con un fotocontrol ® NEMA de 7 clavijas con capacidades de atenuación. Si se utiliza ®...
- Page 6 Documento LPN00851X0001A0_C Fecha: 06-22-2022 INSTRUCCIONES DE INSTALACIÓN Creado por: Serie C-AR-A-AL Tirando suavemente de los cables a través de la ranura del muñón, mueva el muñón hacia la luminaria, para alinear la zona de la articulación inferior con la superior. Vea la fi gura 5 en la página siguiente.
-
Page 7: Conexiones Eléctricas
Documento LPN00851X0001A0_C Fecha: 06-22-2022 INSTRUCCIONES DE INSTALACIÓN Creado por: Serie C-AR-A-AL FIGURA 5 CONEXIONES ELÉCTRICAS El dispositivo está equipado con un controlador universal de voltaje de 120-277 V (es decir 120 V, 208 V, 240 V o 277 V) CABLEADO DE FASE A NEUTRO 120/277 V 1. - Page 8 Documento LPN00851X0001A0_C Fecha: 06-22-2022 INSTRUCCIONES DE INSTALACIÓN Creado por: Serie C-AR-A-AL FIGURA 9 Orificio de 0.344" (9 mm) de diámetro Se requieren 2 2.00" (51 mm) 1.125" (28.6 mm) 5.5" (140 mm) Orificio de 0.688" (18 mm) de diámetro NO ESTÁ A ESCALA http://lighting.cree.com/warranty 866-924-3645...
-
Page 9: Mesures De Sécurité Importantes
Document LPN00851X0001A0_C Date : 06-22-2022 INSTRUCTIONS D’INSTALLATION Créé par : Série C-AR-A-AL REMARQUE : Les fonctions de gradation sont accessibles par le réceptacle à 7 broches NEMA si le luminaire est muni d'un interrupteur ® photoélectrique à gradation à 7 broches NEMA . - Page 10 Document LPN00851X0001A0_C Date : 06-22-2022 INSTRUCTIONS D’INSTALLATION Créé par : Série C-AR-A-AL Tout en tirant les cordons à travers la fente du tourillon, déplacez le tourillon vers le luminaire, en alignant la surface inférieure de la rotule avec la surface supérieure de la rotule. Voir Figure 5 à la page suivante.
-
Page 11: Raccordements Électriques
Document LPN00851X0001A0_C Date : 06-22-2022 INSTRUCTIONS D’INSTALLATION Créé par : Série C-AR-A-AL FIGURE 5 RACCORDEMENTS ÉLECTRIQUES Le luminaire est équipé d’un pilote de tension universelle de 120 à 277 V (c’est-à-dire, 120 V, 208 V, 240 V ou 277 V). CÂBLAGE PHASE VERS NEUTRE 120/277 V 1. -
Page 12: Non À L'échelle
Document LPN00851X0001A0_C Date : 06-22-2022 INSTRUCTIONS D’INSTALLATION Créé par : Série C-AR-A-AL FIGURE 9 Trou ø 9 mm (0,344 po) 2 Requis 51 mm (2,000 po) 28,6 mm (1,125 po) 140 mm (5,5 po) Trou ø 18 mm (0,688 po) NON À...