Samsung HW-R450 Mode D'emploi
Masquer les pouces Voir aussi pour HW-R450:
Table des Matières

Publicité

Les langues disponibles

Les langues disponibles

Liens rapides

FULL MANUAL
HW-R450
Imagine the possibilities
Thank you for purchasing this Samsung product.
To receive more complete service, please register
your product at www.samsung.com/register

Publicité

Table des Matières
loading

Sommaire des Matières pour Samsung HW-R450

  • Page 1 FULL MANUAL HW-R450 Imagine the possibilities Thank you for purchasing this Samsung product. To receive more complete service, please register your product at www.samsung.com/register...
  • Page 2: Safety Information

    BLADE OF PLUG TO WIDE SLOT, FULLY Refer to the table below for an explanation of INSERT. symbols which may be on your Samsung product. • This apparatus shall always be connected to a AC outlet with a protective grounding connection.
  • Page 3 It is for personal use only. Condensation You can access the FULL MANUAL on may occur if your product has been stored in Samsung’s on-line customer support centre by cold temperatures. If transporting the unit scanning the QR code. To see the manual on...
  • Page 4: Table Des Matières

    CONTENTS Checking the Components Inserting Batteries before using the Remote Control (AA batteries X 2) ------------------------- Product Overview Front Panel / Right Side Panel of the Soundbar ------------------------- Bottom Panel of the Soundbar ------------------------- Connecting the Soundbar Connecting Electrical Power ------------------------- Connecting the Soundbar to the Subwoofer -------------------------...
  • Page 5 Connecting a Mobile Device Connecting via Bluetooth ------------------------- Using the Samsung Audio Remote App ------------------------- – Installing the Samsung Audio Remote App ------------------------- – Launching the Samsung Audio Remote App ------------------------- Using the Remote Control How to Use the Remote Control...
  • Page 6: Checking The Components

    • The power components are labelled (1, 2, 3). For more information about power connections, see page 5. • To purchase additional components or optional cables, contact a Samsung Service Centre or Samsung Customer Care. • Depending on the region, the appearance of the AC plug may differ from the plug displayed above, or it may be supplied integrated with the AC/DC adapter.
  • Page 7: Product Overview

    02 PRODUCT OVERVIEW Front Panel / Right Side Panel of the Soundbar Position the product so that the SAMSUNG logo is located on the top. Right Side of the Soundbar Display Displays the product’s status and current mode. +/- (Volume) Button Adjusts the volume.
  • Page 8: Bottom Panel Of The Soundbar

    Bottom Panel of the Soundbar DIGITAL AUDIO IN (OPTICAL) USB (5V 0.5A) DC 19V AUX IN DIGITAL AUDIO IN DC 19V (OPTICAL) USB (5V 0.5A) AUX IN DIGITAL AUDIO IN (OPTICAL) Connect to the digital (optical) output of an external device. USB (5V 0.5A) Connect a USB device here to play music files on the USB device through the Soundbar.
  • Page 9: Connecting The Soundbar

    03 CONNECTING THE SOUNDBAR Connecting Electrical Power Use the power components (1, 2, 3) to connect the Subwoofer and Soundbar to an electrical outlet in the following order: 1 Connect the power cord to the Subwoofer. 2 Connect the AC plug to the adapter. 3 Connect the power adapter to the Soundbar and then to a wall socket.
  • Page 10: Connecting The Soundbar To The Subwoofer

    Soundbar unit is connected properly. Connect again. See the instructions for Connection failed manual connection on page 7. Red and See the contact information for the Blinking Malfunction blue Samsung Service Centre in this manual. ENG - 6...
  • Page 11: Manually Connecting The Subwoofer If Automatic Connection Fails

    Manually connecting the Subwoofer if automatic connection fails Before performing the manual connection procedure below: • Check whether the power cables for the Soundbar and subwoofer are connected properly. • Make sure that the Soundbar is turned on. 1. Press and hold ID SET on the rear of the subwoofer for at least 5 seconds. •...
  • Page 12: Connecting An Swa-8500S (Sold Separately) To Your Soundbar

    Wireless Receiver Module (sold separately) is clear of any obstructions. Connecting an SWA-8500S (Sold Separately) to your Soundbar Expand to true wireless surround sound by connecting the Samsung Wireless Rear Speaker Kit (SWA-8500S, sold separately) to your Soundbar. 1. Connect the Wireless Receiver Module to 2 Surround Speakers.
  • Page 13 2. Check the standby status of the Wireless Receiver Module after plugging it into an electrical outlet. • The LINK LED indicator (blue LED) on the Wireless Receiver Module blinks. If the LED does not blink, press the ID SET button on the back of the Wireless Receiver Module with a pen tip for 5~6 seconds until the LINK LED indicator blinks (in Blue).
  • Page 14: Connecting To Your Tv

    04 CONNECTING TO YOUR TV Hear TV sound from your Soundbar through wired or wireless connections. • When the Soundbar is connected to selected Samsung TVs, the Soundbar can be controlled using the TV’s remote control. – This feature is supported by 2017 and later Samsung Smart TVs that support Bluetooth when you connect the Soundbar to the TV using an optical cable.
  • Page 15: Auto Power Link

    2. Select Bluetooth mode on the TV. (For more information, see the TV’s manual.) 3. Select “[AV] Samsung Soundbar R4-Series” from the list on TV’s screen. An available Soundbar is indicated with “Need Pairing” or “Paired” on the TV’s Bluetooth device list.
  • Page 16 If the device fails to connect • If a previously connected Soundbar listing (e.g. “[AV] Samsung Soundbar R4-Series”) appears in the list, delete it. • Then repeat steps 1 through 3. NOTE • After you have connected the Soundbar to your TV the first time, use the “BT READY” mode to reconnect.
  • Page 17: Connecting An External Device

    05 CONNECTING AN EXTERNAL DEVICE Connect to an external device via a wired or wireless network to play the external device’s sound through the Soundbar. Connecting using an Optical or Analogue Audio (AUX) Cable BD / DVD player / Set-top box / Right Side of the Soundbar Game console DIGITAL AUDIO IN...
  • Page 18: Connecting A Usb Storage Device

    06 CONNECTING A USB STORAGE DEVICE You can play music files located on USB storage devices through the Soundbar. USB port Display DIGITAL AUDIO IN DC 19V (OPTICAL) USB (5V 0.5A) AUX IN USB (5V 0.5A) Micro USB to USB adapter Cable 1.
  • Page 19 File Format Type Compatibility list Extension Codec Sampling Rate Bitrate *.mp3 MPEG 1 Layer2 16kHz ~ 48kHz 80kbps~320kbps MPEG 1 Layer3 16kHz ~ 48kHz 80kbps~320kbps MPEG 2 Layer3 16kHz ~ 48kHz 80kbps~320kbps MPEG 2.5 Layer3 16kHz ~ 48kHz 80kbps~320kbps *.wma Wave_Format_MSAudio1 16kHz ~ 48kHz 56kbps~128kbps...
  • Page 20: Connecting A Mobile Device

    Soundbar for more than 5 seconds to display “BT PAIRING”. 2. On your device, select “[AV] Samsung Soundbar R4-Series” from the list that appears. • When the Soundbar is connected to the Bluetooth device, [Bluetooth Device Name] → “BT”...
  • Page 21 • You cannot connect the Soundbar to a Bluetooth device that supports only the HF (Hands Free) function. • Once you have paired the Soundbar to a Bluetooth device, selecting “[AV] Samsung Soundbar R4-Series” from the device’s scanned devices list will automatically change the Soundbar to “BT”...
  • Page 22 Disconnecting the Bluetooth device from a Soundbar You can disconnect a Bluetooth device from the Soundbar. For instructions, see the Bluetooth device’s user manual. • The Soundbar will be disconnected. • When the Soundbar is disconnected from the Bluetooth device, the Soundbar will display “BT DISCONNECTED”...
  • Page 23: Using The Samsung Audio Remote App

    Market search : Samsung Audio Remote Launching the Samsung Audio Remote App To launch and use the Samsung Audio Remote app, touch the Audio Remote icon on your smart device, and then follow the directions on the screen. Audio Remote •...
  • Page 24: Using The Remote Control

    08 USING THE REMOTE CONTROL How to Use the Remote Control Turns the Soundbar on and off. Power Press to select a source connected to the Soundbar. PAIR • BT PAIRING mode Source To turn on “BT PAIRING” mode, change the source to “BT”...
  • Page 25: Bluetooth

    Press the PAIR button. “BT PAIRING” appears in the Soundbar’s display. You can connect the Soundbar to a new Bluetooth device in this mode by selecting the PAIR Soundbar from the Bluetooth device's search list. Bluetooth PAIR SOUND MODE Press the p button to pause a music file temporarily. When you press the button again, the music file plays.
  • Page 26 • Volume Restriction function To protect your hearing, the Volume Restriction function restricts the volume to 20 if you turn on the Soundbar when the volume is set higher than 20. – The default value for the Volume Restriction function is Off. You must turn it on to activate it.
  • Page 27: Adjusting The Soundbar Volume With A Tv Remote Control

    The default mode for this function is – Each time you push the WOOFER button control by a Samsung TV remote. If your TV is not up and hold it for 5 seconds, the mode a Samsung TV, follow the directions below to switches in the following order: change the settings of this function.
  • Page 28: Using The Hidden Buttons (Buttons With More Than One Function)

    2.0 ch 2.1 ch 4.1 ch SMART 5.1 ch 2.1 ch 4.1 ch • The Samsung Wireless Rear Speaker Kit can be purchased separately. To purchase a Kit, contact the WOOFER vendor you purchased the Soundbar from. ENG - 24...
  • Page 29: Installing The Wall Mount

    09 INSTALLING THE Wallmount Components WALL MOUNT Wall Mount Guide Installation Precautions • Install on a vertical wall only. • Do not install in a place with high Holder-Screw Screw temperature or humidity. • Verify whether the wall is strong enough to support the product’s weight.
  • Page 30 2. Align the Wall Mount Guide’s Centre Line 5. Push a screw (not supplied) through each with the centre of your TV (if you are Holder-Screw, and then screw each screw mounting the Soundbar below your TV), and firmly into a support screw hole. then fix the Wall Mount Guide to the wall using tape.
  • Page 31: Detaching The Soundbar From The Wall

    Detaching the Soundbar from • The left and right mounts are different shapes. Make sure to position them the Wall correctly. 1. To separate the Soundbar from the wall mount, push it in the direction of arrow, tilt it up slightly, and then pull it away from the Wall Mount R Wall Mount L wall as shown.
  • Page 32: Software Update

    4. Turn off the Soundbar and connect the USB your Soundbar. For more information about how stick containing the software update to the to download update files, go to the Samsung female port on a Micro USB adapter cable. Electronics website at Connect the cable to the USB port on the www.samsung.comSupport.
  • Page 33: If Update Is Not Displayed

    If UPDATE is not displayed 1. Turn off the Soundbar, disconnect and then reconnect the USB storage device that contains the update files to the Soundbar’s USB port. 2. Disconnect the Soundbar’s power cord, reconnect it, and then turn on the Soundbar. NOTES •...
  • Page 34: Troubleshooting

    11 TROUBLESHOOTING Before seeking assistance, check the following. The unit will not turn on. Is the power cord plugged into the outlet? ; Connect the power plug to the outlet. A function does not work when the button is pressed. Is there static electricity in the air? ;...
  • Page 35: Licence

    12 LICENCE 13 OPEN SOURCE LICENCE NOTICE To send inquiries and requests regarding open sources, contact Samsung via Email Manufactured under license from Dolby (oss.request@samsung.com). Laboratories. Dolby, Dolby Audio, Pro Logic, and the double-D symbol are trademarks of Dolby 14 IMPORTANT Laboratories.
  • Page 36: Specifications And Guide

    Dimensions (W x H x D) 181.5 x 343.0 x 272.0 mm AMPLIFIER Rated Output power 130W NOTES • Samsung Electronics Co., Ltd reserves the right to change the specifications without notice. • Weight and dimensions are approximate. ENG - 32...
  • Page 37: Informations Relatives À La Sécurité

    Reportez-vous au tableau ci-dessous pour une BRANCHEZ LA FICHE AU FOND, EN explication des symboles pouvant figurer sur PRENANT SOIN D’INSÉRER LA TIGE LARGE votre produit Samsung. DANS LA FENTE LARGE. • Cet appareil doit toujours être branché à une prise terre.
  • Page 38: Précautions

    Votre produit n’est pas prévu pour un usage sur le centre d’assistance clientèle en ligne de industriel. Ce produit ne peut être utilisé qu’à Samsung ou en scannant le code QR. Pour des fins personnelles. Une condensation consulter le manuel sur votre PC ou appareil peut se former si le produit ou un disque a mobile, téléchargez-le au format document...
  • Page 39 SOMMAIRE Contrôle des Composants Insertion des piles avant l’utilisation de la télécommande (Piles AA X 2) ------------------------- Présentation du Produit Panneau avant / Panneau côté droit de la Soundbar ------------------------- Panneau inférieur de la Soundbar ------------------------- Connexion de la Soundbar Connexion de l’alimentation électrique ------------------------- Connexion de la Soundbar au Caisson de basse...
  • Page 40 Connexion à un Appareil Mobile Connexion via Bluetooth ------------------------- Utilisation de l’application Samsung Audio Remote ------------------------- – Installation de l’application Samsung Audio Remote ------------------------- – Lancement de l’application Samsung Audio Remote ------------------------- Utilisation de la télécommande Comment utiliser la télécommande ------------------------- Réglage du volume de la Soundbar avec une télécommande de téléviseur...
  • Page 41: Contrôle Des Composants

    • Pour acheter des composants supplémentaires ou des câbles optionnels, contactez un Centre de service Samsung ou le Service client de Samsung. • En fonction de la région, l’apparence de la fiche CA peut varier ou elle peut être fournie intégrée à...
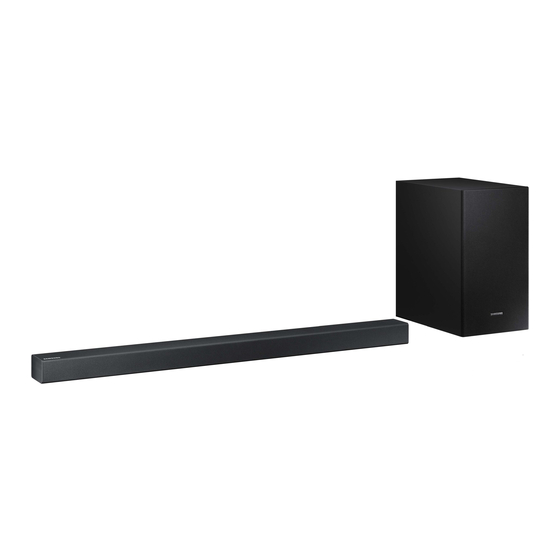
  • Page 42: Présentation Du Produit

    02 PRÉSENTATION DU PRODUIT Panneau avant / Panneau côté droit de la Soundbar Placez le produit de sorte que le logo SAMSUNG se trouve sur le dessus. Côté droit de la Soundbar Affichage Affiche l'état et le mode actuel du produit.
  • Page 43: Panneau Inférieur De La Soundbar

    Panneau inférieur de la Soundbar DIGITAL AUDIO IN (OPTICAL) USB (5V 0.5A) DC 19V AUX IN DIGITAL AUDIO IN DC 19V (OPTICAL) USB (5V 0.5A) AUX IN DIGITAL AUDIO IN (OPTICAL) Permet de connecter la sortie numérique (optique) d'un appareil externe. USB (5V 0.5A) Permet de connecter un périphérique USB pour lire des fichiers musicaux sur le périphérique USB via la Soundbar.
  • Page 44: Connexion De La Soundbar

    03 CONNEXION DE LA SOUNDBAR Connexion de l’alimentation électrique Utilisez les composants d’alimentation (1, 2, 3) pour connecter le Caisson de basse et la Soundbar à une prise électrique dans l’ordre suivant : 1 Connectez le cordon d’alimentation au Caisson de basse. 2 Connectez la fiche CA à...
  • Page 45: Connexion De La Soundbar Au Caisson De Basse

    Rouge Activé Reconnectez. Reportez-vous aux Échec de la connexion instructions sur la connexion manuelle à la page 7. Reportez-vous aux informations de Rouge et Clignotement Dysfonctionnement contact du Centre de service Samsung bleu dans le manuel. FRA - 6...
  • Page 46: Connexion Manuelle Du Caisson De Basse Si La Connexion Automatique Échoue

    Connexion manuelle du Caisson de basse si la connexion automatique échoue Avant d’effectuer la procédure de connexion manuelle ci-dessous : • Vérifiez que les câbles d’alimentation pour la Soundbar et le Caisson de basse sont connectés correctement. • Assurez-vous que la Soundbar est allumée. 1.
  • Page 47: Connexion Du Swa-8500S (Vendue Séparément) À Une Soundbar

    Connexion du SWA-8500S (Vendue séparément) à une Soundbar Passez au vrai son surround sans fil en connectant votre kit d’enceintes arrière sans fil Samsung (SWA-8500S, vendu séparément) à votre Soundbar. 1. Connectez le module de réception sans fil à 2 enceintes surround.
  • Page 48 2. Vérifiez l’état de veille du module de réception sans fil après l’avoir branché à une prise électrique. • Le voyant LED LINK (LED bleue) situé sur le module de réception sans fil clignote. Si la LED ne clignote pas, appuyez sur la touche ID SET au dos du module de réception sans fil avec la pointe d’un stylo pendant 5 à...
  • Page 49: Connexion À Votre Téléviseur

    • Lorsque la Soundbar est connectée à un téléviseur Samsung TV sélectionné, la Soundbar peut être contrôlée à l’aide de la télécommande du téléviseur. – Cette fonction est prise en charge par les téléviseurs Samsung Smart TV sortis en 2017 et ultérieurement, et qui prennent en charge le Bluetooth lorsque vous connectez la Soundbar au téléviseur à...
  • Page 50: Méthode 2. Connexion Sans Fil

    2. Sélectionnez le mode Bluetooth sur le téléviseur. (Pour plus d’informations, reportez-vous au manuel du téléviseur.) 3. Sélectionnez «[AV] Samsung Soundbar R4-Series» dans la liste sur l’écran du téléviseur. Une Soundbar disponible est indiquée «Need Pairing» ou «Paired» dans la liste des appareils Bluetooth sur le téléviseur.
  • Page 51: Déconnexion De La Soundbar À Partir Du Téléviseur

    Si la connexion de l’appareil échoue • Si la liste de Soundbar connectées précédemment (par ex. «[AV] Samsung Soundbar R4-Series» apparaît dans la liste, supprimez-la. • Ensuite, répétez les étapes 1 à 3. REMARQUE • Après avoir connecté la Soundbar au téléviseur pour la première fois, utilisez le mode «BT READY»...
  • Page 52: Connexion À Un Appareil Externe

    05 CONNEXION À UN APPAREIL EXTERNE Raccordez un appareil externe via un réseau câblé ou sans fil pour écouter le son de l’appareil externe via la Soundbar. Connexion à l’aide d’un câble audio Optique ou Analogique (AUX) Lecteur BD/DVD / Boîtier décodeur / Côté...
  • Page 53: Connexion D'un Périphérique De Stockage Usb

    06 CONNEXION D’UN PÉRIPHÉRIQUE DE STOCKAGE USB Vous pouvez lire des fichiers musicaux situés sur les périphériques de stockage USB via la Soundbar. Affichage Port USB DC 19V DIGITAL AUDIO IN (OPTICAL) USB (5V 0.5A) AUX IN USB (5V 0.5A) Câble adaptateur Micro USB à...
  • Page 54: Liste De Compatibilités

    Liste de compatibilités Extension Codec Débit d'échantillonnage Débit binaire *.mp3 MPEG 1 Layer2 16 ~ 48 kHz 80 ~ 320 kbps MPEG 1 Layer3 16 ~ 48 kHz 80 ~ 320 kbps MPEG 2 Layer3 16 ~ 48 kHz 80 ~ 320 kbps MPEG 2.5 Layer3 16 ~ 48 kHz 80 ~ 320 kbps...
  • Page 55: Connexion À Un Appareil Mobile

    3. Lisez des fichiers musicaux à partir de l’appareil, connecté via Bluetooth, via la Soundbar. Si la connexion de l’appareil échoue • Si la liste de Soundbar connectées précédemment (par ex. «[AV] Samsung Soundbar R4-Series» apparaît dans la liste, supprimez-la.
  • Page 56 • Vous ne pouvez pas connecter le Soundbar à un périphérique Bluetooth qui prend en charge uniquement la fonction HF (Hands Free). • Lorsque vous avez apparié la barre audio à un périphérique Bluetooth, sélectionner «[AV] Samsung Soundbar R4-Series» parmi la liste des périphériques connectés à ce périphérique placera automatiquement la barre audio en mode «BT».
  • Page 57: Déconnexion De L'appareil Bluetooth D'une Soundbar

    Déconnexion de l’appareil Bluetooth d’une Soundbar Vous pouvez déconnecter le périphérique Bluetooth du système Soundbar. Pour les instructions, reportez-vous au manuel d’utilisation de ce périphérique. • Le système Soundbar sera déconnecté. • Lorsque la Soundbar est déconnectée de l’appareil Bluetooth, la Soundbar affichera «BT DISCONNECTED»...
  • Page 58: Utilisation De L'application Samsung Audio Remote

    Google Play. Recherchez : Samsung Audio Remote Lancement de l’application Samsung Audio Remote Pour lancer et utiliser l’application Samsung Audio Remote, appuyez sur l’icône Audio Remote sur votre téléphone, puis suivez les instructions affichées à l’écran. Audio Remote •...
  • Page 59: Utilisation De La Télécommande

    08 UTILISATION DE LA TÉLÉCOMMANDE Comment utiliser la télécommande Allume et éteint la Soundbar. Alimentation Appuyez pour sélectionner une source connectée à la Soundbar. PAIR • Mode BT PAIRING Source Pour activer le mode «BT PAIRING», changez la source sur le mode «BT», puis appuyez et maintenez enfoncée la touche (Source) pendant plus de 5 secondes.
  • Page 60 Appuyez sur la touche PAIR. «BT PAIRING» s'affiche sur l'écran de la Soundbar. Vous pouvez connecter la Soundbar à un nouvel appareil Bluetooth dans ce mode en PAIR sélectionnant la Soundbar dans la liste de recherche d'appareils Bluetooth. Bluetooth PAIR SOUND MODE Appuyez sur la touche p pour mettre le fichier musical temporairement en pause.
  • Page 61 • Fonction de restriction du volume Pour protéger votre audition, la fonction Restriction du volume limite le volume à 20 si vous allumez la Soundbar lorsque le volume est réglé plus haut que 20. – La valeur par défaut pour la fonction Restriction du volume est désactivée. Vous devez la régler sur activée pour l’activer.
  • Page 62: Réglage Du Volume De La Soundbar Avec Une Télécommande De Téléviseur

    Utilisez d’abord le menu du téléviseur pour régler le SAMSUNG-TV REMOTE 5 Sec son de votre téléviseur Samsung sur les enceintes externes, puis utilisez votre télécommande Samsung pour contrôler le volume de la Soundbar. Pour plus d’informations, reportez-vous au manuel d’utilisateur –...
  • Page 63: Utilisation Des Touches Dissimulées (Touches Avec Plus D'une Fonction)

    2.1 canaux 4.1 canaux SMART 5.1 canaux 2.1 canaux 4.1 canaux • Le kit d’enceintes arrière sans fil Samsung peut être acheté séparément. Pour acheter un kit, WOOFER contactez le vendeur chez qui vous avez acheté la Soundbar. FRA - 24...
  • Page 64: Installation Du Support Mural

    09 INSTALLATION Composants de fixation au mur DU SUPPORT MURAL Guide de fixation murale Précautions d’installation Vis de fixation • Installez sur un mur vertical uniquement. • N’installez pas dans un endroit à température élevée ou humide. • Vérifiez si le mur est suffisamment robuste pour supporter le poids du produit. Sinon, renforcez le mur ou choisissez un autre Support de fixation Support de fixation...
  • Page 65 2. Alignez la Ligne centrale du Guide de 5. Enfoncez une vis (non fournie) dans chaque fixation murale avec le centre de votre Vis de fixation, puis vissez fermement téléviseur (si vous fixez la Soundbar sous chaque vis dans un trou pour vis portante. votre téléviseur), puis fixez le Guide de fixation murale au mur avec du ruban adhésif.
  • Page 66: Retrait De La Soundbar Du Mur

    Retrait de la Soundbar du mur • Les fixations droite et gauche ont des formes différentes. Veillez à bien les 1. Pour retirer la Soundbar de la fixation positionner. murale, poussez-la dans la direction de la flèche, inclinez-la légèrement et retirez-la du mur comme indiqué...
  • Page 67: Mise À Jour Du Logiciel

    Nous vous recommandons d’écrire vos paramètres pour pouvoir les rétablir après la mise à jour. Notez que Samsung peut proposer des mises à jour pour le la mise à jour du micrologiciel réinitialise microprogramme du système de la Soundbar également la connexion du subwoofer.
  • Page 68: Si Update Ne S'affiche Pas

    Si UPDATE ne s’affiche pas 1. Éteignez la Soundbar, déconnectez et ensuite reconnectez le périphérique de stockage qui contient le fichier de mise à jour au port USB de la Soundbar. 2. Débranchez le cordon d’alimentation de la Soundbar, rebranchez-le, puis allumez la Soundbar. REMARQUES •...
  • Page 69: Dépannage

    11 DÉPANNAGE Avant de contacter l’assistance, veuillez lire ce qui suit. L’unité ne s’allume pas. Le cordon d’alimentation est-il branché dans la prise murale? ; Branchez la fiche secteur sur la prise. Une fonction ne répond pas lorsque la touche est enfoncée. De l’électricité statique est-elle présente dans l’air? ; Débranchez la fiche secteur et rebranchez-la. Des distorsions sonores se font entendre en mode BT.
  • Page 70: Licence

    12 LICENCE 13 AVIS DE LICENCE LIBRE Pour toute requête et demande concernant les sources ouvertes, contactez Samsung via e-mail à Manufactured under license from Dolby l’adresse (oss.request@samsung.com). Laboratories. Dolby, Dolby Audio, Pro Logic, and the double-D symbol are trademarks of 14 REMARQUE Dolby Laboratories.
  • Page 71: Spécifications Et Guide

    Dimensions (L x H x P) 181,5 x 343,0 x 272,0 mm AMPLIFICATEUR Puissance de sortie nominale 130W REMARQUES • Samsung Electronics Co., Ltd se réserve le droit de modifier les caractéristiques sans préavis. • Le poids et les dimensions sont approximatifs. FRA - 32...
  • Page 72 ‫للحيلولة دون وقوع الصدمات الكهربية، قم‬ • ‫راجع الجدول الموضح أدناه لتوضيح الرموز التي قد تكون‬ ‫بمطابقة الشفرة العريضة للقابس مع الفتحة‬ .Samsung ‫موجودة عىل منتجك من‬ .‫العريضة ثم أحكم إدخالها‬ ‫ينبغي أن يكون هذا الجهاز متص ال ً دوم ً ا بمأخذ التيار‬ •...
  • Page 73 ‫الشخصية فقط. من الممكن أن يحدث تكاثف في‬ ‫يمكنك الوصول الدليل الكامل من مركز دعم عمالء‬ ‫حالة تخزين المنتج في درجات حرارة منخفضة. في‬ .QR ‫ عبر اإلنترنت من خالل مسح رمز‬Samsung ‫حالة نقل الوحدة خالل فصل الشتاء، انتظر لمدة‬ ‫ولعرض الدليل عىل الكمبيوتر الشخصي أو الهاتف‬...
  • Page 74 ‫المحتويات‬ ‫التحقق من المكونات‬ )AA ‫إدخال البطاريات قبل استخدام وحدة التحكم عن ب ُ عد (بطاريتان بحجم‬ ------------------------- ‫نظرة عامة حول المنتج‬ Soundbar ‫اللوح األمامي / اللوح األيمن الجانبي في‬ ------------------------- Soundbar ‫اللوح السفلي من‬ ------------------------- Soundbar ‫توصيل‬ ‫توصيل الطاقة الكهربائية‬ ------------------------- ‫...
  • Page 75 ------------------------- Samsung Audio Remote ‫استخدام تطبيق‬ ------------------------- Samsung Audio Remote ‫تثبيت تطبيق‬ – Samsung Audio Remote ‫بدء تشغيل تطبيق‬ – ‫استخدام التحكم في ب ُ عد‬ ‫كيفية استخدام التحكم عن ب ُ عد‬ ------------------------- .‫ باستخدام جهاز التحكم عن ب ُ عد‬Soundbar ‫تعديل مستوى الصوت بوحدة‬...
  • Page 76 ‫ي ُ شار إىل خطوات توصيالت الطاقة باألرقام التالية ( 1 , 2 , 3 ). لمزيد من المعلومات حول توصيالت الطاقة، انظر‬ • .5 ‫صفحة‬ .Samsung ‫ أو خدمة عمالء‬Samsung ‫لشراء المكونات اإلضافية أو الكبالت االختيارية، اتصل بمركز خدمة‬ • .AC/DC ‫قد يختلف شكل مقبس التيار المتردد وفق ً ا للمنطقة، أو قد يتم تزويده مدمج ً ا مع محول‬...
  • Page 77 ‫نظرة عامة حول المنتج‬ Soundbar ‫اللوح األمامي / اللوح األيمن الجانبي في‬ SAMSUNG ‫ضع المنتج بحيث يكون شعار‬ .‫ظاهر ً ا عىل الجزء العلوي‬ Soundbar ‫الجانب األيمن من‬ ‫الشاشة‬ .‫تعرض حالة المنتج والوضع الحالي‬ )‫زر +/- (مستوى الصوت‬ .‫تعديل مستوى الصوت‬...
  • Page 78 Soundbar ‫اللوح السفلي من‬ DIGITAL AUDIO IN (OPTICAL) USB (5V 0.5A) DC 19V AUX IN DIGITAL AUDIO IN DC 19V (OPTICAL) USB (5V 0.5A) AUX IN DIGITAL AUDIO IN )OPTICAL( .‫التوصيل بالمخرج (البصري) الرقمي من الجهاز الخارجي‬ USB )5V 0.5A( .Soundbar ‫...
  • Page 79 SOUNDBAR ‫توصيل‬ ‫توصيل الطاقة الكهربائية‬ ‫ بمآخذ تيار كهربائي حسب الترتيب‬Soundbar ‫استخدم مكونات الطاقة (1 و2 و3) لتوصيل مضخم الصوت وجهاز‬ :‫التالي‬ .‫1 قم بتوصيل سلك التيار الكهربائي بمضخم الصوت‬ .‫2 قم بتوصيل مقبس التيار المتردد بالمحول‬ .‫ ثم بمقبس الحائط‬Soundbar ‫3 قم بتوصيل محول الطاقة بجهاز‬ .‫انظر...
  • Page 80 ‫استعداد (في حالة إيقاف تشغيل‬ .‫ الرئيسية‬Soundbar ‫بوحدة‬ )‫ الرئيسية‬Soundbar ‫وحدة‬ ‫تشغيل‬ ‫األحمر‬ ‫أعد محاولة التوصيل مرة أخرى. لقراءة تعليمات‬ ‫فشل التوصيل‬ .7 ‫التوصيل اليدوي، انظر صفحة‬ ‫انظر معلومات جهة االتصال لمركز خدمة عمالء‬ ‫األحمر‬ ‫األعطال‬ ‫الوميض‬ .‫ في الدليل‬Samsung ‫واألزرق‬ 6 - ARA...
  • Page 81 ‫توصيل مضخم الصوت يدوي ً ا في حالة فشل التوصيل التلقائي‬ :‫قبل إجراء التوصيل اليدوي، تتبع اإلجراءات التالية‬ .‫ ومضخم الصوت متصلة بشكل صحيح‬Soundbar ‫تحقق ما إذا كانت كبرت الطاقة لوحدة‬ • .‫ قيد الشتغيل‬Soundbar ‫تأكد أن‬ • .‫ الموجود عىل الجزء الخلف لمضخم الصوت لمدة 5 ثوان‬ID SET ‫اضغط باستمرار عىل‬ ‫المؤشر...
  • Page 82 .‫االستقبال الالسلكية ( ت ُ باع منفصلة) خالية من العوائق‬ Soundbar ‫ ( ت ُ باع بشكل منفصل) بجهاز‬SWA-8500S ‫توصيل جهاز‬ ‫ الخلفية‬Samsung ‫يمكنك تعزيز الصوت المحيطي الالسلكي ليصبح حقيقي ً ا عن طريق توصيل طقم سماعات‬ .‫ الخاص بك‬Soundbar ‫ - ت ُ باع بشكل منفصل) بجهاز‬SWA-8500S( ‫الالسلكية‬...
  • Page 83 .‫تحقق من حالة االستعداد في وحدة االستقبال الالسلكية بعد التوصيل بمآخذ تيار كهربائي‬ ‫ الموجود في وحدة االستقبال الالسلكية. إذا لم يومض‬LINK ‫ (باللون األزرق) الخاص بـ‬LED ‫يومض مؤشر‬ • ‫ الموجود في الجزء الخلفي من وحدة االستقبال الالسلكية باستخدام سن قلم‬ID SET ‫، فاضغط عىل الزر‬LED ،LED ‫...
  • Page 84 ‫التوصيل بالتلفزيون الخاص بك‬ .‫ عن طريق توصيالت سلكية والسلكية‬Soundbar ‫استمع إىل صوت التلفزيون من‬ ‫، يمكن التحكم في السماعات من باستخدام‬Samsung ‫عندما تكون السماعة متصلة بجهاز تلفزيون مح د َّ د من‬ • .‫جهاز التحكم عن ب ُ عد الخاص بالتلفزيون‬...
  • Page 85 ."BT PAIRING" ‫ ألكثر من 5 ثوان لعرض‬Soundbar ‫لجهاز‬ ).‫ بالتلفزيون. (لمزيد من المعلومات، راجع دليل التلفزيون‬Bluetooth ‫حدد وضع‬ ‫[" من القائمة المعروضة عىل شاشة التلفزيون. ي ُ شار إىل‬AV] Samsung Soundbar R4-Series" ‫حدد‬ ‫" عىل قائمة أجهزة التلفزيون التي تدعم تقنية‬Paired" ‫" أو‬Need Pairing" ‫ المتاح بالجهاز‬Soundbar .‫،...
  • Page 86 ‫إذا فشل الجهاز في االتصال‬ ‫[") في القائمة، فقم‬AV] Samsung Soundbar R4-Series" ‫ المتصلة من قبل (مثل‬Soundbar ‫إذا ظهرت قائمة‬ • .‫بحذفها‬ .3 ‫بعد ذلك، كرر الخطوات من 1 إىل‬ • ‫مالحظة‬ .‫ "، إلعادة التوصيل‬BT READY" ‫ بالتلفزيون خاصتك للمرة األوىل، استخدم الوضع‬Soundbar ‫بعد توصيل‬...
  • Page 87 ‫التوصيل بجهاز خارجي‬ .Soundbar ‫التوصيل بجهاز خارجي عبر شبكة سلكية أو السلكية لتشغيل صوت الجهاز الخارجي عبر‬ .‫) أو تناظري‬AUX( ‫التوصيل باستخدام كبل صوتي‬ / DVD ‫ / مشغل‬BD ‫مشغل‬ Soundbar ‫الجانب األيمن من‬ ‫جهاز استقبال / جهاز كونسول لأللعاب‬ DIGITAL AUDIO IN (OPTICAL) ‫كبل...
  • Page 88 USB ‫توصيل جهاز تخزين‬ .Soundbar ‫ عن طريق‬USB ‫يمكن تشغيل ملفات الموسيقى في أجهزة تخزين‬ USB ‫منفذ‬ ‫الشاشة‬ DC 19V DIGITAL AUDIO IN (OPTICAL) USB (5V 0.5A) AUX IN USB (5V 0.5A) ‫كبل مهايئ‬ USB ‫ إىل‬Micro USB ‫) عىل أحد األطراف ومقبس‬B ‫ (النوع‬USB Micro USB 2.0 ‫ بمقبس ذكر‬USB ‫ إىل‬Micro USB ‫قم بتوصيل مهايئ‬ .Soundbar ‫...
  • Page 89 ‫قائمة التوافق‬ ‫معدل البت‬ ‫معدل العينات‬ ‫نظام الترميز‬ ‫امتداد‬ ‫08 ~ 023 كيلو بايت في الثانية‬ 48kHz ~ 16kHz MPEG 1 Layer2 mp3.* ‫08 ~ 023 كيلو بايت في الثانية‬ 48kHz ~ 16kHz MPEG 1 Layer3 ‫08 ~ 023 كيلو بايت في الثانية‬ 48kHz ~ 16kHz MPEG 2 Layer3 ‫08 ~ 023 كيلو...
  • Page 90 • .Soundbar ‫ عن طريق‬Bluetooth ‫تشغيل ملفات الموسيقى من الجهاز متصبل عبر تقنية‬ ‫إذا فشل الجهاز في االتصال‬ ‫[") في القائمة، فقم‬AV] Samsung Soundbar R4-Series" ‫ المتصلة من قبل (مثل‬Soundbar ‫إذا ظهرت قائمة‬ • .‫بحذفها‬ . 2‫ثم كرر الخطوتين 1 و‬...
  • Page 91: Bluetooth

    .)Hands Free( HF ‫ يدعم فقط وظيفة‬Bluetooth ‫ بجهاز‬Soundbar ‫ال يمكنك توصيل جهاز‬ • ‫[" من‬AV] Samsung Soundbar R4-Series" ‫، يؤدي تحديد‬Bluetooth ‫ بجهاز‬Soundbar ‫بمجرد إقران جهاز‬ • ."BT" ‫ تلقائي ً ا إىل وضع‬Soundbar ‫قائمة األجهزة التي تم فحصها إىل تحويل جهاز‬...
  • Page 92 Soundbar ‫ عن‬Bluetooth ‫فصل جهاز‬ ‫. لالطالع عىل التعليمات، راجع دليل المستخدم الخاص بجهاز‬Soundbar ‫يمكنك فصل جهاز البلوتوث من نظام‬ .‫البلوتوث‬ .Soundbar ‫سيتم فصل نظام‬ • .Soundbar "BT DISCONNECTED" ‫، ستظهر عىل الشاشة األمامية بجهاز‬Bluetooth ‫ من جهاز‬Soundbar ‫عند فصل‬ •...
  • Page 93 .Google Play ‫ من متجر‬Samsung Audio Remote Samsung Audio Remote : ‫أبحاث السوق‬ Samsung Audio Remote ‫بدء تشغيل تطبيق‬ ‫ عىل الجهاز الذكي الخاص بك، ثم اتبع‬Audio Remote ‫، المس رمز‬Samsung Audio Remote ‫لبدء واستخدام تطبيق‬ .‫التعليمات التي تظهر عىل الشاشة‬ Audio Remote ‫...
  • Page 94 ‫استخدام التحكم في ب ُ عد‬ ‫كيفية استخدام التحكم عن ب ُ عد‬ .‫ وإيقاف تشغيله‬Soundbar ‫تشغيل‬ ‫ا لتشغيل‬ ‫اضغط لتحديد المصدر المراد توصيله بجهاز‬ .Soundbar PAIR BT PAIRING ‫وضع‬ • ‫المصدر‬ ‫"، قم بتغيير‬BT PAIRING" ‫للتحويل إىل وضع‬ ‫" ثم اضغط باستمرار عىل زر‬BT" ‫المصدر إىل وضع‬ .
  • Page 95 .Soundbar ‫ عىل شاشة‬BT PAIRING ‫ . تظهر‬PAIR ‫اضغط عىل الزر‬ ‫ من‬Soundbar ‫ بجهاز بلوتوث جديد في هذا الوضع من خالل تحديد‬Soundbar ‫ي ُ مكنك توصيل جهاز‬ PAIR .Bluetooth ‫قائمة بحث جهاز‬ Bluetooth PAIR SOUND MODE .‫ إليقاف تشغيل الموسيقى مؤق ت ً ا‬p ‫اضغط عىل الزر‬ .‫إذا...
  • Page 96 ‫وظيفة تقييد الصوت‬ • ‫لحماية سمعك، تعمل وظيفة تقييد مستوى الصوت عىل تقييد مستوى الصوت إىل 02 إذا كان تم‬ .Soundbar ‫ضبط مستوى الصوت عىل أكثر من 02 عند تشغيل جهاز‬ ‫القيمة االفتراضية لوظيفة تقييد مستوى الصوت هي "إيقاف التشغيل". يجب عليك تشغيل‬ –...
  • Page 97 ‫يتم التحكم في الوضع االفتراضي لهذه الوظيفة بواسطة‬ ‫االستمرار لمدة 5 ثوان ٍ ، يتم تبديل الوضع بالترتيب‬ ‫. إذا لم يكن‬Samsung ‫جهاز التحكم عن ب ُ عد لتلفزيون‬ )‫" (الوضع االفتراضي‬SAMSUNG-TV REMOTE" :‫التالي‬ ‫، فاتبع اإلرشادات أدناه‬Samsung ‫جهازك هو تلفزيون‬...
  • Page 98 ‫1.5 قناة‬ ‫1.4 قناة‬ ‫1.2 قناة‬ ‫0.2 قناة‬ SMART ‫1.4 قناة‬ ‫1.2 قناة‬ ‫1.5 قناة‬ ‫ بشكل منفصل. لشراء طقم، اتصل بالبائع‬Samsung ‫يمكن شراء طقم مكبرات الصوت الخلفية الالسلكية من‬ WOOFER • .Soundbar ‫الذي اشتريت منه سماعة‬ 24 - ARA...
  • Page 99 ‫تركيب حامل التثبيت‬ ‫مكونات التعليق عىل جدار‬ ‫بالحائط‬ ‫دعامة التثبيت بالحائط‬ ‫احتياطات التركيب‬ .‫التركيب عىل في وضع عمودي فقط‬ • ‫ال تقم بتركيب الجهاز في األماكن ذات درجات الحرارة‬ • ‫براغي‬ ‫حامل البراغي‬ .‫العالية أو الرطوبة‬ ‫التحقق ما إذا كان الجدار قوى بالقدر الكاف لدعم وزن‬ •...
  • Page 100 ‫ضع البراغي (غير المز و َّ دة) في كل حامل البراغي ثم‬ ‫قم بمحاذاة خط المنتصف لدعامة التثبيت عىل‬ .‫قم بربط البراغي بإحكام في فتحة البراغي‬ ‫الحائط مع منتصف جهاز التلفزيون (في حالة تثبيت‬ ‫ أسفل التلفزيون)، ثم قم بتركيب‬Soundbar ‫دعامة...
  • Page 101 ‫ من الحائط‬Soundbar ‫فك‬ ‫يختلف شكل وحدة التثبيت عىل الحائط اليمنى‬ • ‫عن شكل وحدة التثبيت اليسرى. تأكد من وضع‬ ‫ عن دعامة الحائط، ادفعه في‬Soundbar ‫لفصل‬ .‫وحدتي التثبيت بشكل صحيح‬ ‫اتجاه السهم ثم قم بإمالته قليال ً واسحبه بعيد ً ا عن‬ .‫الحائط...
  • Page 102 ‫إجراء التحديث‬ ‫هام: تؤدي وظيفة التحديث إىل حذف كل إعدادات‬ ‫المستخدم. ننصحك بتدوين إعداداتك ليمكنك إعادة‬ ‫ تحديثات البرامج الثابتة لنظام‬Samsung ‫قد تقدم شركة‬ ‫تعيينها بسهولة بعد التحديث. الحظ أن تحديث البرنامج‬ .‫ في المستقبل‬Soundbar .‫يعيد تعيين اتصال مضخم الصوت أيض ً ا‬...
  • Page 103 UPDATE ‫في حال عدم عرض‬ USB ‫ وافصل جهاز‬Soundbar ‫قم بإيقاف تشغيل‬ ‫ بـ‬USB ‫المحتوي عىل ملفات التحديث من منفذ‬ .‫ ثم أعد توصيله به‬Soundbar Soundbar‫افصل سلك التيار الكهربائي الخاص بـ‬ .Soundbar ‫وأعد توصيله ثم قم بتشغيل‬ ‫مالحظات‬ ‫قد ال يعمل تحديث البرامج الثابتة بشكل صحيح إذا‬ •...
  • Page 104 ‫استكشاف المشاكل وإصالحها‬ .‫قبل البحث عن المساعدة، راجع ما يلي‬ .‫الوحدة ال تعمل‬ ‫هل تم توصيل سلك الطاقة في مأخذ التيار الكهربائي؟‬ .‫قم بتوصيل قابس التيار الكهربي من مأخذ التيار الكهربي‬ .‫ال تعمل الوظيفة عند الضغط عىل الزر‬ ‫هل يوجد كهرباء ساكنة في الهواء؟‬ .‫افصل...
  • Page 105 ‫إشعار ترخيص‬ ‫الت ر اخيص‬ ‫المصدر المفتوح‬ ‫إلرسال االستفسارات والطلبات المتعلقة بالمصادر‬ ‫ عبر البريد‬Samsung ‫المفتوحة، يرجى االتصال بشركة‬ Manufactured under license from Dolby .)oss.request@samsung.com( ‫اإللكتروني‬ Laboratories. Dolby, Dolby Audio, Pro Logic, and the double-D symbol are trademarks of ‫مالحظة هامة عن‬...
  • Page 106 ‫المواصفات والدليل‬ ‫المواصفات‬ HW-R450 ‫اسم الطراز‬ 5V/0.5A ‫5.1 كجم‬ ‫الوزن‬ ‫ 5.07 ملم‬x 53.5 x 907.5 )‫األبعاد (العرض × االرتفاع × العمق‬ ‫من 5+ درجات مئوية إىل 53+ درجة مئوية‬ ‫درجة الحرارة المناسبة للتشغيل‬ 75 % ‫% 01 إىل‬ ‫درجة الرطوبة المناسبة للتشغيل‬...
  • Page 107 © 2019 Samsung Electronics Co., Ltd. All rights reserved. Contact SAMSUNG WORLD WIDE If you have any questions or comments relating to Samsung products, please contact the SAMSUNG customer care Centre. Country Contact Centre  Web Site Country Contact Centre ...

Table des Matières