Hisense RF254N6CSE Guide D'utilisation Et D'entretien

Manuels Connexes pour Hisense RF254N6CSE


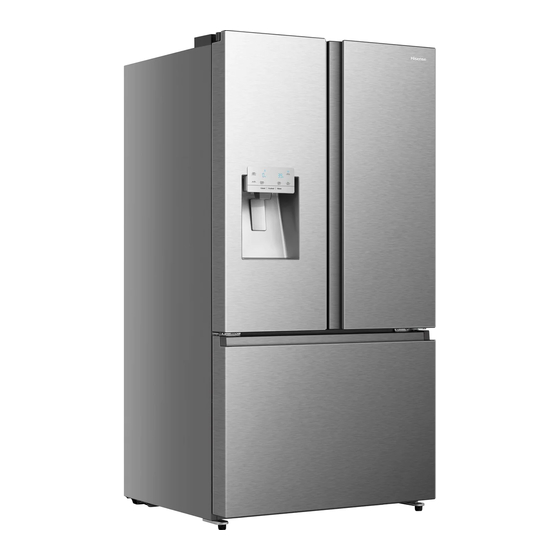
Sommaire des Matières pour Hisense RF254N6CSE
- Page 30 Manuel d’Utilisation & d’Entretien du Réfrigérateur Modèle:RF254N6CSE Pour toutes questions sur les fonctionnalités, le fonctionnement/ les performances, les pièces détachées ou l’entretien, veuillez contacter le: 1-855-344-7367...
- Page 31 Table des Matières Brève introduction ........................1 Instructions de sécurité importantes ..................2 Installer votre nouvel appareil ....................4 Description de l’appareil ....................... 10 Commandes d’affichages ..................... 11 Utilisation de l’appareil ......................14 Nettoyage et entretien ......................19 Conseils et astuces utiles ......................
-
Page 32: Brève Introduction
Brève introduction Merci d’avoir choisi Hisense. Nous sommes Zones de cuisine dans les magasins, bureaux certains que vous seriez satisfaite au cours et autres environnements de travail. de l’utilisation de votre nouveau Hôtels, motels et autres environnements réfrigérateur. Avant d’utiliser cet appareil, résidentiels. -
Page 33: Instructions De Sécurité Importantes
Instructions de sécurité importantes Sécurité générale et utilisation Ne placez pas des articles au-dessus de l’appareil, ils pourraient blesser en au quotidien cas de chute. Il est très important d’utiliser votre appareil Ne laissez jamais les enfants jouer avec avec précaution. Nous recommandons de l’appareil en se suspendant ou en se suivre les directives ci –... - Page 34 Si la fiche électrique n’est pas Pour éviter des blessures aux yeux, ne appropriée à votre prise de courant, elle regardez pas directement dans le luminaire devrait être coupée et soigneusement LED situé dans le compartiment du rangées. Pour éviter d’éventuels chocs, réfrigérateur.
-
Page 35: Installer Votre Nouvel Appareil
Installer votre nouvel appareil Avant l’utilisation de l’appareil pour la 2" 2" première fois, vous devez être informé des astuces suivantes. ATTENTION Pour une installation appropriée, ce 1/2" 1/2" réfrigérateur doit être placé sur une surface à niveau conçu avec un matériel solide à... -
Page 36: Nivellement De L'appareil Électrique
Nivellement de l’appareil Démontage des portes électrique Si votre porte d’accès à la maison est trop étroite pour le passage du réfrigérateur, retirez Pour un nivellement et une circulation les portes et les tiroirs du réfrigérateur. Si vous d’air suffisant dans la section arrière n’avez pas besoin de retirer les portes de basse de l’appareil, les pieds du bas l’appareil, passez à... -
Page 37: Désassembler La Porte Du Congélateur
5. Enlevez les 4 charnières à boulon Retirer les vis (5) fixées sur les charnières hexagonale (8) avec une clé Allen avec une clé (5/16", 8mm) et 1 vis de (5/32”, 4mm). Enlevez les charnières terre (6) fixée à la charnière avec un inférieures gauches et droites de la tournevis Philips (+). -
Page 38: Installation Des Conduits D'eau
Enlevez le tiroir inférieur du Installation des conduits d’eau congélateur (12) en le soulevant. Un dispensateur d’eau muni de filtre est l’un des éléments utiles de votre nouvel appareil. Pour promouvoir une meilleure santé, le filtre à eau enlève les particules indésirables de l’eau. -
Page 39: Connexion À La Ligne D'alimentation En Eau
Connexion à la ligne Rincer le tube. Allumez l’alimentation en eau principale et rincez les tubes jusqu’à ce d’alimentation en eau que l’eau soit claire. Ensuite, fermez l’eau à la vanne d’eau après avoir faire traverser 1. Il faudrait d’abord fermer environ un litre d’eau dans les tubes. - Page 40 6. Ouvrez l’eau et vérifier l’écoulement. MISE EN GARDE! Vérifier s’il y a des fuites d’eau au niveau des connexions de la ligne d’eau. Remarque: Utilisez uniquement les nouveaux tubes fournis avec le réfrigérateur. De vieux tubes ne doivent pas être utilisés. Après avoir été...
-
Page 41: Description De L'appareil
Description de l’appareil Tiroir inférieur du Circuit d’aération Machine à glaçons automatique congélateur Étagères en verre Balconnets Couvercle de la charnière Étagère Pliable Meneau Interrupteur de la porte Couverture Bloc de Guidage des Bacs à légumes Antiquaire Garde-manger pleine Meneaux largeur Voyant LED du réfrigérateur Tiroir supérieur du... -
Page 42: Commandes D'affichages
Commandes d’affichages Votre produit possède un panneau de commandes, situé sur la porte du réfrigérateur. Utiliser votre appareil conformément aux consignes de contrôle suivantes. Verrouillage Enfants et Alarme Lorsque l'appareil est mis sous tension pour la première fois, le rétroéclairage de la Porte des icônes de l'écran commence à... -
Page 43: Réglage De La Température Du Congélateur
à son vendeur qui vous a vendu le réfrigérateur ou réglage précédent. auprès du service après – vente de Hisense. Régulation de la température Veiller à ce que le nouveau filtre soit du du réfrigérateur même type que le filtre fourni avec votre... -
Page 44: Commande Du Distributeur
°F/°C Lorsque le Verrouillage Enfant est désactivé, vous pouvez appuyer sur le bouton « °F/°C » pour basculer entre les unités Celsius et Fahrenheit. L’unité par défaut est l’affichage en Fahrenheit. Lors du passage en Fahrenheit, l’icône « » s’allume. Commande du distributeur Lorsque le Verrouillage enfant est actif, le... -
Page 45: Utilisation De L'appareil
Utilisation de l’appareil Cette section vous explique comment Pour obtenir de la Glace Pilée utiliser la plupart des fonctionnalités importantes. Nous vous recommandons Pour obtenir de la glace pilée, appuyer sur de les lire attentivement avant d’utiliser le bouton glace pilée (Crushed) comme désiré. - Page 46 S’il en existe, répétez les étapes 1-5. Si une fuite persiste, cesser l’utilisation et appeler le service clientèle Hisense. Enlever tout élément résiduel de la conduite de fourniture d’eau après avoir installé le filtre à eau 1.
-
Page 47: Utiliser Compartiment Du Réfrigérateur
Remarque: MISE EN GARDE! Rassurez-vous de bien nettoyer le distributeur, autrement, l’eau pourrait Ne fermez jamais les portes du s’égoutter du distributeur. Cela réfrigérateur alors que les étagères, voudrait dire qu’il y a encore de l’air le bac à légumes et/ou les côtés dans la ligne. -
Page 48: Utilisation Du Tiroir De Votre
Pour réinstaller les étagères en verres, Utilisation du tiroir de votre inclinez l’avant de l’étagère vers le haut congélateur et guidez ses crochets à l’intérieur des fentes à la hauteur souhaitée (G). Puis Le compartiment de congélation est fourni abaisser l’avant de l’étagère pour que les crochets puissant tenir dans les fentes (H). - Page 49 Pour enlever le bac à glaçons, MISES EN GARDE 1. Le soulever délicatement, puis le • Ne pas appliquer une pression sortir lentement tout en maintenant le excessive sur le couvercle du bac. Le fond du bac avec une main et un côté couvercle peut casser.
-
Page 50: Nettoyage Et Entretien
Nettoyage et entretien Nettoyage intérieur Pour des raisons d’hygiène, l’appareil (y compris les accessoires intérieurs et extérieurs) doit être nettoyé au Nettoyer régulièrement l’intérieur de moins une fois tous les deux mois. l’appareil. Il serait plus facile de le nettoyer lorsque ATTENTION! la quantité... -
Page 51: Nettoyage Des Joints De Porte
Remplacement du ATTENTION! luminaire LED N'utilisez pas d'objets pointus pour retirer le gel du ATTENTION! compartiment de réfrigération. C’est seulement après que Le luminaire LED doit être l’intérieur soit sec que l’appareil remplacé par une personne doit être rallumé et rebranché compétente . -
Page 52: Conseils Et Astuces Utiles
Conseils et astuces utiles Conseils d'Économie d'Énergie Conseils pour la réfrigération Nous recommandons que vous suiviez Pour la viande: (Tous types) enveloppez- les astuces ci-dessous pour la dans un plastique et placez-la sur économiser l’énergie. l’étagère en verre au-dessus du tiroir pour légumes. -
Page 53: Conseils Pour L'entreposage Des Aliments Surgelés
Produits glacés (glaçons, glaces) : s’ils sont consommés immédiatement après avoir été retirés du compartiment de congélation, ils peuvent entraîner des brûlures cutanées dues au froid. Il est recommandé d'étiqueter et de cocher chaque colis congelé afin de suivre l'heure de stockage. Conseils pour l’entreposage des aliments surgelés Assurez-vous que les aliments congelés ont... -
Page 54: Dépannage
Dépannage Si vous rencontrez un problème avec votre appareil ou craignez que l’appareil ne fonctionne pas correctement, vous pouvez effectuer des contrôles simples avant d’appeler le service client, voir ci-dessous. ATTENTION 1. N'essayez pas de réparer l'appareil vous-même. Si le problème persiste après que vous ayez effectué... - Page 55 Il est normal d’entendre régulièrement le bruit du moteur. Il devra fonctionner davantage dans les conditions suivantes: La température de consigne est plus froide que nécessaire. Le moteur Une grande quantité d’aliments chauds a été récemment fonctionne en stockée dans l’appareil. permanence La température à...
- Page 56 Avez-vous attendu 12 heures après l'installation de la ligne • d'alimentation en eau avant de faire de la glace? Si elle n'est pas suffisamment froide, il peut prendre plus de temps pour faire de la glace, par exemple lors de la première installation.
-
Page 57: Recyclage De L'appareil
Recyclage de l'appareil DANGER Il est interdit de se débarrasser de cet appareil électrique de la même manière que les déchets ménagers. Matériaux d'emballage Les matériaux d'emballage avec le symbole de recyclage sont recyclables. Disposez-vous de l’emballage dans un collecte de déchets approprié pour le recycler. Avant l’élimination de l’appareil électrique 1. -
Page 58: Déclaration Sur Le Droit D'auteur
© 2020 Hisense Company Ltd. Tous Droits Réservés. Tout le matériel contenu dans ce Manuel d’Utilisation est la propriété de Hisense Company Ltd. et de ses filiales et est protégé par les lois américaines, canadiennes, mexicaines et internationales sur le copyright et/ou les autres lois sur la propriété...